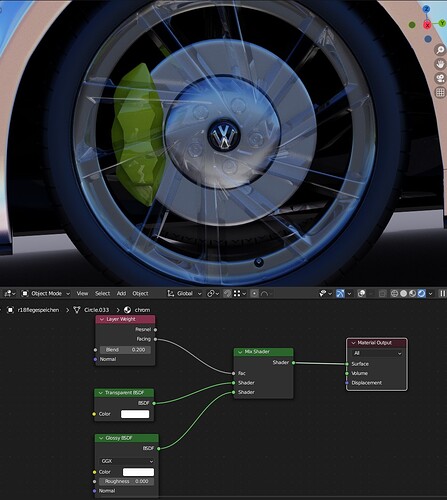
Hi!
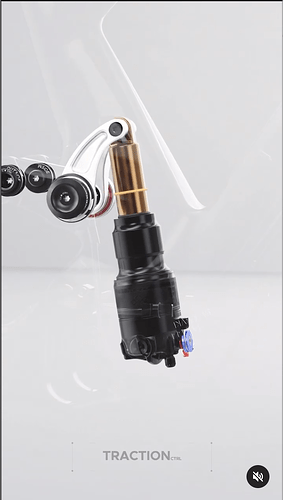
I attached a picture and as you can see, the bikeframe only uses its reflective areas and the rest is transparent! I tried several methods but couldn’t achieve this result. I´m not good enough for the light path node but maybe there’s a way! ![]()
Hey,
What render are you using, Cycles or an Eevee?
Hi! Cycles ![]()
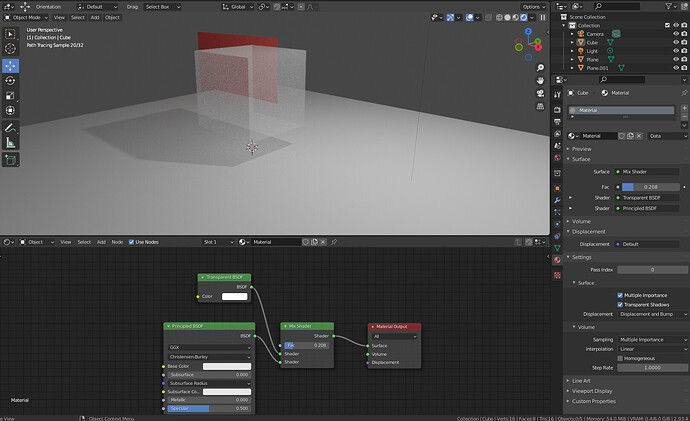
You can do something like this:
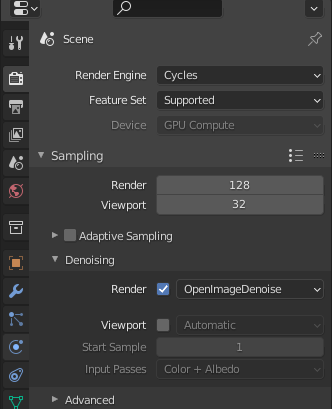
There’s a bit of noise in there, but you can reduce it by turning on “Render” in Denoising Tab and set it to “OpenImageDenoise”
yo! it’s not the same: You’re just mixing between those shaders. The goal is to extract the highlights of a material and use this as a mask/factor between the alpha and the glossy material.
You can use a reflection function mixed together with a transparent function. Mix is driven by a Layer weight node. The output of this node can be remapped for narrow highlights.
been there, but its not the result I need. There must be a way to extract only the reflections and everything else should be transparent (or alpha 0).
That is exactly what I described.
Edit: I now know what you mean. Got you wrong first.
You basically want to mask out reflection that are reflecting light to the camera, i.e. highlights.
I’ll take a look. ![]()
If you extract Reflection and set Alpha 0, then your mesh will not be render.
And in Cycles, you can not extract only highlights. This terms based on old render engines, not new raytracted/path traced engines.
ok I understand but what do you suggest to get the results shown above?
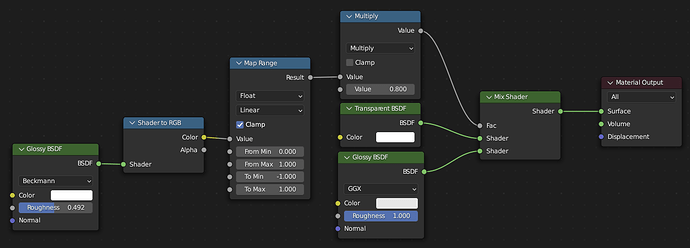
Use goorman’s setup, but add “Fresnel” node and connect to Mix Shader’s Fac socket. And use Glossy shader rather than PBR node.
This seems to work in Eevee only. At least I could not manage to create this effect with Cycles.
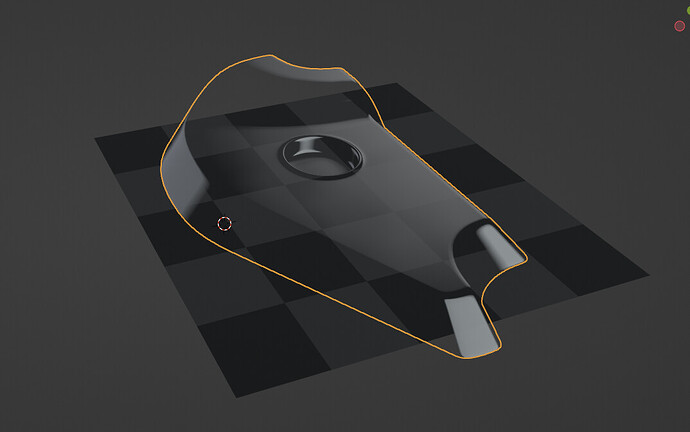
This example works however. So you can simply add a new Scene, renderer set to Eevee and comp it over your Cycles render.
edit: The extra Glossy is for extra control. Otherwise, plug the first Glossy into Mix Shader directly.
That’s nice, looks like what I want to achieve, but it would be nice to get it to work in cycles ![]()
Yeah I had that one in the beginning but it’s a different effect. I know its subtle but its different ![]() Also when you have several objects in front of another the transparent shaders stack up and get darker
Also when you have several objects in front of another the transparent shaders stack up and get darker ![]()
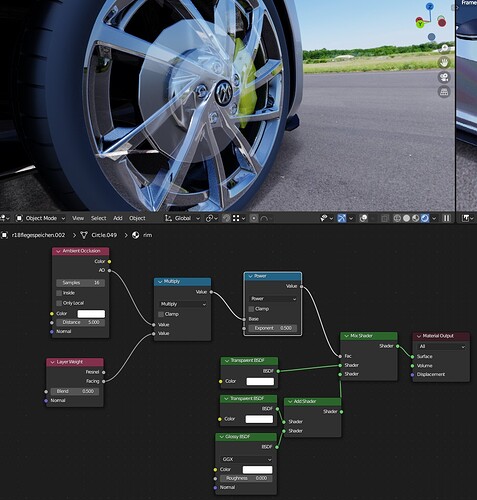
Ok anther try
ambient occlusion gives only reflections from the layer weight, if its no shadow there otherwise its gets transparent.
power controls the reflection strength.
transparent into addshader to avoid shadows from the glossyshader part.
Use the Add > Input > Light Path Node to control a mix.
It has a Is Reflection Ray socket.
Take the time to study Light Path / Geometry / Object Info Nodes.
I’m not sure that I’ve ever understood what “comp it” means.
Could you elaborate? Or suggest a tutorial that describes it?
Thanks.
Comp it…
The use of the compositor to arrange images, bits of image etc.
You have a wonderful economy with words.
Pretend that I’m 6 years old and I want to learn about the “comp” operation that you described above. I guess the “Eevee comp’d over Cycles” part is the most interesting part.
Are they two separate renders that are “comp’d” in a seperate third project?
Any suggestions?
