Hi,
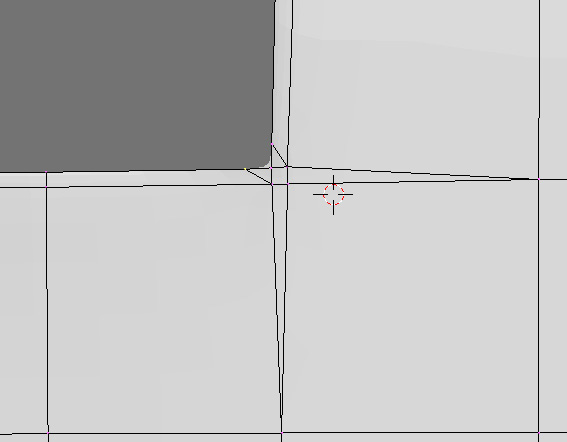
I’ve been trying to model a seaking for a few months and i had a reasonably complete model but keep running in to the same snags with the window frame and door frame corners. I want to keep my mesh nice and clean with quads but end up having to put in triangles, as per the first pic.
If i put a quad in the corner like this image then the subdiv becomes a mess.
As luck would have it,3d world is also has a tutorial for modelling a seaking and so i though this might solve my problems. However they seem to end up making a 5 sided polygon to increase the vertex count in the corner.
Has anyone got any good tips on how to square things away.
When you model something model the general shape of it using quads and cubes (have sub surfs off, this will keep the temptation of trying to model the final shape right away), this goes esp. for sharpish corners and cube like shapes.
When you want to start adding definition (this is where you should turn sub surfs on) refine the shape with ctrl+r (or k key). This adds edge loops, these edge loops are great tools that add an extra line in your mesh allow for you to have more control over it. Add the edge loop as close are as far away from the original to add sharpness. This technique will eliminate quads. or keep that at a minimum
First model your object in normal mesh mode, no sub surfs:
Now hit ctrl+r, move you sursor around to see different areas where an edgeloop can be placed.
Left click to place your edge loop near an original set of vertices your modeled, closer to them adds definition, farther away adds less.
Add as many as you need to add enough definition to your object. Remember edge loops are also great for organic models. This is the final object we got from the original extruded cube above, complete with sexy smooth bevels and a still workable mesh. What would be really cool is contruction history so we could modify the original mesh while keeping our edgeloops there.
yeah I did the face loop thing for my original model and it worked well until I came to do the corners at the end.
Artis, I tried your solution and having three loops close together unfortunately ended up affecting the smooth edges across the model once subdivided. There was a noticeable bump along the edge of the aircraft.
Dittohead, yeah thanks for the info. It seems to work nicely for objects until you try and remove a face (eg a window or door) and they have curved sides.
Oh, and the reason that i am getting fussed about the triangles is that later one when i tried to use more faceloops to extend the detail, they didn’t wrap round the model very well with triangles randomly placed.