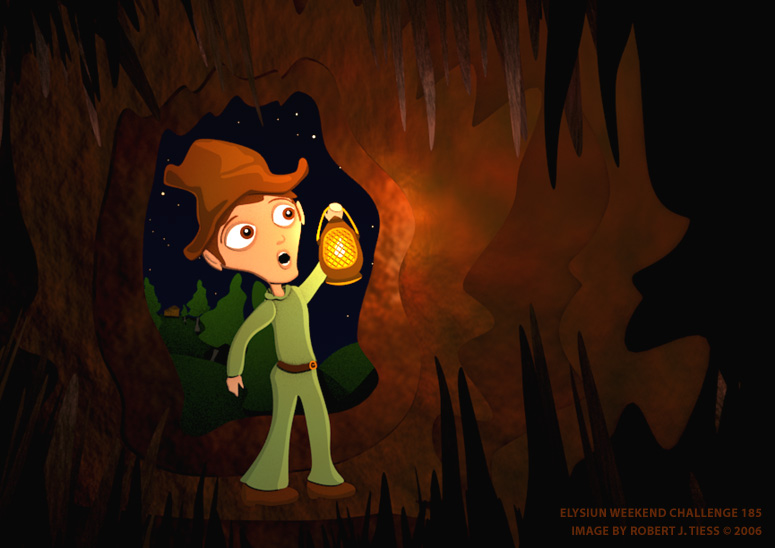
This is a vector stylized Blender project I completed this evening:

Last year (for WC185) I created a vector style piece that had helped me better appreciate how advanced Blender’s 2D capabilities can be for this style of work. I had done some pieces like that before but not as ambitious, with highlights and details as separate layered meshes.
I continued working on projects like that from time to time, all the while growing to much prefer Blender to dedicated 2D programs I used privately and professionally, such as Adobe Illustrator, MS Publisher, OpenOffice, and Inkscape.
I do find much of this particular style of work more intuitive to create in Blender than some of the other programs mentioned. You are not limited to paths, beziers, and simple meshes, but can use mesh with/without SDS instead (as this piece does) and even incorporate 3D elements and practices as necessary, all within one program and a speedy interface.
For example, the clouds were created from mesh circles transformed and then joined into one mesh without having to resort to booleans. The gradient (blend) texture works nicely without added concerns of non-manifold geometry.
There are other advantages, such as lighting/shadows, AO, advanced material and texture options, nodes, render passes, camera placement/maneuverability, PET, selection tools, material linkage, lattice deformations, particles/particle objects, arrays, curves, scripting, and advanced animations (rigged or simply Loc/Rot/Size keyed along custom object center pivot points).
I enjoyed this cleaner look so much that one of my more interesting animation projects is going to be done in this kind of style, although the stylizing and tone will be decidedly different.
Editing this kind of work can also go much faster in Blender, particularly as things such as gradients, layer effects, and alpha-enabled elements are visible only after rendering (unless you perform preview renders or are experimenting with GLSL binaries) – not exactly WYSIWYG as you go.
Of course, there’s the added comfort of being able to break out of the exclusive 2D camera view and work in non-orthogonal 3D views when necessary. I’ve attached a 3D view of the project to give you a glimpse of how it is arranged.
It is necessary to very slightly stagger some objects along the camera/Y axis in Blender to avoid unintended overlaps, but that, for me, is much faster than working with something like the Arrange menu in Publisher. Just grab and go =)
There can be some limitations, particularly at the output stage if you have advanced output needs (some of which might be met in the current flash render work I’ve read about at some point elsewhere in the forum). For my own limited print needs, high resolution renders proved more than sufficient.
It’s probably worth mentioning that there is also Alexander Ewering’s DTPBlender to consider possibly when developing projects of this nature. It is a program based on an older version of Blender. DTPBlender is designed with 2D work in mind:
http://dtpblender.instinctive.de/
Announcement thread (from May 2006):
http://blenderartists.org/forum/showthread.php?t=67880
My image above has been created and rendered in regular Blender (2.44) without raytracing or shadows. Blender’s built-in toon edge was used for the lighter outlines. Render nodes were mainly used for a blending overlay layer for the concentric circles slightly blurred via a blur node.
I might be inclined to post more of these types of projects in the future, perhaps along with some more workflow specifics and tips, if there is sufficient interest in seeing Blender used in less typical ways.
Thanks for looking, and have a good weekend!
RobertT
Attachments
