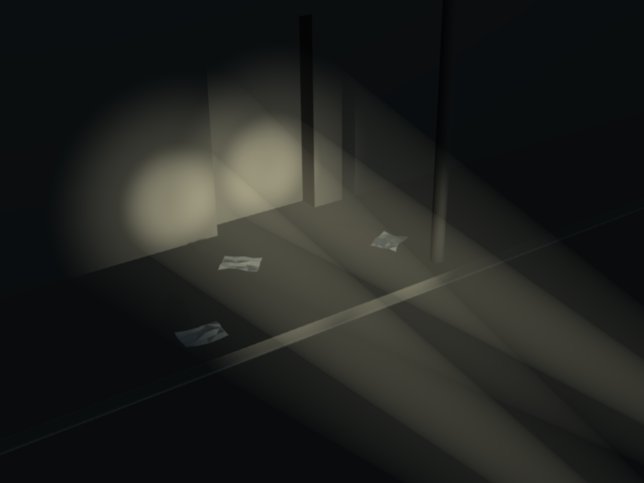
Hi,
Has anybody got any tips on how to get a decent looking headlight affect against a wall at night? I’ve attached a couple of examples of where I’m currently at, it’s still very much a work in progress.
Thanks in advance.
Chris.
Hi,
Has anybody got any tips on how to get a decent looking headlight affect against a wall at night? I’ve attached a couple of examples of where I’m currently at, it’s still very much a work in progress.
Thanks in advance.
Chris.
hey chris,
oddly enough i’m looking to do a similar thing w/a character holding a flashlight. both lighting effect and flashlight will be seen in the shot. i’ve tried fumbling around w/grouping to objects w/no luck. maybe some brown or blackbelts out there could help us w/technique…
Is this the effect you’re looking for?

Hi selwaywalker, Heh heh, yeah perhaps we need to call the A-Team… Thinking about it I might know how to find a way round this. I’ve got the blender creature factory tutorials on dvd and I think he creates some ‘God rays’ in it. Might be something that can be manipulated for our needs.
Hi Darkomni - Thanks for the example render, the shape of the lights on the wall is roughly what I’m looking for. I might need to find some photos or illustrations as an example.
Cheers guys.
Chris.
Hey selwayalker, I think I’ve sorted it. It was pretty easy after a quick google.
If you use a spot lamp just click the ‘halo’ button in the settings for the lamp. You can then play with the halo settings.
Here’s a quick test I’ve done.
skinner78, thanks for the tip. yer headlight rig looks off to a good start. i have been working with halo’s, to some good effect, particularly the flare and star settings. keeping coming back to groups and constraints, though. i’ll keep plumbing that and post the reskluts (or results, if you prefer.)
selwaywalker
Cheers selwaywalker,
Yeah post your results if you get chance.
Car headlight made of 2 spots just doesn’t sit well with me. So I tested few setups. It turns out that by adding few more spots, headlight looks better; bright central spot with wide weaker spot per headlight. See attached image. This is because headlight has main beam surrounded by secondary reflected spill over beams. By keeping the center beam narrow and separated, you don’t get that overlap hot spot in the middle. It appears Blender light beam just “adds” each rendered beam on top of each other. So you get this ugly dark beam envelop line superimposed on top of each beam!

Hey ridix!
Thanks for the reply and rendered example. I think your set up looks good and will give it a try.
Cheers.
Chris.