Interior Mapping is a technique that renders the interior of a building when looking at it from the outside without the need to actually model or store this interior.
This technique is used in games like Grand Theft Auto, Saint’s Row, Superman Returns and Spiderman.
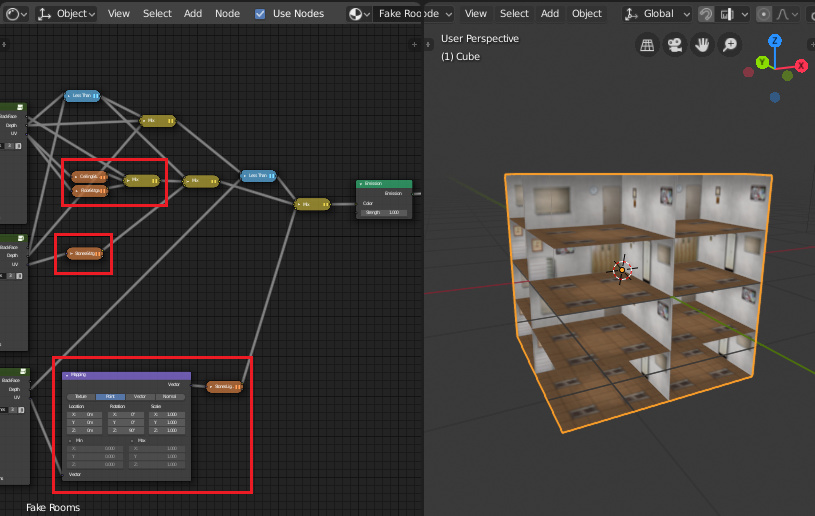
I was able to simulate the original technique through the Blender nodes. Here the result:
The original technique is written directly in the shaders and has the advantage of also writing the depth component, which is useful for intersections and shadows.
I intended to do a tutorial, but it would be very extensive (and complex).
So I share here just the blend file with the material for you to test: Texture_Fake_Rooms.blend (747.4 KB)
Thank you very much for your work, I would really like to test it, but I am too stupid to connect image textures to your shader, I see there is a texture ceiling64.tga but it is not wired up. Thx in advance!
I’m sorry but I’m not an expert on nodes… i couldn’t find where i should put my image and such at the node that you presented.
I hope you wouldn’t mind to help me understand more… it is such beautiful works btw!
For more efficiency it is better to edit the nodes to merge all UVs into a single combination to use a cubemap.
(I did not do this to avoid complicating it further).
Ah ok, thanks, you have had that in mind already, would it be hard to implement? Just curious about this techniqe, with possibilities for curved projections and some randomization methods this could be quite powerful for mid- and background architecture!
Woow! Nice work polygonsoul!
I’m glad to see this technique being used to archviz renderings in Blender.
I see it’s worth continuing to edit in this shader.
If you’re out of time do like I do: just record everything on one go capture, speak whenever you feel like and send the “uncut” version to youtube. That’s it. Whosoever would like to follow along will know “how to skip intros”
I hope this is shader is still getting some attention. I downloaded the file and have no idea how to get textures in . . . but otherwise it is looking fabulous (with just the silly stand-in color shades) and is working great in Blender 2.80. No crashes at all, which I was experiencing with my attempts to use the OSL “WindowBox” shader. Not to mention that OSL is not GPU enabled, which is a big minus, and is also probably why it kept crashing.
Altogether, the direction of this shader is a lot better anyway. You’re able to quickly define the number of floors and rooms per axis, and if I could just figure out how to get the textures to work . . .
With randomization and curved projection, I would pay money for this. Anyway, thanks, mano-wii, and keep it up!

 Thank you soo much for the help!

