I’ve seen a few tutorials describing how to texture and create skin materials in blender. Here are some examples. However, these are not quite what I’m going for.
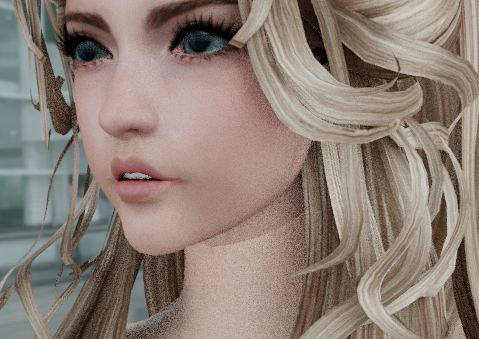
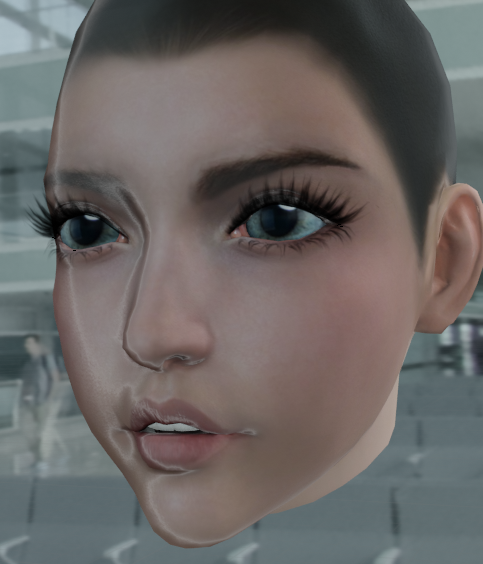
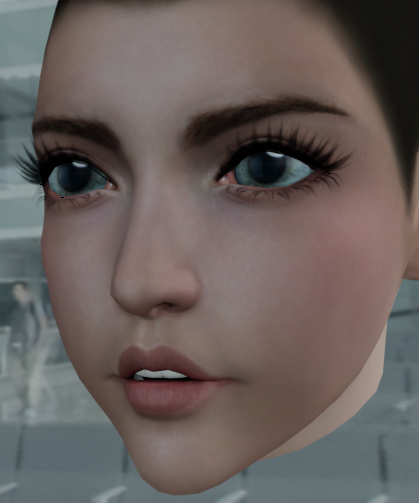
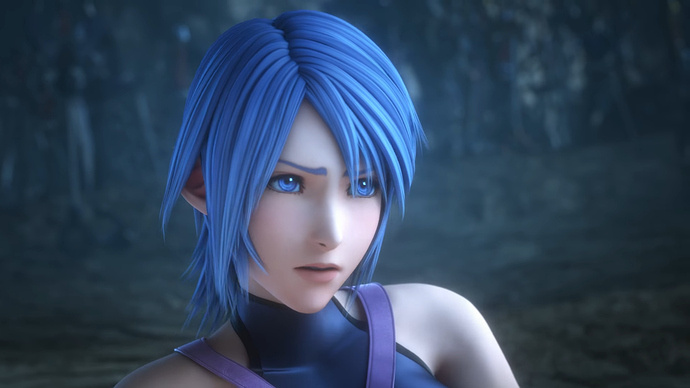
But I’m trying to go for something a bit more smooth, such as something from kingdom hearts or final fantasy. Here are some reference photos.
Uv unwraping a character, picking a solid color for the skin tone, and then with a very soft trasparent brush darken areas with a darker hue in places that make sense. under the nose, under the brows under the neck/chin. You may use a red color for the lips. I’ve even done this with just vertex painting before, just depends on how detailed you wish to go!
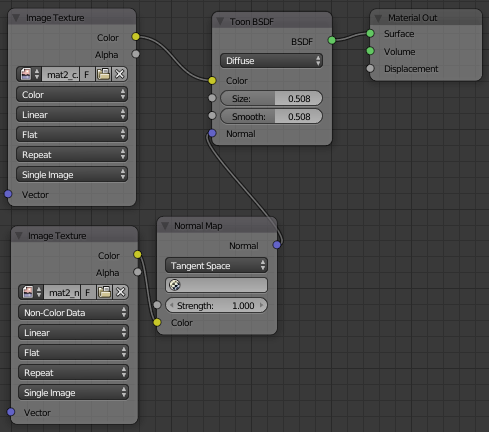
I just checked and toon shader is a part of 2.79b… so you could still use it… did a quick setup and works ok…I haven’t really ever used it as I use principled shader virtually all the time.
Skin shader using toon and a diffuse UV image texture and normal map.
Sorry for the late reply. Thank you for your advice! My only question now is how I can give the skin a bit of glow… emission doesn’t really work. Maybe Fresnel?
What happens if you assign a material ID to the material, then Compositor/Converter/ID Mask to create a skin based post effect glare node with very low threshold? Very subtle I think. I’m not sure if they do this in feature film cartoony like animations; they appear to have “some glow” to them, but it might be just a result of featureless subsurface stuff going on. I really don’t have a clue though, this is outside of what I normally do.
for glow you can try Eevee with its glow settings,or if you are useing Cycles you have to use Glow in the compositing.
For the skin,use Subsurfscattering.
SSS looks more real and if you have little pores detail,then without SSS the skin can looks muddy.
If you switch to SSS with the details and the more you increase the SSS, then the details gets blended together,if that makes sence.
i have not tryed the caroonish look, but i know this about my own Emiliy renders.
for the lighting.lighting is very important an can have a drastic different look with different contrast,hard light hard shadows ect.
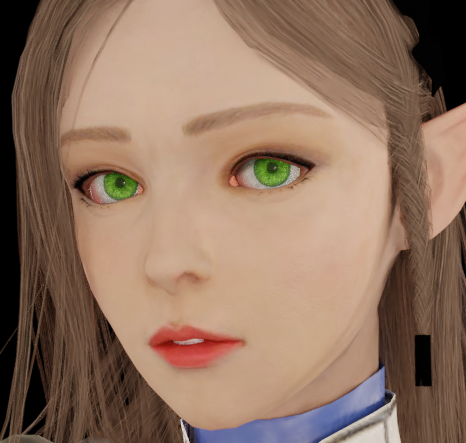
the pic with the blue hair character has very soft light and shadowing if i am not wrong.this soft light helps to avoid sharp bumps in the skin pores too (if you have bump maps and displacement maps for details active in your mat)
the cartoonish look,if you have a close up shot from the blue hair character,do you see pore details ?if not then maybe the artist dont use it at all.or very subtle maybe,you have to check your reference what you want to achieve.
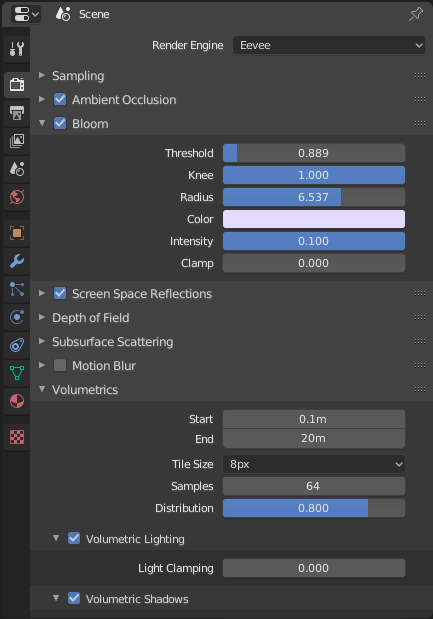
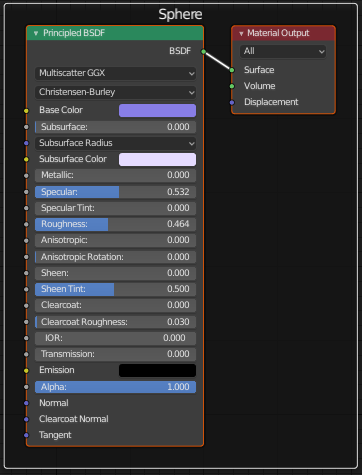
Did not have time to try a character, but played with just a sphere. @pixelgrip suggestion on sub-surface might have some merit on a realistic character but looked bad on toon shading, need to work with it a bit more… Lighting and Camera, as well as Bloom and Volumetrics, is where I focused…
I used a soft HDRI with several distinct light sources, as well as adding an area light just off center
Second off add Bokeh effect to the camera
The focus was just shy of the object, aperture blades will add shape to lights and reflections, so 12 gives a rounded shape. The ratio is the Bokeh effect “The way the lens renders out-of-focus points of light”.
Yes… I am also sure you are right, but I also think their render engines play a big part.
I did play around with the Glare-Node… normally don’t use the Compositor, but since the above does not affect a render in cycles…gave it a try and it gives just about the same effect…
Not to hijack the thread, but regarding bokeh in DOF, does animated feature films tend to use circular, shaped, or anamorphic? I absolutely love the feel of the anamorphic in real movies, but I’ve actually never paid attention to it on animations.
i think you are right.If you look at the blue haired pic,you can clearly see that the left shoulder in the shadow has no glow,vs the right shoulder and skin in the keylight has that glow effect.
maybe threshold is enough, to get everything in the keylight with glow and everything with lower/shadow intensity without glow.
set everything with glow seems wrong.beside that would be to much if everything in the scene gets glow.
a subtle glow for the keylight part should be right.
I am overwhelmed with the amount of support and suggestions! Thank you everyone! That said,
I am not very experienced with the compositor or with Eevee (does 2.79 have Eevee?).
I know how to change the saturation or hue of an image after it’s been rendered in the compositor, but that’s about it.
I don’t know how to only composite certain materials, how to work with sub surface scattering, volumetrics, or bokeh.
I’m not quite sure where to start, and I am a bit overwhelmed.
You’re Welcome. Yes, it is overwhelming…I have used Blender since 1.0 Beta…and I still don’t know what all it can do…Like you, I only started with 2.8 a couple of months ago…and I barely can get around the UI…My first experience with nodes !!! Ackkk I stayed away for a long time !! But once I started, plugging one by one…till it is a whole makes it far better than looking at the whole, and being overwhelmed! I only experimented with what I shared, and had never tried it before…and I learned just by @pixelgrip and @ArtAvenue some very cool new things I never knew about! That’s the way it goes…one bit at a time…and a thorough knowledge of how to use Google search!