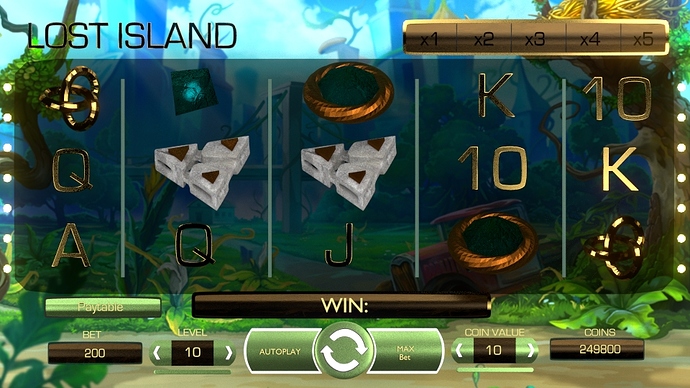
This may help.
First you want to make the objects part of a wheel like a slot wheel. Work on one column of objects at a time. You need to have a camera, an empty for that column and the column of objects.
The Empty is going to be the center of rotation of the objects, the center of a slot wheel. So put it at 0,0,0 and then move it away from the camera. Imagine that from the side, you are making the center of the slot wheel. The distance between the empty and the object in the vertical center is the radius of the wheel.
I put my camera at 0x and 0z, rotated 90 degrees in X. Then move it in Y to where you want it. You may need to adjust the field of view so that it frames your objects properly. Since you have the scene set up as a still, this may be done already.
Next you attach the objects to the Empty. Select the object in the center of the column. Select the Empty. Press P to parent the empty to the center object.
Next, choose the top object and move it down until it is at the same height as the center object. Select the empty. Press Shift S and choose Cursor to Selected. Next, set the Pivot Point to 3D Cursor.
Select the top object. Rotate it up so that it is in the same place it was originally with respect to your camera view. Use the Ctrl key when rotating and note what angle the read out is. This will help you place all the objects on the wheel at consistent angles.
Then select the empty and press P to parent the empty to the top object.
Next, choose the bottom object and move it up until it is at the same height as the center object.
Rotate it down so that it is in the same place it was originally with respect to your camera view.
Then select the empty and press P to parent the empty to the bottom object.
Now you want to add some more objects to the column so that as your slot wheel spins there will be objects.
When your wheel is done, select the camera.
Look at the location of the camera in the 3D view properties panel. It’s probably 0x, 0z, and some negative value in Y. Open the Camera context in the Properties Panel, Under Lens, set the Clipping End value to a positive value equal to the negative number in the camera’s Y location. Now, anything father from the camera than the empty will not be rendered.
Now, since there is an area around your slot wheel with all kinds of fancy detail. you only want to render part of the image. You want to maskl off the other area.
Select the Render Layers context in the Properties Panel. Under Layer, you see 3 sets of the 20 layer boxes. Where it says Layer: check the boxes of the layers you want to render. Where it says Mask Layer: select a different layer box. Where it says Scene: select the same layers you have selected previously, Layer: and Mask Layer:
Now you need to make a mask. Create a plane and align it to the camera view. Move it so it is between the objects and the camera. Scale it up so it covers the entire camera view. Press Tab to get into Edit mode. Press I to insert a face in the center. Scale the face down so it is the right height. Scale the face’s width so it is correct. Delete the face. Make sure that the mask is in the proper layer that you selected in the Properties Panel Render Layers context.
Press F12, and you should see your objects, trimmed by the mask, but the mask shouldn’t show. If it does, make sure your layers are assigned properly.
Next you animate the slot wheel. At frame 1 rotate the Empty, press I, then choose Rotation from the popup menu. Go to the final frame of your animation. Rotate the empty to where you want it. Press I, then choose Rotation from the popup menu.
Repeat this for the other columns of objects. You don’t need a new camera or a new mask, but you will want a new empty for each slot wheel.
Enclosed is the zip file of the blend file that I made while figuring out the steps. You will probably want to make a bigger wheel and have a greater distance between your objects and your empty.
[ATTACH]382775[/ATTACH]
