Smoke - increase depth in lit scene?

Hi folks,

I’m struggling to get the look I want with a smoke sim, and wondered if anyone had any ideas on how to tackle this.

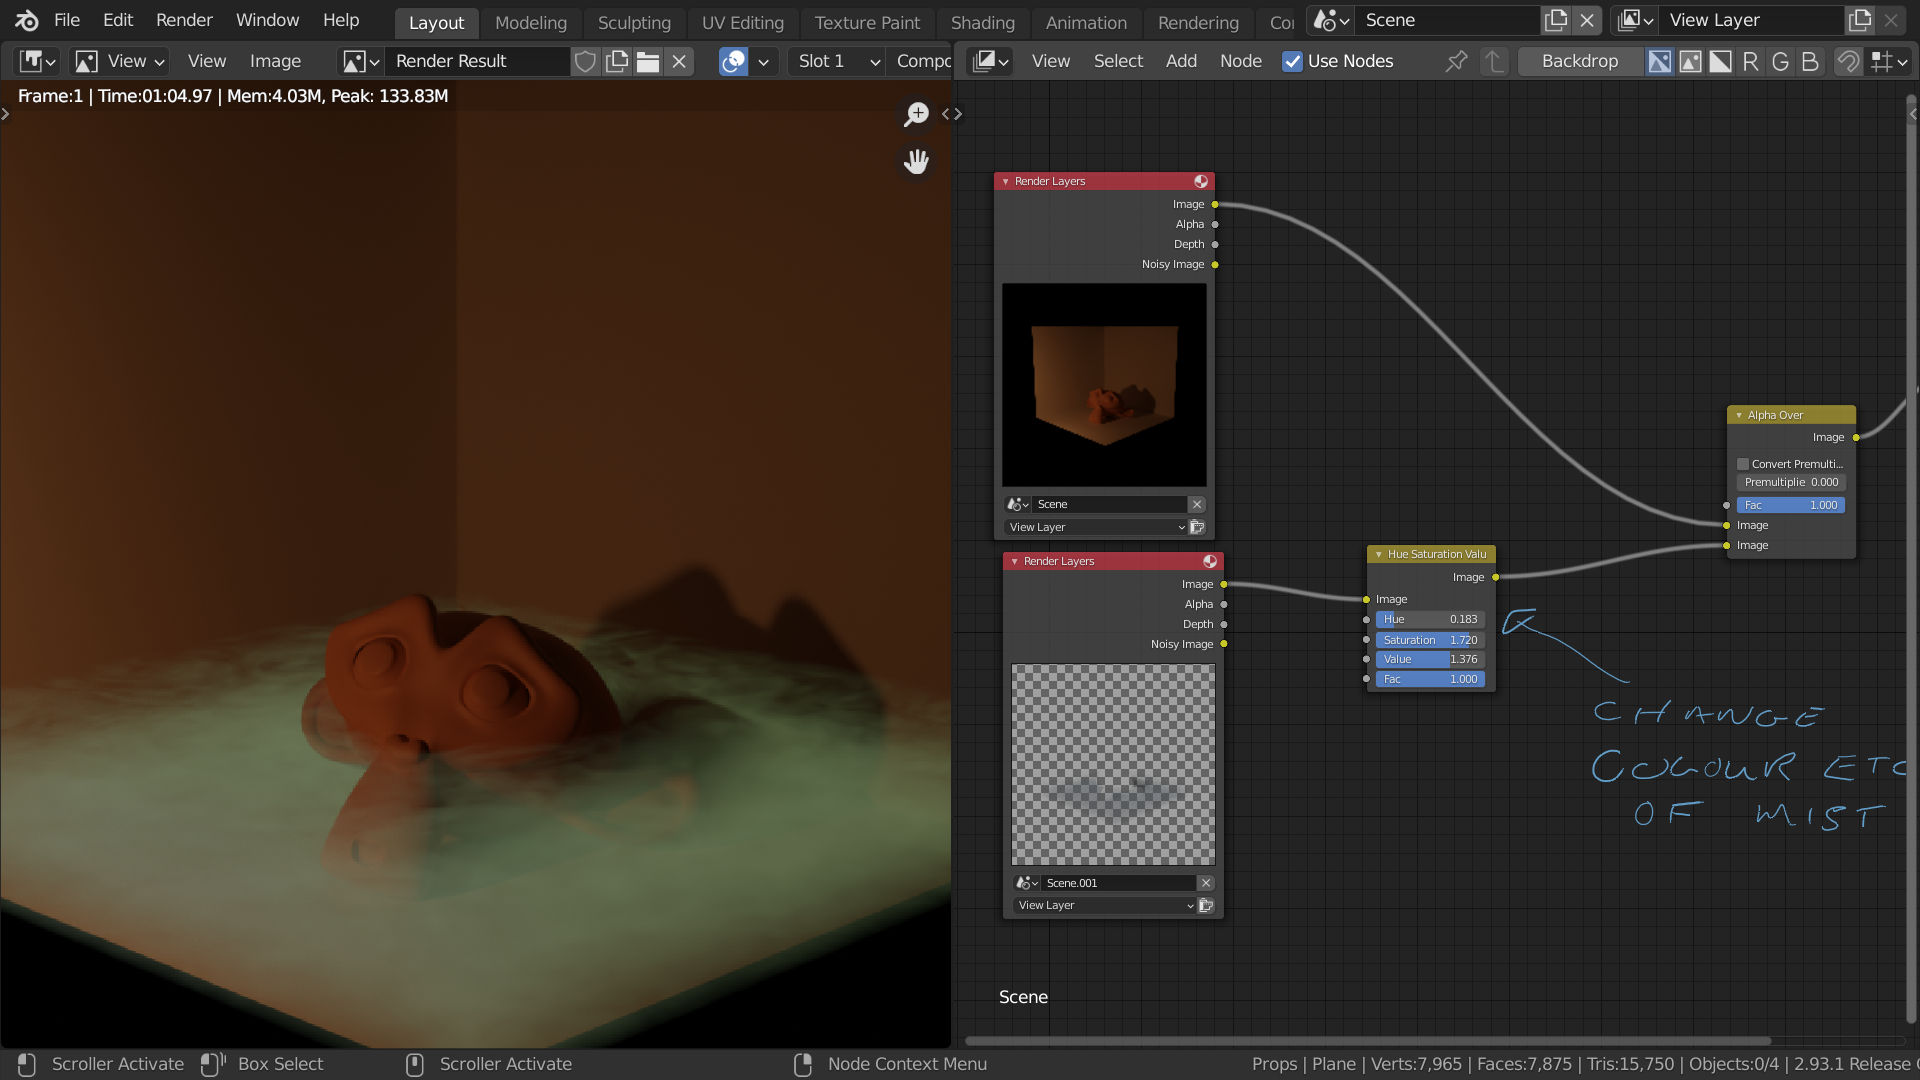
Here is a WIP:
Unfortunately the smoke is rather “flat”. Changing the density seems to make the smoke thicker (or it disappears entirely) but it doesn’t add any “depth” to the shading. I want the blacks blacker, and the lights lighter - so it looks less homoegeneous. I’ve tried changing the principled volume settings, but I am not which trait to focus on. I even wonder if a noise texture somewhere would help? Upping the volume light bounces did help a little, but not too significant.

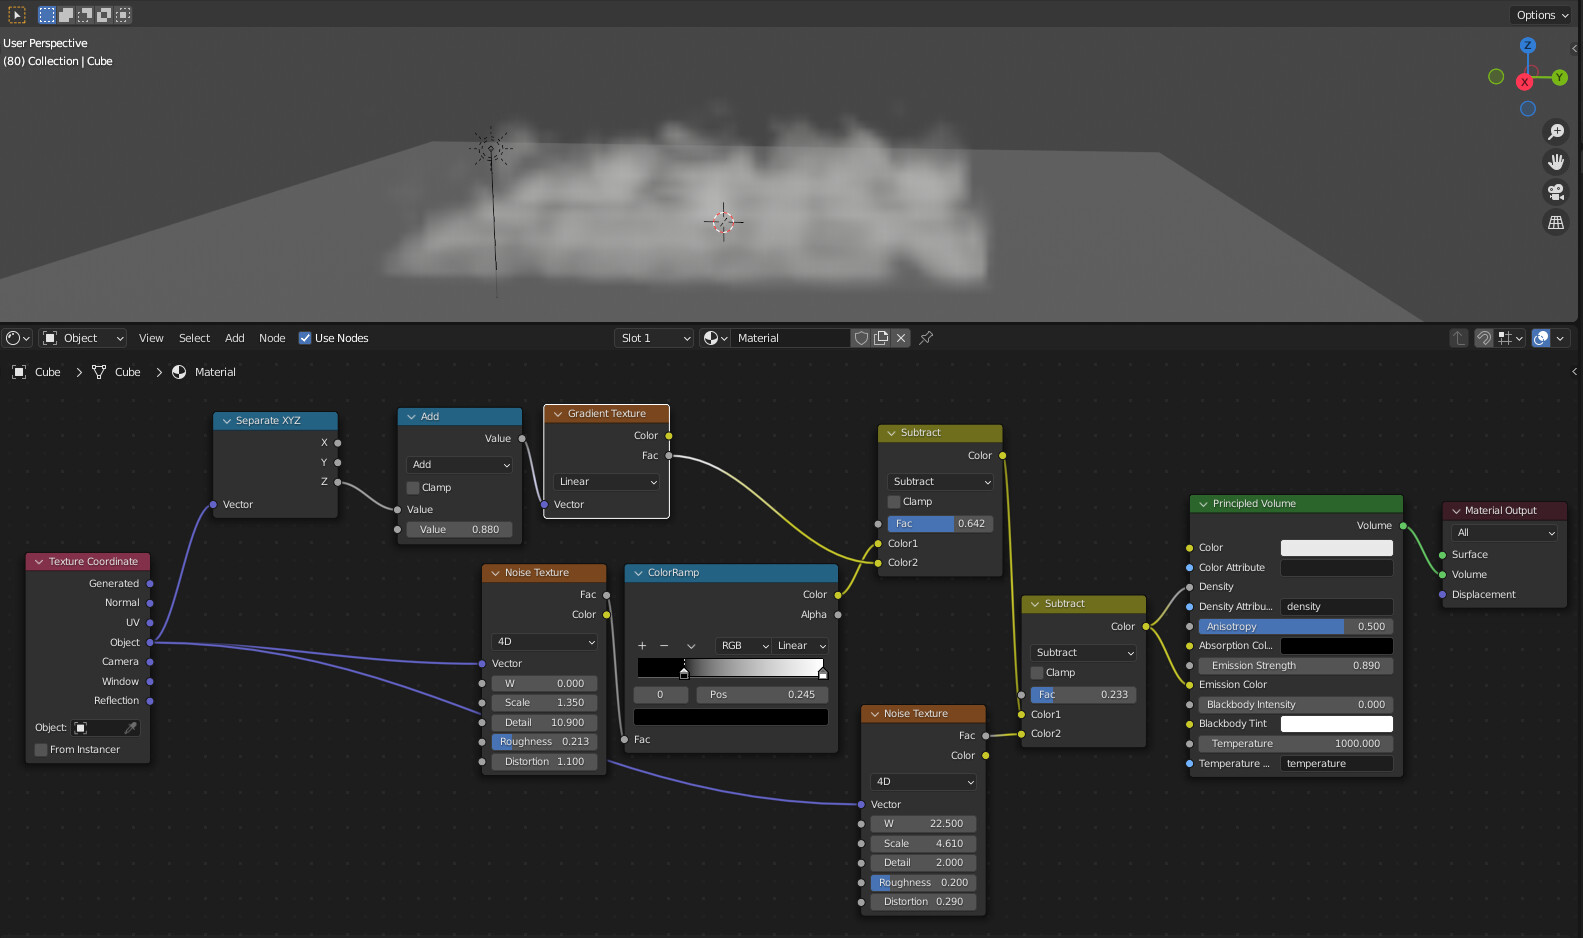
My set up is as follows:

I should say that changing the input from emission to colour doesn’t do much noticeable. Changing the positions in the colour ramp makes a small difference, but not much.

I’m looking for something more like this. Like the classic high contrast dry ice sort of look (albeit it a bit dirtier looking).

I am still experimenting, but it’s very slow on my machine to preview this. I wondered if someone might have tried something similar and could share their setup or suggestions?

Giving the smoke emission values will not help as the emission will lighten up the shadows leading to less contrast, the higher the emission value the less contrast you will get.

For Eevee make sure that you have “volumetric shadows” turned on in the render settings (at the bottom of the volumetrics tab), if not the smoke will always look flat.

For Eevee if you want to make the highlights lighter you can set the volume slider of your light source to a value over 1 by typing in a larger value, or you can add a light source that only illuminates the volume by turning down to 0 the diffuse and specular sliders. These sliders are only available for Eevee.

Here I have 2 lights, one is orange and lights everything equally (all sliders at 1), the other blue light only lights the volumetrics (diffuse and specular sliders at 0 as shown). I set the volumetric slider to 10 but you can also turn up the power value to get the same effect. I set the radius of the blue light to 0 to enhance contrast.

There are probably a few more tricks that I am not aware of, I do not do smoke in cycles as my computer will not handle it !

Thanks for the tips - I should have mentioned, I’m working in cycles.

That being said - I need to practice working in eevee too, so these tips will be handy!

Why do you have the camera ray light path node fed in to the the emission color, it´s probably killing off the rays for shadows in relation to the camera.

Also, be careful with using the volume info density output, it seems to retreive data a bit different from the standard density attribute.

You could just add density attribut, feed that directy into emission color, or strenght and use a color contrast brightness node to increas values.

The color channel of the principle node increases the scattering, and density of the volume, including deeper shadows the whiter it is, you can boost this with a brightness contrast color node,

Also, even though you have plugged those nodes in to the emission channel, I doubt that will have Any effect at all, You do not have any emission strength at all to get even have it active.

Also, Ligh type and it´s settings matter a lot, point light´s aren´t ideal, try using a directional light for the smoke perhaps, or an Area light, not to larges in size cause that will give a more dispersed light, less deeper shadows, increase power a lot, and make sure you aim that light towards the smoke in a good way.

I would start by unplugging pretty much all the nodes you have set up in the principle shader, and start with getting the lights working within the smoke context, it really should be enough with that for getting a thicker smoke with shadows.

But also, depends on indirect lighting and volume bounces, the volume bounces will not give you deeper shadows, just more light bouncing inside the volume, thus brighter smoke and Less deeper shadows.
color of background matters for the indirect lighting only, not direct lighting causing the deeper shadows.
And the question is if you have an open environment or is it a closed room?

You can however use the cam ray light path in to emission, if you aim for not using volume bounces that takes a bit more time to render, but as I said, it will cut of the rays and shadows, so if you do use it, make sure the strength of it is very low, just to illuminate the smoke a little, but still not shutting off all the rays.

The color ramp is there to provide additional “fake” depth of the emission illumination, so it doesn´t look as flat.

@MI65 Many thanks for this - definitely feel more motivated to work in a direction now and not flail about aimlesslessly!

The node setup was basically from a tutorial - they seemed to get good results with it, so I thought it was a good basis. But now that I’ve taken off these nodes again and fiddled with lighting, I can see how it was limiting things.

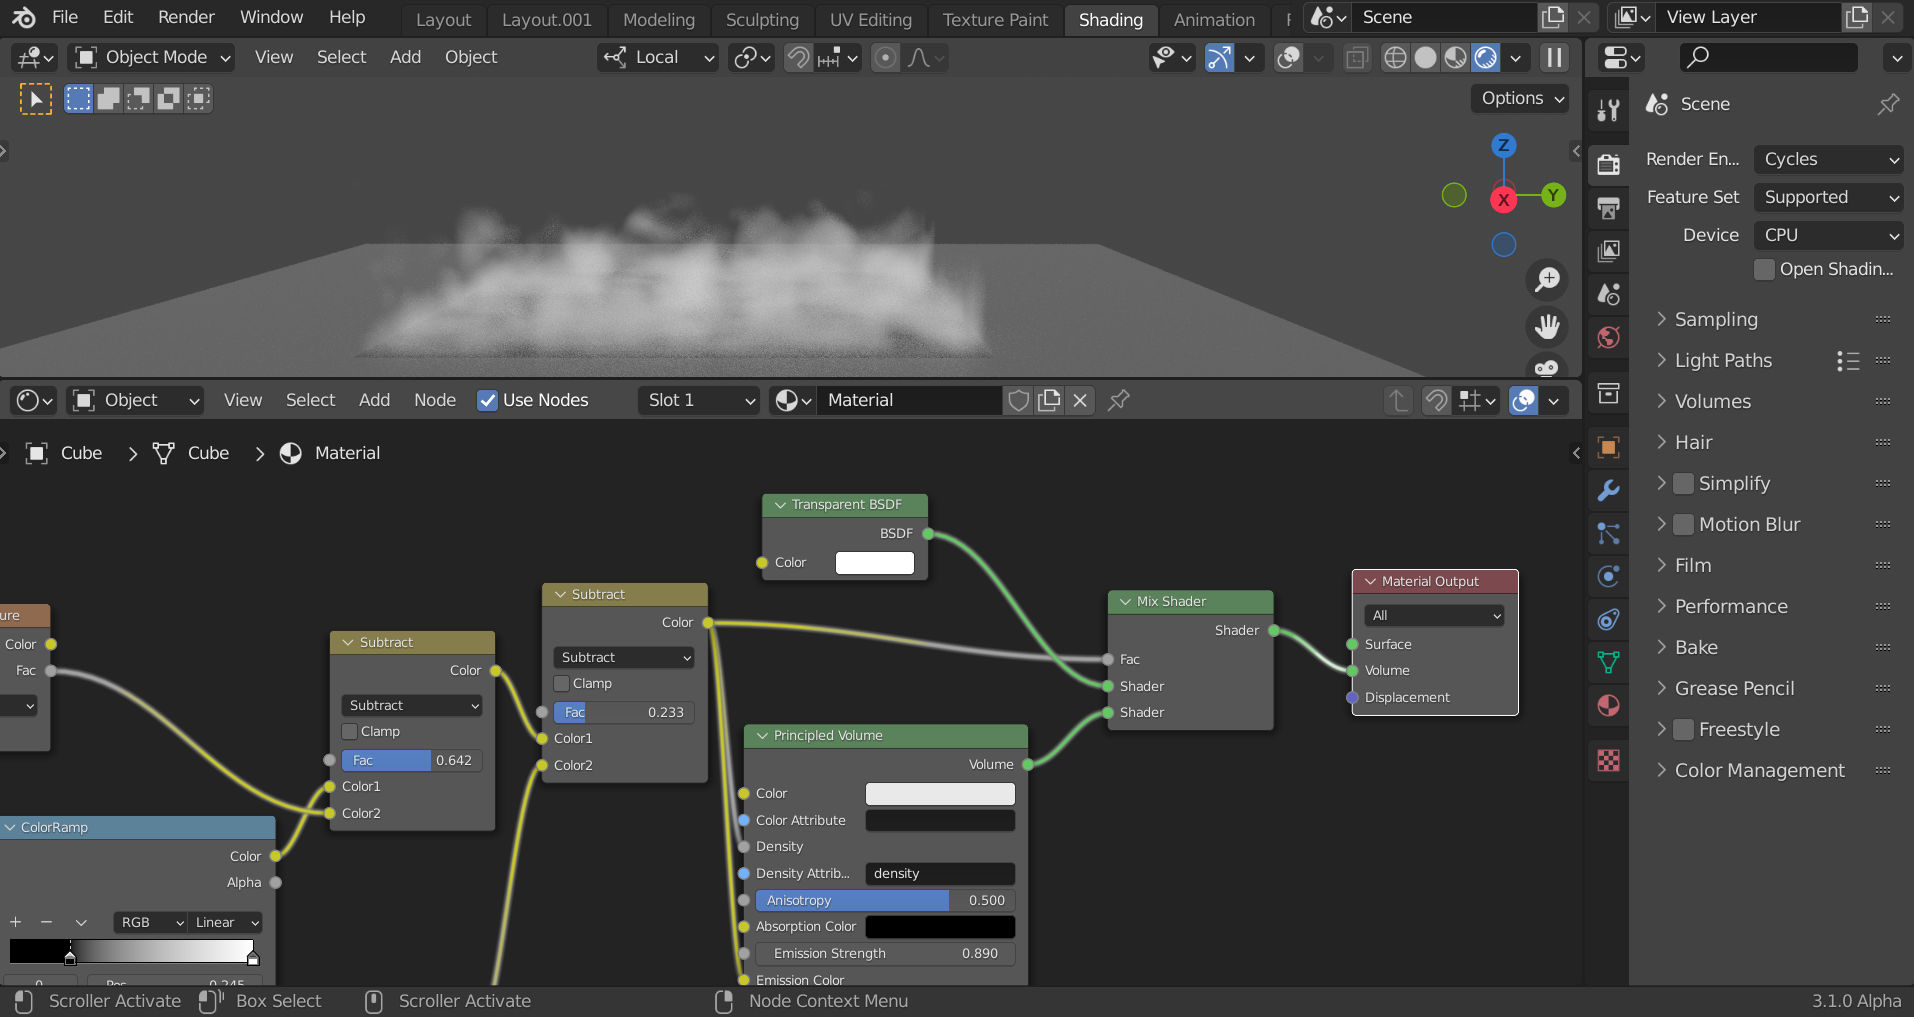
I did have a bit of a weird result when adding some floor backlights:

These are just area lamps (small, low wattage) but they seem to be cutting through the smoke entirely. It’s a little odd as it looked fine in the preview window at 64 samples, but rendered properly at 500 samples they seem to disappear. I think this has given me an idea however, as I like some patches of floor showing through (if I can get them a bit more random, it might look better).

I think that the only way to light the volume separately in cycles is to render the volume in a different scene with it’s own lighting, using your props as a holdout collection (so that the volume does not go through them)
You have to render the volume/smoke scene with the film transparent option.
Then composite the volume scene over the main image.

Once set up it will open a world of compositing possibilities. You can change the colour and density (value) of you volume at will in the compositor, you could add a texture to the factor of the alpha over to get patches with no smoke and much more. All of this without re-rendering the scene

I used a cube with volume but you can do the same with smoke, I used a noise texture to control the density.
I think you will find it fun!

Here is the file if you are interested (it is cycles) open the file and hit render to update the compositors nodes.

Smoke.blend (210.2 KB)

Blender could use implementation of exluding light´s from objects (if there isn´t one already)
In Lightwave for instance, I can assign a light specificly to work on vdb smoke, and exclude the light from affecting any other object.

Now…vdb shading in Lightwave isn´t recommendable, it´s way better in blender…but that is another story, the actual feature of being able to exclude objects from lights while it affects other scene elements is however nice to have I think.

Yes defiantly, I have read that light linking is in the works. For the moment we are doomed to compositing.

Also to get nice volumetric shadows you need very dense volume it would be great to have a sort of shadow multiplier to fake shadow boost.

In my example I did not get any nice shadows as my volume is too thin, I have tried to achieve a effect similar to the example posted by but have not succeeded yet.

Increasing shadow is mostly done within the color channel and various nodes, using curves, contrast etc…it increases the density sort of.

Yes, a separate shadow intensity would be nice, in Lightwave for instance, I have a setting for volume items that is called “shadow” intensity…it let´s me balance out the shadows from 0 and up, for no shadows to very strong shadowing.
Ufortunately this feature isn´t available for Lightwave´s VDB volumetrics, just the other volume item shading system.

Not sure if it can be implemented in cycles.

here is a setup for ground floor.


Ground_Fog.blend (819.8 KB)

i ve used two noise textures with turbulence, mixed by a top bottom gradient. one is used to subtract the top fog part based on object Z coordinates.
Hope it s what you are looking for.

That’s a good one, I had to add a transparent shader for it to work in cycles if not the top half of the container was totally black (probably absorption).

This looks promising - awesome! I’m always impressed that people will stumble on these threads and then somehow figure this stuff out so fast.

Sorry I’ve not had a chance to respond or test this yet, but hopeully in the next few days. I actually managed to get a job as a 3D modeller, so I’ve been a little distracted :slight_smile:

That’s really a good news that you get a modelling job.

I finally had some time to revisit this.

Re: DNorman / skuax I have a strange problem with this full setup in that it causes the smoke to not render at all. I’m not sure why - I might try it again in a new blender file, perhaps it is something specific to my session.

I did however try a simplified node setup with just a noise texture and colour ramp into the colour socket (or emission/density) principled volume - this DOES work, however, the results are not very good (mostly it makes it very transparent). And it adds a lot to render times.

So I then took your advice and adjusted the lighting. I noticed that area lights cut through the fog entirely, but if you switch them back to point lamps they work fine. I also observed that on my version of Blender 3.0, the smoke does not appear at all, even if baked. On 2.93 it works perfectly. Weirdly, I’ve just tested sending the file to a render farm and it will render fine via them using Blender 3.0!

Very confused!

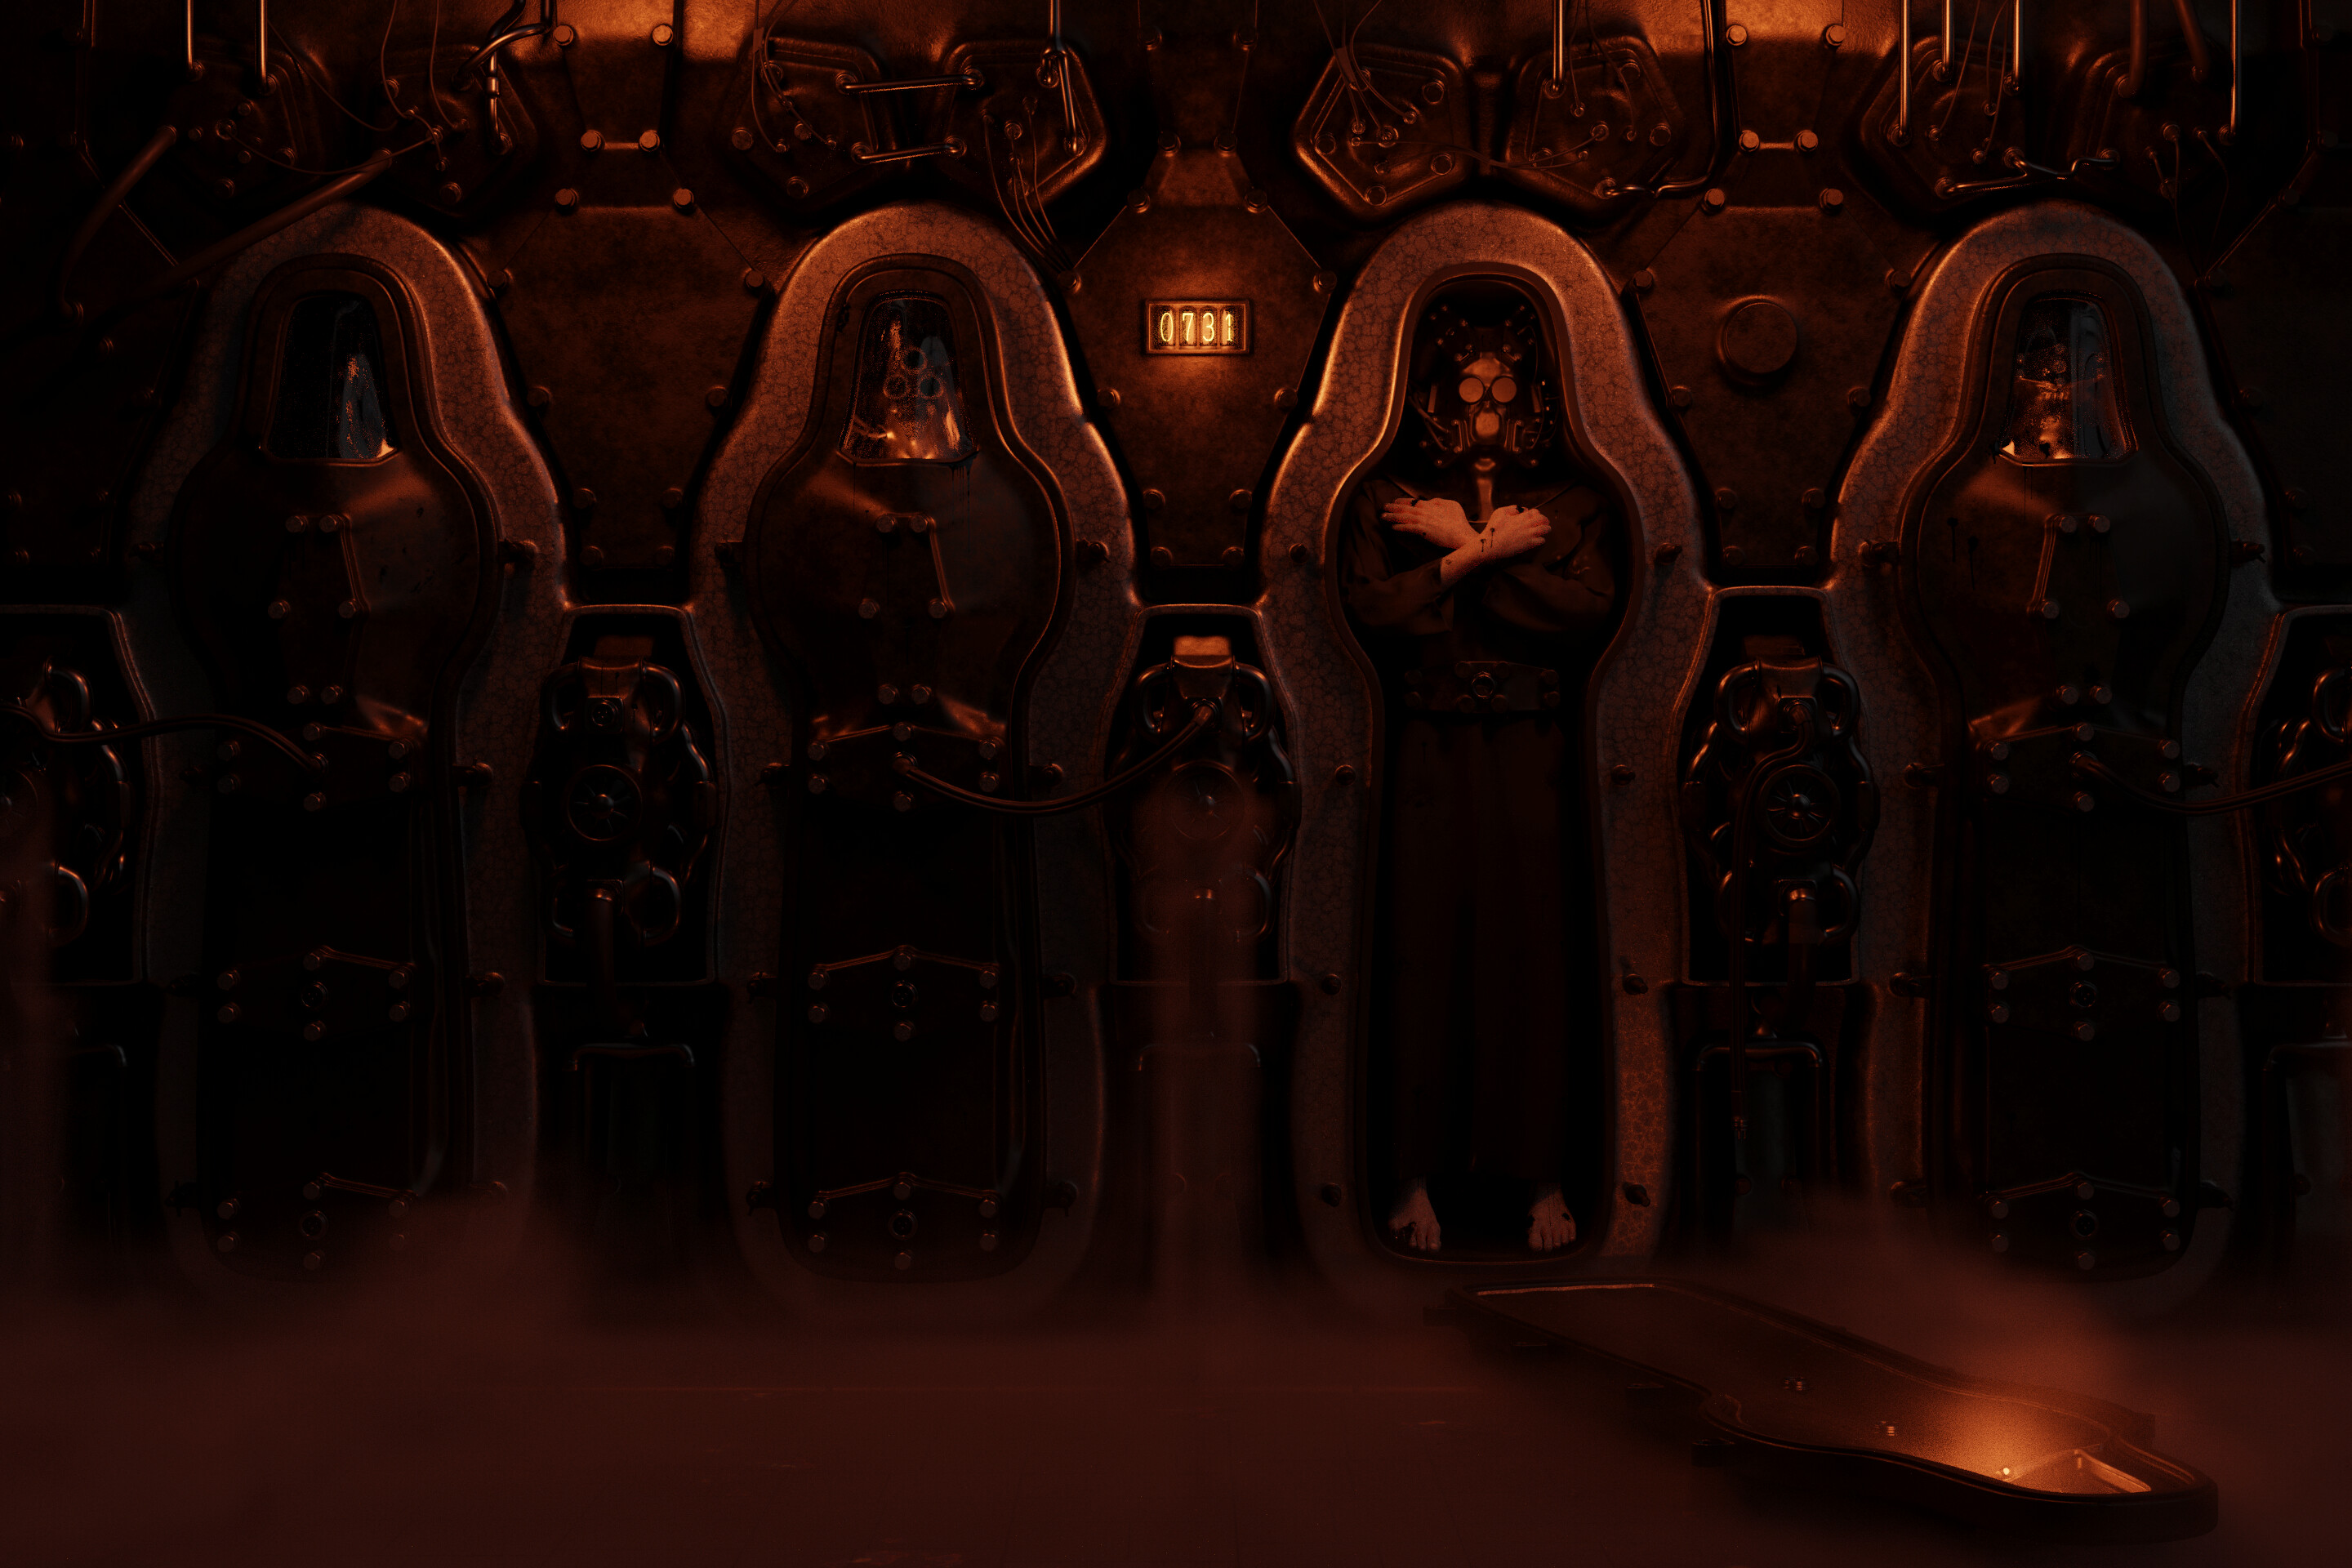
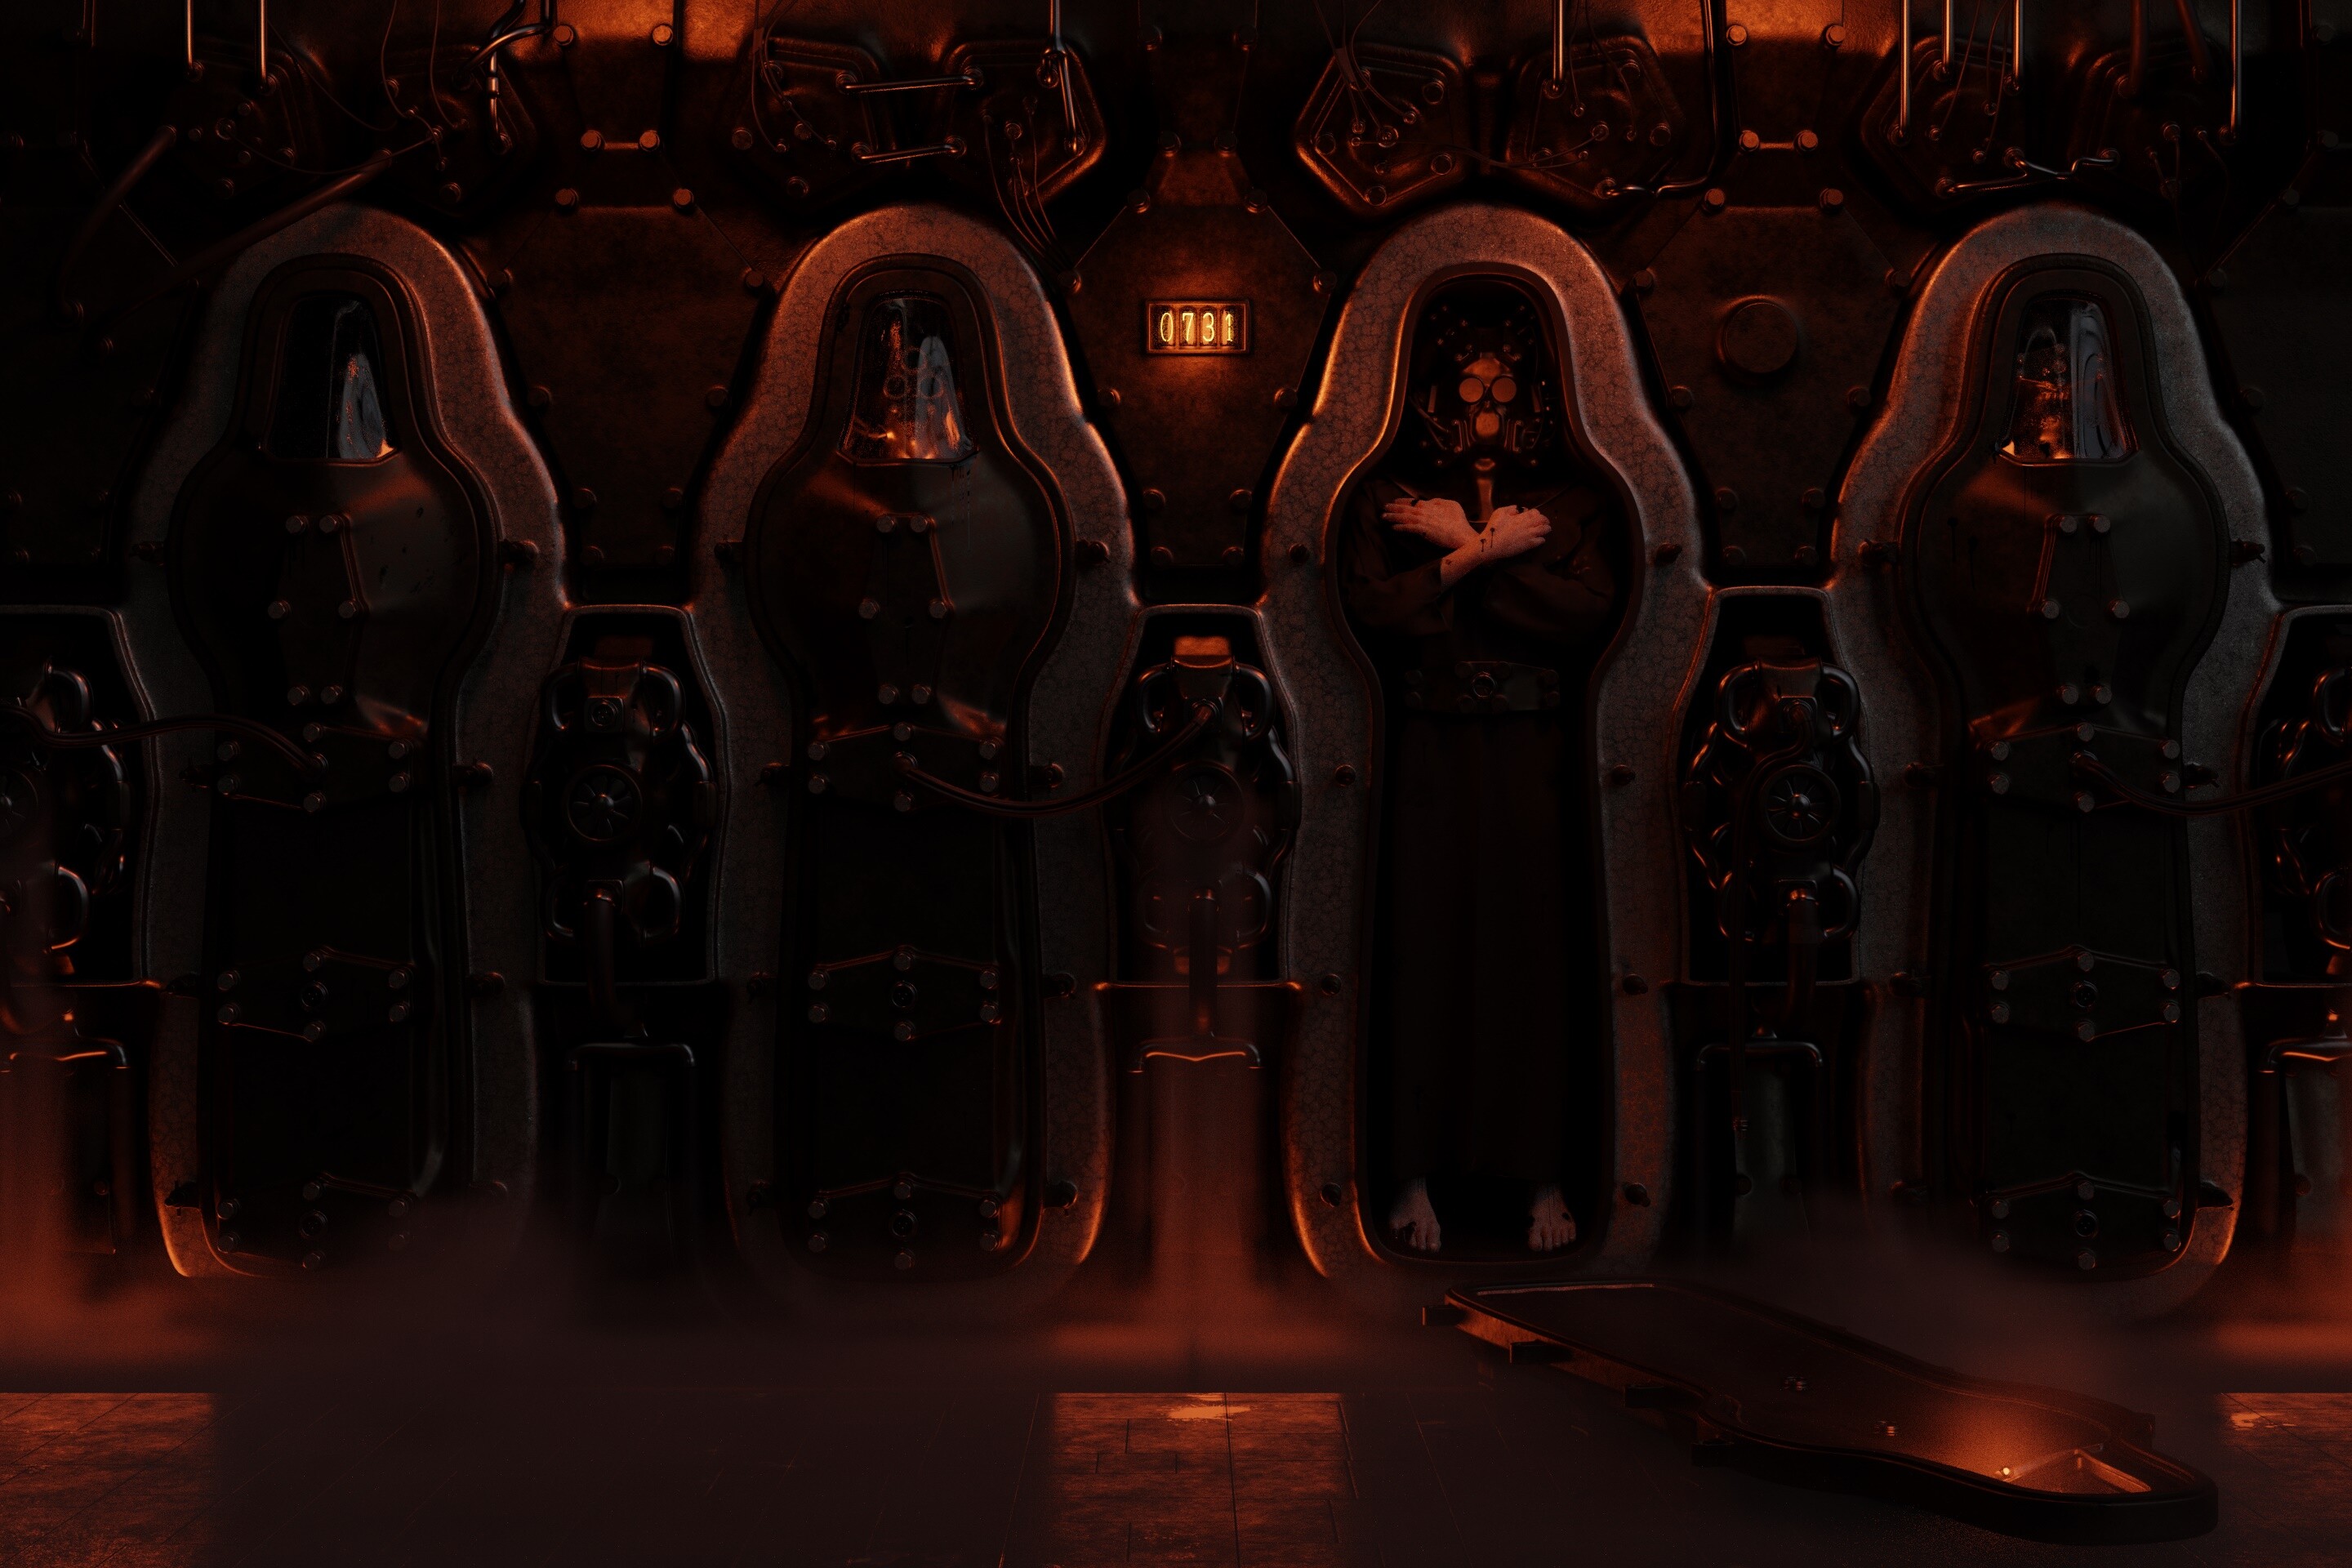
Anyway, here is a draft image with some lightroom tweaks - much closer to what I had in mind (but still improvable).

There is still a little noise, so I might see if upping the samples will remove this. Otherwise I might need to do something more creative.

What about the smoke however - does it still seem too flat? I wonder if I might need to figure out a way to edit this in Photoshop. I’m not sure I can get much further with rendering, and I’m cautious of the need to render this image at 9600x14400, which might take a while even as it is.

I have no idea why this happens, I can not reproduce (I only have 2.93 and 3.1 alpha), if it is a bug it could be related to a specific build.

I would strongly recommend that if you open the file in 3.0 or 3.1 that you save it with a different name before editing so as not to corrupt your 2.93 file.
There are compatibility issues between 2.93 and 3.0>

If you are using a smoke sim you may have to delete the original bakes and then re-bake them in 3.0

As for the smoke in the new image I do not think it looks “flat”, maybe a little bit of distortion in the noise would give it a bit of flow.
As for the noise well more samples (can get painful!) or the denoiser (which can make things to “mushy”)

If you go for the compositing method with the smoke in its own layer you will have much more control of the smoke and how you light it without effecting the rest of the scene.
I would tend to give the smoke a slight tinting with maybe a blue-ish light that only effects the smoke. This is just an idea and maybe not what you prefer.

You could render a de-noise pass (“denoising data” in the render passes) and fine tune denoising in the compositor instead of using general denoise in the render settings. This way you have control of the de-noising in post-pro and can try different intensities without having to re-render.

Your image is definitely intriguing, I look forward to seeing what you come up with.