Hello,
I have a problem and can’t find a solution on the internet. I would like to smooth a body.
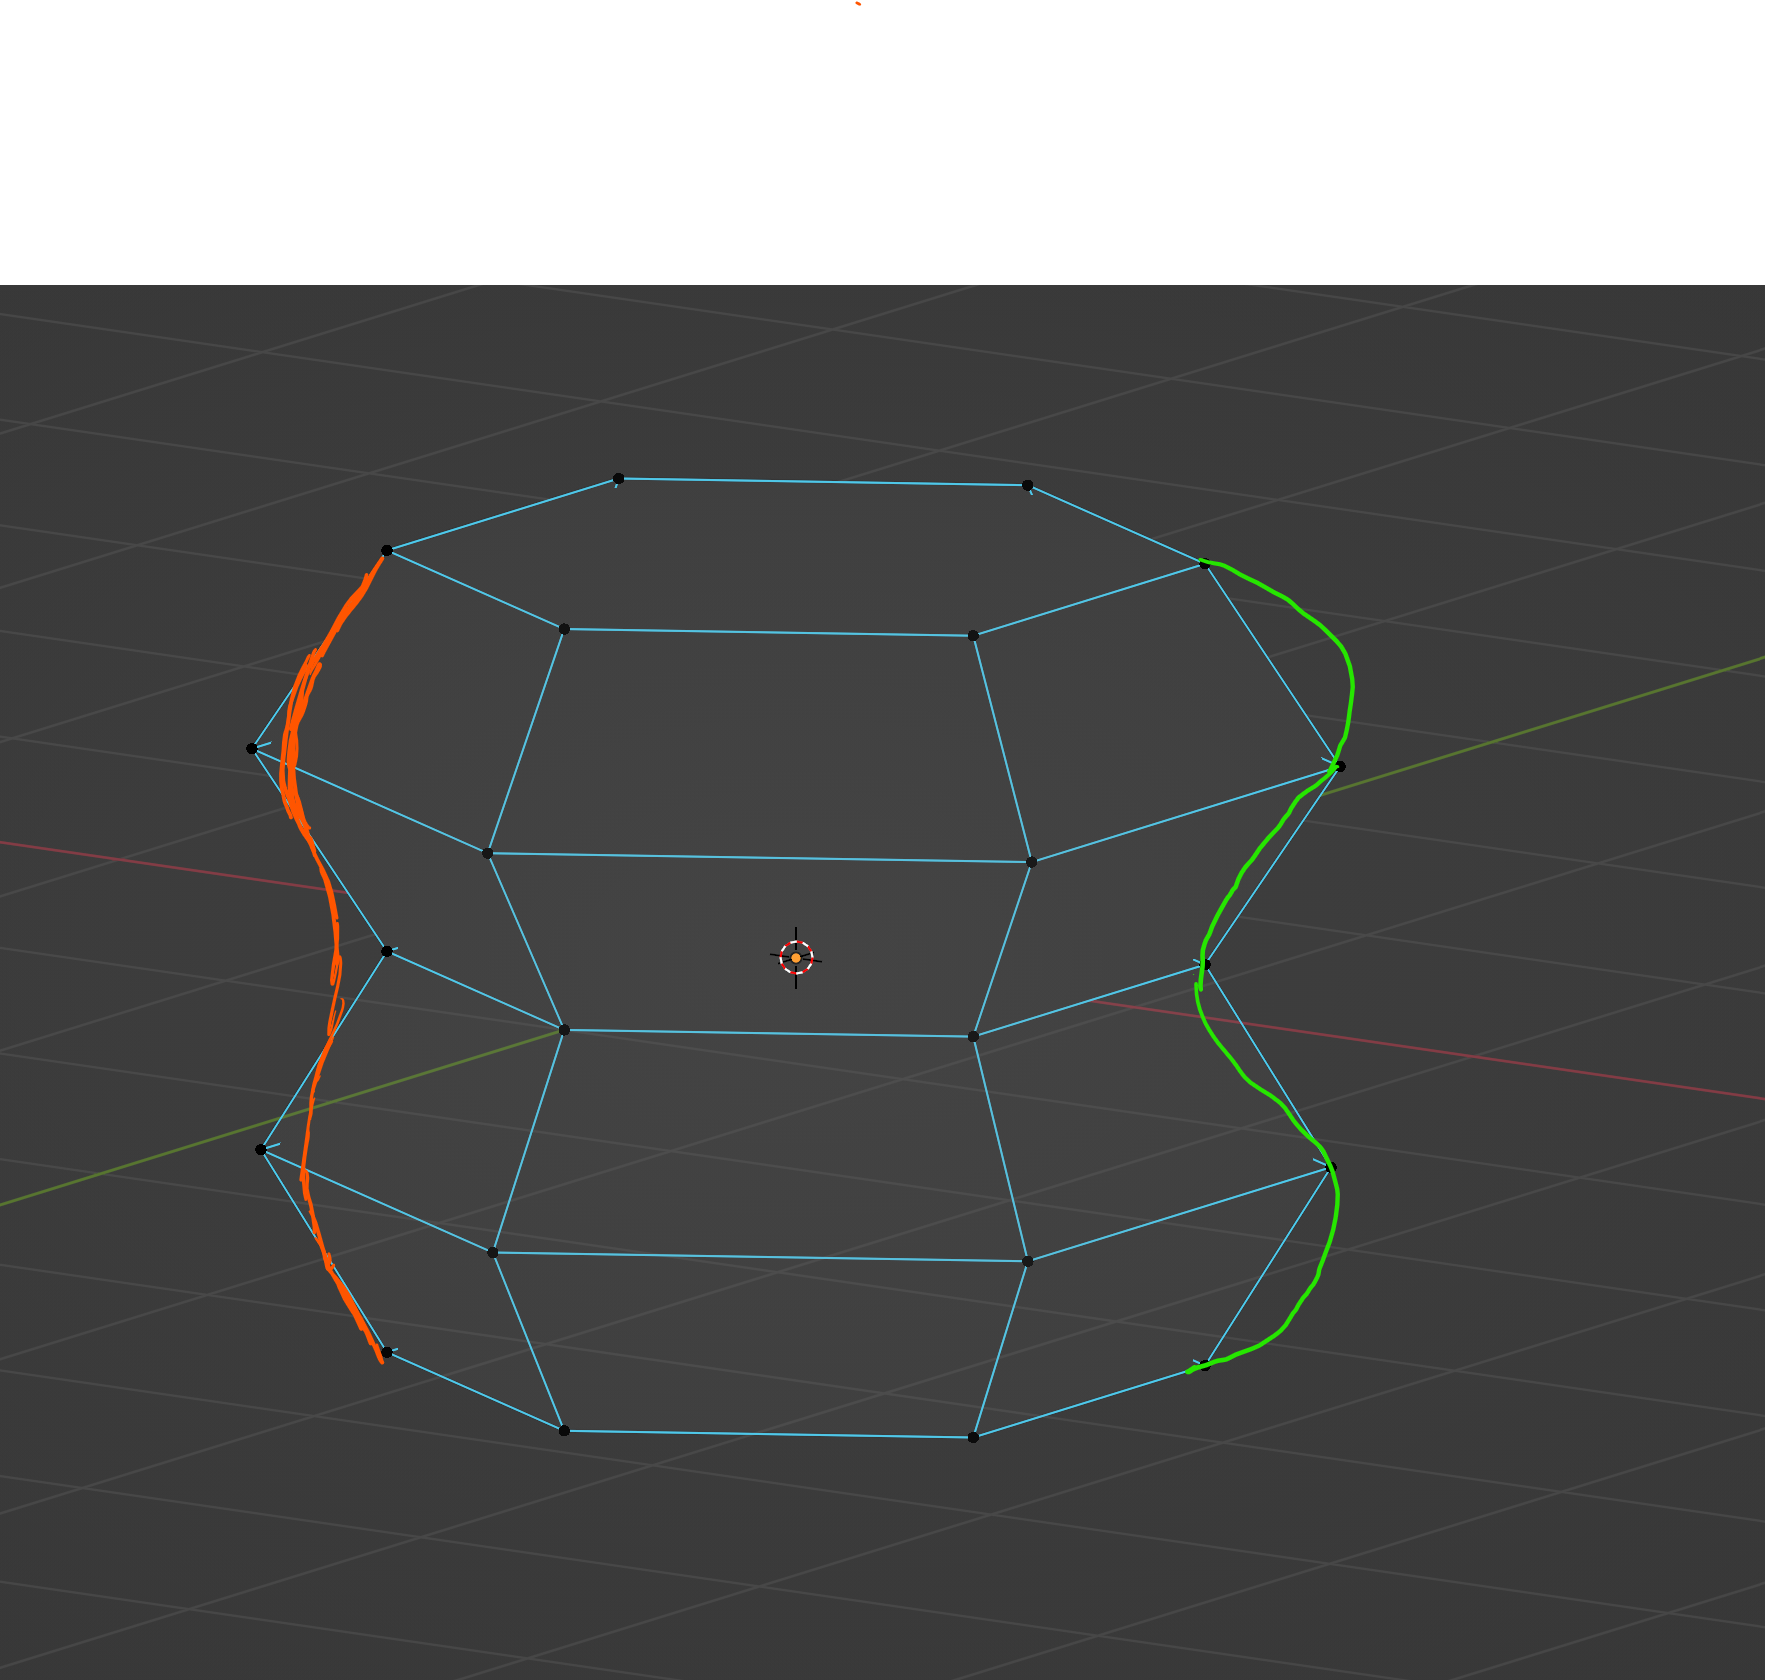
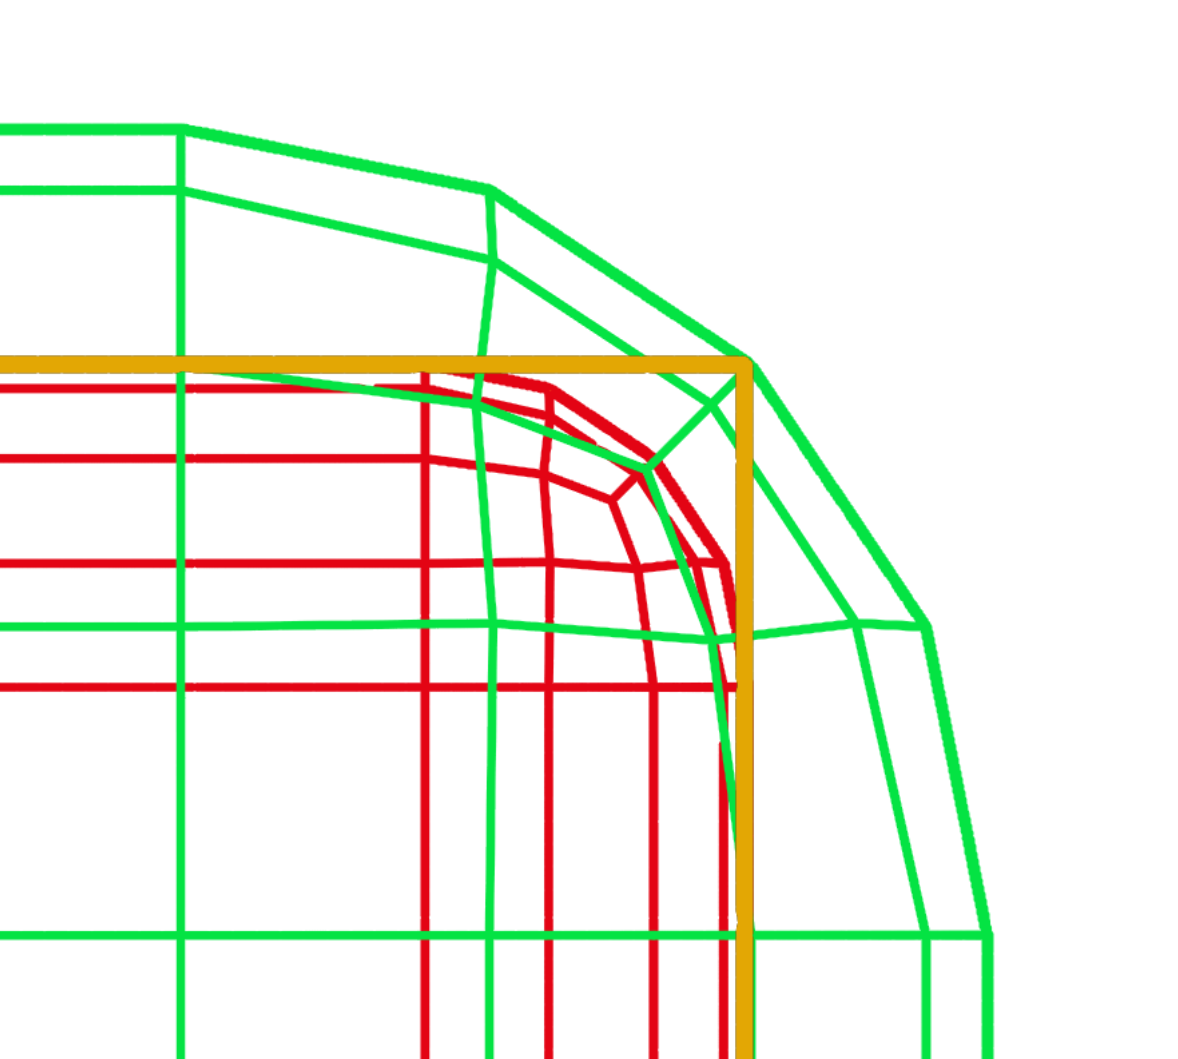
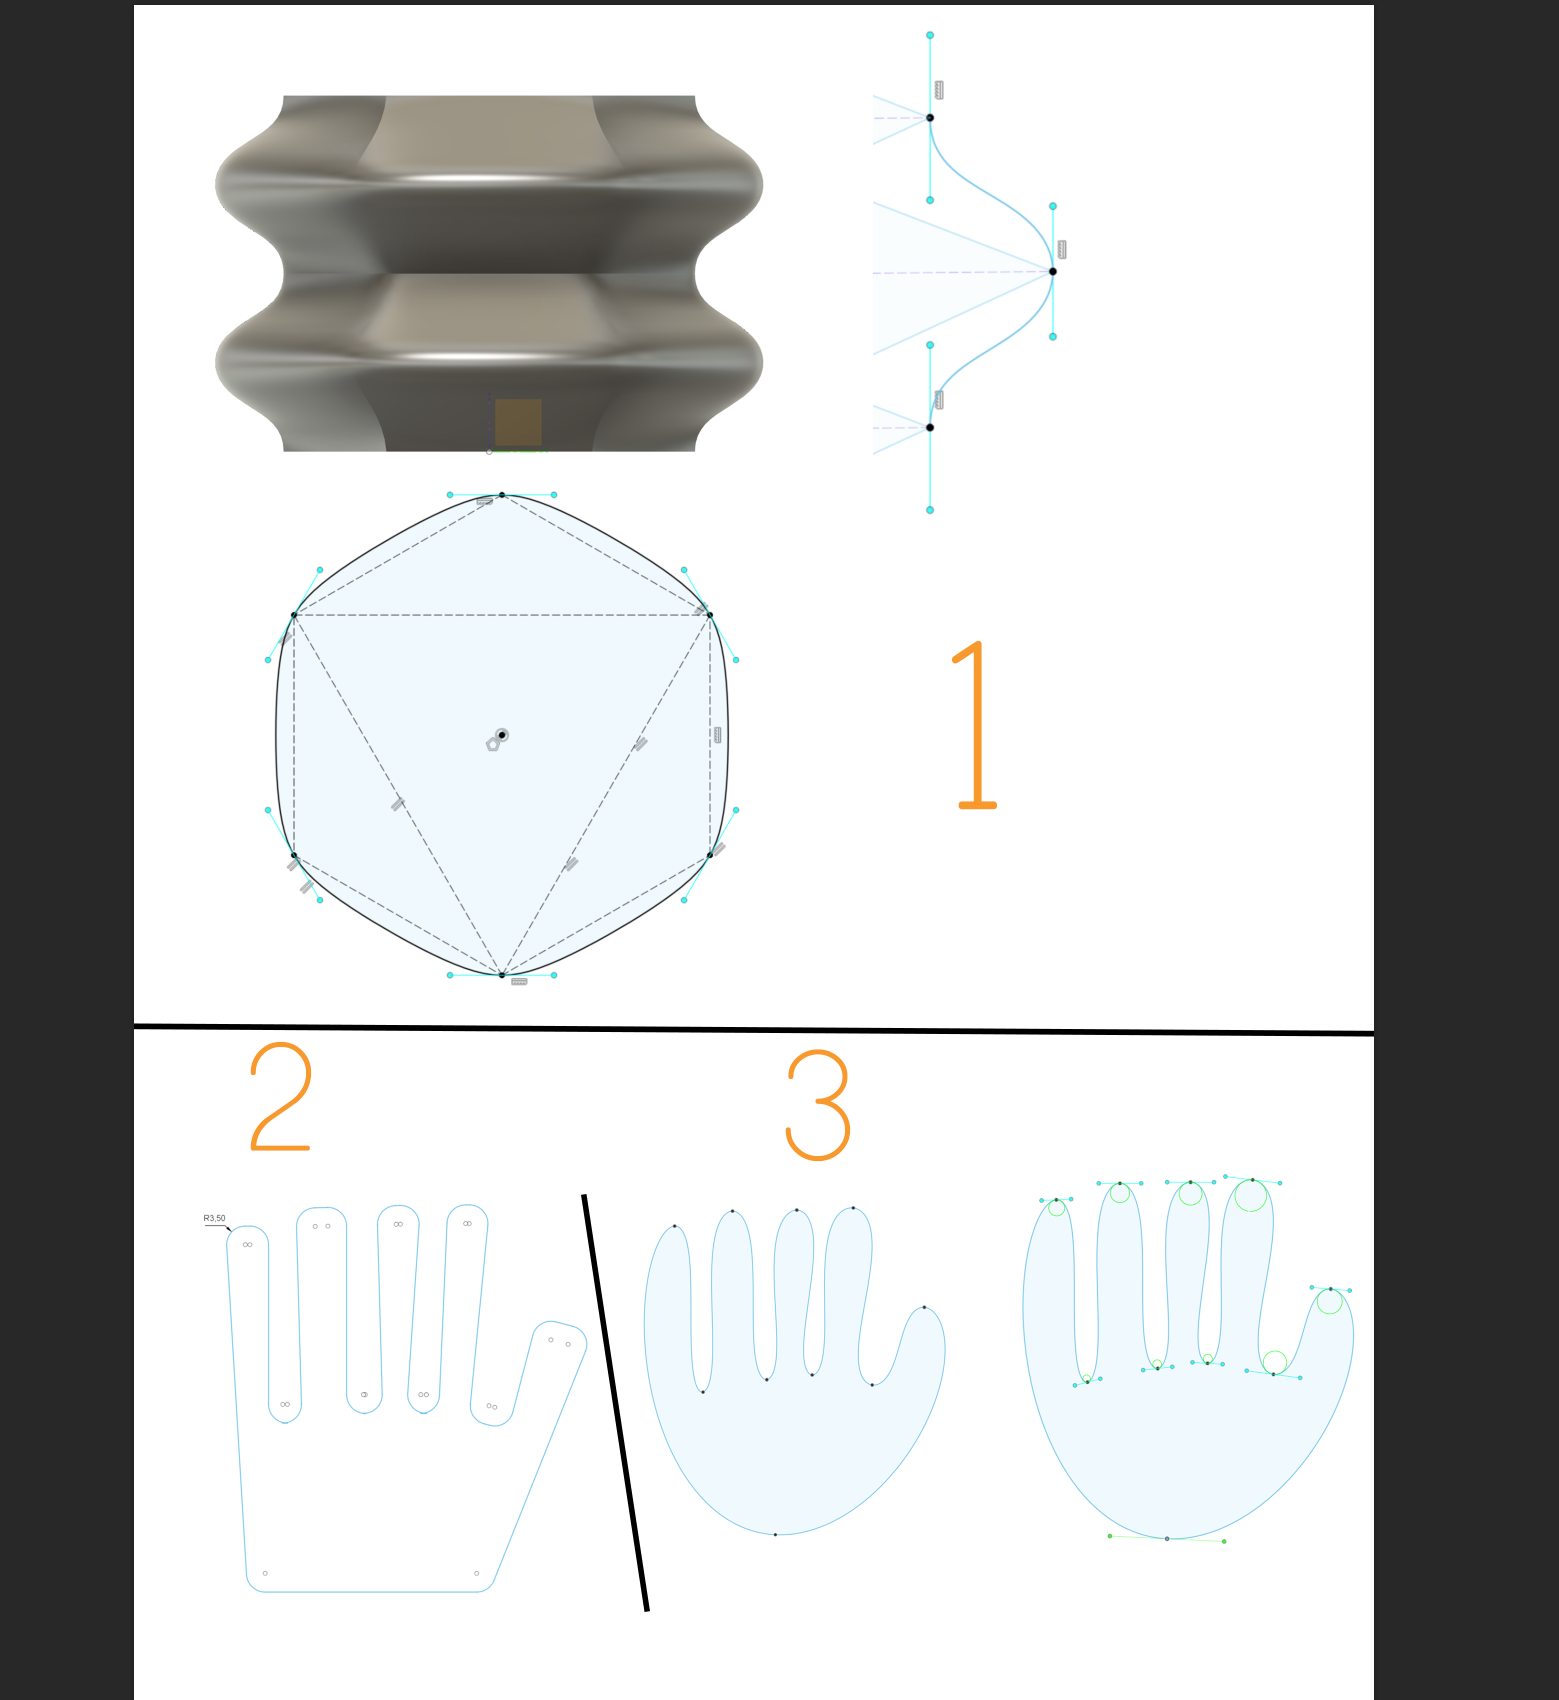
As an example, I have a 6-corner inflated cylinder. When I smooth it becomes like the red line. But I would like to keep the vertices and make it look more like the green line.
(The drawn lines should show the cross section.) I want to keep the points as a boundary. The connecting lines should be “bent”.
The body is normally not symmetrical (unlike in the example). It would be best if I could simply change the basic body later.
Well, as I see it, you could select one of your horizontal edges and press CTRL+B to add some bevels to it (read more about it here), It’ll be similiar to SubDivision Modifier, but allows your to control the numbers of added poligons, thus, you’ll be able to control the level of your smoothness.
Here’s the video for better understanding:
Or, if you want just add a smoothness without adding any of new polygons, you could do something like this:
You can control the look of your smoothness by increasing/reducing the “Weight” parameter. Just turn it all the way down to 1 & you’ll get perfectly smoothness object.
Note: keep in mind, that adding smoothness without adding any of polygons by second method is so-called “fake smooth”, which means that you have smoothed your object without adding any of polygons to your object. It is good if you you’re making low poly model or some little stuff that would’t be play a big role in your scene. But if you’re working with high poly or just wanting to make something with high quality look, you’d better need to work bevels or subdivision modifiers.
@goorman thanks, but that’s not what I was looking for, or I didn’t understand your help
With the bevel, the corner is rounded like red, but I’m looking for the same as with the green. The corner point should remain as a boundary. Otherwise the model will be reduced in size because the corners are missing.
Maybe smoothing is the wrong term for it and that’s why I can’t find anything.
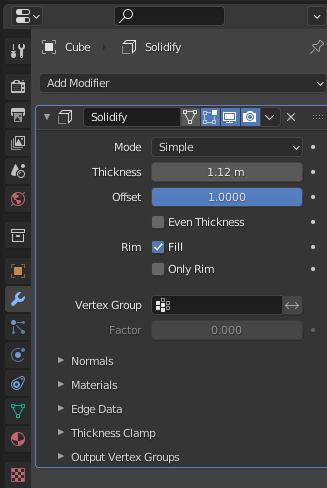
Try to use Solidify Modifier by increasing it’s Offset/Thickness. It should help you.
Neither Bevel or Subdivision Surface modifiers, as far as I know, doesn’t reduce object’s size. Bevel just adds some smoothness to your edges, that’s it. Especially it can be viewed on example with the Cube. Subdivision reduces the default size of an object, but that’s just how it works, Subdivision are made for sculpting & high poly modeling
Are you referring to an existing tool from another software that does what you want ?
I think @goorman more or less listed all the possibilities.
If you want the shape to be smooth, or like your greenline, you need to add geometry,
You can do that by either using a bevel, but in general the subdivision surface modifier is better.
But both will kind of reduce the volume, or will look in fact indeed, like your orange line.
When doing that , you need to do two things :
1/ You need to manually compensate for the volume loss,
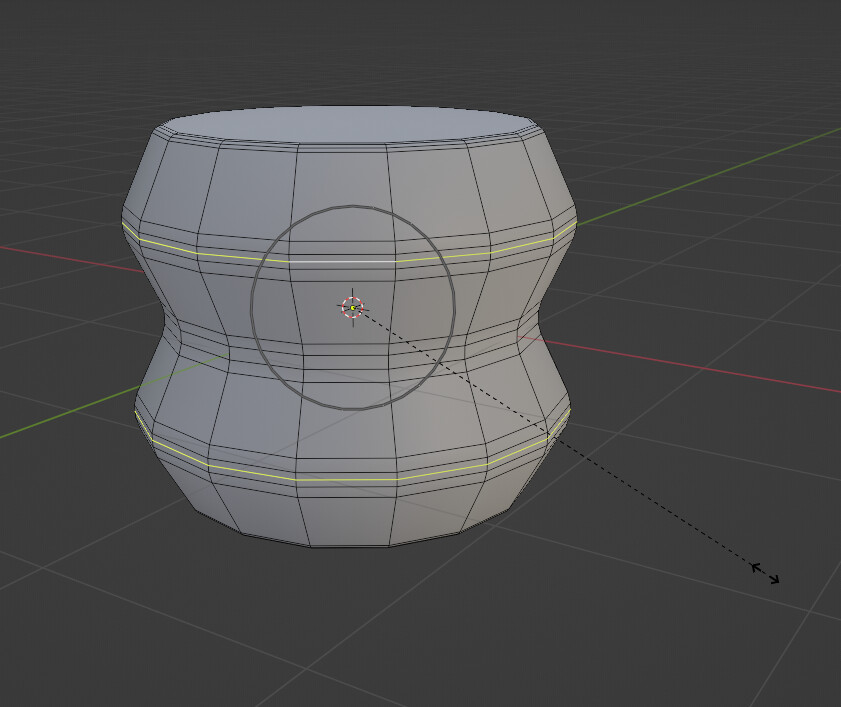
2/ in case of the subdiv, you’ll probably want to sharpen some angle,s like the one in the middle of your sphere. For that you need to add additional loops,
One way is to add a bevel to the center line. another is to do add some support loops using CTRL-R
like so :
You could model that from a cylinder…add 3 edge loops…Use Scale on the loops to make the shape. Then bevel each of the loops to smooth it out…
If you add an odd number of loops on the bevels you can select the center loop on the bulges and scale them using proportional editing…with a small falloff…something like this…
That’s as close as you’ll get in Blender also… A general 3d surface fitting solution is a non-linear problem which is hard to implement - so you’ll generally only find specific solutions for specific use-cases e.g. the Surface fitting algorithm in Matlab, which only works on a 2D projected “surface”.
The Catmull-Clarke subdivision algorithm is linear, so generally that means it is way more “doable” for a computer in linear time.
So, in Blender, similar to Fusion360, you would start with a Bezier Curve and “sweep” it… which you can do with Geometry Nodes or with the Screw modifier.