I updated the Add-on so that it will work again with Blender 2.8 and I adjusted the UI a bit. Also I made some changes that break some of the blend-files that I posted in this thread before.
3 Likes
Incredible work! Really nice how you display the orbital information. I’ll play around with it for a bit ![]()
Hey again! I’m trying to interface with the plugin, but I don’t know how to access the functions in the tools panel. I want to programmatically create an orbit and then access the properties from my script so I can easily change the parameters.
If I create an orbit manually, I can do all the steps after that from the script/command line. How do I also do the initial orbit creation from the command line?
# I have the other values available within a for-loop for several planets.
orbit = bpy.context.object
orbit.sssim_orbit.center_name = "Center"
orbit.sssim_orbit.name = str(j) + "_orbit_" + names[j]
orbit.sssim_obj.mass_mantissa = masses[j]
orbit.sssim_obj.mass_exp = 6
orbit.sssim_orbit.distance_mantissa = a
orbit.sssim_orbit.distance_exp = 6
orbit.sssim_orbit.eccentricity = e
orbit.sssim_orbit.inclination = i
orbit.sssim_orbit.asc_node = oom
orbit.sssim_orbit.arg_periapsis = om
Hi! Great to hear that the Add-on is useful for you. To answer your question, here are two ways for creating the initial orbit object:
- Call the operator from Python
# create orbit object via operator
orbit_name = str(j) + "_orbit_" + names[j]
bpy.ops.object.sssim_create_planet(center_name="Center", planet_name=orbit_name)
orbit = bpy.context.object  # the active object is the new planet

# set orbit properties
orbit.sssim_obj.mass_mantissa = masses[j]
...
- Create the orbit object in Python (it is just an Empty, but you need to activate the simulation)
# set up name of object first, then create it and link to the active collection
orbit_name = str(j) + "_orbit_" + names[j]
orbit = bpy.data.objects.new(orbit_name, None)
bpy.context.collection.objects.link(orbit)

# activate solar system simulation
orbit.sssim_obj.use_sssim = True
orbit.sssim_obj.object_type = 'PLANET'

# set orbit properties
orbit.sssim_obj.mass_mantissa = masses[j]
...
Awesome! That works, but I’m still struggling with some of the inputs/units. I hope you have some time to help me out :).
What I’m trying to do is draw orbits in 3d space based on these input parameters:
- mass as a fraction of the Sun’s mass (e.g. 1.66012082548918190E-07 for Mercury)
- t time in days, I have a snapshot every 200 years but will start with visualizing just t = 0
- a semimajor axis in astronomical units
- e eccentricity (unitless)
- i inclination in radians (or degrees if that’s easier)
- om ArgPerihelion in rad
- oom LongAscNode in rad
- vpi LongPerihelion in rad
- mn mean anomaly in rad
In this case I’m not too interested in the planet’s motion on the orbital plane, I just want to draw the ellipse for the orbit as quickly as possible for each timeslice so I can see how it changes over geologic time. This needs to be pretty low-level because I need to draw or potentially animate many time steps.
I also have snapshot positions and velocities for each planet for every timestep to compare the results with. This means that if I draw the orbit I can see visually if the planet’s snapshot position falls on the orbit or not.
However, I don’t know how to set the semimajor axis directly:
orbit.sssim_orbit.semi_major_axis = 1.5236789922894167e+00
Traceback (most recent call last):
  File "/usr/lib/python3.11/code.py", line 90, in runcode
    exec(code, self.locals)
  File "<blender_console>", line 1, in <module>
AttributeError: bpy_struct: attribute "semi_major_axis" from "SSSIMOrbit" is read-only
and the distance_mantissa + the exponent give me everything in xx * 10 ^ exponent km in stead of in au.
Before I had just set the semimajor axis value to the distance_mantissa and 6 for the exponent and this sort of kind of matches the raw vector xyz positions of the planets’ snapshots, but not exactly.
Any help/pointers would be appreciated!
For the mass and semi-major axis you need to decompose the number as m*10^e. This can be done with the log10 function from Python’s math library. Here is an example (for Mercury):
import bpy
from math import floor, log10

mass_fraction = 1.66012e-07  # mass as a fraction of the Sun’s mass
a_in_au = 0.387098  # semi-major axis in astronomical units
orbit = bpy.context.object  # change orbit of active object

# convert mass to kg, then split into mantissa * 10**exponent
mass_in_kg = 1.9885e30 * mass_fraction
mass_exp = floor(log10(mass_in_kg))  # smallest power of 10
orbit.sssim_obj.mass_exp = mass_exp
orbit.sssim_obj.mass_mantissa = mass_in_kg / 10**mass_exp

# convert a to km, then split into mantissa * 10**exponent
a_in_km = 1.495978707e8 * a_in_au
a_exp = floor(log10(a_in_km))  # smallest power of 10
orbit.sssim_orbit.distance_exp = a_exp
orbit.sssim_orbit.distance_mantissa = a_in_km / 10**a_exp
The conversion factors 1.9885e30 and 1.495978707e8 are the mass of the sun (in kg) and the length of 1 AU (in km), I took both values from Wikipedia.
The inclination (sssim_orbit.inclination), ArgPerihelion (sssim_orbit.arg_periapsis) and LongAscNode (sssim_orbit.asc_node) should be given in radians.
For reference, the following properties can be set by a script or the user interface:
sssim_obj.use_sssim (True or False)
sssim_obj.object_type ('CENTER', 'PLANET' or 'SURFACE')
sssim_obj.show_info (True or False, toggle to show info in UI)
sssim_obj.mass_mantissa (float between 0.001 and 1000)
sssim_obj.mass_exp (integer between 0 and 50)

sssim_orbit.center_name (string)
sssim_orbit.eccentricity (float between 0 and 0.999)
sssim_orbit.distance_mantissa (float between 0.001 and 1000)
sssim_orbit.distance_exp (integer between 0 and 12)
sssim_orbit.inclination (float in radians between -pi/2 and 3*pi/2)
sssim_orbit.asc_node (float between 0 and 2*pi)
sssim_orbit.arg_periapsis (float between 0 and 2*pi)
sssim_orbit.time_offset (float between 0 and 1)
sssim_orbit.override_period (True or False)
sssim_orbit.use_frames (True or False)
sssim_orbit.override_period_seconds (float >= 0)
sssim_orbit.override_period_frames (float >= 0)
and the following properties are read-only:
sssim_obj.mass (computed from mantissa and exponent)

sssim_orbit.center_object (=bpy.data.objects.get(sssim_orbit.center_name))
sssim_orbit.center_is_valid (True if sssim_orbit.center_object is a valid center object)
sssim_orbit.semi_major_axis (computed from mantissa and exponent)
sssim_orbit.semi_minor_axis (from semi-major axis and eccentricity)
sssim_orbit.periapsis (from semi-major axis and eccentricity)
sssim_orbit.apoapsis (from semi-major axis and eccentricity)
sssim_orbit.orbital_period (calculated from Kepler's third law or set by hand)
sssim_orbit.orbital_period_frames (calculated from orbital_period)
sssim_orbit.true_anomaly (calculated from current frame, orbital period, eccentricity and time_offset)
1 Like
Thanks for helping out and explaining all the properties! In the end it turns out that this was not enough to get what I want, since the conversion between cartesian coordinates (location vector r (xyz) and the velocity vector ṙ (uvw)) to keplerian elements and back wasn’t as simple as I had hoped ;-). I’ve now switched to using this python package to handle the calculations for me https://danielk.developer.irf.se/pyorb/ and to visualize the outputs manually using python.
Thanks for all the help, I’m sure your last post will be helpful for others who dive in in the future!
No problem, I know that the add-on is fairly limited in what it can compute. But thanks for mentioning the pyorb package. It includes some features that I always wanted to add (like parabolic and hyperbolic orbits), maybe I will have time one day and extend the add-on a bit.
Hi again Markus! I’ve now made my python code available as well! It’s not a fancy Blender plugin (yet?) but it’s a start for the purposes I wanted :).
Hi, thanks for this amazing tool! It´s really nice to use. Can I somehow bake the paths of the Planets at one specific moment?
The easiest way is just to delete the driver, e.g. select the planet, go to the physics tab and in the “Calculation” panel press the “Use driver” button to deactivate it. But you still need to go through every planet one by one, there is no automated way to do it.
Thanks for this smart and flexible add-on. I have a question.
Is there a setting to render orbits as well as celestial objects?
I have tried to render orbits but it only renders planets(satellites).
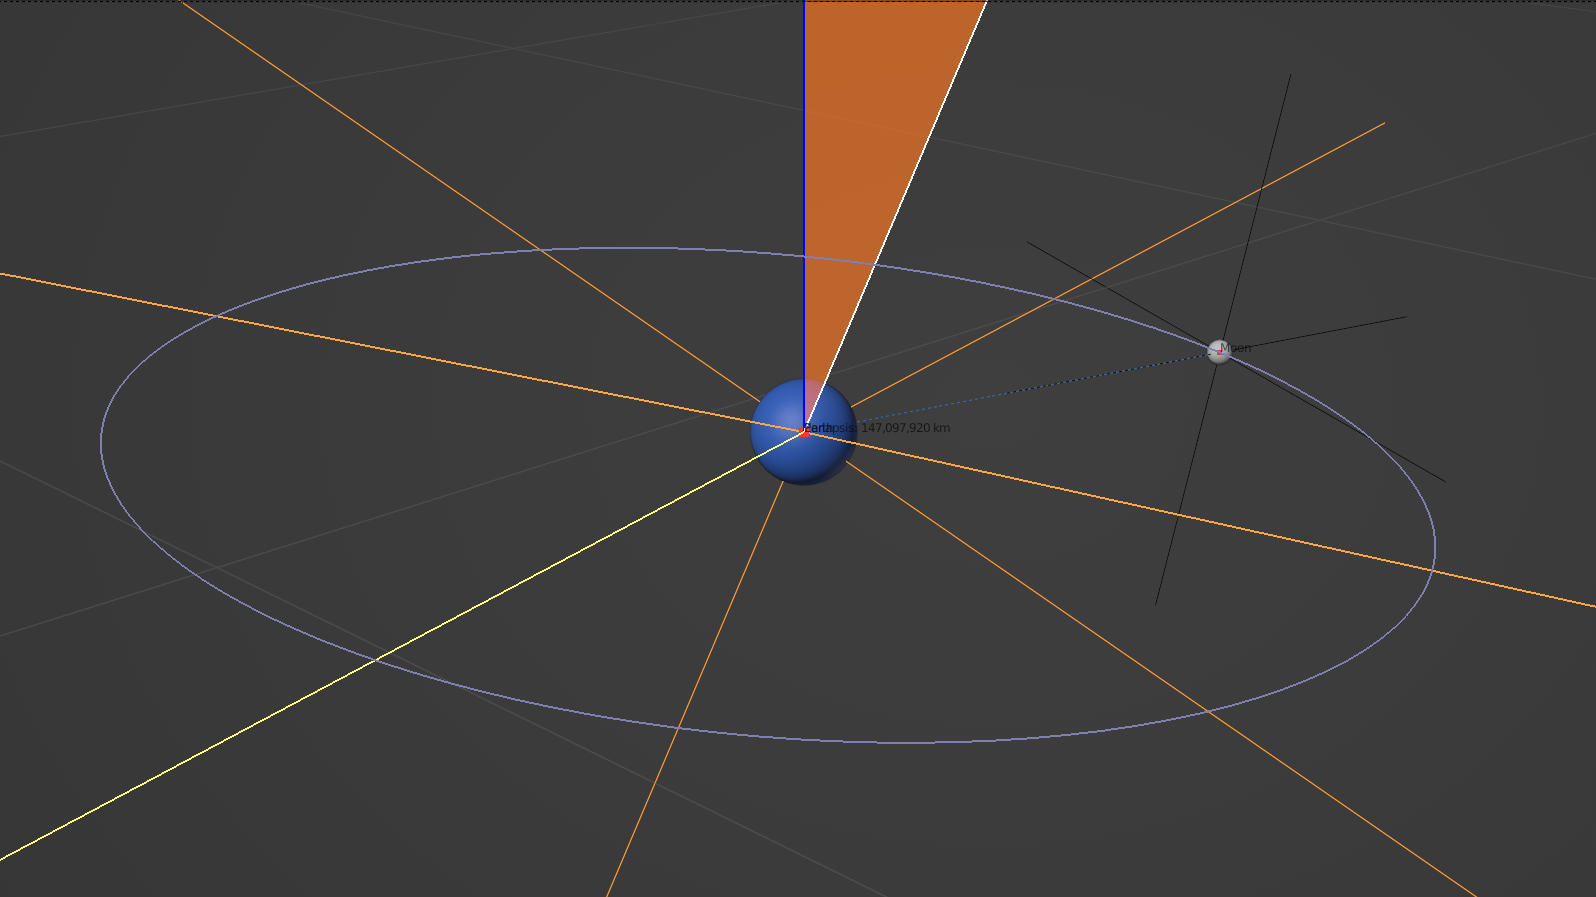

No sorry, the Add-On doesn’t include a way to convert the orbits to a curve or mesh so that they can be rendered. The “Draw Orbit” setting will draw the orbit directly in the viewport using Blender’s OpenGL module.
It is similar to how Blender displays Motion Paths for an animation. Actually, I am surprised that there is no way (and no Add-On) to convert a motion path to a curve.
An alternative is to model the orbit by hand:
- Add a circle (curve or mesh)
- Scale it to the size of the semi-major axis
- Scale it along one axis to get the correct eccentricity
- In edit mode, move it so that one of the focii of the ellipse is at the origin
- Rotate it to match the inclination, ascending node and argument of periapsis
If you use a curve (not a mesh) for the circle, you can control the thickness and smoothness in the curve properties panel. (This will give you more control over the appearance than using a circle mesh.)
1 Like
Thank you very much for explaining it so well.
I see, Blender does have its weaknesses.
I will try the methods you have shared with me.
I am happy to be a part of this community.
Hi Markus and everyone else!
I’m a few days new with Blender, using 4.1. I need some pointer with installing and activating this add-on.
Here’s what I tried:
- Preferences > Add-ons > Install …
Blender deflate the zip file from the GitHub repo and copies its content into my user’s scripts/addons/ directory - I see no change even after refreshing the add-ons list – I can’t see the add-on
I also tried opening the 2 .blend files contained within the zip file.
What am I missing? Thanks in advance.
Hi @David_not_Dave, sorry to hear that you ran into some problems. If the Add-on it is not loaded correctly, there will be error message in the system console (on Windows, you first need to click Blender Topbar ‣ Window ‣ Toggle System Console). Can you please check if there are any messages?
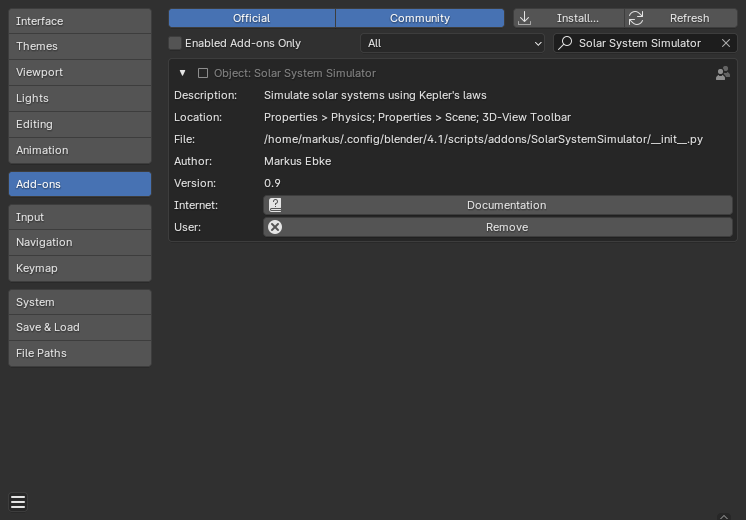
I tried to recreate your issue on my computer (Blender 4.1.1 on Ubuntu 22.04), but the Add-on loaded correctly and shows up in my list, see picture below.
Thanks for the quick reply @Markus_Ebke!
The screenshot you posted allowed me to figure out how Blender (Mac, 4.1) was deflating the archive into the add-ons directory, but inside another directory. I had to move the solar_system_simulator subdirectory straight up into the addons directory. It now shows up in the list of Add-ons.
How can I copy a drawn planet orbit into a path/curve that I could select, duplicate and convert to a mesh?
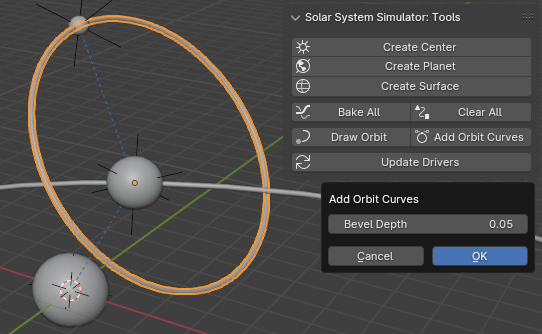
Someone else (@Astrolab) had the same question a few weeks ago, so I am convinced now that this is a useful feature. I spent some time today to implement it and upload a new version of the Add-on (v0.10) to GitHub.
In the Sidebar 3D Viewport you can find a new operator named “Add Orbit Curves”. It will convert the orbits of all selected planets to Bézier circles, you can then adjust the bevel depth to give the orbit lines some thickness or convert them to a mesh.
1 Like