I wanted to try out some of the new features in Blender 3.5, especially to see how far I could get with an exclusively procedural fur workflow using the new hair toolsets without combing or statically generated curves. It all worked pretty well, minus a potential bug with the interpolate curves setup; it seems to loose track of the material assignment from the initial generate hair curves layer. Creating a quick geometry nodes layer to re-assign with a set material node fixed the issue. If you ever run into an issue where modifying the material on your hair system isn’t changing anything in the render…this might be why!

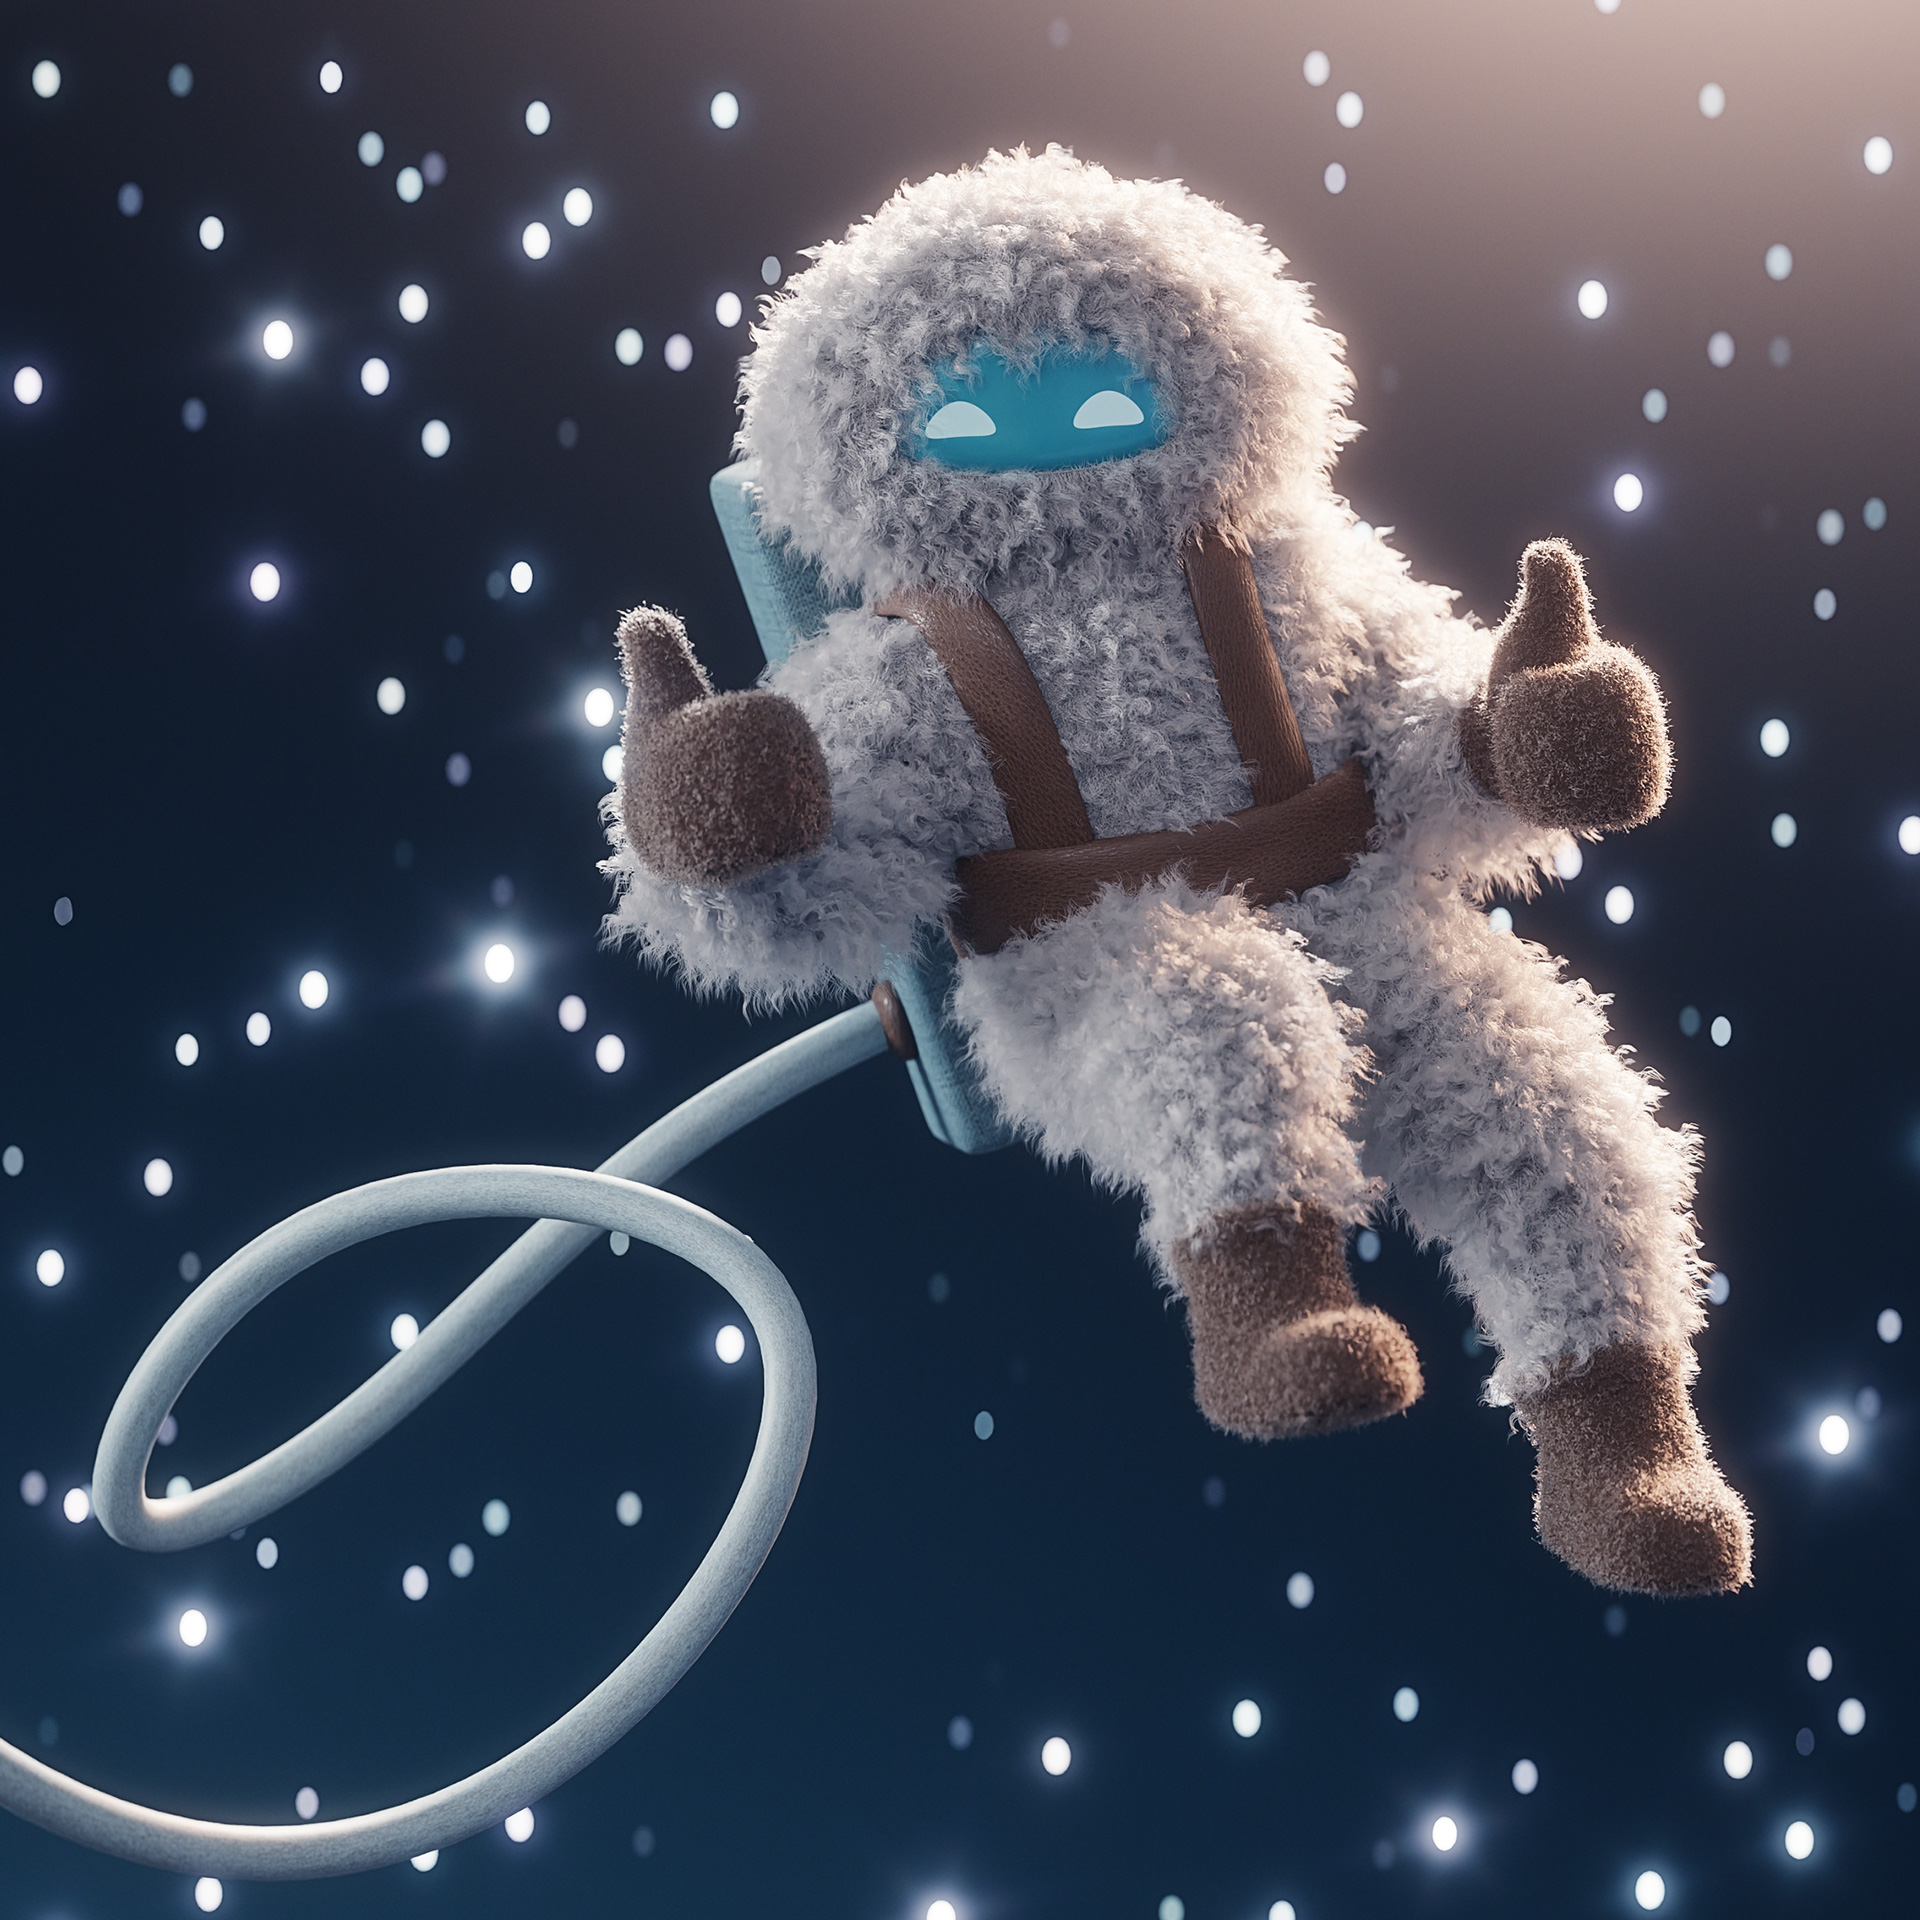
I stayed up far too late Wednesday night to complete the illustration start-to-finish. ![]() My goal was to evoke old stop-motion holiday specials with a stylised and entirely impractical space walk (no space suit needed, just the feeling of an astronaut with white fur and a shiny face plate).
My goal was to evoke old stop-motion holiday specials with a stylised and entirely impractical space walk (no space suit needed, just the feeling of an astronaut with white fur and a shiny face plate).

I used an HDRI for fill and 5 rectangular area lights for the primary lighting sources of various colours. The background just uses a thresholded voronoi noise texture with a couple distance gradients to add glows.
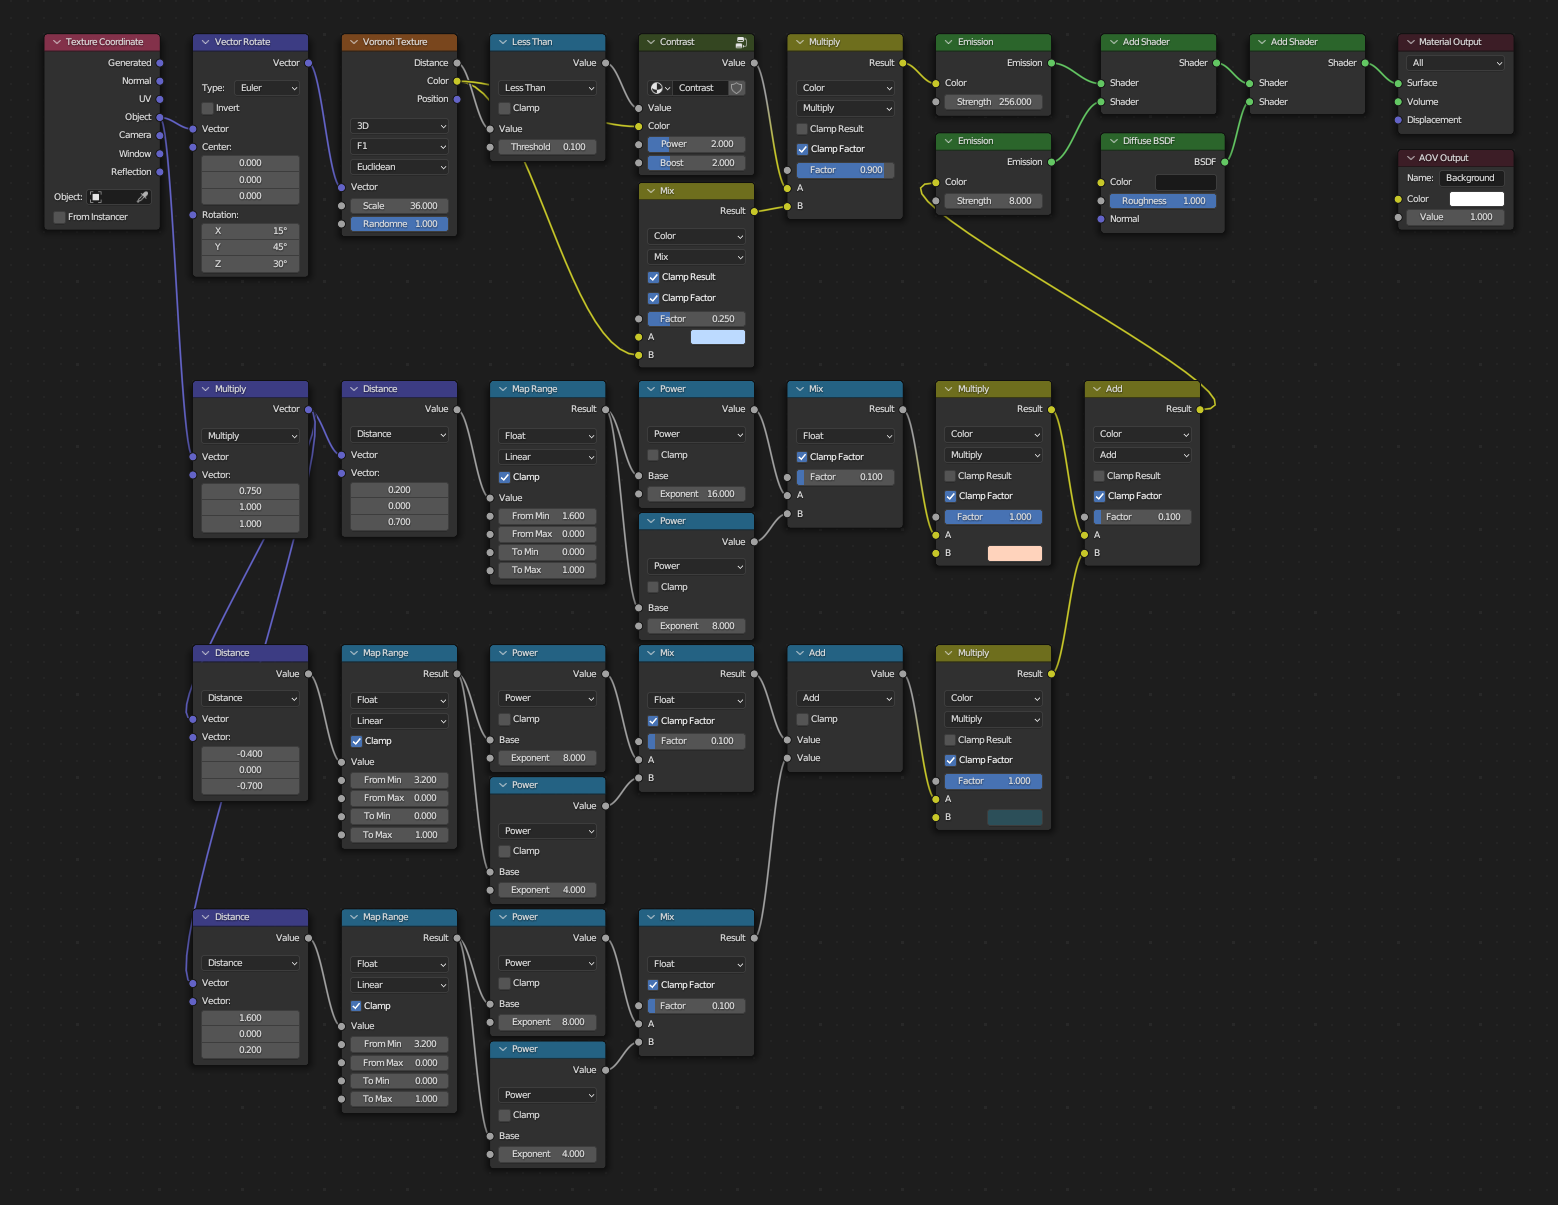
Compositing in the viewport is fantastic. I’ve wanted GPU optimisation for so long, and it’s working great! Massive improvement over the previous CPU based compositing system, and I didn’t notice slowdowns, even with a recursive blur group I made to give exactly the lens haze falloff I wanted (I still used the Blender glare node to create the rotated stars).

There’s plenty to improve on (I even had to fix some fur sticking through objects afterward in Photoshop), but for a first try and a single night, this was super fun!

