Hello ~ Today I am posting this topic to ask you how to make this kind of material
1.This material is transparent
2.This material is transparent but will not show the objects behind of it
(in other word, This material hides objects behind of it)
So No matter how many objects are behind this object
we will see the HDRI Environemental Texture’s background (Yes my scene has HDRI applied on world)
To help your understanding let me give you one simple example
There are 2 cubes (A,B) and 2 dogs (C,D)
2 dogs are behind of each cubes
Cube A is having the transparent material on it and is like a window or water
we can see the dog C behind this cube
Cube B is having the special transparent material that I described in this topic
and the dog D is behind this cube but we can’t see the dog
we see the empty viewport background color or the hdri background
I don’t remember exactly but I’ve made this material accidentally in the past
but I can’t remake it anymore…
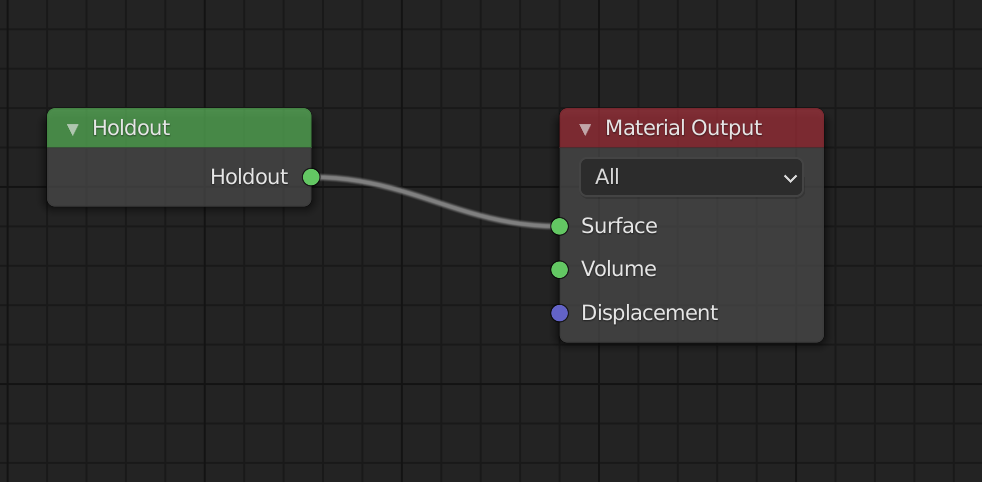
I’ve tried the holdout shader but I don’t know if I am doing it correctly but no luck it didn’t work
It makes the alpha texture (chessboard like texture) but thats it, I can’t see the HDRI background through it
3.The black cube is now changed to alpha texture (chessboard like texture)
and also my background HDRI is gone and
is switched to the same alpha texture (chessboard like texture)
while keeping my hdri world texture, If the cube showed the hdri texture it would be perfect
but… didnt work
You need to do a bit of compositing with the holdout image.
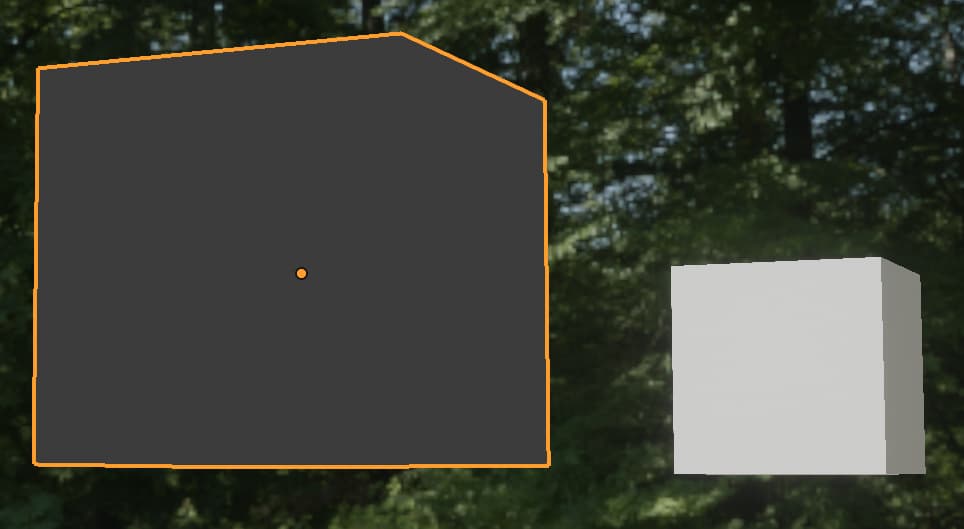
Here I made 2 scenes, one with the cube (using the holdout shader) and a dog behind the cube. I used an hdri for the lighting but also set the render setings to “film transparent”. The result is the dog partially hidden by the transparent cube on a transparent background.
In the second scene there were no objects, just the camera and the hdri world. This second scene is NOT set to film transparent. The result is the hdri image.
In the first scene I set up the compositor nodes shown using the alpha over to overlay the first scene onto the second. Render out the cube and dog scene and that’s it.
Thank you for sharing the idea but it looks kinda complicated !
(I see why mine was not working lol…) I hope to see a simpler method
I gotta try your method tomorrow I am going to sleep now x) Have a good week end !
It is not that complicated really. Get some sleep and try tomorrow!
Here is the file, I changed the dog for a red sphere and the hdri for a sky texture.
render out to see the result.
Sir Thank you very much ! You are Genius !
I’ve never touched that compositing menu but I did it !!
Thank you for encouraging me It was not that simple but no that hard either ^ ^
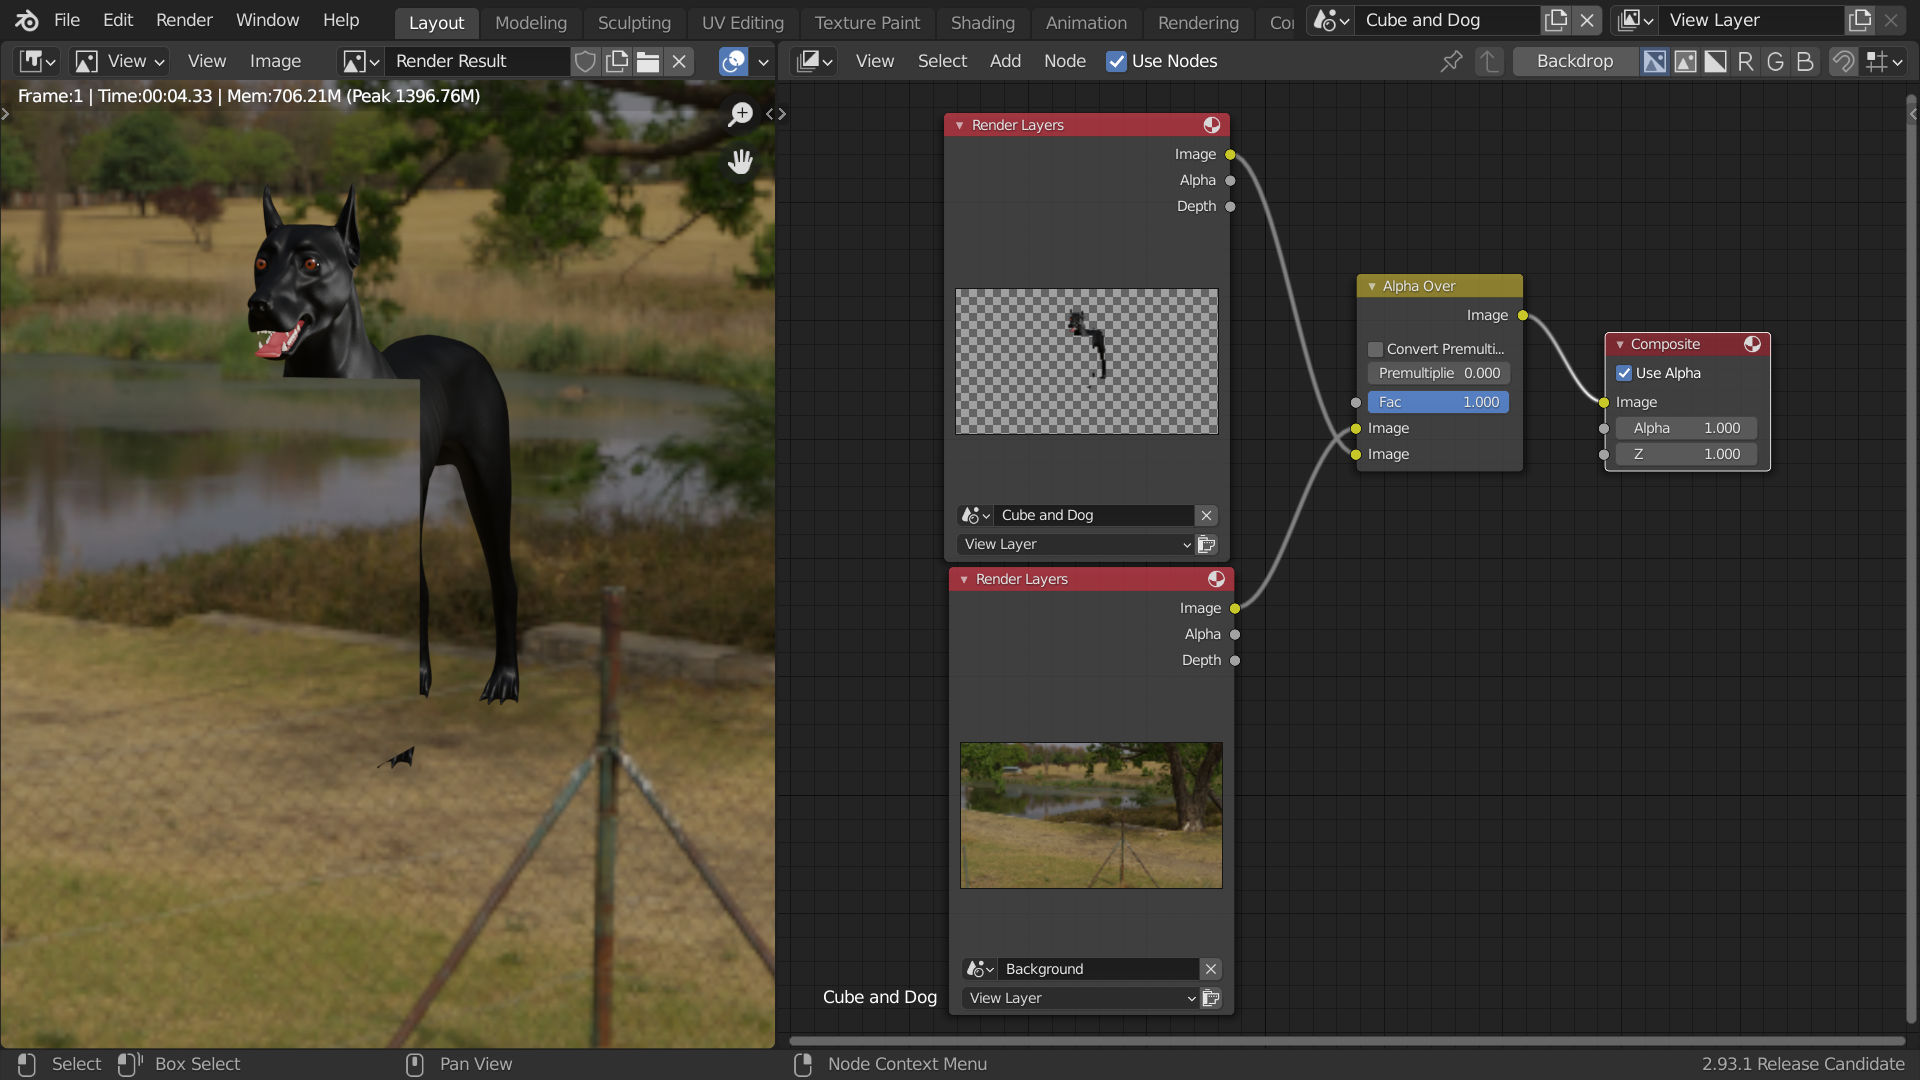
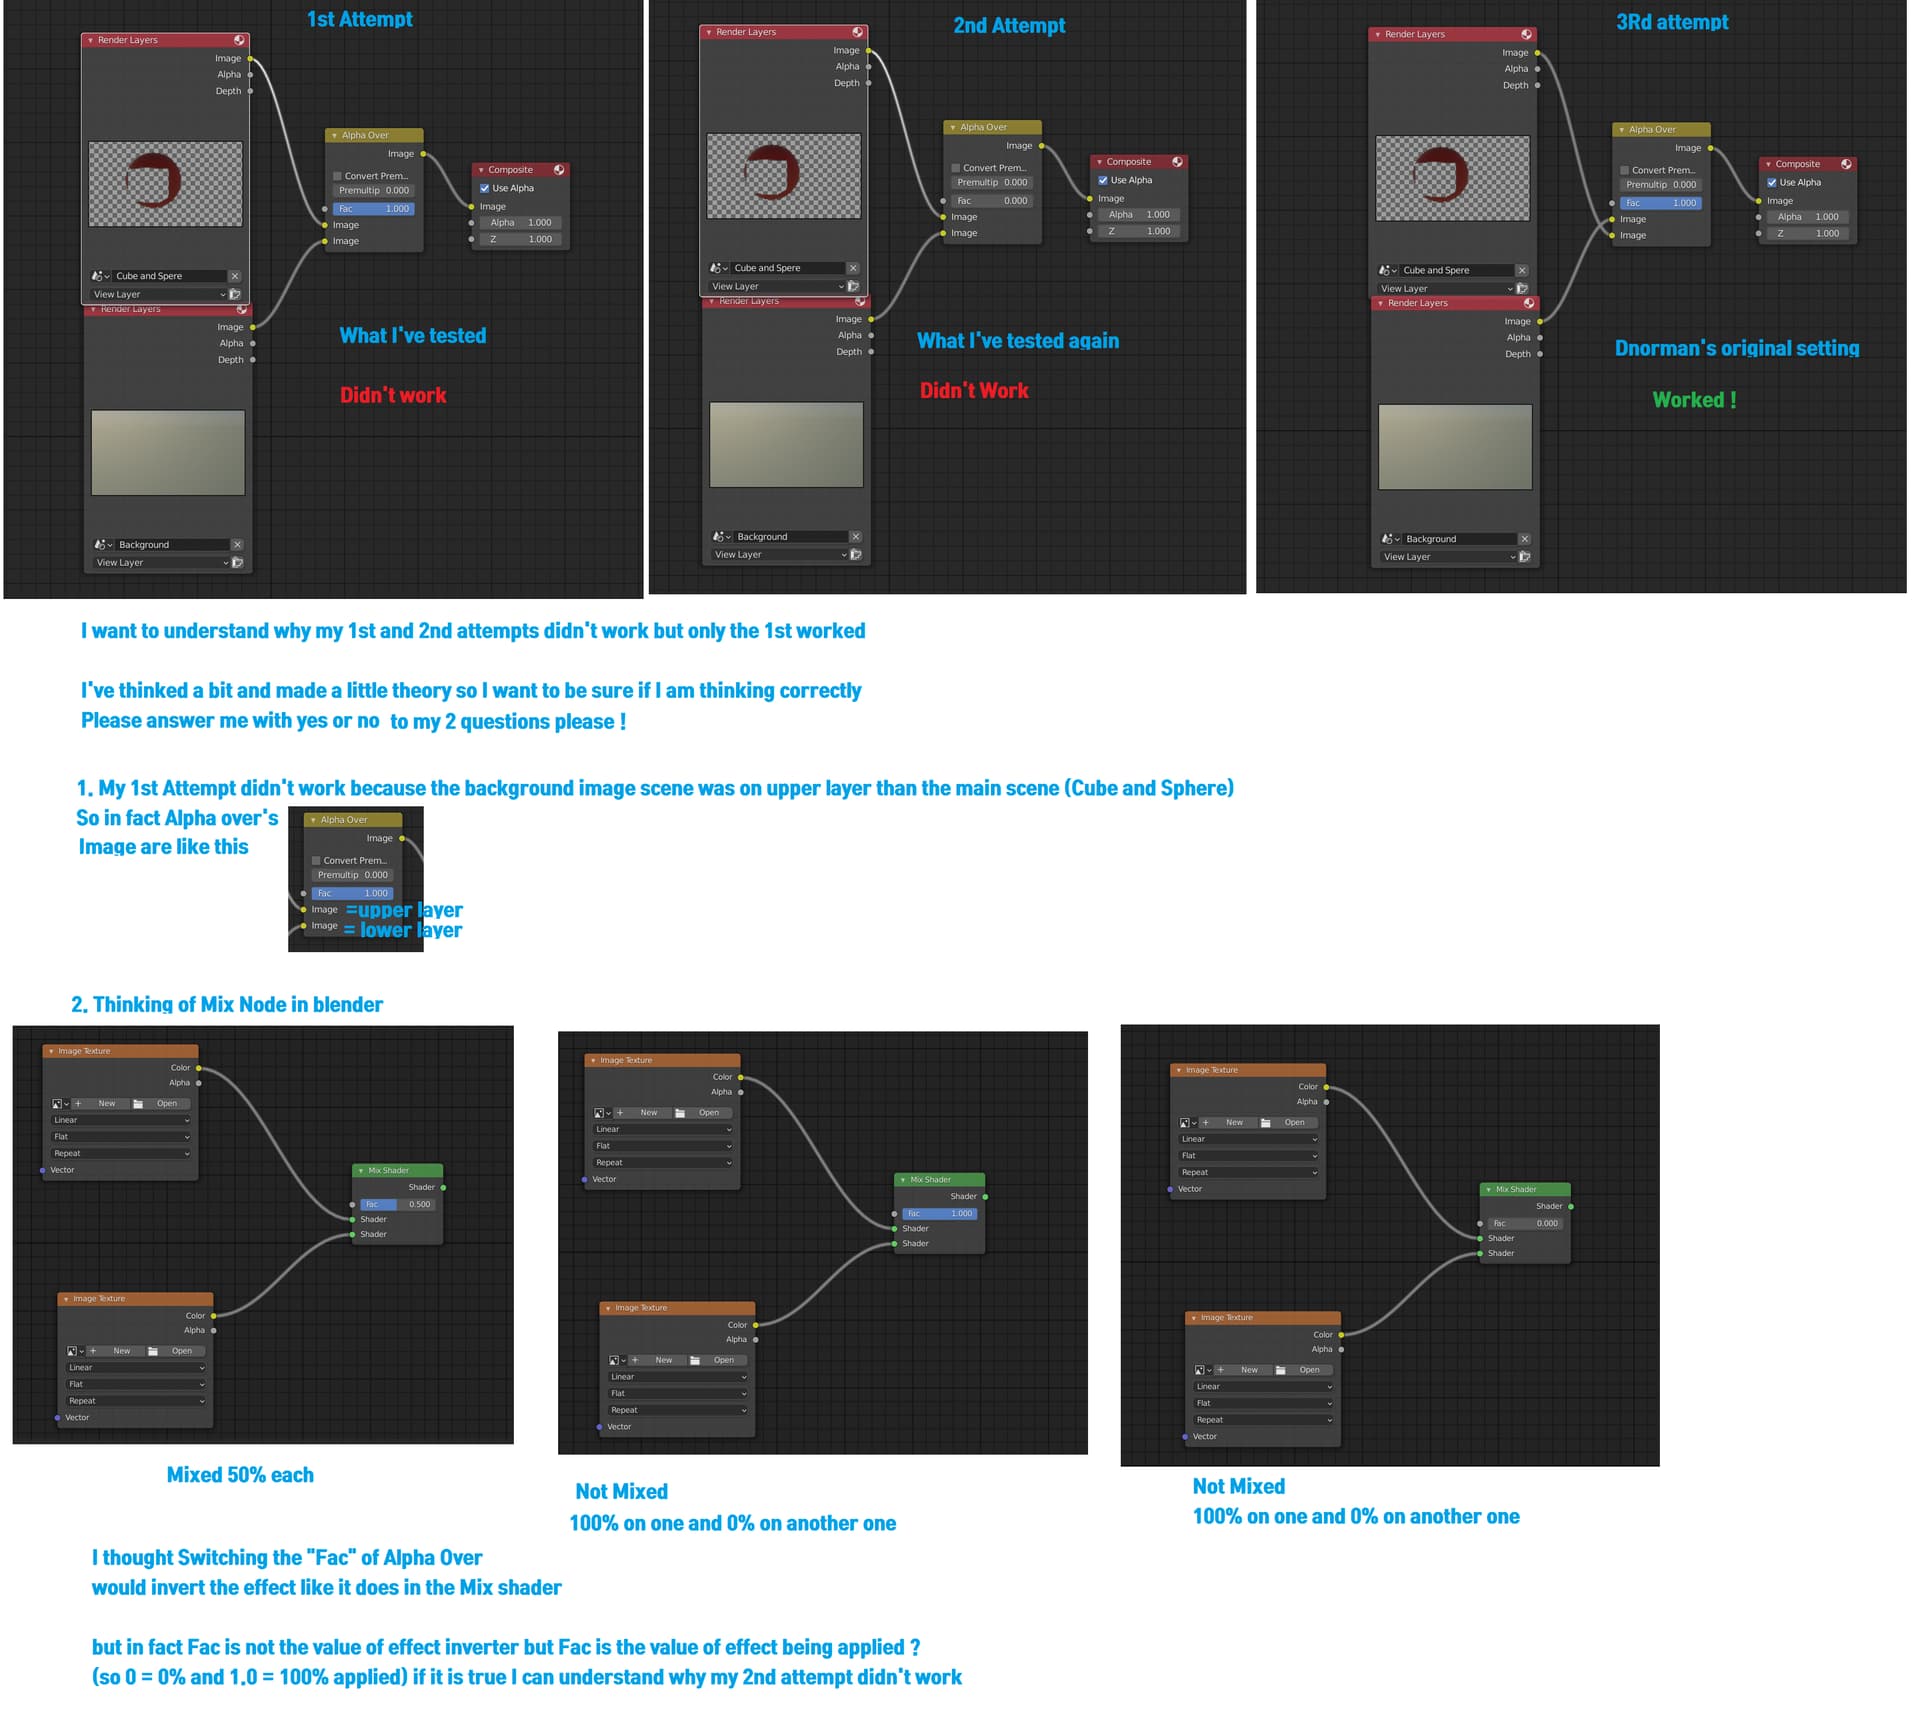
by the way while doing it I’ve done some several attempts and 2 questions passed to my head
Sorry to sound like a politician, but there is not a direct yes and no answer to your questions.
Question 1
Yes your first attempt did not work because the images were in the wrong order.
But your conclusion is not correct.
The alpha over node places the second input over the first input.
So the top input is the “lower” layer (it is the image that will be underneath) and the bottom input is the “upper” layer (the image that will be on top).
I know it is a bit strange but this is Blender!
Question 2.
Sort of.
In the shader editor the “mix shader” and the “mix colour” nodes factor does NOT invert the effect.
It does the same thing as the factor of the alpha over node.
The factor slider for any node will always go from 0 (do nothing at all to the first input) to 1 (total influence of the second input)
So your last statement ( 0 = 0% and 1 = 100% applied ) is correct for both the “alpha over” and the “mix shader” nodes:
You might want to take a look at this thread that also talks about the alpha over node:
Edit:
Ha, ha, its the firs time someone called me that!
“The devil knows more because he is old than because he is the devil.”
Thank you for the kind explanation ! I haven’t fully understood yet (yeah as always, things never come cleary at first)but I think I’ll understand soon ^ ^ have a nice day !