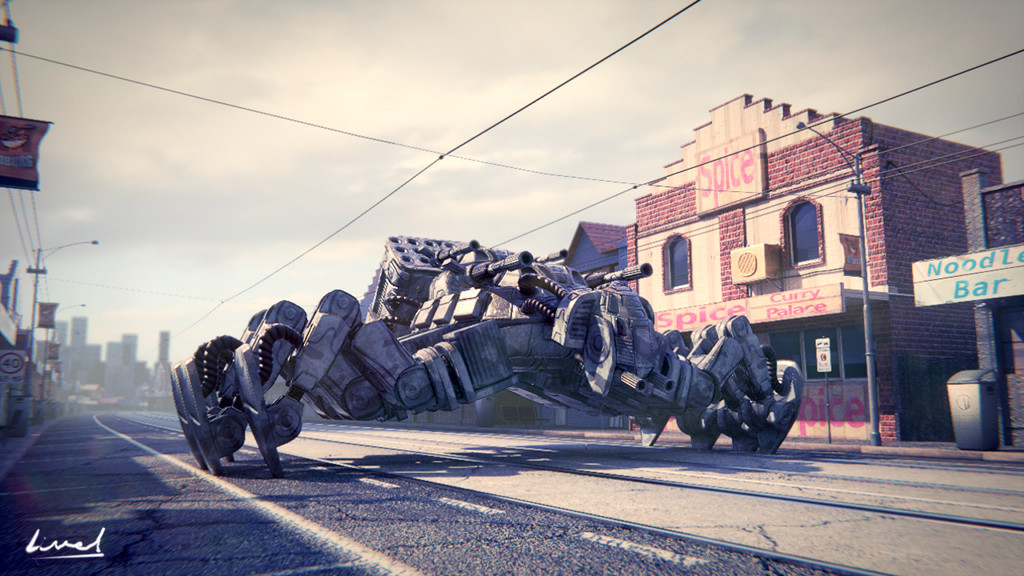
The RDS patrols the city streets looking for any last semblance of resistance, while the invaders sit quietly in office cubicles on the other side of the world.
This image was created in Blender with Cycles and Gimp, and rendered in under 2 minutes at 720p.
Comments and crits welcome, as I might come back and do an animation with this one.
looks pretty cool,
now if you can get the animation to look like the still photo that would be cool.
(with the same colors etc…)
have the mech raise his right arm in the air then slam it down into the ground really hard, sending asphalt flying up and at the camera.
pick up is arm again and you see a big slashed hole where is big claw penetrated the ground…
spin a 180deg, then another 180deg, head look around… hehe…
that guy would be fun to animate.
Thanks for the feedback guys :). Looks like I’ll have to get around to animating him ASAP. Getting the animation to come out with the same colors will be fine, the image is straight out of blender. All the post processing was done in the compositor. Gimp was used purely for creating all the textures from my own photo sources.
Awesome. I really love it.
If I may advance a suggestion, I’ll make it a bit less blurry (this is not the right term, I mean with metal parts more sharp). But maybe I am wrong, the way it is the image has a definite personality.
Amazing !
Well done, excellent.
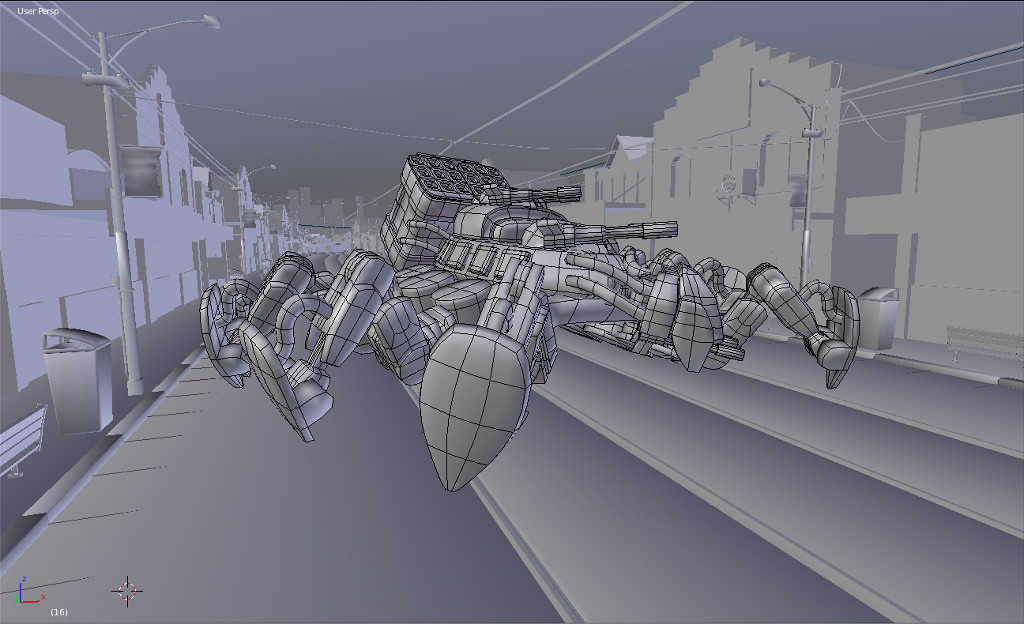
How many poly there? How you handled the well known cycles difficulty, no normal maps, problematic smooth shading… Experimental displ mode works well (both mode) but a little unstable on UV textured models.
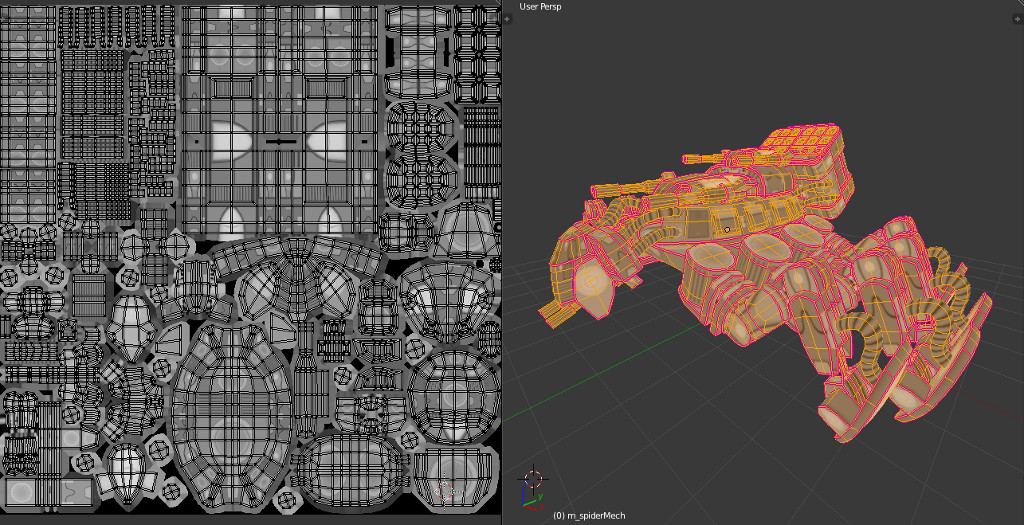
@michalis, Well, the whole scene was about 367,000 faces, with the mech weighing in at about 9000. However after this I did subdiv the mech at about 3 levels to avoid any smoothing issues. I made all the assets for use with this scene, so the lack of normal maps was not an issue. I just used bump maps. I was inspired by reading this modular environments tutorial, and seeing his results.. I thought it would be cool to try and make a mech using a similar technique. I quickly threw together a texture baked(AO, and Bump) from some simple geo, and then freestyle modelled and unwrapped over the following texture sheet as I went.
The only major annoyance was only having one UV set to play with, so I had to re-unwrap the model later, and transfer the textures into a unique uv space so I could add some more details without too much obvious repetition and scale issues.
@Zander Nicolic, I was going for a dull paint military vehicle sort of of look. I wanted the overall form to feel aggressive, but the individual components to not seem too alien.
This sounds like an interesting workflow but I can’t quite seem to wrap my head around it even with the tutorial link you provided. Can you describe a bit more the steps from your quote? Particularly, how to “model over a texture sheet”?
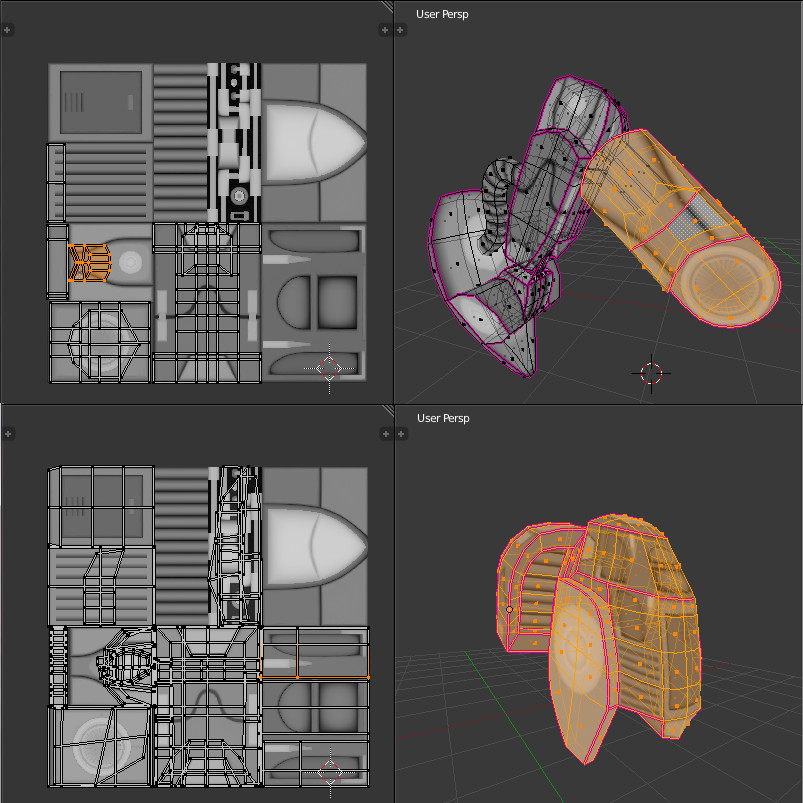
Well, because I already had an AO map, and Bump map(and various masks for things like paint, rubber, and glass) on the layout I showed above. I started by modelling individual pieces and unwrapping each one as I made it onto the sheet to make use of the details in interesting ways. Like so:
I basically wound up using a texture sheet of random details as inspiration for the modelling process. After I had completed modelling the entire mech(and unwrapping it to my “bits and pieces” texture) I re-unwrapped it with more unique uv space coverage. I then baked each of my textures(AO, Bump, Glass Mask, Rubber Mask) to the new layout.
After this was done I was then able to paint a diffuse texture using all the masks I’d baked out to help. This let me put in details like dust and mud splatter without having issues with scale and repetition. It wound up being an interesting experiment. I think this would work fairly well if you wanted to make a fleet of different mechanical objects that look like they belong as part of a set.
Anyway, I managed to rig it over the weekend, so hopefully I can get an animation done soon.