Spring armature

Hello everyone and happy holidays and a happy new year

I found this tutorial
https://blender.stackexchange.com/questions/148794/can-anyone-help-me-rig-a-watch-escapement

where you see an animated spiral spring.
I’m studying it to understand how to do the animation.

I managed to make the mesh of the spring and color it with the gradient,of the weight paint, then I match the mesh with the armor, but I do something wrong and I can’t make the spring rotate. I send my file

spiral.blend (827.7 KB)

how i can animate the spring?

For a mistake i copied the file of tutorial, my file with problem is this

SPRING-PROBLEM.blend (1.5 MB)

Took a look at your file and the Stack Exchange article. (you can edit your posts here, you should probably edit your first post to remove the wrong file to avoid confusion on which file to look at)

So Stack Exchange says:

The first bone has 100% influence on the spring.

The second one, its child and which is rotating, has a gradient influence on it.

To make this gradient, start with a simple plane and set the weight to 1 for a side (interior side), and to 0 for the second side (exterior side).

Once done, stretch it and loop cut it.

Which you did do, I see the gradient weight on the spring. That weight is a vertex group called ‘molla’, your top most bone that should rotate was named something else. Rename the top bone to ‘molla’ and it will work. Bone names have to match vertex group names.

That will only partially fix your problem. Try that fix and the outside of the spring doesn’t work right.

From Stack Ex -

The first bone has 100% influence on the spring.

So you need a vertex group named ‘padre’ that has 100% weight.

Hope this helps,
Randy

Randy, tankyou very much for help,
and happy holidays and happy new yera

now i can animate the spring,
but i have problem with the weight of bone,
how do you attribute 100% to bone molla and 0% to bone padre?

attached my file blend

molla-animata-bilancere.blend (1.0 MB)

A quick way is to set it here when you assign the vertex group:

tankyou very much,
now the bone molla rotate the spring,
but the spring not rotate correctly becouse the edge of spring not function correctly, how i do for avoids this problem?

Ok, I’ll explain it a bit more.

In your file - SPRING-PROBLEM.blend - you have 2 bones - figlio & padre, and you have your spring mesh. Your spring mesh has 2 vertex groups - molla & Group.001:

The figlio bone is the one that you will rotate to animate this. In order for that bone to control the mesh there has to be a vertex group defining what verts this bone will control and the vertex group name has to match the bone name. I told you to

So now the top bone’s name matches the vertex group name. Instead of renaming the top bone, you could have also changed the vertex group ‘molla’ to ‘figlio’ and it would work as well. The names don’t matter, they just have to match - bone name = vertx group name.

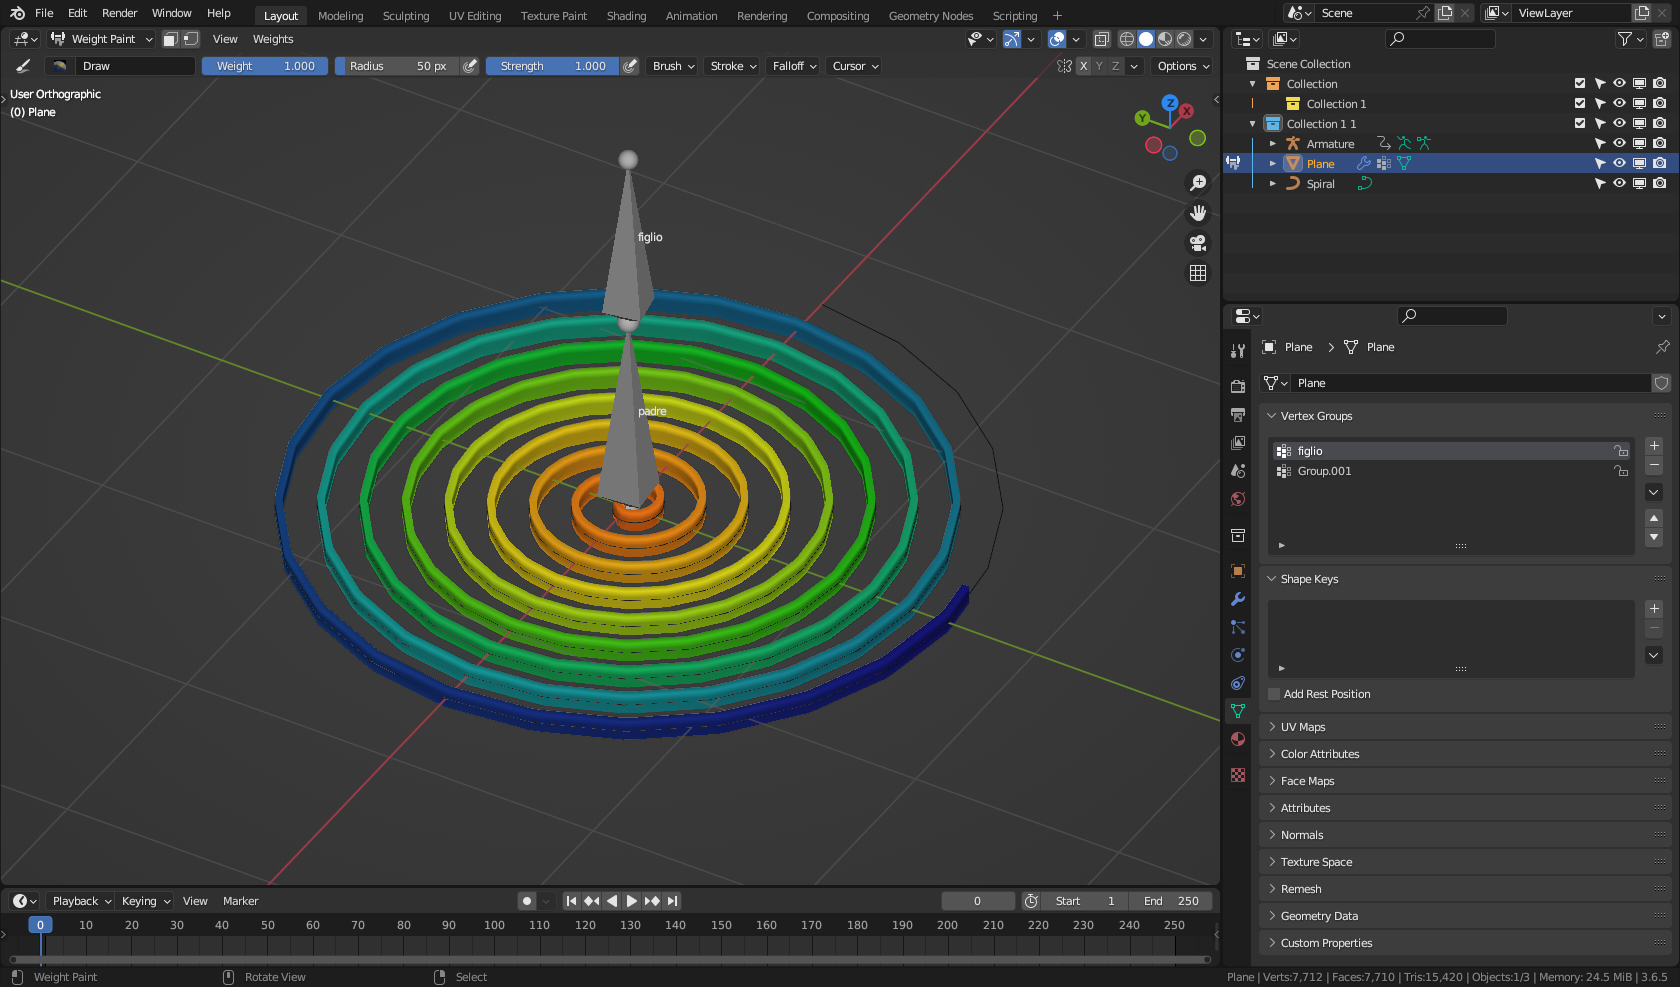
In SPRING-PROBLEM.blend, I changed vertex group name from ‘molla’ to ‘figlio’. To see the weight of this vertex group, switch to Weight Paint mode:

The parts of the mesh that are blue will have 0% influence from the bone. The parts that are red will have 100% influence from the bone, parts that are yellow will have less influence, and green even lesser influence.

Weights always add up to 1, or 100%. If you have a vertex with a weight of 100% to one bone and 100% to a 2nd bone, the actual weight is 50% to one bone and 50% to the other, because weights always add up to 100%, or 1. If a vertex has a weight of .2 (or 20%) to one bone, but no weight to another bone, then it will be weighted 100% (or 1) to that single bone.

Since your spring only has 1 valid vertex group, renamed to ‘figlio’, all verts will be weighted 100% to the bone figlio. To fix your problem you need another vertex group to mix with the ‘figlio’ vertex group.

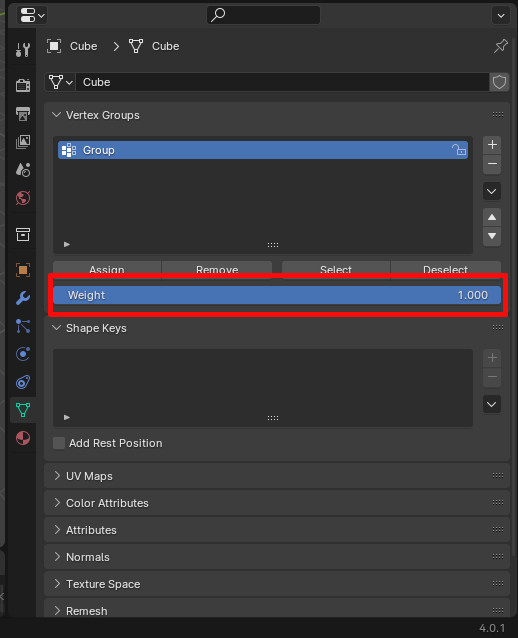
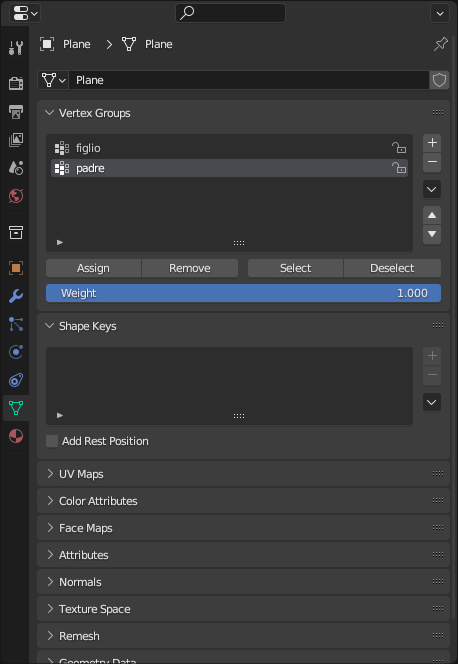
Rename ‘Group.001’ to ‘padre’ - the name of the bone that doesn’t rotate. Enter edit mode for the spring mesh, select the ‘padre’ vertex group and under the vertex group names box there is an ‘Assign’ button and a Weight slider set to 1. Hit the Assign button to assign a weight of 1 to all verts in the ‘padre’ vertex group.

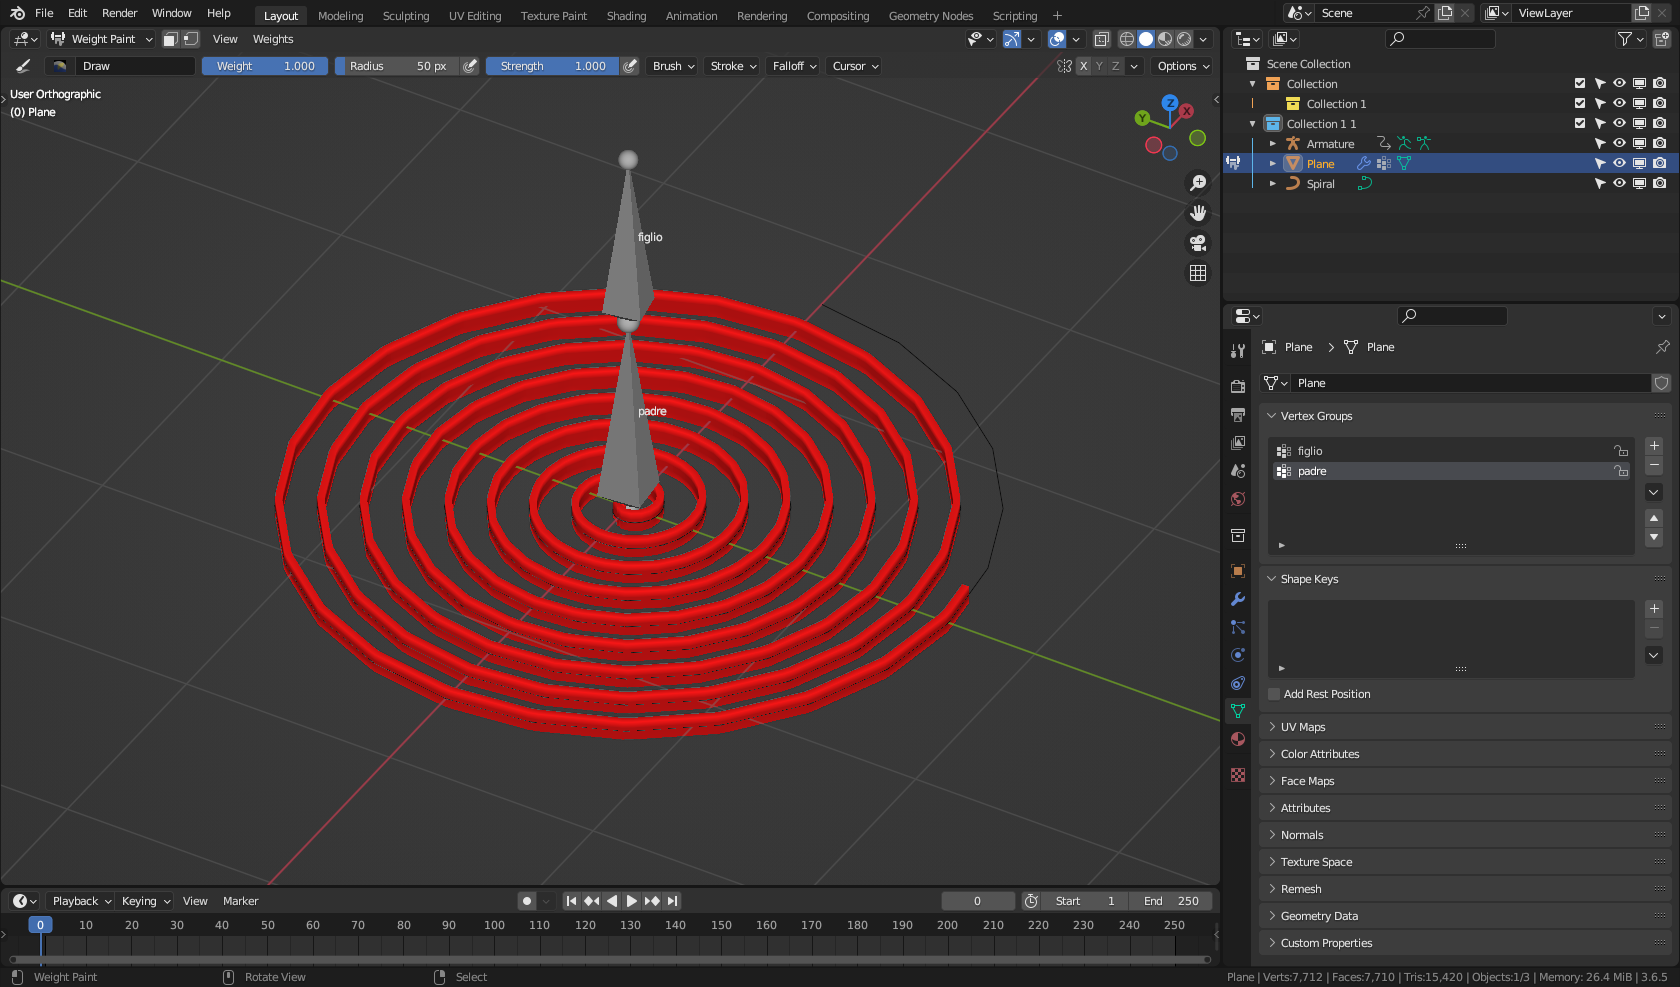
In Weight Paint mode, it should look like this:

Now this vertex group will mix with the other one to vary the influence of the figlio bone. The outside of the spring will be influenced by the padre bone, the inside of the spring influenced by the figlio bone, and the areas in between will be mixed.

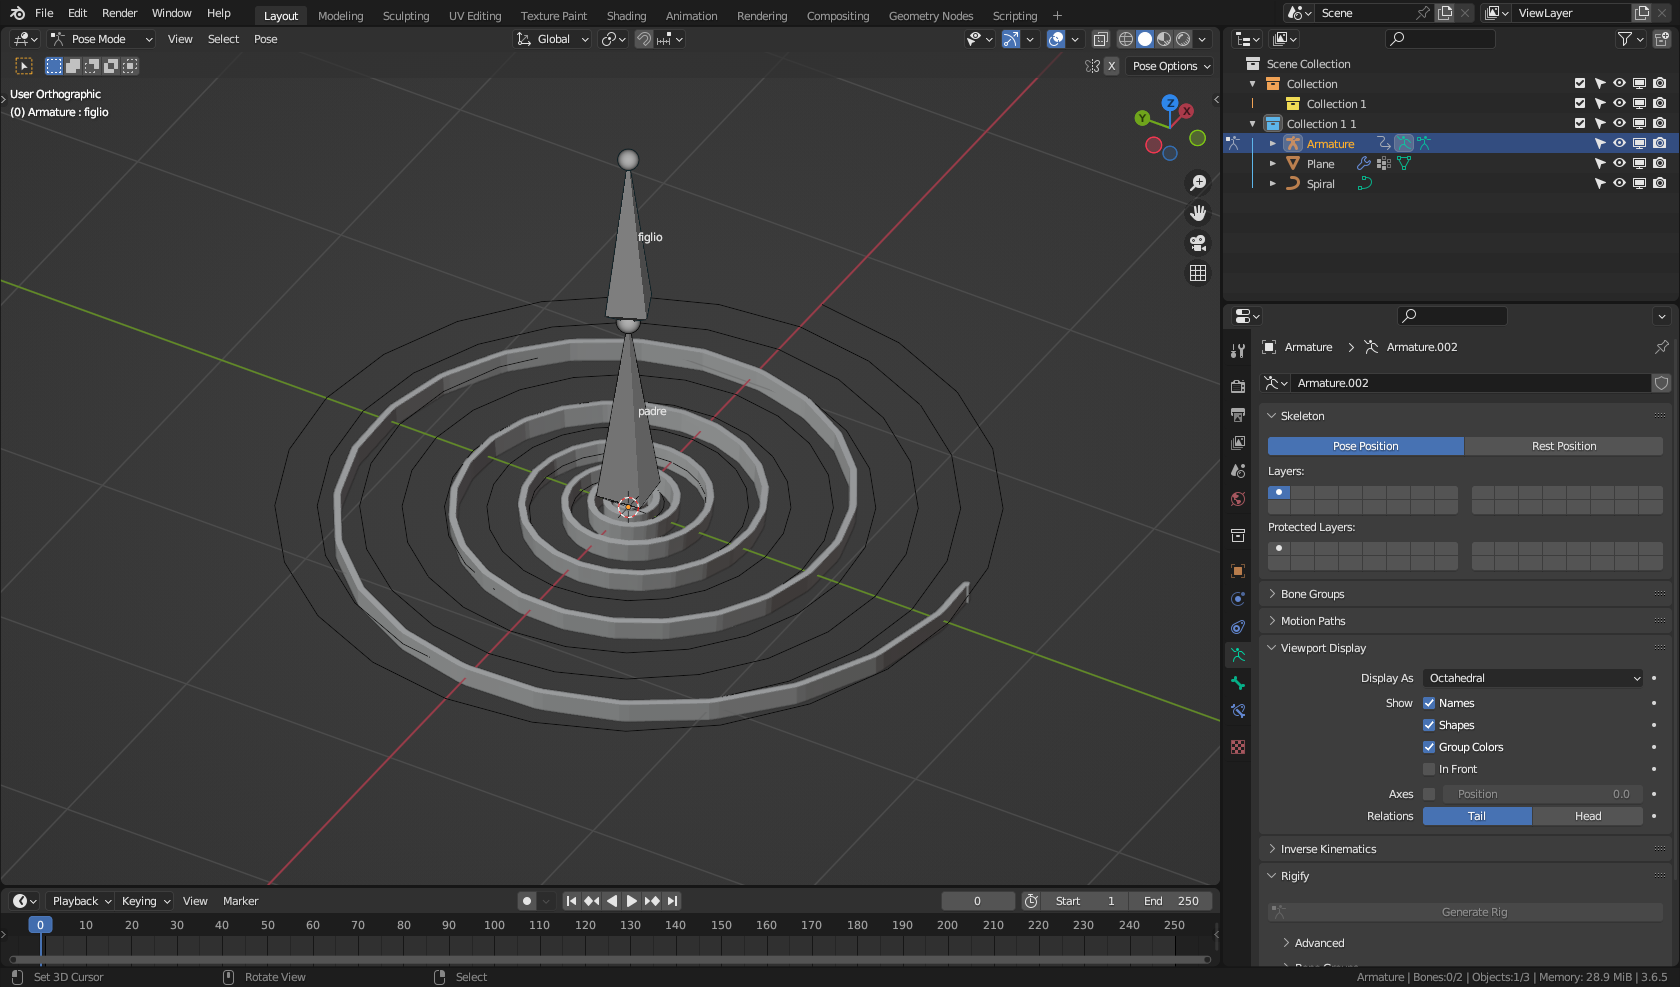
Giving me this when I rotate figlio:

SPRING-PROBLEM_fix.blend (1.6 MB)

Merry Christmas & Happy New Year as well!

Randy

3 Likes

:pray: :grinning:Thank you,
you really gave me a great gift

a difficulty I encounter is when I go to attribute the weights to the spring in weight paint,
I follow this procedure, but it doesn’t work,

to the plane mesh, I attribute the gradient in weight paint
then I go into edit mode,
I scale it and lengthen it, and I apply the Cut loop,
so I get the mesh of the spring.

Then with the vertices selected, I go to vertex group,
I assign the name child to these vertices.

then I return to weigt paint and color the mesh red,

so I go into edit mode and with the vertices selected,
I go to vertex group, where I assign a new group of vertices
that I call father, this is red,

while the child should have the gradient.

it happens that when I go to see my son’s weigh paint,
this turns red,

the gradient is no longer there.

where am I wrong
in the procedure for assigning the gradient to the spring mesh??

Happy New Year to all :four_leaf_clover:

I’d suspect that you have autonormalization enabled on your weight painting. When you paint the new group red, autonormalization understands that as you saying, “Okay, make these vertices fully weighted to this new group, and not at all to any other.”

You can do two things, either of which is different but valid. First, you can assign all first, and then paint the gradient after. Or, you can disable autonormalization for your weight painting. The first will lead to stronger weights on the gradient group.

If I am following this correctly -

Now the child vertex group is the gradient weight, but then you -

So when you return to weight paint, you are working on the child vertex group, because it is the active vertex group. And you paint that group red, which gives you -

You need to create the father vertex group after you create the gradient child vertex group. With father as the active vertex group, then assign weight. You can do this with weight paint, but since you want all verts in the father group to be red you can take a short cut.

Create the father group, enter edit mode for the spring mesh, select all verts, then in the vertex properties -

Hit the Assign button, that will assign a weight of 1 to all the verts.

Randy

tankyou very much :four_leaf_clover: :pray: :grinning: and happy new year

1 Like