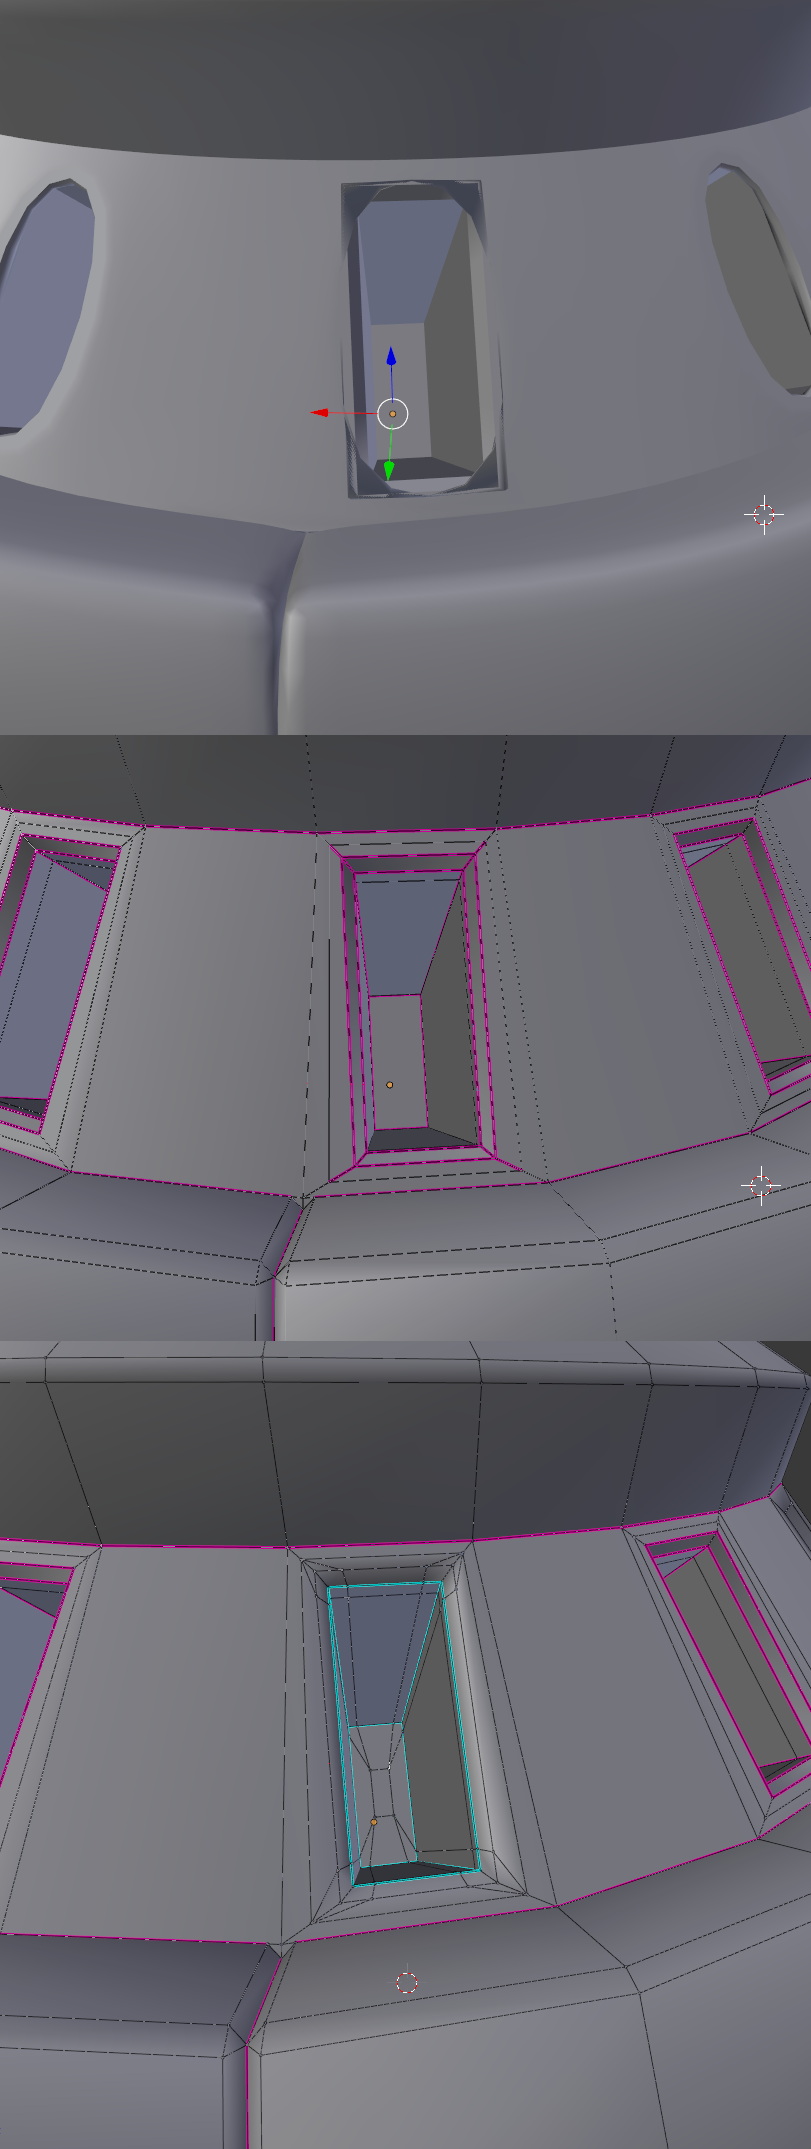
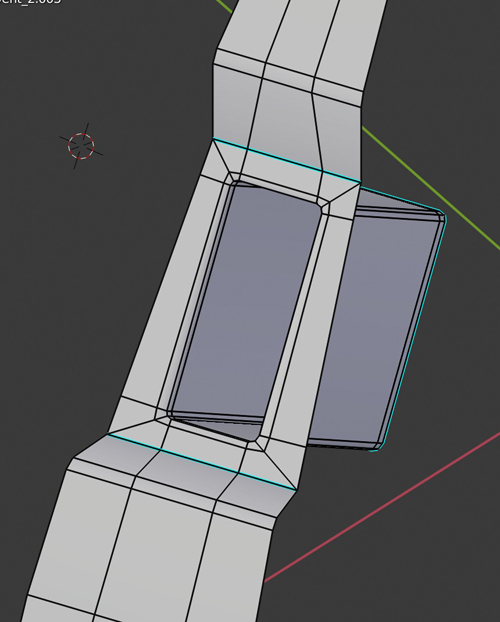
I’ve tried getting these holes to stay square with the best of my abilities, especially using what references I can find online in this case, but none of it seems to work. It just causes the same curves to get worse, or stay the same. The two examples in the picture are the best results I’ve had, and both resulted in equally bad outcomes.
Does anyone have any clue how I can work around this? I’m still fairly new with using subsurf, but I’ve been able to mostly get the hang of what works with it, and what doesn’t by winging it with the exception of square cuts like this.
You can set subsurf to simple, but normally you will use bevel, so you have an extra vertex on all sides. The distance then determines the sharpness of the edge.
have you tryed to mark the edges sharp?
another way is loop cuts.but mark the edges sharp is easyer,because with loopcuts you have to deal with more mesh.
@MarioPeper
When I set it to simple it just defaults to the mesh’s shape with no additional smoothing for some reason, so that’s out of the question for me, unfortunately. I’ve also done quite a lot of vertex additions just to see if it would help, and nothing seems to square this up at the corners.
@pixelgrip
I’ve tried marking sharp, as well as markind sharp with no difference. Even assing a metric ton of cuts doesn’t do anything to square out the edges. Everything behind those rounded corners are square, but the very surface won’t remove those rounded corners.
@moonboots
I feel like one of the methods I’ve used is almost exactly like the modem cuts, but for some reason it still doesn’t help. The most anything I’ve done has resulted in is the unwanted curves being smoother.
I suppose fair point, though it still means I just can’t tell what I’m doing wrong based on the example of what I should be doing. I’m certain there’s something I’m missing otherwise it would look how I want it to, I just can’t place a finger on it.
Anyway, sure, here’s the model. the holes are a bit scattered on how they look just because I was tinkering trying to see if I liked round, or square holes better, but I couldn’t get the squares to maintain shape.
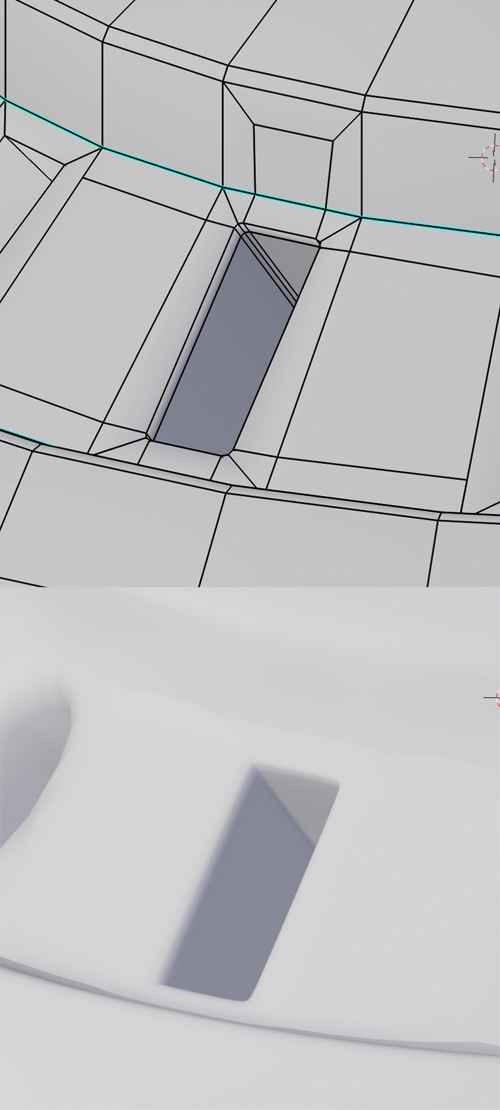
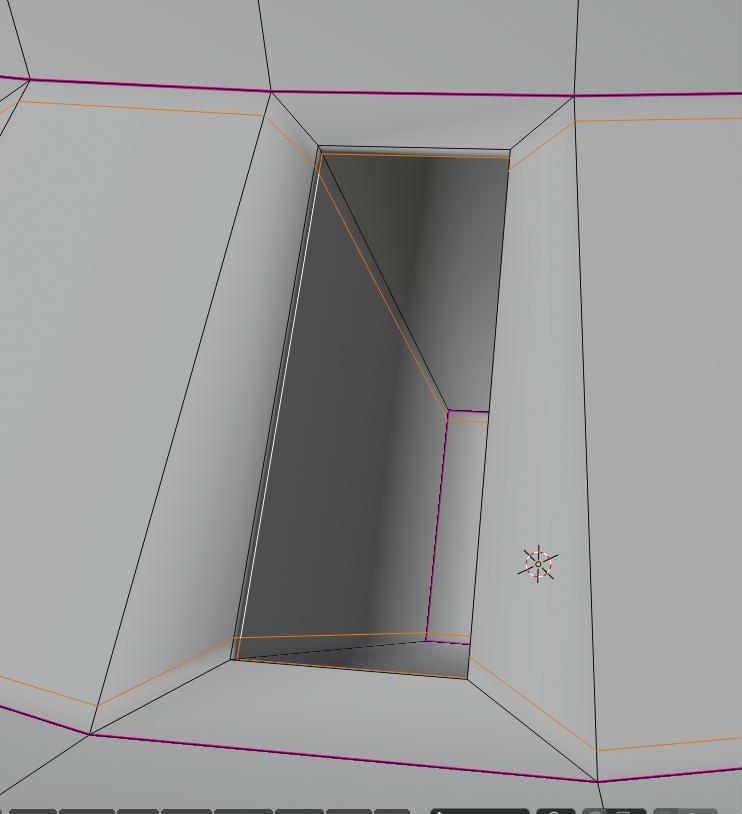
so the following topology works fine, it just need a bit more edge loops all around, but sometimes you don’t have other choices, here as you can see I limited with some topology reductions, maybe not always ideal but it was just to avoid working the whole thing. Actually once you have found the good topology, you could only keep a slice of your sphere and array around an Offset Object in order to avoid correcting each part individually.
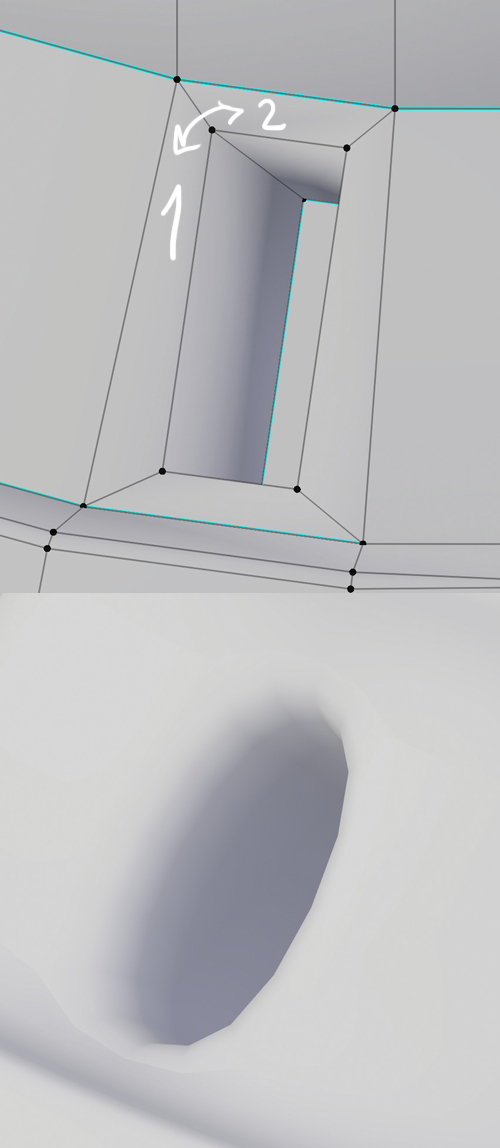
I don’t know a lot about creases, but for example with your current topology the Subdivision Surface will try to smooth between adjacent faces, for example between face 1 and 2, and it will round this part:
I think I understand how it works even though I had to re-read the explanation a couple of times. The result is definitely what I’m looking for, so as long as it doesn’t make the cylinder that you had to add cuts to wonky, and off-shape, then I think I’ll probably go with that.
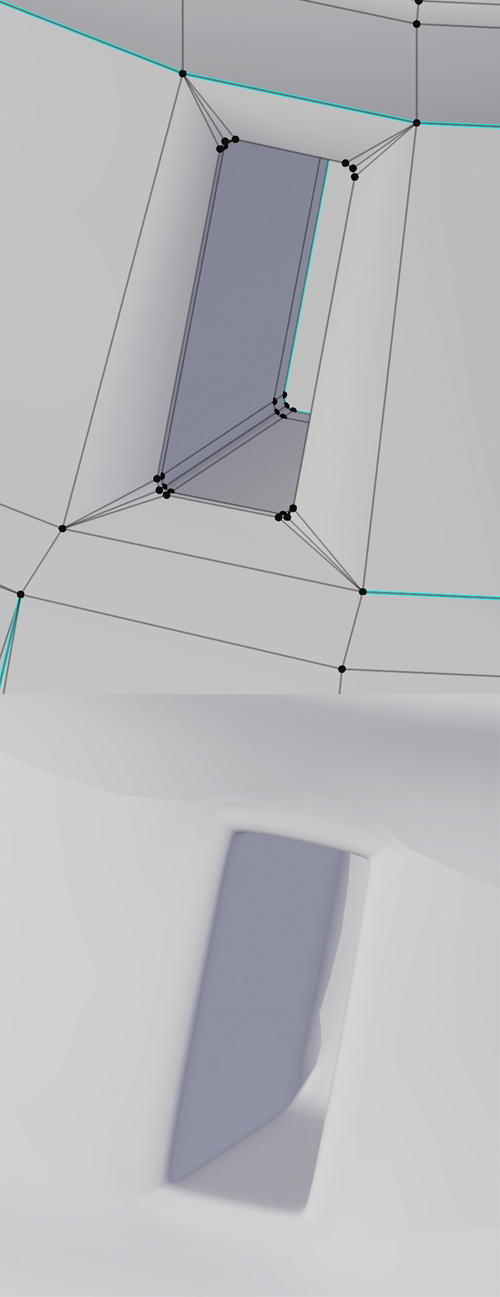
maybe begin with more edge loops, so that you don’t have to make the topology reduction I had to make, and work only on a slice of the whole thing, then array around an Offset:
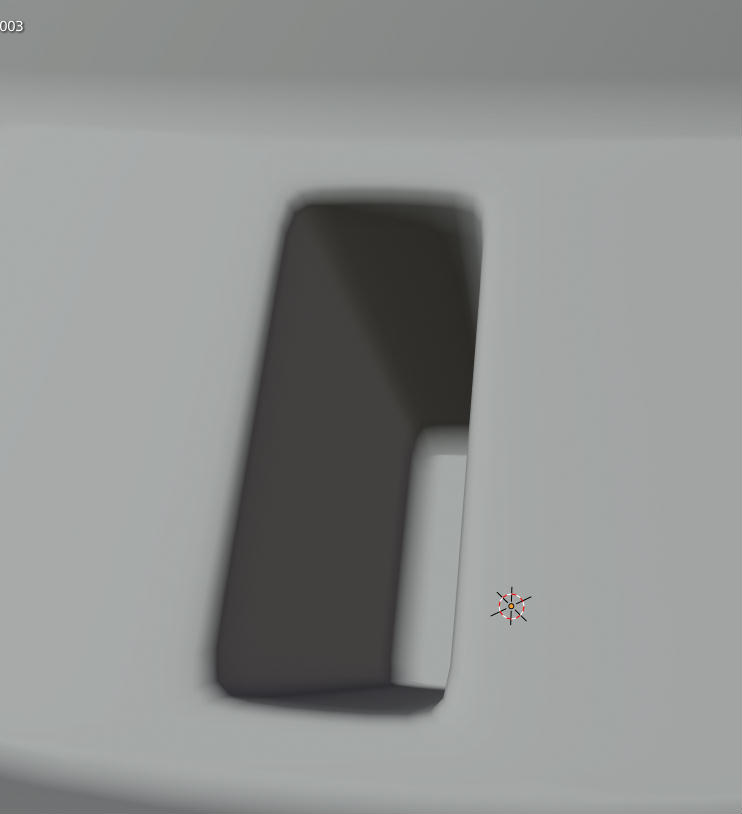
If you add two loop-cut on the side edge of one of those inset squares and tighten them to the top and bottom of the inset, they will hold the square shape well. Then you can add a loop-cut within each inset square and pull it up tight near the top to sharpen the curve so it won’t be so rounded with subdivision surface turned on.