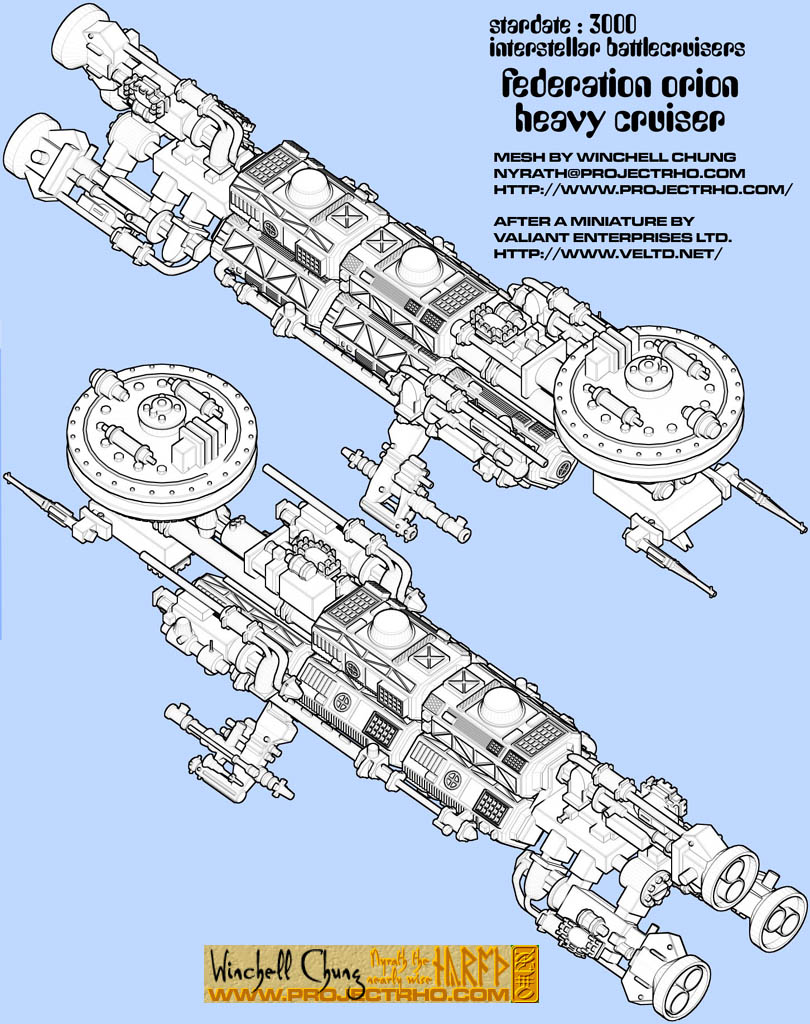
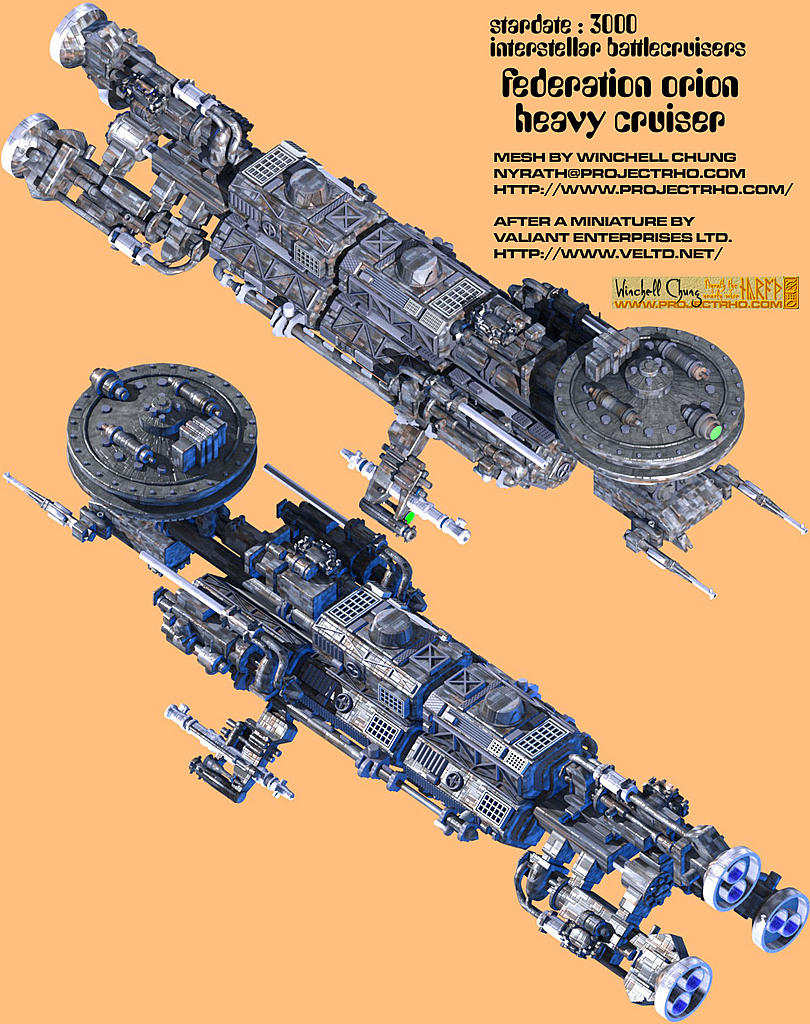
Every since I was young, I loved the little metal miniature starships produced by Valiant miniatures. http://www.veltd.net/stardate.htm
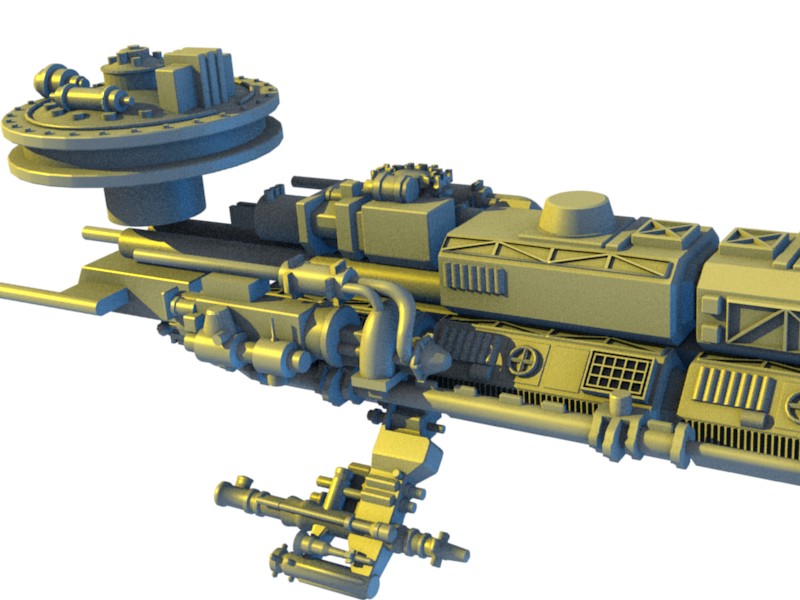
Especially the heavy cruiser.
So I’m trying to recreate it in Blender.
As it turns out, the original miniature master was constructed out of glued together HO steam locomotive parts. The top of the cruiser’s dish is the nose of the locomotive.
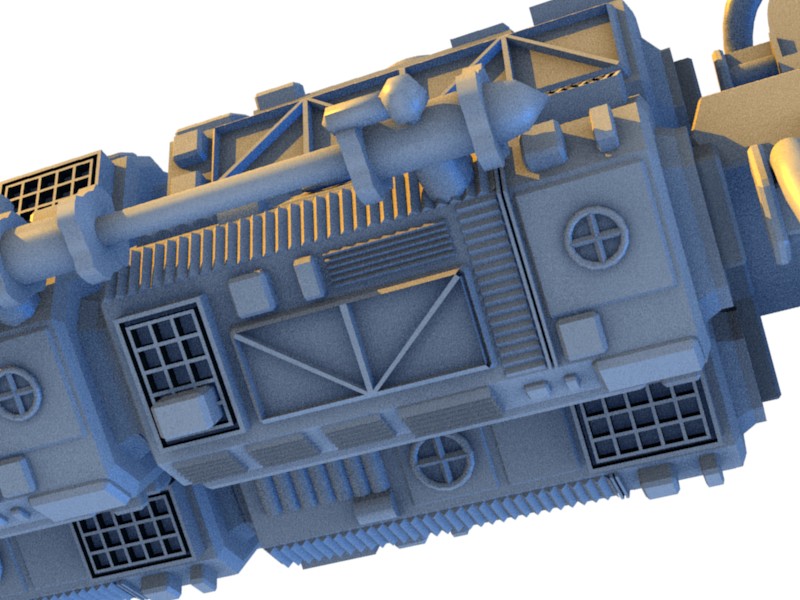
Work is slow, since I have no blueprints, and my eyes are not as strong as they used to be. I’m currently using a jeweler’s loupe at about 15x magnification trying to get a clear view of the details.
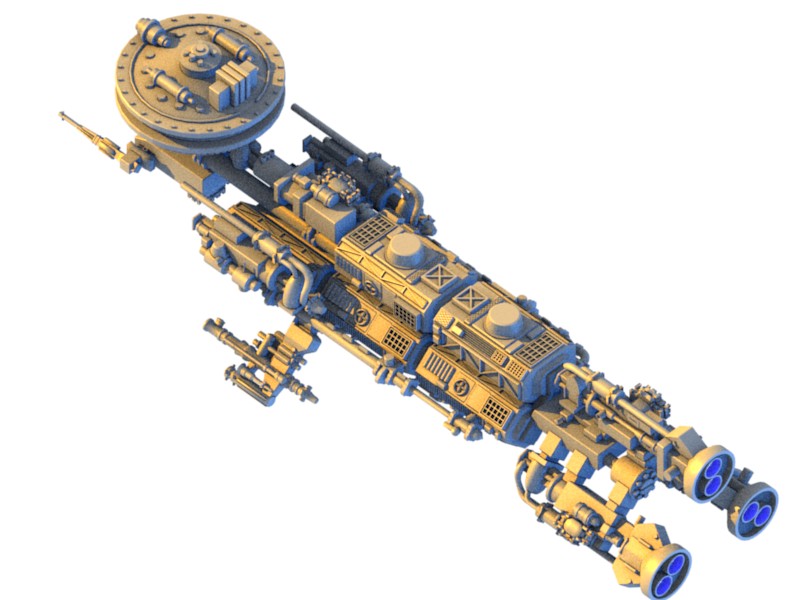
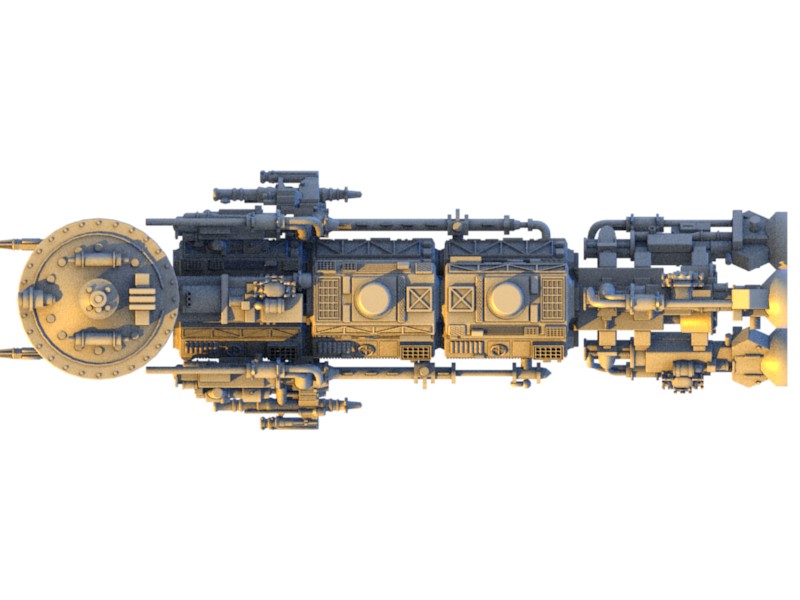
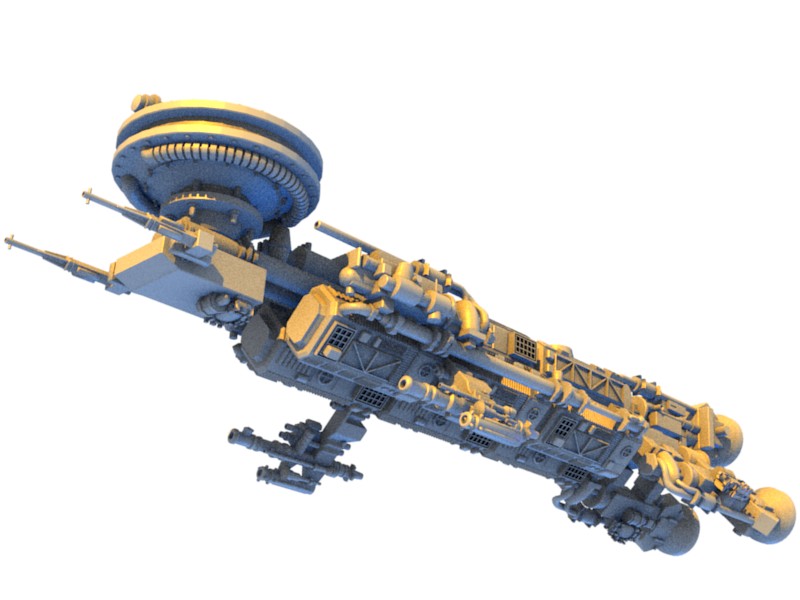
I have a habit of setting a suite of cameras around any work-in-progress and making renders as the work progresses. That way I can watch it grow, and maybe back-track if things don’t work out.
Thanks, but the entire thing is just a conglomeration of loop-cut cubes and cylinders.
You think that makes it any less impressive?
It’s really nice work so far, and the texturing doesn’t necessarily have to be that much of a nightmare, there are a few little tricks to texture hundreds if not thousands of seperate parts without resorting to mind bending uv-mapping.
The thing I’m using more than anything else is the Bevel Center script. I knew that beveling edges is a good way to avoid the “it-looks-like-a-two-inch-model” syndrome. And I am constantly adding a new cube or whatnot to an existing object, Bevel Center allows me to bevel just the newly added object (unlike the standard Bevel tool).
The long tubes are done with loop-cuts. I make a cylinder of the appropriate length. At spots where the diameter changes, I make two loop-cuts close together. Then I select the loop cut closest to the transition, look in a view aimed down the axis of the cylinder, and use the scale tool until it is the correct diameter. Repeat for each diameter change.
Sometimes I do this by extruding the end of the tube.
Thanks!
It wasn’t as hard as it looks, it was just tedious. With only a couple of exceptions everything is based on a cube or a cylinder.
The exceptions are the rings on the top and bottom of the saucer. These were done using the spin tool. However, the original model has lots of cables that I haven’t included. I guess this means I’ll have to learn how to make cables by extruding along Bezier curves.
Beziers are super and very easy to use to make cables.
1 Add a bezier CURVE shape it to the path you want the cable to follow. You may need to subdivide it for more control points and you may need to click ‘3d’ to allow the control points to be non-planar.
2 When the curve nicely follows the path you want, add a bezier CIRCLE and size it to the diameter of the cable. Change the name of this circle in the ‘ob’ field. I usually use a name like ‘cable_1_rad’ for cable 1 radius. Then select the curve that is the path for cable 1, and in the ‘BevOb’ field in the ‘Curve and Surface’ panel enter the name you gave the circle and BOOM- you now have a cable.
You may have kinks in it depending on the configuration of your control points. 3d control points have 4 dimensions- x,y,z, and tilt which is like rotation. If you have a kink, you can try fixing it with tilt by selecting a control point closest to the kink and typing ‘t’. You can now alter the tilt of the point which you can see by the hash lines along the curve changing as if the curve were being twisted. Tilt alone cannot always fix a kink. You may have to fiddle with control points and their handles to get it right.
This is a cool ship- very greebly. Good luck with your cables.
Like I said, it isn’t difficult, just tedious. It’s all cubes and cylinders, with a lot of squinting through a jeweler’s loupe, and making fuzzy scans of the metal miniature on a flat-bed scanner.