Originally, I didn’t mean to make a thread here, because I didn’t know how much time I’d have to continue with this model. However, I think it’s going quite well, so here is how far I am at the moment.
Thanks to www.stargate3d.fsnet.co.uk for the reference images.
Notes:
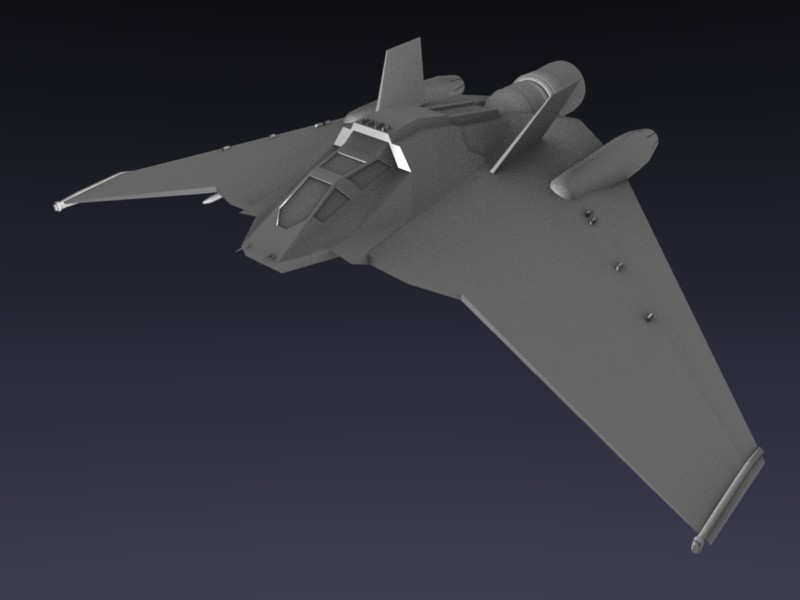
Top View: Not much to say, pretty much finished. I’ll most likely add some basic interior though. And the outer engines still have to be integrated a little neater.
Back View: Don’t know why the middle engine has these black spots. It aren’t the normals or double faces, I checked that already. Also, the outer engines have to be a little more massive, and the middle engine needs some “splits?” in the rear part. Bottom view: The arrow-point-like-thing (fuel-container? Don’t know) does not completely connect to the main engine yet. Also, the outer engines should be broader on the bottom of the plane. Another thing to do is to remove this shiny effect, I think it has to do with irregular faces & smoothing. And at last, I got to think of something to attach the rockets to, right now they’re hovering under the plane
I did this in 3 days, but was 1 day free of school, and it is my 3rd attempt, which is finally going well
Really nice model you’ve got there. The guns on the nose seem a tad too small, but I’m no expert when I come to planes. Nothing holding the missiles under the wings either. This looks like it will become really good.
The guns on the nose are antennas, as far as I know
About the rockets:
Maybe I should have called them missiles instead of rockets, that might have been a little clearer
Thank you very much! I wonder where you heard / saw that though I did make a stargate, true, but I haven’t really even finished it ;), so this is my 2nd stargate-mesh.
But you’re right, when I have some more models, I definitely plan on making an animation
Antennae? lol. I thought that they were guns. After looking at the pics again I think I have something to crit., the uh… flaps-pointing-upward on the wings seem too thin around the base. They also don’t seem entirely attached.
I see what you mean I will move some vertices down, so they are connected to the wings. (Or, seem to be connected )
About the thickness: I think you noticed that when viewing the back of the F302: When you take a look at the front-view, you’ll notice they are thicker. They are supposed to be (relatively) thick and get thinner on the back. But you’re right, it does seem very thin from the back. I think I’ll change that too.
Right now I’m remodelling the “arrow-thing”, but my egdes behave, ‘unexpected’.
Although my geometry is quite clean (as far as I can see) I keep getting these artifacts…
Note: The three selected faces don’t show the usual square… I can select them without problems though, and they are nor double faces, nor normal-mistakes.
Anyone know by what this is caused, and how to solve it?
Thanks,
Sven
(p.s. Darkscar888, I forgot one stargate model, I once made apuddle jumper: I’m not sure if this one counts though, it was a long time ago
EDIT: Well, I found another way of making it look nice, but it isn’t ideal; I used subsurf lvl 3, combined with some creases & set smooths, and now it looks quite good. (3rd attachment) Sadly, I can’t keep the sharp edge because of the subsurf (when using crease in that part, I get these artifacts again), but I think this roundness looks ok as well.
Explanations about why I get these artifacts are still welcome
Well, I think I can regard the modelling as finished. However, I still have to do the attach-missiles-to-F302-things. But I’ll do that later
Some basic interior will follow as well, but now I want to start texturing.
I know how to texture, (buttons, techiniques), but what do you think would be better? Mainly procedurals, or mainly UV-textures?
I tried to start with the UV-map. Cutting the edges etc etc is called skinning right? (If not, I still use that word in this post :D)
The start went quite good, but as always, when you come to more difficult parts, it gets more difficult. I’m especially having trouble with the air intakes. I do have some glitches on quite easy pieces as well though. I wonder if someone could take a look and improve it / tell me how to improve, as this can be seen as my first skinned object.
I tried to keep the “islands” as big as possible, but I don’t know if it’s ok like this. In the render I gave each island another colour, to show what belongs to what. Please take a look at the blend file for more detail.
Comments please, as I think I really can improve on this!
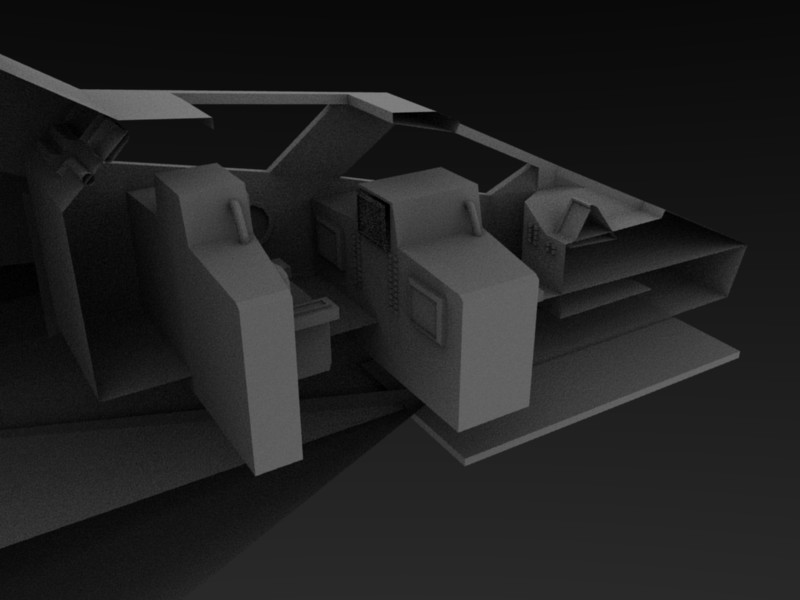
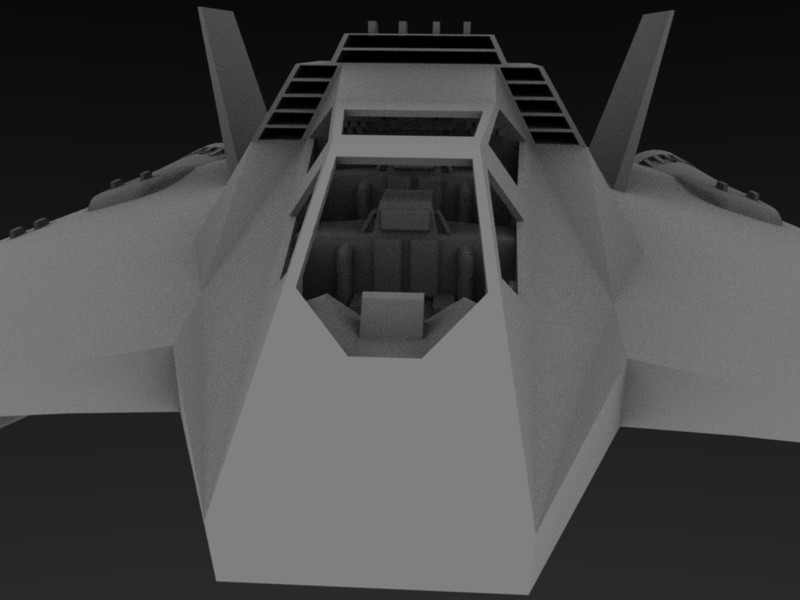
Meanwhile I added some interior. I think I’ll have the UV again, as I made quite some new faces to tweak things.
I disabled the mirror-modifier, so you can see everything better.
What do you think of the interior? (And do you have tips for UV-mapping?)
it’s looking very good.
the interior makes a big difference in the model.
hows the new uv mapping coming along?
please keep working on this,
often not comments means there’s not much to crit & people are watching your progress without interrupting.
m.a.
Thanks both
About the UV-map: I’m still thinking how to do that. I was satisfied with it when I started, but at the end I thought it could be done much better, just don’t know how yet. So, any UV-experts: Tips are welcome
I should know that “no comments” means as much as “no crits, keep it up”, but I like to read what people think about my work (And this is my first real WIP, so still a little bit new to the “WIP-bussines”
Now I thought I knew how UV-mapping worked, but when I saw this I was surprised. I always thought that you could compare UV-mapping to cutting out a 3d paper-model: Where you make a seam, you cut with your scissor.
But then, why does my UV-map of this piece look so skew? In the model, the vertices marked with a red circle all have the same Y-axis value. So I suppose, they should be right above eachother in the UV-screen? Why don’t they?
I’m wondering whether there’s a better way than UV-mapping…
Some seconds ago I decided I will not be unwrapping my F-302 anymore. Looking at the reference images I used, I think procedural textures will be enough. (Please see www.stargate3d.fsnet.co.uk --> models for the texture I’m trying to reach)
Little update on the texturing. Mainly it’s a very small cloud texture, but I think it looks quite good
(Yay, yesterday I got “the Essential Blender” from Sinterklaas, a man from Spain who gives Dutch people presents on 5 december Dank je wel Sinterklaas!:yes:)


 Will definitely keep an eye on this thread!
 )
)


 (And this is my first real WIP, so still a little bit new to the “WIP-bussines”
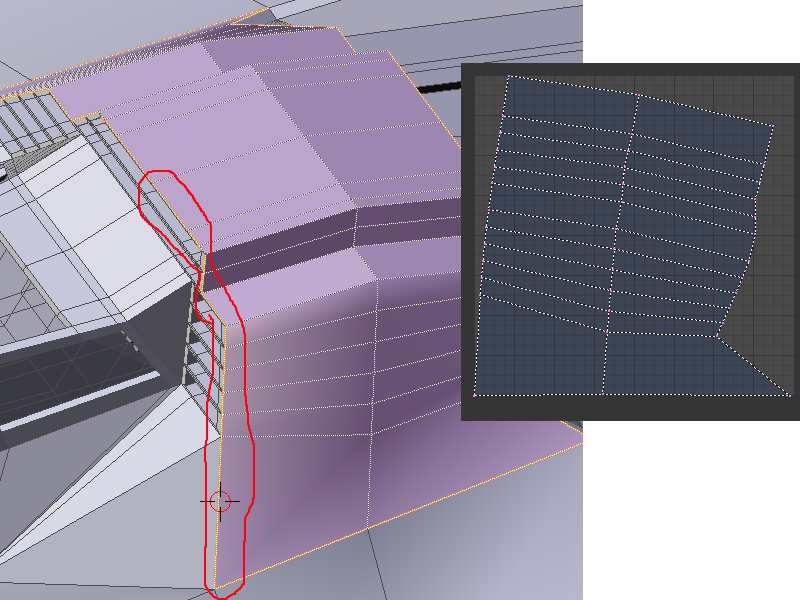
 Dank je wel Sinterklaas!:yes:)