I’m trying to model a stone bridge for an n-gauge model railway, with the idea that I’ll 3D print the model. I’m coming unstuck when the texturing / displacement of the texture. I’m still new at Blender so I’ve been watching videos about subdividing surfaces, but damned if I can produce the result I want.
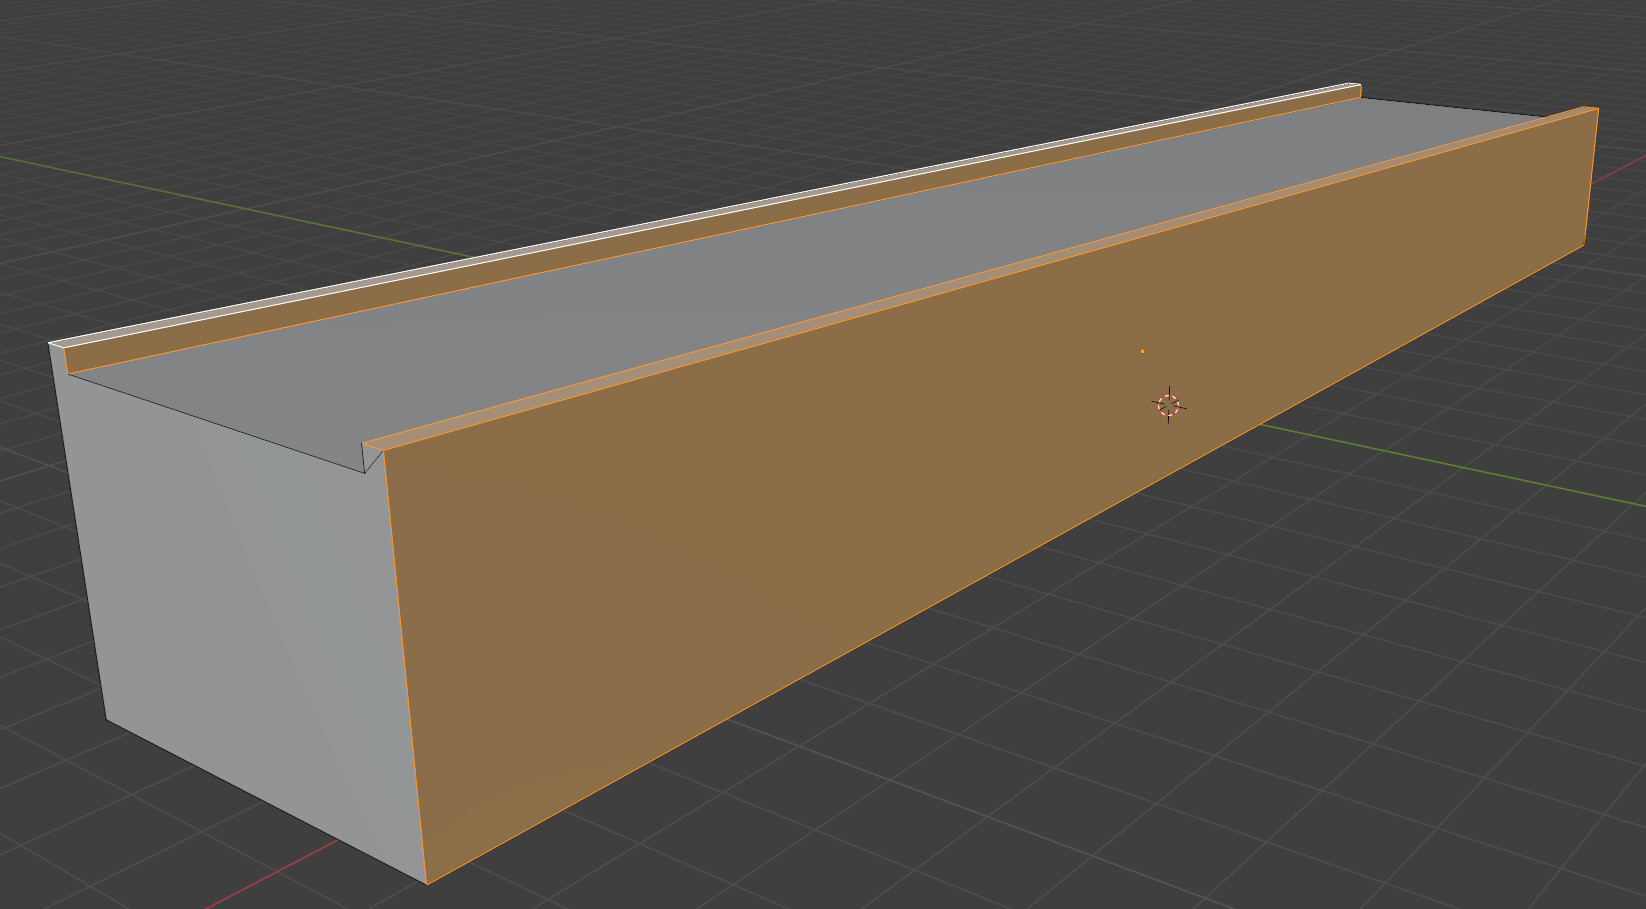
This is the basic model - I’ll subtract arches from it and bend it a bit later, but I wanted to add the texture at this point. This is the one that I think will look good for an old stone bridge.
I subdivided the surfaces lot, but it still looked fairly awful. And adding a subdivide modifier to that then just crashed. The individual stones need to be fairly small - not so small that I can’t see them in the 3d printer results, but more than just a couple of stones.
Can anyone point me in the right direction please?
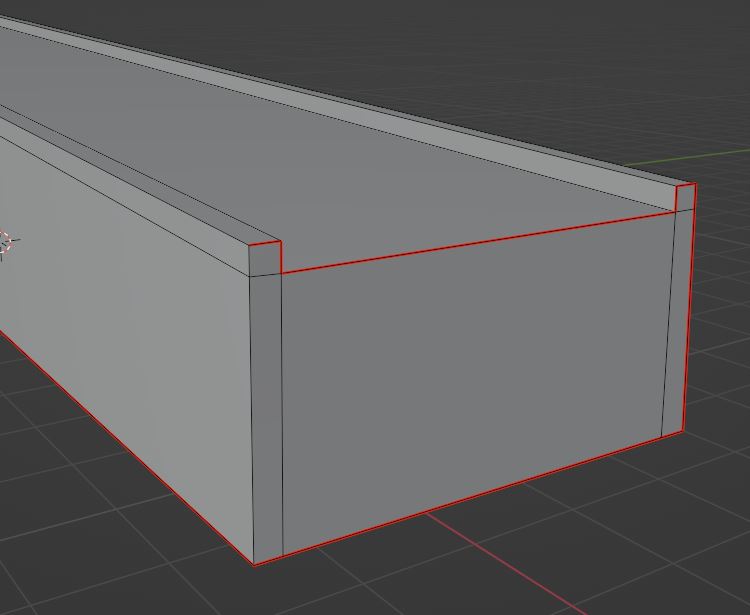
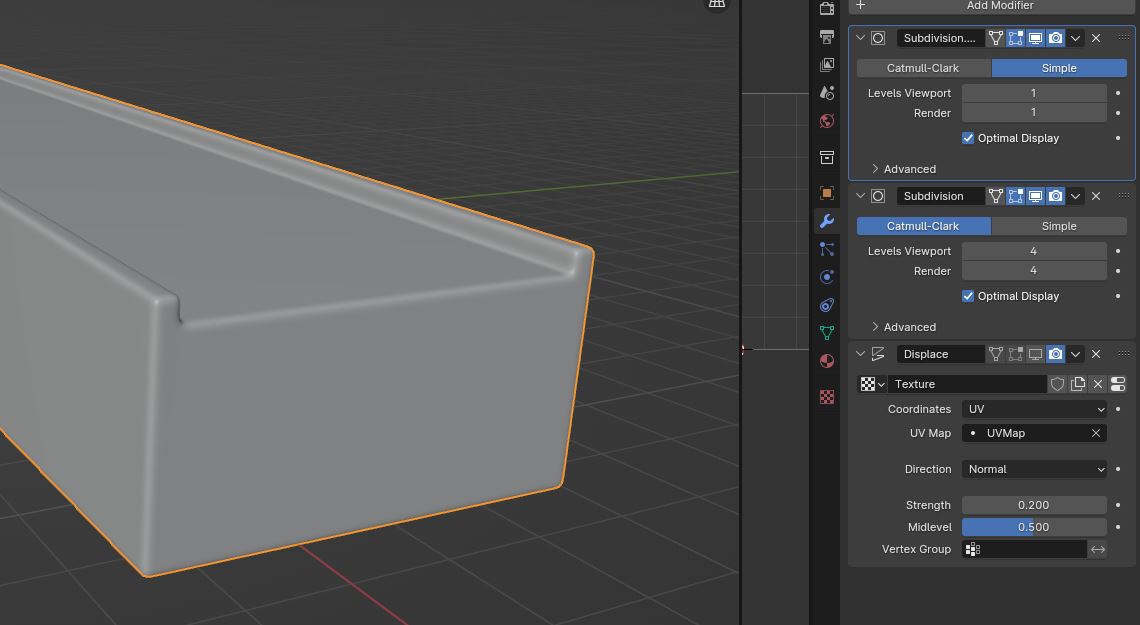
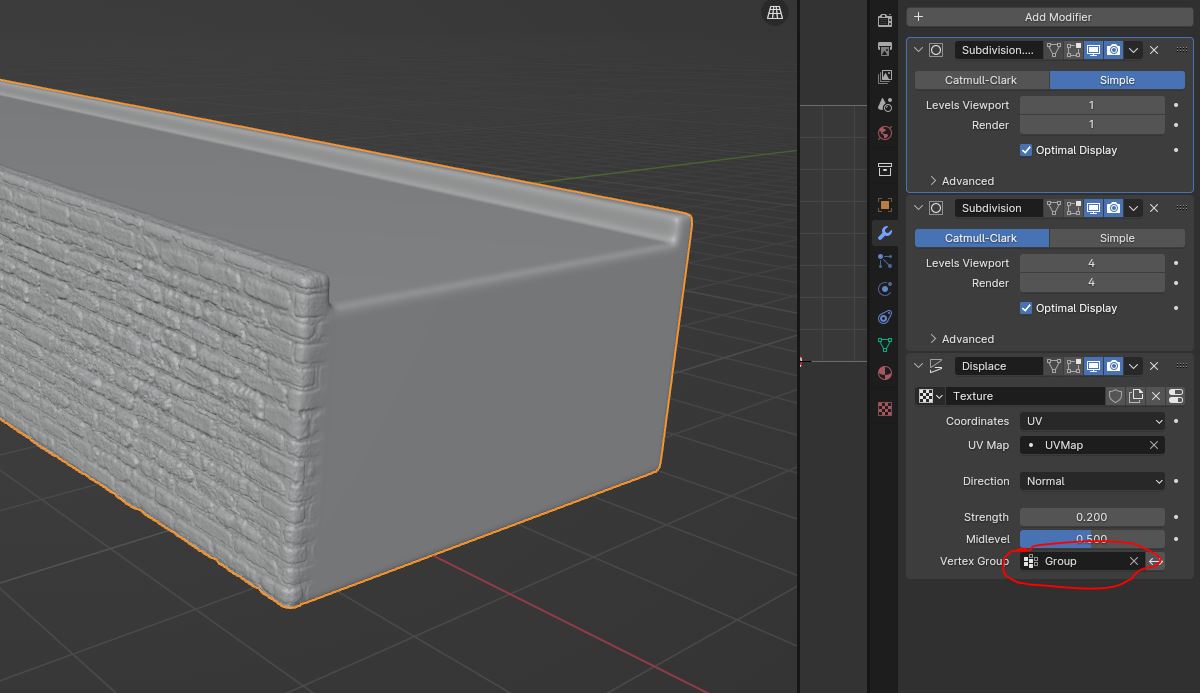
If you want to subdivide and displace this model, the polygon structure will need to be clean and even for that to work.
This means connecting the borders, dissolving triangles and adding cuts so the model is made of an even grid of quads. Remove a few subdivision levels on the modifier before attempting this though, or Blender won’t appreciate.
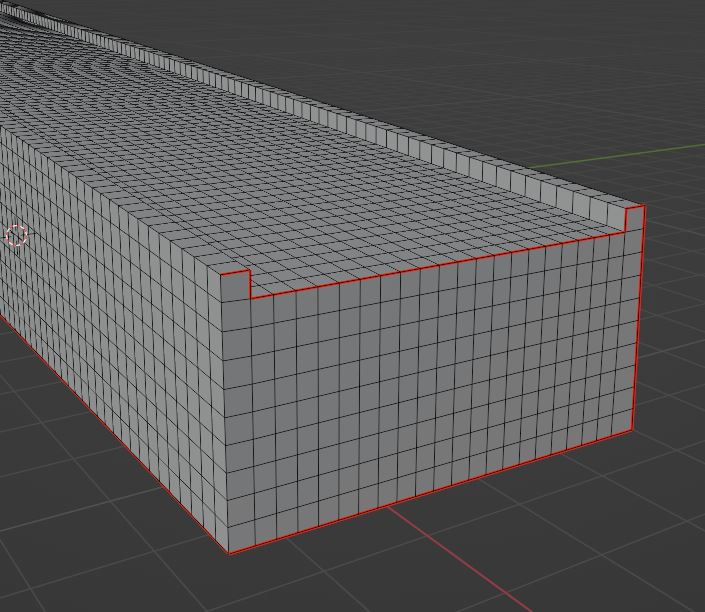
Then, you will probably need to redo the UVs if you want the stones to map well to the shape of the model. Maybe an unwrap with “follow active quads” could help? This allows UVs to be straightened, so the texture follows the surface even if it’s distorted. You should look it up if you have never used it.
Then, I would use 2 subdivision modifiers. The first in simple mode, the second in Catmull-Clark mode. This will allow a bit of softness around the edges, giving a nicer transition between the sides. The subdivision numbers in the screenshot are what’s reasonable on my computer.
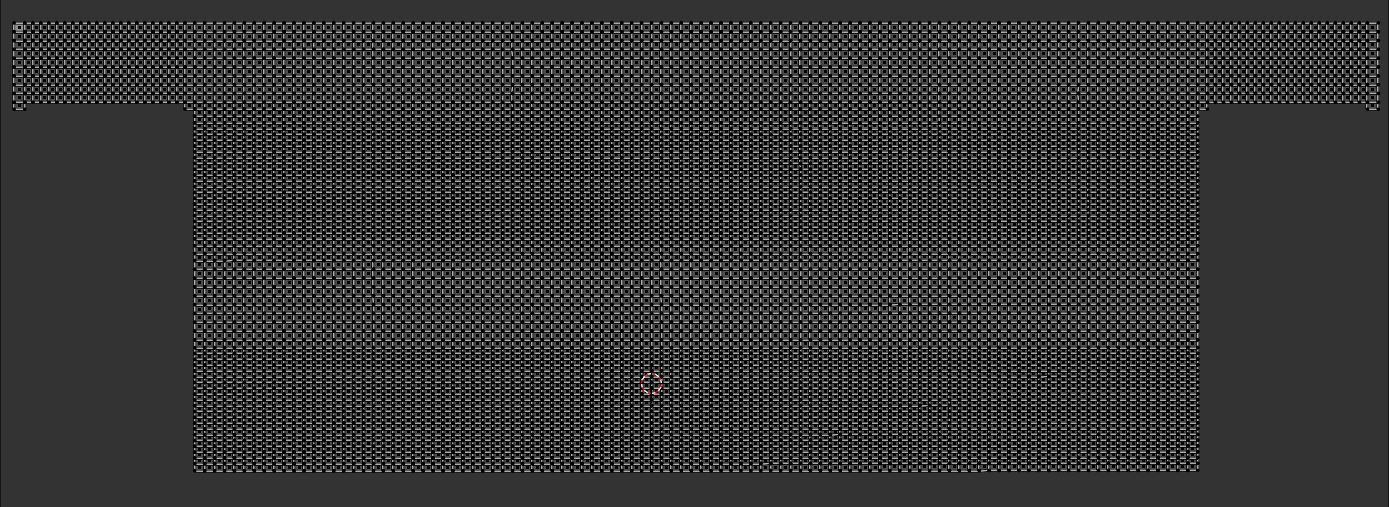
Then, you can decide which parts of the model have the displacement by creating a vertex group and assigning parts of that model to the group in edit mode. Here shown with my own brick texture as an example.
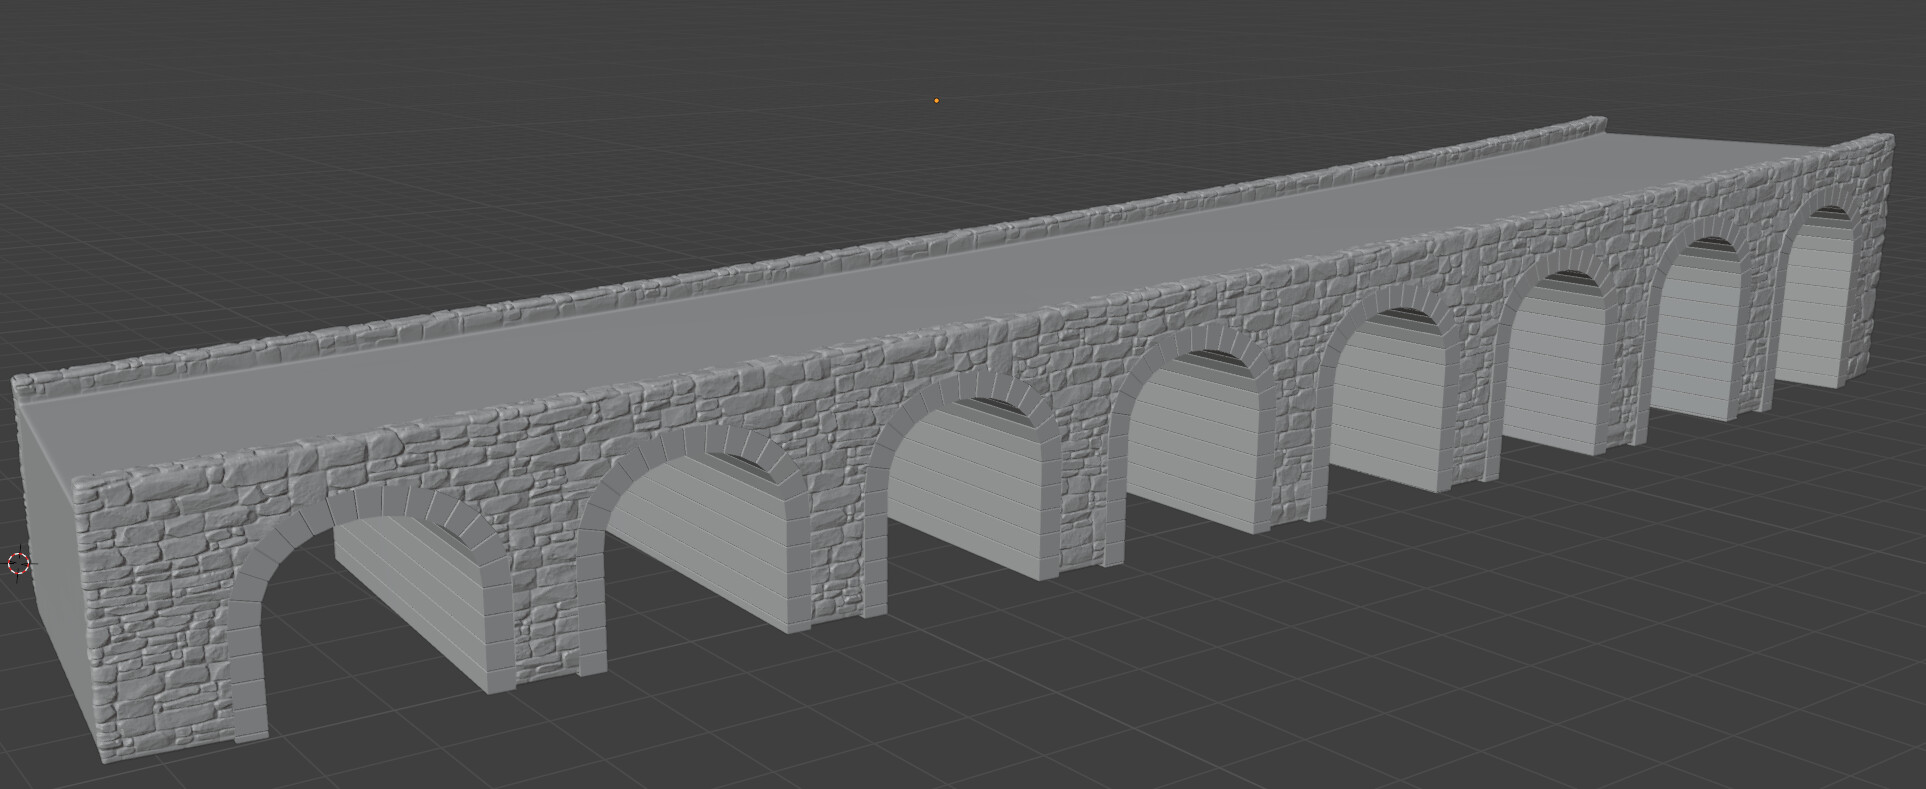
Applogies for the long delay in thanking you for your help! I couldn’t have got this done without your help (and this forum in general!). I’m really pleased with how the bridge I’ve been working on has turned out - now to 3D print it for the train set
It would be quite helpful if you could now take the time to construct a bit of a tutorial on exactly how you constructed this bridge – especially as “suitable for 3D printing.” (Let us know also how the printing worked out!) The tutorial could of course be “video,” if you’re feelin’ like a movie star. But it could also just be text with illustrations.