I’ve beem experimenting over the past few months about ways to righ a belt mesh in a way that you can strech it amd pinch it without the need of curve modifiers or cloth simulations, so i came up with this
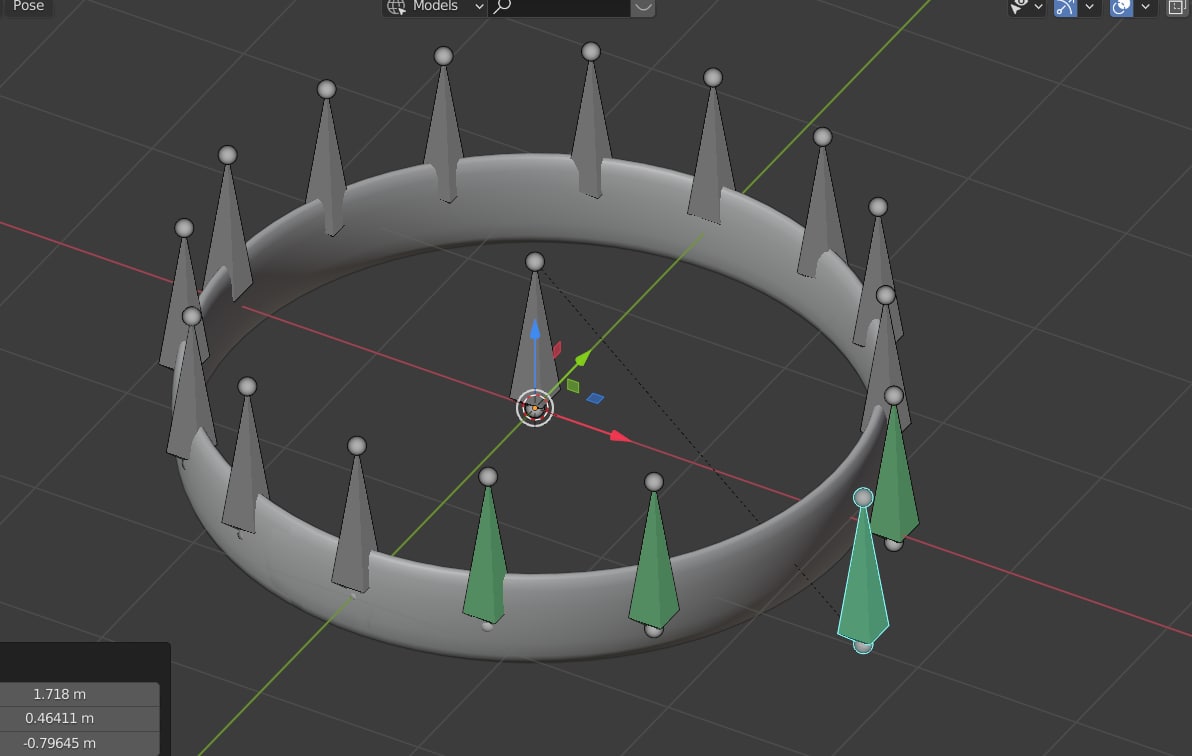
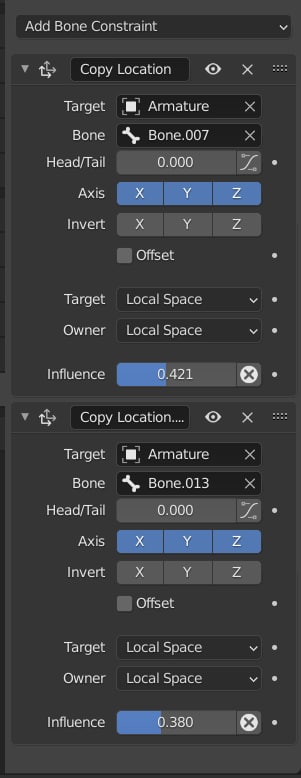
Basically what’s going on here is that i made a ring of independent bones all around the belt zone, each of them are totally freedom of movement except for the parent bone in the center, this bones would move different zones of the belt each time the characters pulls from it, the thing is, how do i make it look elastic? Like, how do i make the bones around the Active selectes bone follow it? What i came up with was this, i used two constraints for each bone, one making it follow the position of the bone at the right and the other making it follow the one on his left,
I believe this is a case in which “Child Of” Bone Constraint can be useful.
https://docs.blender.org/manual/en/latest/animation/constraints/relationship/child_of.html
By making Child Of, a single Bone (like each of the outer ring of the belt) can behave as if it was being affected by ‘multiple Parents’ (supposedly multiple Bones); more than that, it has Influence value, and finally, it should substitute the need of Copy Location and Copy Rotation.
This whole notion of providing a Bone with arbitrary and immediate ‘multiple Parents’ on different levels of Influence is actually incredible. It’s like Weight Paint but not applied directly to the Object’s Mesh but to the Armature’s Bones themselves.
Now, I’ve never used that Bone Constraint before; but I’m starting to make a plan to employ it on my Organic Rigging. From what I’ve learned theoretically, it’s seem incredibly useful and not that complicated; I guess it can solve your issue.
Yet another hypothetical solution: there is special method that makes a Bones follow a Vertex; it could be used so that the belt ring Bones “follow” (change Location according to) the transforming mesh of the waist region of the character. This would imply that each of ring Bones around the belt would have a Copy Location Bone Constraint to a single vertex’s Vertex Group (¡this is not to be confused with Weight Paint Vertex Group!), but 1 different Vertex Group of that kind for each of those ring Bones; note that those Vertex Groups would probably require to be from the mesh of your character’s body Object, and not from the belt itself which has probably Weight Paint already relating to those ring Bones (otherwise, this might create an infinite glitch loop between Bone / Weight Paint / Vertex Group which guides Bone; so better not use the mesh of the belt to direct the ring Bones, as the ring Bones with Weight Paint are the ones that direct the belt’s mesh, but the ring Bones can still be directed by the mesh of the body Object).
This method is a bit slow to setup, but it works; however, it will fail with Mirror Modifier on. So if you’re not willing to Apply your Mirror Modifier by the end of your project, you shouldn’t use this method.
This is just an example of what it would look like (the 2nd method); note that I’m moving the mesh, not the Bones (the Bones just follow).
1 Like