So I have been struggling with this for a while now, and it’s gotten to the stage where I’m just frustrated. I would really, really appreciate any help.
What the below shows is this:
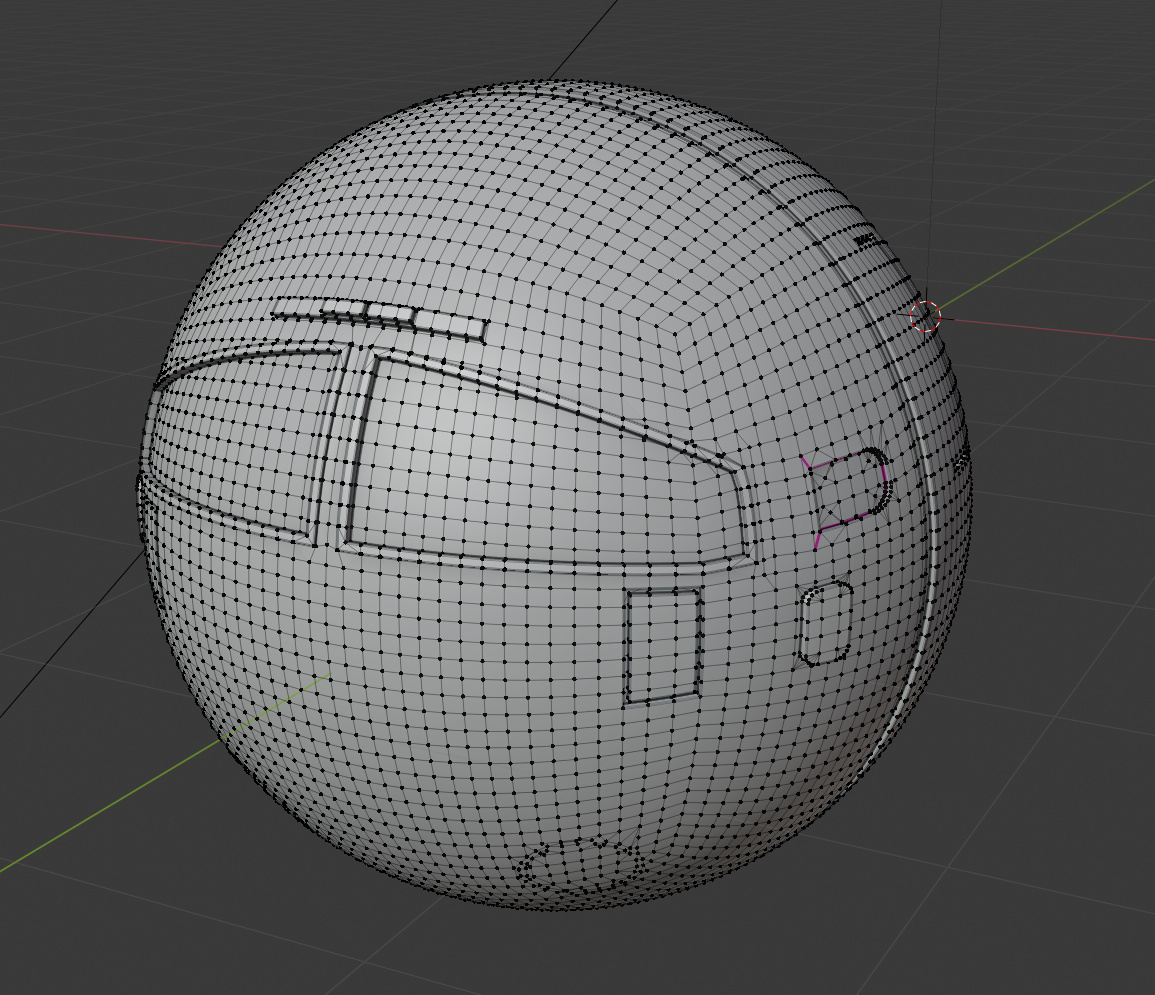
I made the mesh (see below).
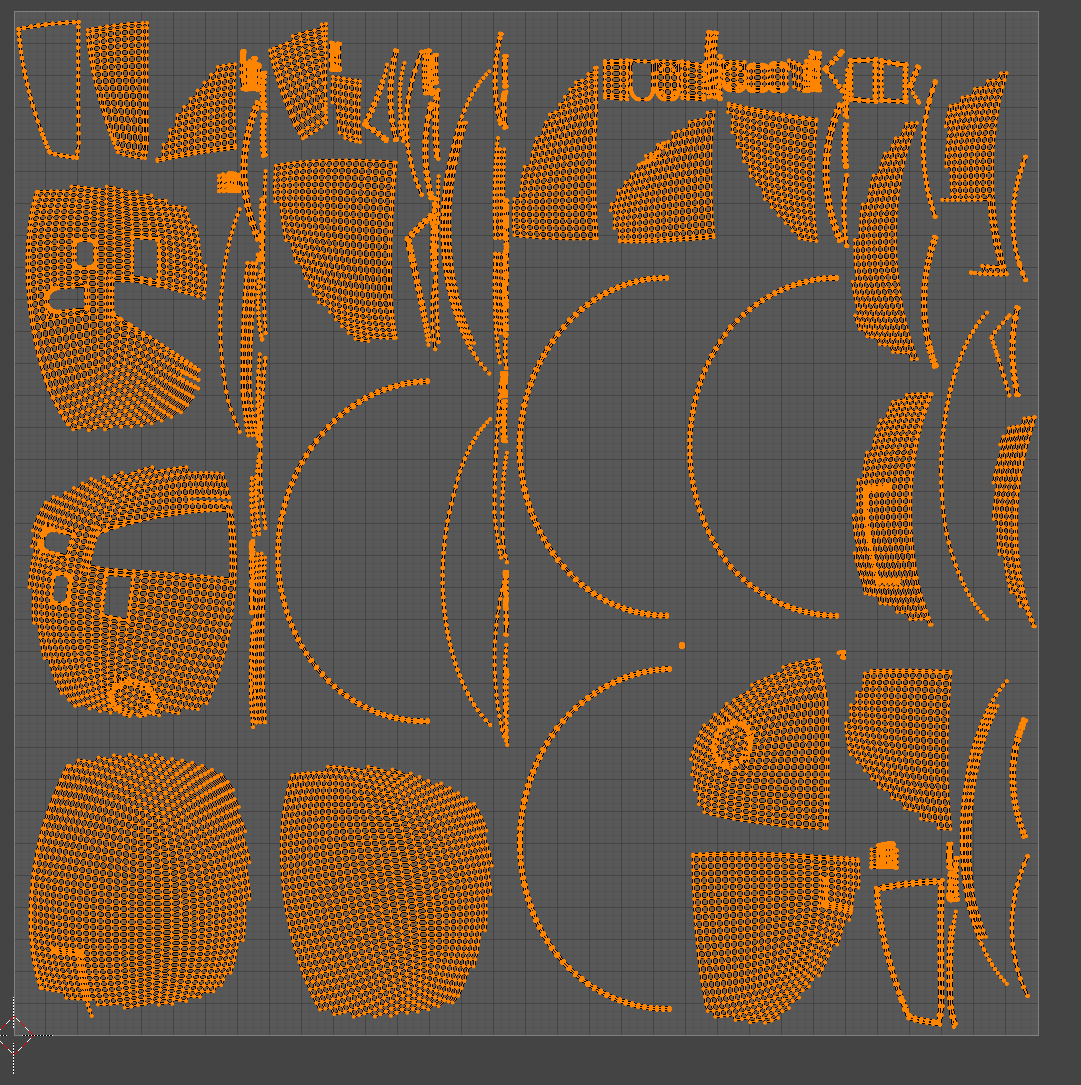
I created a UV map.
I used TexTools to bake a 4k normal map. Save it to file.
I save the FBX of the mesh to file.
I open up Mixer, and open the mesh.
I load in the normal map.
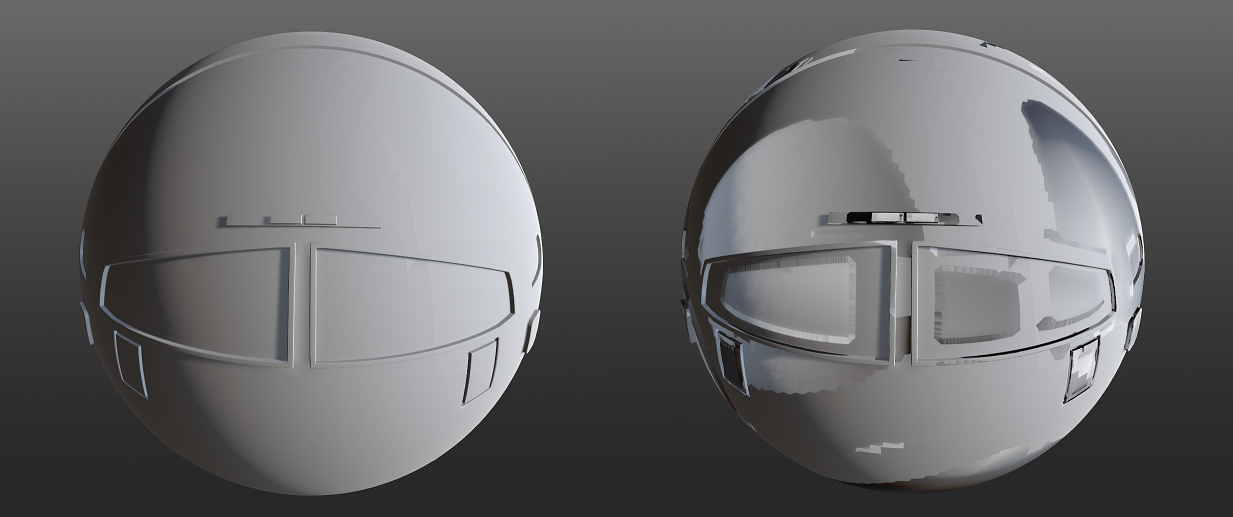
Below is a side by side of a before and after of when I load in the normal map.
As you can see, the normal map is borked. I’ve tried this in multiple ways, using different variations of UB unwraps and normal maps. Always ends up like this.
SP is little different. However if I just import the FBX and let Surface Painter do it’s own normal maps, it seems to end up working ok. Though the mesh still has a few small artifacts. Which I’m not sure why. This is probably about as clean as I can make a mesh like this, I honestly have no clue what I could have done.
I’d appreciate any help. Tutorials aren’t a whole lot of use, as they generally provide a ready-made shape that they produce, and I need to learn how to make complex shapes work in texturing.
Have you checked in case any of your normals are flipped? What is the purpose of baking the normal map in Blender before heading to Substance Painter or Mixer? If you examine the normal map that SP will generate while setting a project up you will see that it contains no information (It doesn’t have to. You have the geometry). Feeding it a normal map at the start or allowing it to bake a useful one would only serve a purpose if you were transferring normal information from a high poly mesh to a low poly mesh. In most cases the only normal map you need to worry about will be the one you export from SP after creating your texturing.
If you only have the mesh shown there’s no need to do any baking in Blender. Open the FBX. Bake the mesh maps. Start creating your material. Things looking funky in SP is almost always down to flipped normals in my experience.
Huh, you have a point, I’m not sure why I was trying to export a normal map in this case… it might have been out of habit as all the tutorials etc always do that step.
As far as flipped normals go, they all appear to be fine, I’ve already checked those. I recalculated anyway just to be sure.
Although when SP unwraps the mesh, it splits it into 4 separate UV maps, one for each ‘texture set’. Which is fine, but I’m not sure how I’d use those back in blender as they wont line up with the model. However I believe I can just export the SP mesh + UV’s as a new fbx and just work from that, so I don’t think it’s an issue.
Edit: Though using SP isnt really a solution, as I don’t want to have to rely on it, considering its a subscription service. I’m still trying to see if I can make Mixer ‘work’ for me. Though substance seems to be winning me over so far with it’s edge detection for effects too.
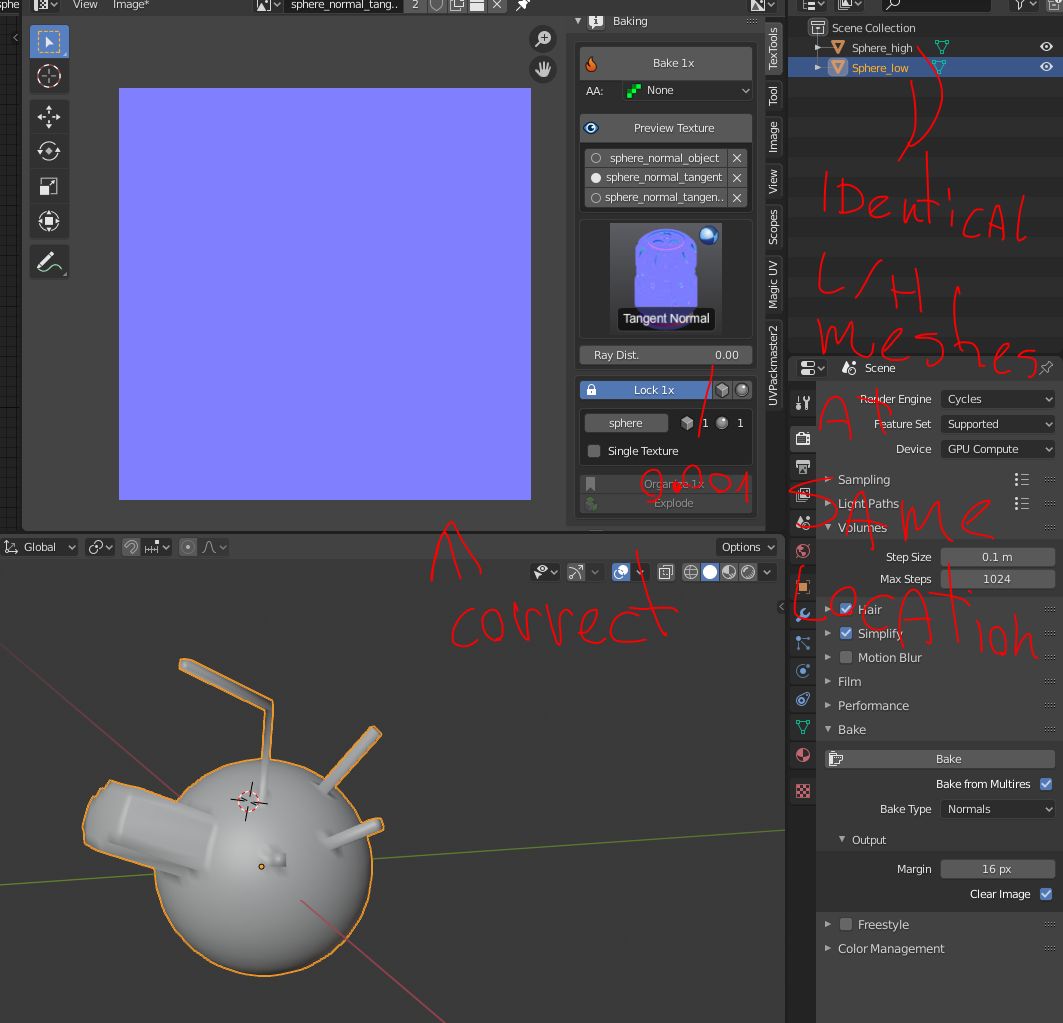
Can you show the normal map baked by blender? Just the flat image.
Edit: Since your overall goal is to just use mixer for texturing wouldn’t it makes sense to test it at least with a low poly object (sphere with no extra details would be fine)? High poly meshes can be suprisingly dirty if they look fine and you only looking to get normals and other baked data from them and your low poly mesh is clean.
The artifacts to me looked liked the bake cage / ray distance was intersecting with high poly geo. Since the cage is usually generated from low poly it doesn’t fit the high poly perfectly and can cause artifacts if not set up properly. No idea how it would behave if the cage was it itself. Technically it should be just 128, 128, 255 in RGB. There might be some setting where it’s possible to mess up the cage that’s a identical copy of itself, but in this case there’s no reason to fix it it, if it isn’t needed at all. Just use neutral normal map color if some program requires it.
That’s a pretty bad unwrap, but, that unwrap by itself doesn’t look like it would inherently cause quite that level of weirdness from your second image. 0451 might be onto something with the cage / ray distance idea.
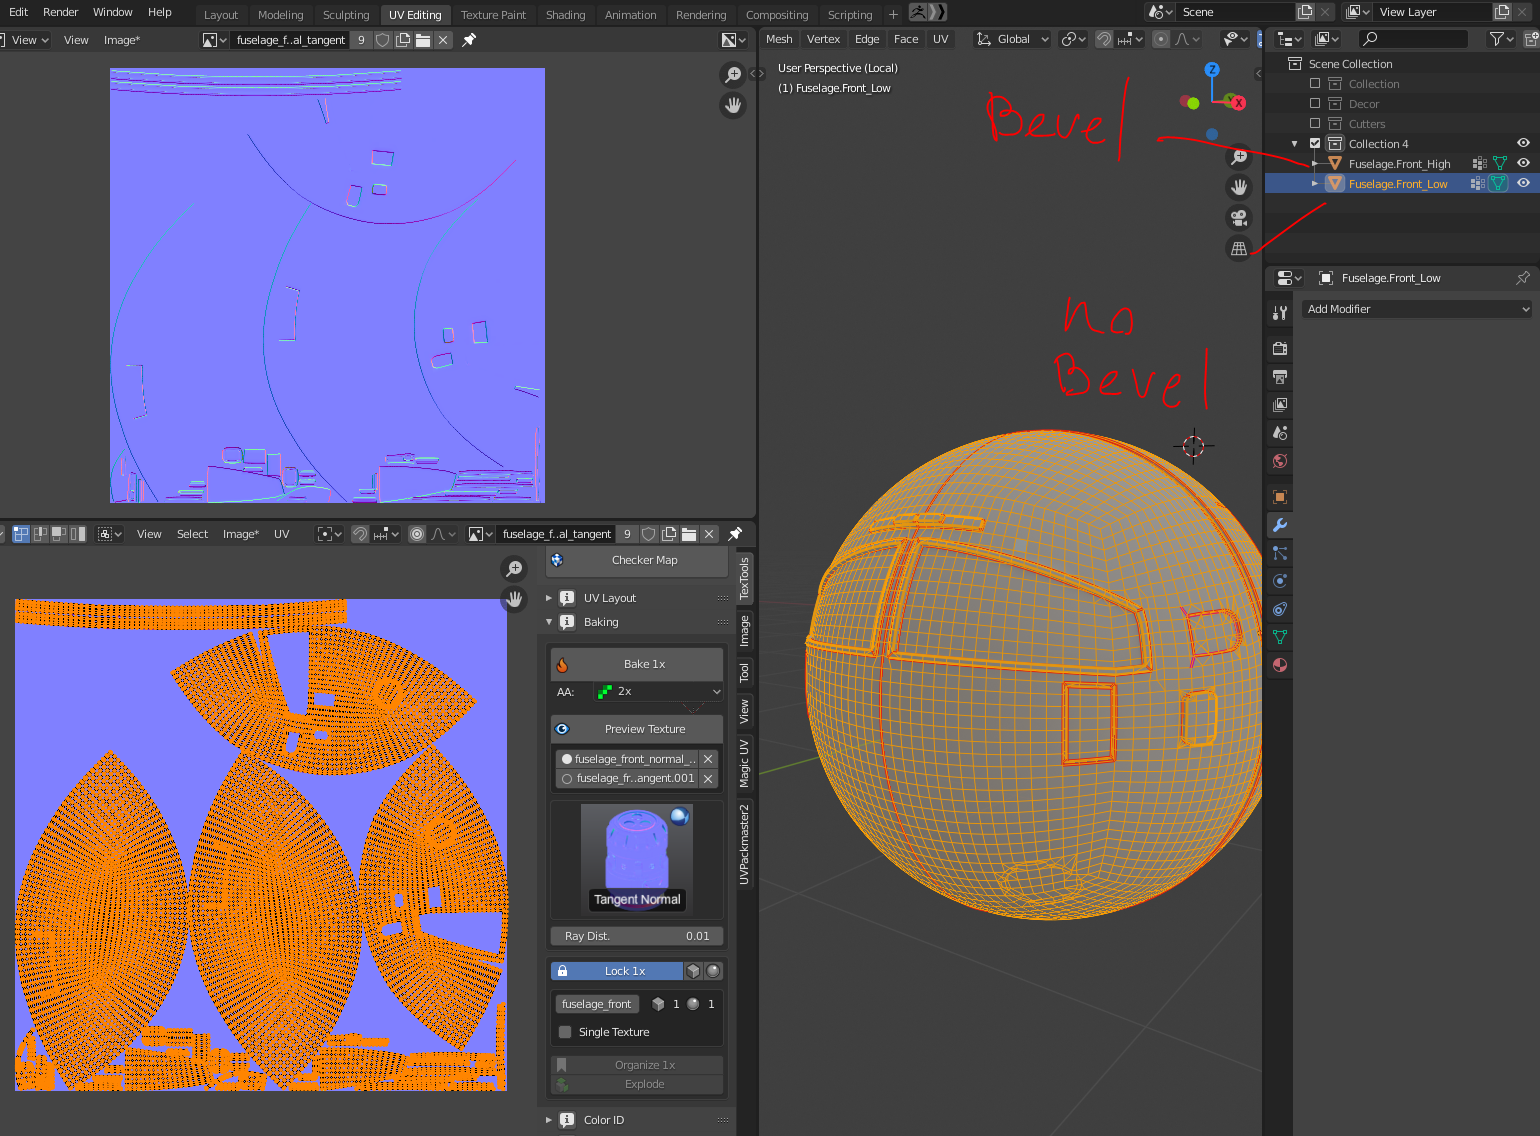
This is… this -is- a low-poly object. It’s barely more than a sphere, there’s a few little details on it and a couple bevelled edges, and that’s it. That’s not even close to what I would call high-poly. Im not sure how I could reduce the poly count for this object without giving it a bunch of obviously flat panels.
Textools should set low and high based on names by default. Is there anything in you scene that could throw it off? This is how it should look like. I don’t see how a bake could be that different with identical mesh without something being wrong in the baking set up. It’s hard to guess without seeing the settings and the whole scene set up.
Edit: Also the point with suggesting to use a low poly was to have a mesh that has actual differences, so that the resulting correctly baked map wouldn’t be blank. Doesn’t matter if it’s a low poly or creating a higher poly variant with subdiv or something similar.
I can send you the full blend if it would help, though it won’t be exactly how I had it set up for the bakes, as this was all testing and so I did things like accept modifications, bake maps, then reload my pre-mod save file.
For substance painter I did use the same mesh for both bakes, using the ‘use low poly as high poly’ option.
I have managed to get Mixer working more like it was expected, now that I’m not bothering with the normal map. Turns out I don’t even seem to need any maps for Mixer to work, other than the material ID map (if I want to auto-select regions for masking). I had thought I needed curvature / AO / etc in order for it to work correctly.
However I now need to do things like add panels / panel lines in the blender file, probably on a duplicated mesh so that I can bake those details onto the lower-poly original. And I’m concerned I’ll end up having the same issues again haha.
I’ll share anyway, as I would certainly appreciate any tips on improving my meshes and my workflow. This was a bit of a … test project, as it was my first that involved non-cuboid shapes. Hot tip - spheres are a pain in the ass to model features onto!
As you say, you wouldn’t describe this model as high-poly, so I’d forget the whole baking thing entirely. It’s not necessary.
If it were my model and I was wanting to texture it in Substance Painter I’d do the following.
I’d put my entire spaceship in a Collection.
I’d duplicate that Collection and hide the original.
I’d apply all mirror modifiers in the copied objects
I’d UV unwrap everything in Blender by adding appropriate seams
I’d unsure that there were no overlapping UVs. For something like this I’d be tempted just to have one UV map for everything. i.e. Once every object had been UV unwrapped I’d select them all, go into Edit mode, run Average Islands Scale and Pack Islands. I’d probably then use UV Packmaster to optimise the UV map. At the very least all the objects that share a common material should be packed into the same UV map.
With all of the objects selected I’d export an FBX with the Selected Objects option checked.
That’s pretty much it. Start a project in SP with that FBX. Under Texture Set Setting hit Bake Mesh Maps and allow it to do so for all materials.
Then you can get on to the fun stuff.
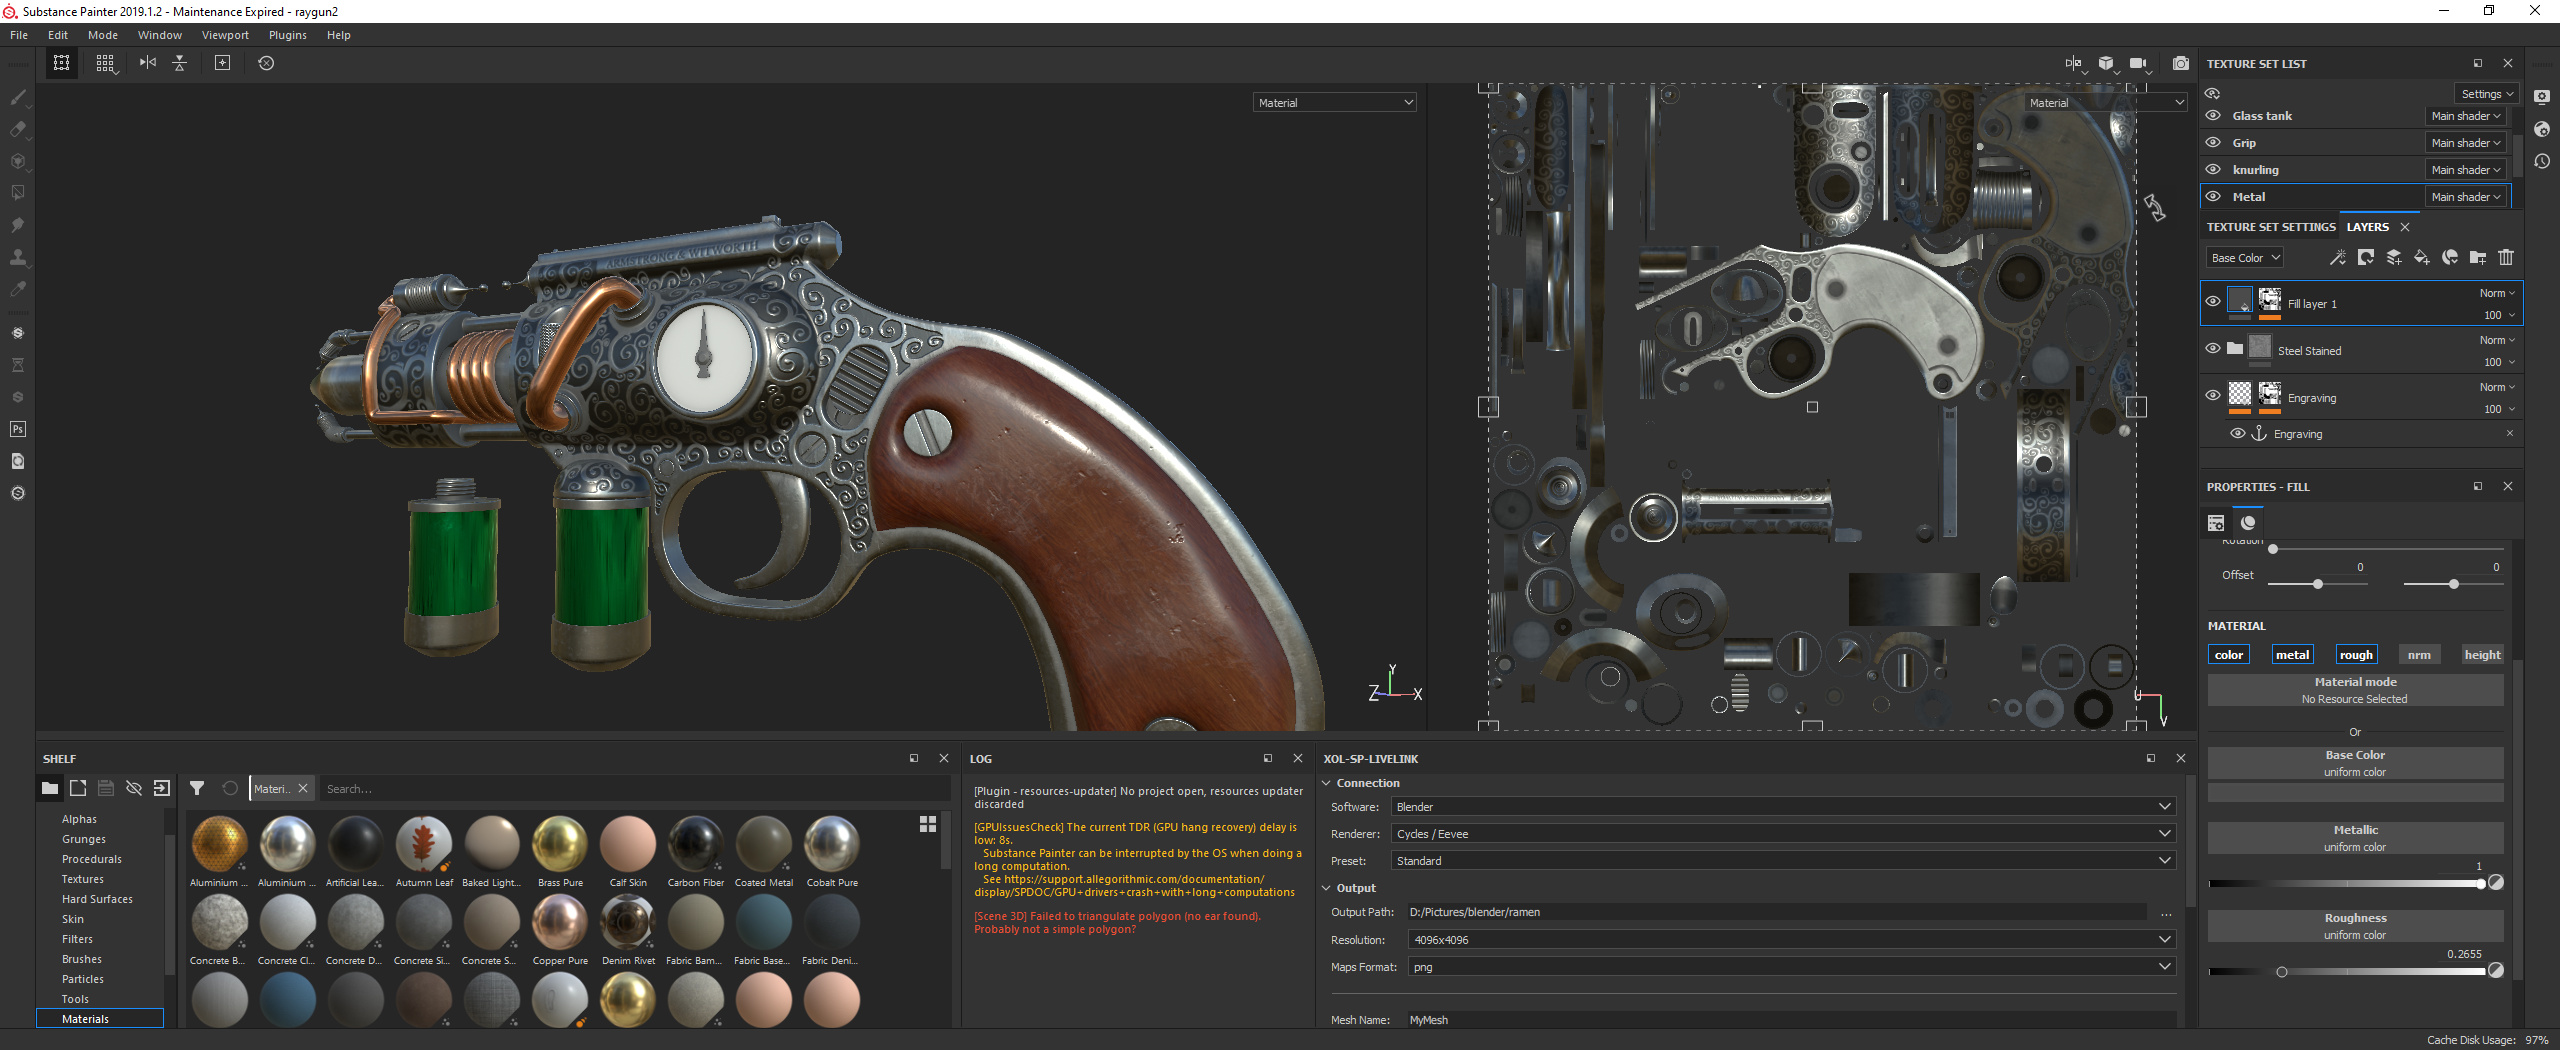
Here’s an example of one of my projects. It’s displaying the main metal material at the moment. The UV islands for things like the wooden grips are packed into some of the clear space you can see on the map. My version of SP requires all objects to be UV unwrapped to start with. Which is a good thing in my opinion.
If I was to redo the same project today I’d make some changes. I’d apply temporary materials in Blender with bright colours and generate an ID map from that. Then I’d apply a single material to everything. That way I could use the ID map in SP to mask things out and end up with only one diffuse map, one roughness map, etc., for everything. As opposed to one per material as I have att present.
@JohnMalcolm1970 That would be the correct way to do it with SP, but Quixel Mixer has no map baking functionality, altough it can generate curvature and other useful data for texturing in real time. I haven’t used it enough to say if it covers all the functionality you can get from baked maps.
@Nirurin The mesh itself is completly fine. There was something wrong with baking set up.
I’ve never had to. Most of the stuff I tend to texture is leaning towards hard surface rather than organic and I don’t work with high poly to low poly type baking stuff. The FBX I see as a temporary step in the process that can be dumped once I’ve generated my PBR image textures in SP. Those will be going straight back onto my quad-based Blender mesh in Blender.
I understand the reasoning behind why some people might do it, but unless I ever run into an issue I wouldn’t bother.
Even having only the ‘cockpit’ as a uv unwrap makes some areas very small, is it actually standard to have a single UV for an entire collection of objects? That would make each piece tiny… I guess at 4k you might still get some detail, but not very much surely? Or am I mistaking how it would end up working out?
Which seams did you add to get the unwrap like that? It looks like you’re using the same seams I did, but when I unwrapped it didnt look anything like that haha.
I did add that perhaps it might be better to have one UV unwrap per material. You have lots of objects which have the main body material applied for example.
Using one UV Map has its advantages and disadvantages. One advantage is that it’s easier to ensure the same texture density overall. In my raygun project above every part is at the same “resolution” in terms of texture. It wouldn’t make sense for my workfflow and intended use to have a couple of parts at a higher texel density. What I would do is take any parts that might be unseen/fully occluded (in my case maybe parts of the metal under the wooden grips) and shrink them down. I’d then have UV Packmaster maximise the UV mapping of everything else before shoving those smaller unimportant islands back into the map.
I just added seams to hard angles and seams at corners for rectangular shapes that would be empty inside to make them into a strip (that should be straigthened, which I didn’t do) or have the “edge” warped. And used UV packmaster to get a better layout. I don’t do much hardsurface so this isn’t a decent unwrap.
If you have baking set up correctly then it’s just adjusting ray distance / cage untill you get a clean bake. With this mesh if you want to use mixer you might be fine with not baking anything and relaying on the auto generated masks or in SP baking it from same mesh.
I took a closer look at mixer and you get following masks generated from mesh geo (and material data if you have baked them): curvature, position gradient and normal. It’s decent enough for hard surface, but you’re still missing AO and thickness compared to substance bake.
If you don’t want to do a highpoly to lowpoly bake then you could use decals and floaters to add smaller details.
Thanks for the feedback, it just seemed odd as like 95% of the ship is the same material, and it felt like it would end up really tiny in the UV map, even for a 4k texture. I’ll give it a go though! Youre right that it will mean there will be more consistency with the textures if I do them like that