Elemental: thanks, I hope to, and already done!
Ace Dragon: I see, yeah, smoothed that out a bit, thanks.
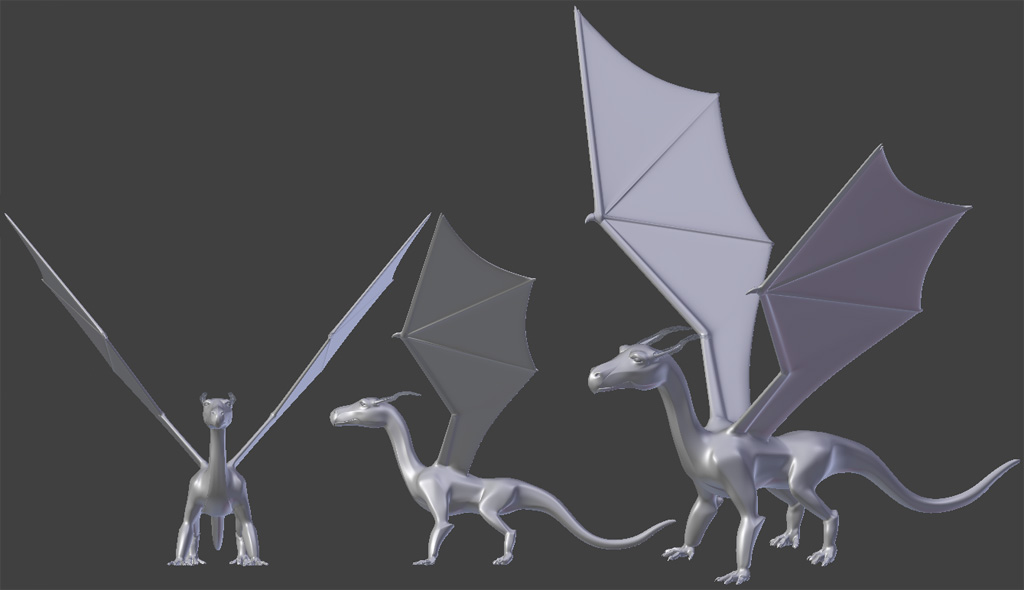
AC3 3592: yeah, made those larger, good call. thanks
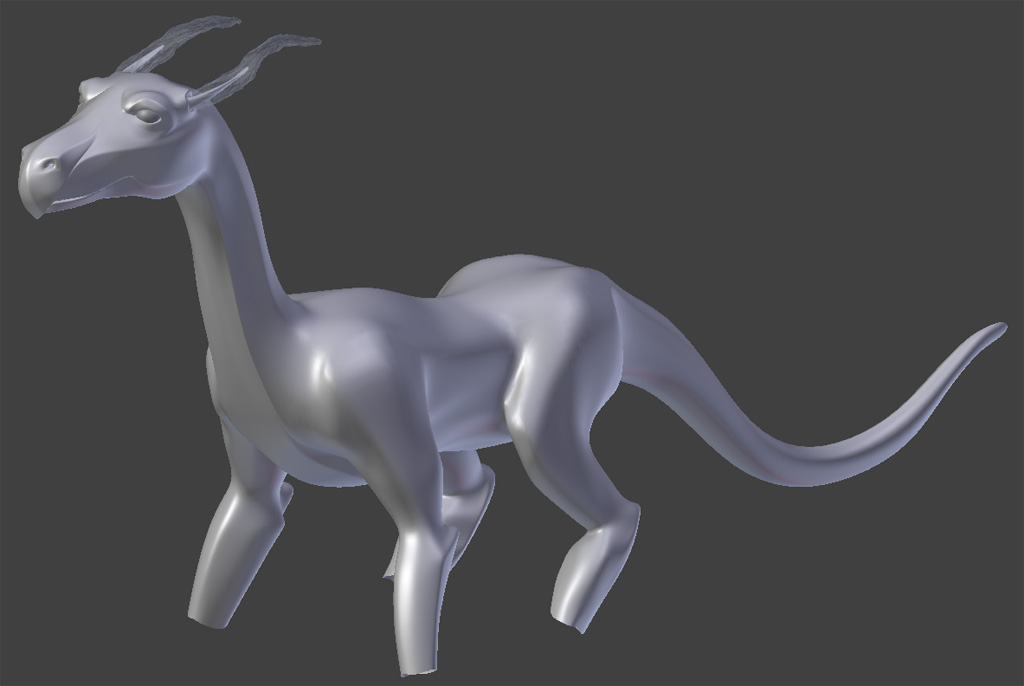
Goosey: Thanks for the depth on the critique, completely agree about the feet and I think I’ve fixed those problems. As for the body shape, the reason I changed it from the last version was mostly in consideration for the weight balance in flight. (as well as that my family thought it was just a horse body. :() I tried to keep a bit of the butt in there though. Most of the referance images I saw looked more like a pair of legs coming out the sides of a big tail, which is kinda what I wanted only with the butt… because she needs her sexy little butt… 
Again thanks for the replies everyone, contrary to what it may look like I haven’t dropped off on this project. Rather, I seem to have run into a little system hiccup, I’m trying to bake my high poly sculpt into a normal map, however every time I do so I run out of memory, and it hard locks* my machine.
I thought I’d fixed the problem when I tried to rip the high poly model apart and then render out the sections, thus breaking up the memory usage. No go, every-time I enter edit mesh on the high poly model blender crashes within a minute, ether just blender or a hard lock. Thinking it could be a file corruption I’ve done as much as I know how with importing into a new file but still the same problems. (That and it often links instead of appends, at least that’s what I think happens as it selects with a light blue and I can’t enter edit mesh at all. I still have no idea what I did differently to link instead of append those times.)
So my question is, is there a good way to split up a texture bake that I’m not thinking of? I’d rather not have to re-sculpt the model in smaller chunks. oh, and lowering the multi res a level really looses most all the detail I’ve sculpted, sense it’s all pretty small.
*I consider a hard lock the only way I can get out of it is to hold down the physical power button on the computer, which, as far as I am aware, is not a very good thing to do to any system.
Thanks for reading if you got this far! :o
~ATS
 My plan is to post an update after each session right now, so without further ado, here’s where she is after session #1.
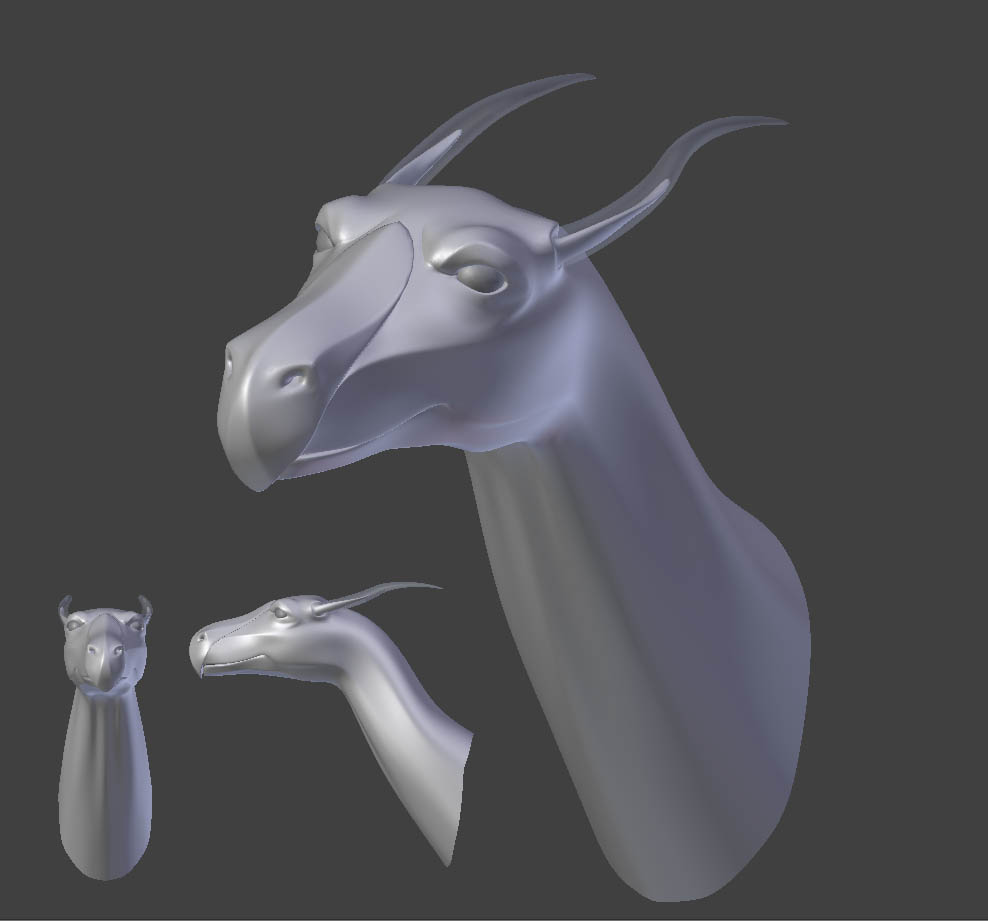


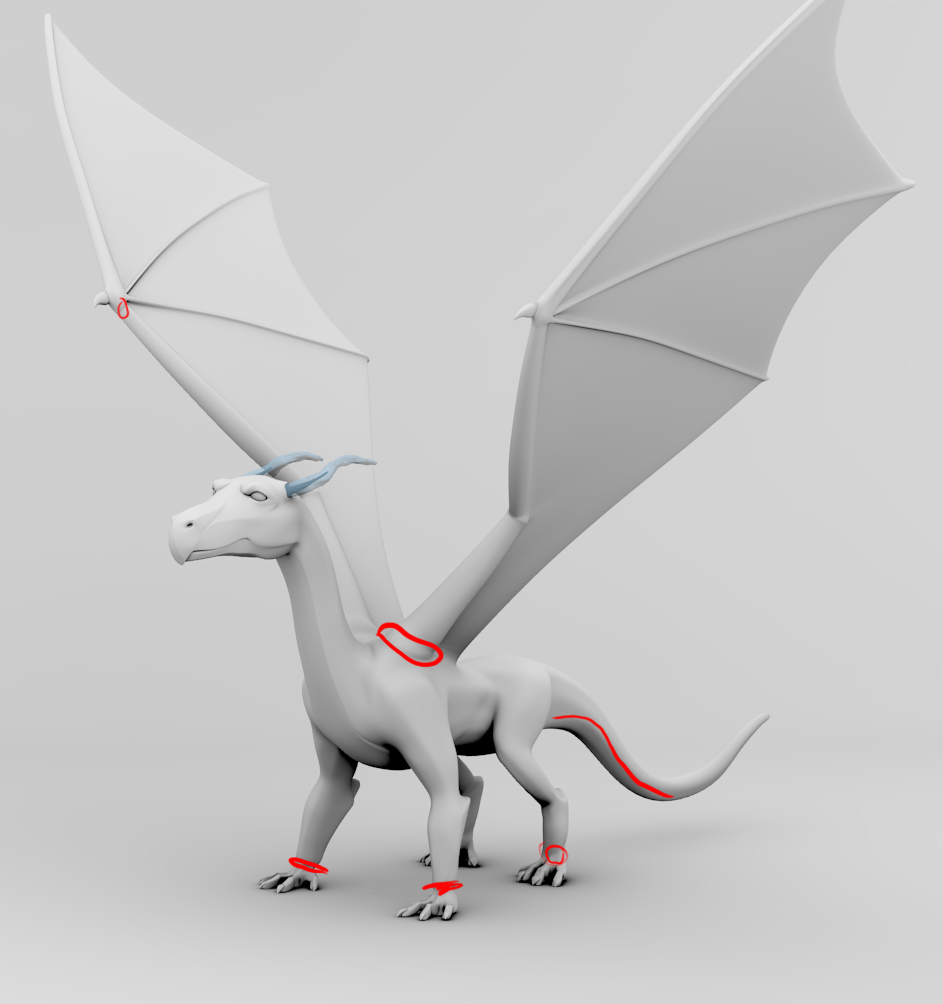
 i think there are a few areas you could improve on though… the ankle area seems very thick and there are some weird things going on on the spots i marked red here