A hand-painted portion of a model exhibits normals in the opposite direction that I would like them in, and I don’t know what I am doing wrong. This is also the only platform I am part of to ask. XD
Note: I have been using Painter for a week, all my knowledge of textures is from Photoshop and Blender.
I am trying to remake paint on the head of an M26 grenade (source on internet) but
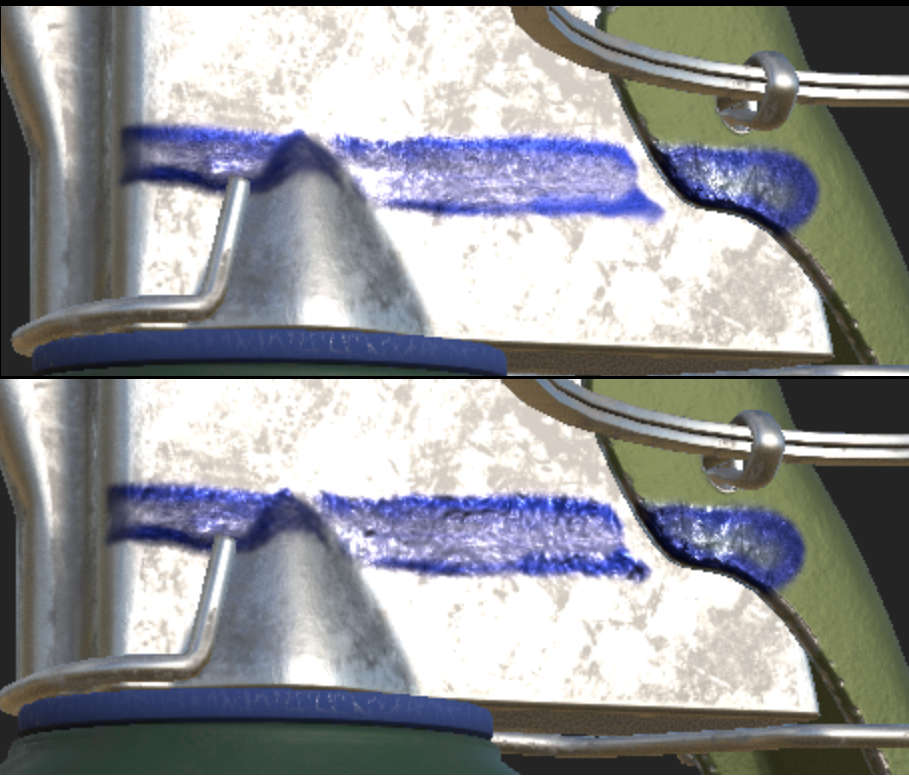
the painted area seems to be sunk in, as if it corroded the metal - to me it looks like cross section A below, while it should be like B. It is barely visible in Painter’s preview window, but becomes pronounced in Blender.
Should note I used a fill layer with an alpha mask so I can change its effects later.
I tried turning off the height influence on the layer in Painter, but it didn’t seem to make a difference in the preview window. I know I turned something off because the bump wasn’t limited to the paint alone, but would instead raise the metal around the paint’s edges and I don’t know how to fix that.
Disabling normals would solve this, but it just made it very flat and more like a marker than an oily paint.
Improvement to either point would solve this. I am happy how the paint looks, but it really bothers me that it looks indented. Anything that can be done?
I recall following a video that said the same thing so yeah, I think I set it to OpenGL - but I only set the colorspace parameter on the paint layer and nowhere else. Should I have changed the underlying layer’s parameter too?
Notice in the ‘Converted Maps’ list there is a ‘Normal OpenGL’ and how in the output maps the norm map has the same matching dark red square, as that is the one I’m using for normal map export, as a 16bit PNG file.
I agree with this answer. Literally had the same problem a few days ago. Was exporting using unreal preset. Use Blender bsdf preset to export our textures and should take care of it.
O and I am of course assuming you have the image node in Blender set to non-colour for the normal map (and most of the other maps, apart from the base colour one).
Yeah, set to noncolor and as far as I could tell my export window was identical to yours aside from channels that I don’t use.
I made a new preset and changed everything to be 16b (because i can) just now, but aside from that it was pretty much the same.
Gives me the impression that whatever it is, is in the material itself.
I’m adding the view from Painter with normals enabled/disabled, in case it sparks an idea - as I said it looks okay, but gets really pronounced in Blender, and whatever could giev that thickened edge will be considered a solution.
Which makes me wonder - do underlying materials react to new layers? Any chance that one of the lower layers is looking for “[thing]” and reacts by indenting?
Just like Photoshop, unless the layers are masked out, then each layer can have an impact on the other.
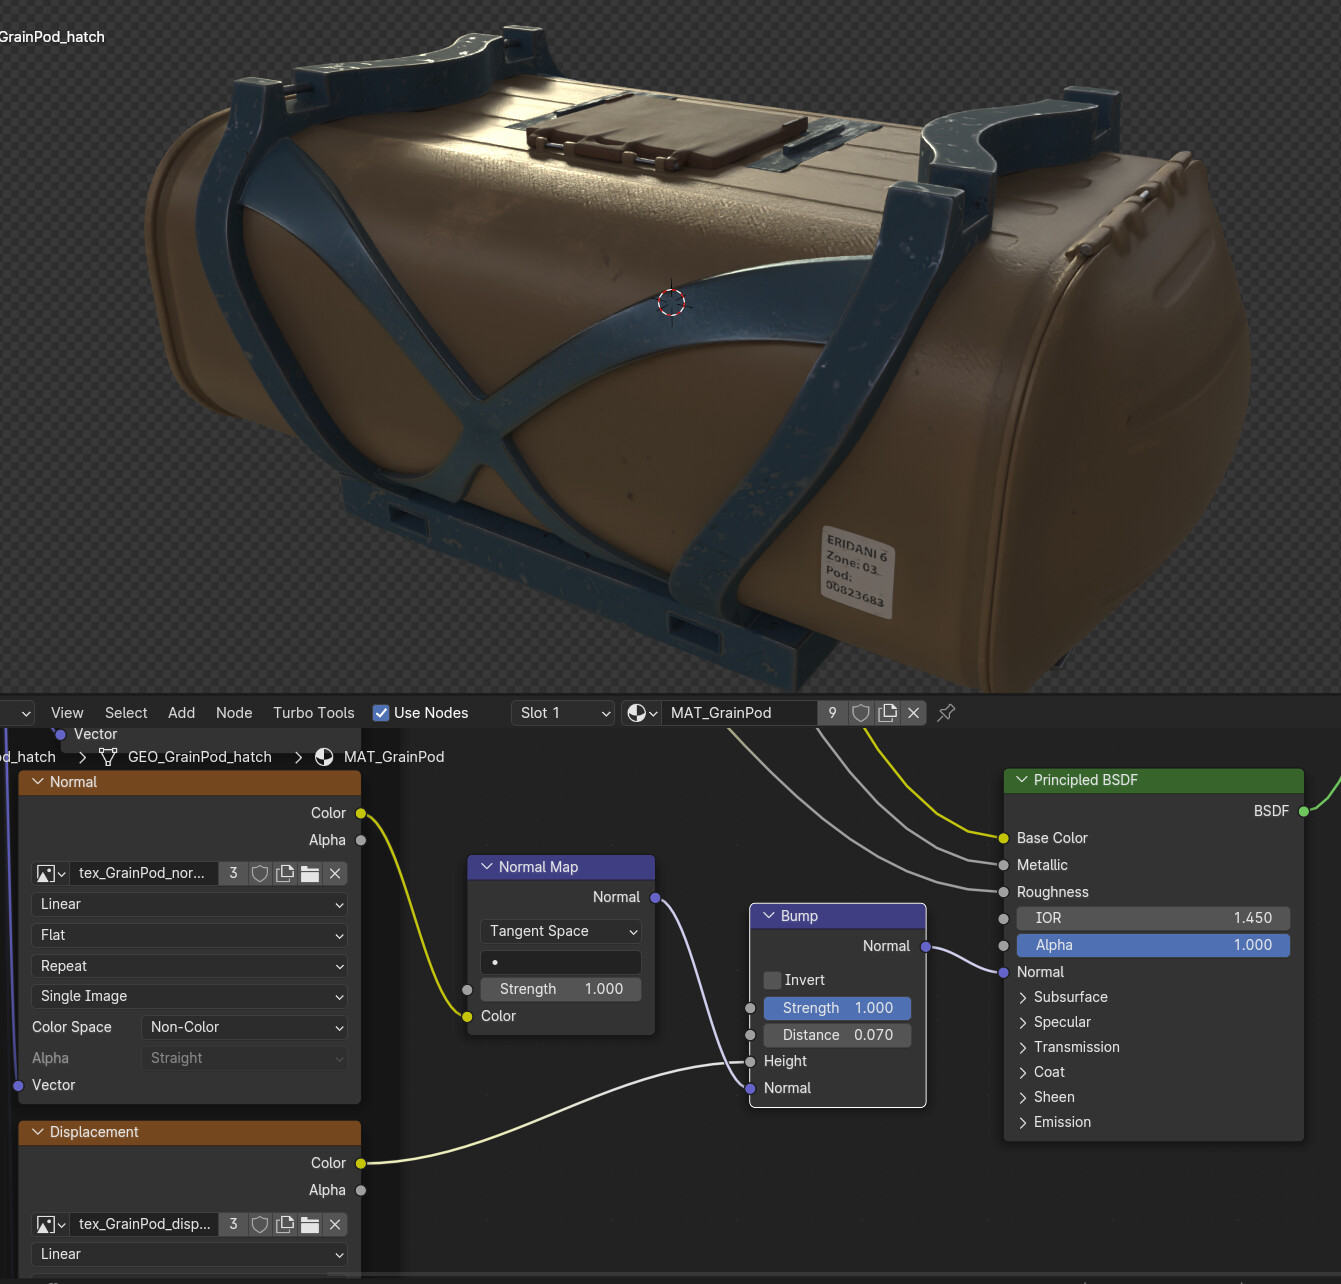
The other thing that comes to mind is the shader setup in Blender. I’ve noticed that things tend to not look right unless I use both a normal map and a displacement map (which is the height map from Painter). So my normal setup in Blender looks like this:
Previously I used Node Wrangler’s automatic setup for UDIMs. The interesting part is that when I tried yours out the area under the paint was unaffected (you know, when you set it up and distance is set to 1.0…). It seems as though there is no height map under it at all. It could just be an illustion.
I don’t know, I think I’ll focus on a few other things for now and revisit this at a later point. But thank you for your time and effort!