Hello people!
I have an issue where I am texturing an ice cream character in Substance Painter but when I export the texture to Blender, it stretches the neutral-happy looking mouth into a lil smirk! While the smirk is adorable too, I am struggling to figure out why this is happening.
Here are some pictures of what I mean:
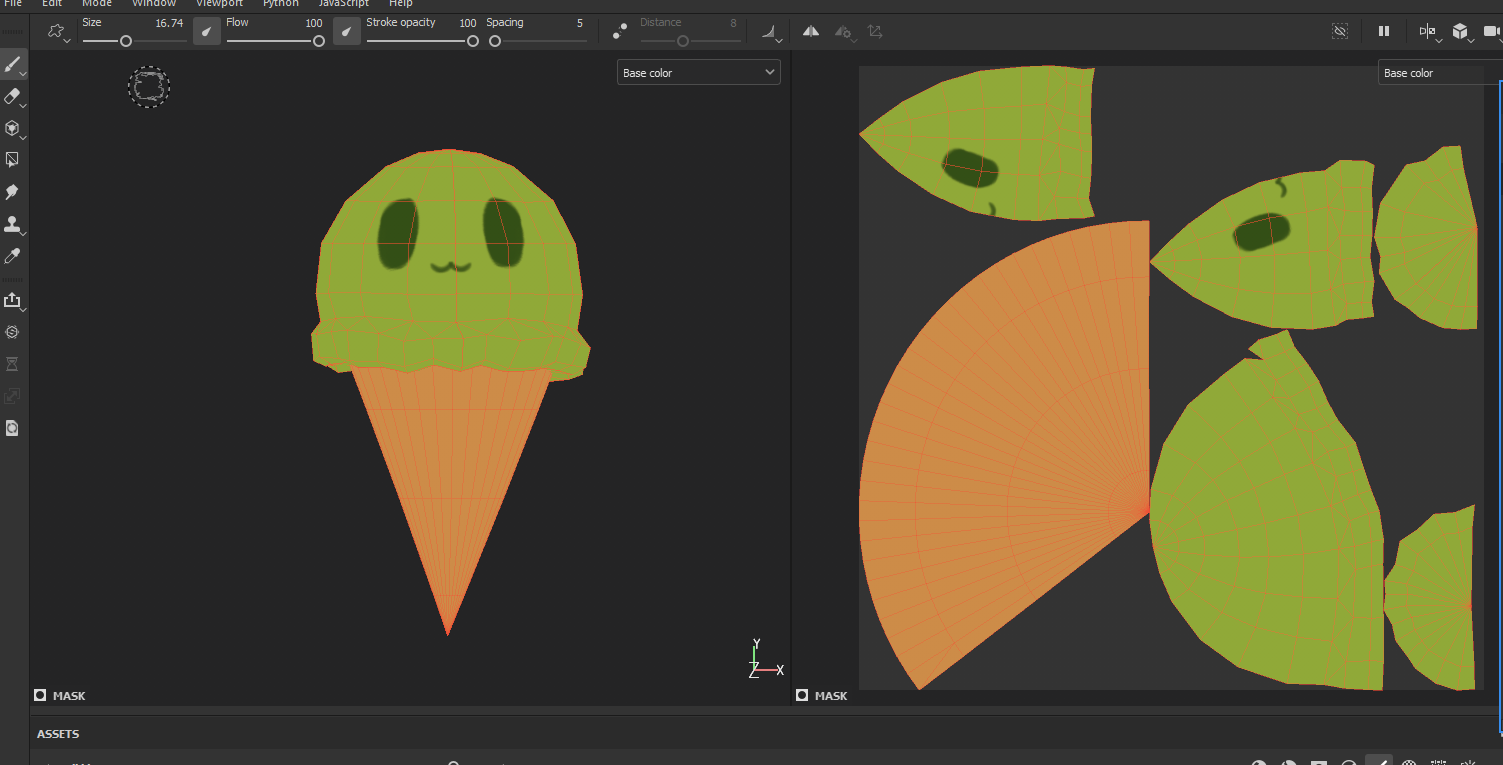
In Substance (looks normal)
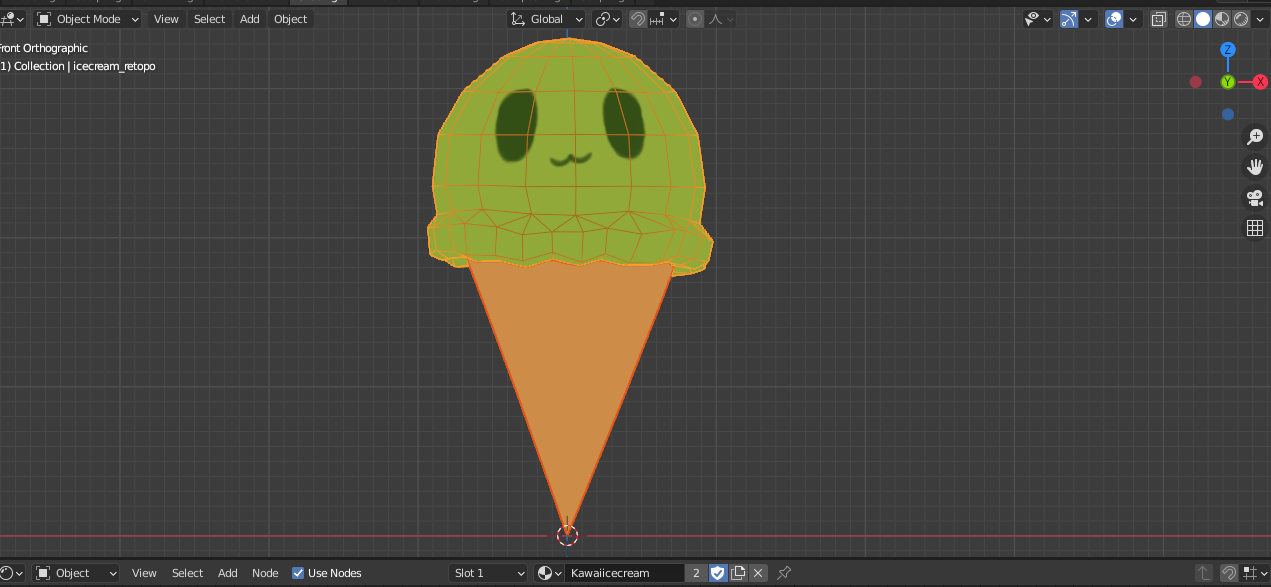
In Blender (slight stretching)
Some things I did/tried already:
- In Substance painter, unchecked “auto-unwrap” option when importing file
- Tried both OBJ and FBX files, both look normal in Substance and get stretched the same back in Blender with the painted texture
- Tried pinning the uv layout in Blender’s uv editor and exporting to Substance, still the same result
- Tried applying scale to the scoop object, then exporting (the scoop and cone are separate objects in Blender but exported together)
Maybe I’m missing something simple? What could it be?
[edit] Using Blender 2.92.0 and Adobe Substance 3D Painter 7.2.1 build 1120
First of i’d advise you to not cut the face in two parts. Doing this, you are splitting the UVs where the details are and you might be subject to artifacts being more visible in that zone.
And for you issue, i’m pretty sure this is due to triangulation being done differently in SP than in blender.
To keep consistant triangulation, add a trianglulate modifier to your objects 
Tell me if it works
1 Like
Ooh thanks and doh, yeah I caught the seam I meant to remove a few minutes ago in the middle of the face. I was redoing a few UV seams. For some reason I thought it was on the backside… lol.
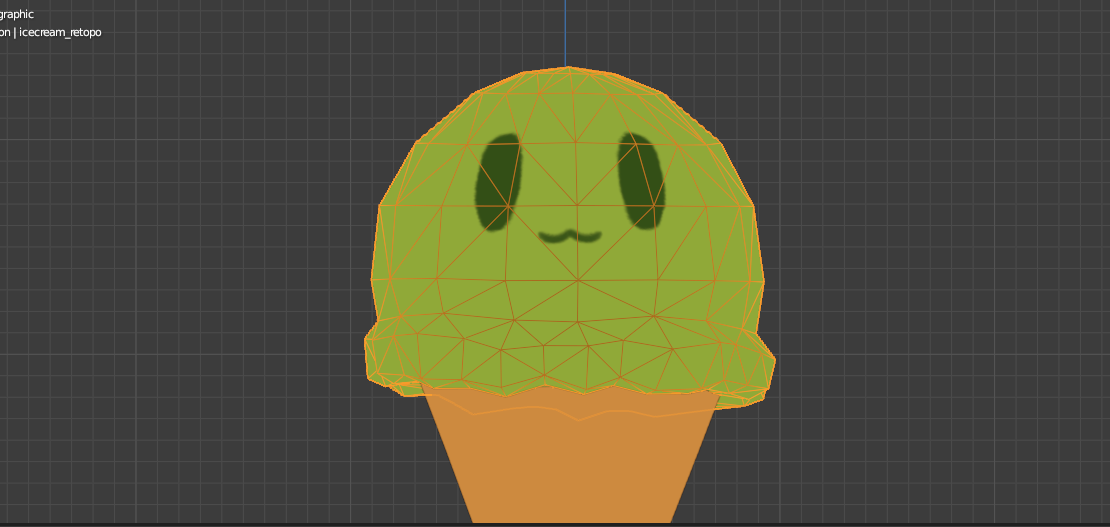
Oh I never knew that about Substance Painter and Blender! I wonder if that is similar to how the normals maps are different too. I tried your suggestion of the triangulate modifier and it looks much better!
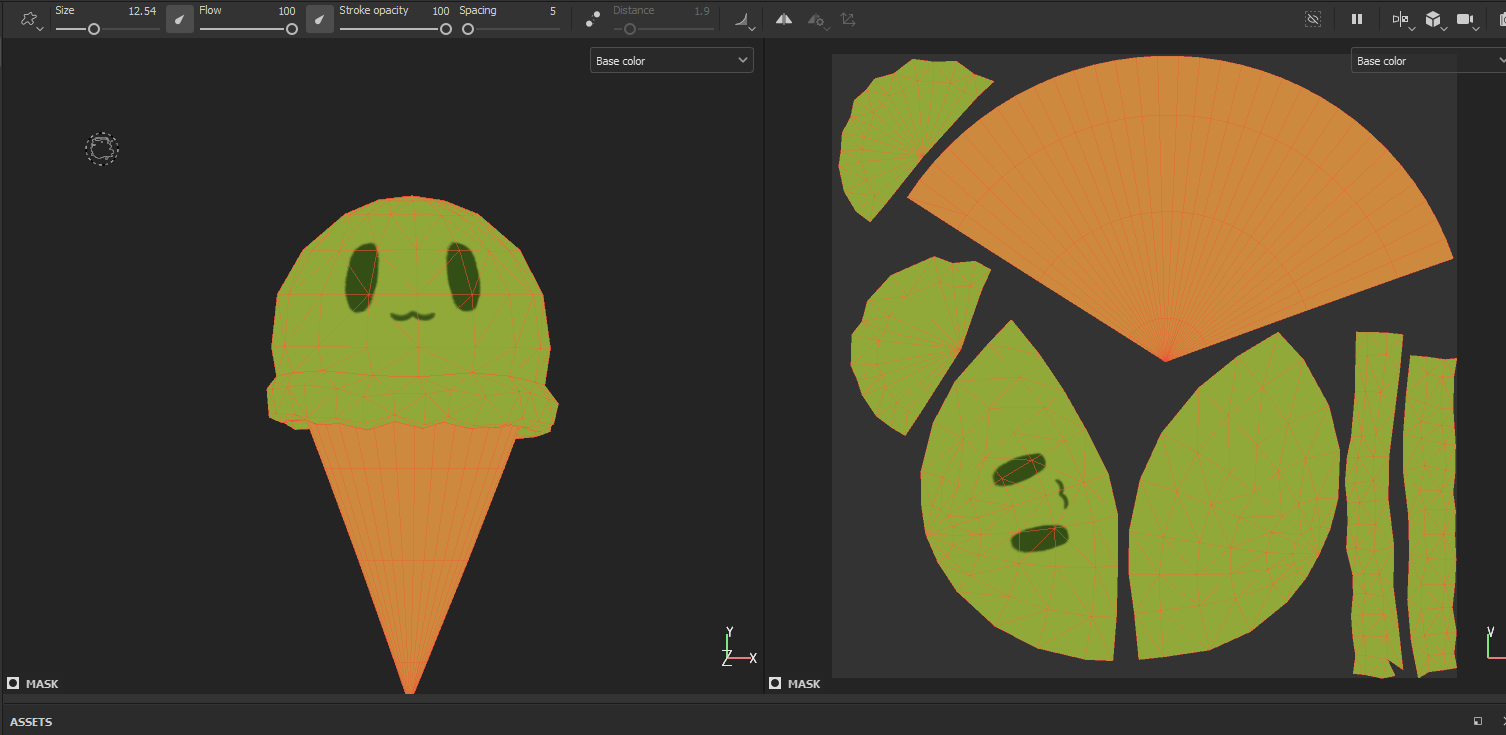
Substance
Blender
I’ve redrawn the basic face a few times so this is a slightly different one but it looks symmetrically unstretched!
Thanks a lot for the tips! I’ll have to do that in future projects too!
No problems
By the way you don’t have to apply the triangulate modifier (and others) before export. If the it is activated in the viewport render, it will be automatically applied on export. Some exporters requires to toggle the options though (for fbx as an exemple, in the export settings it’s under Geometry).
Concerning normal maps, a lot of things can affect them. The triangulation, the tangeant normal of the geometry, and the normal format (OpenGL vs DirectX). For blender you’ll want to use OpenGL, so when you set up your project in Painter, make sure the format is OpenGL, and you can also check the “Compute Tangeant Normal” option.
(Cute Icecream by the way ^^)
Oh yeah, I saw the option to apply modifiers and make sure that is checked before exporting. And yeah, I think I used to just use what Substance gave me for baked normal maps and use a node to make it OpenGL in Blender. But I should look into that project setting because it would probably be one less step later!
And thanks! I was doing all this hand painting on it, worrying about how it looked, then I ended up restarting like twice aha… but it be like that sometimes! The more I restart and do the same thing again, the more I get practice and learn so I don’t think it’s wasted time. This was meant to be a smaller test for another project anyways.
Appreciate all the tips!