Sunbeam Mixmaster kitchen mixer

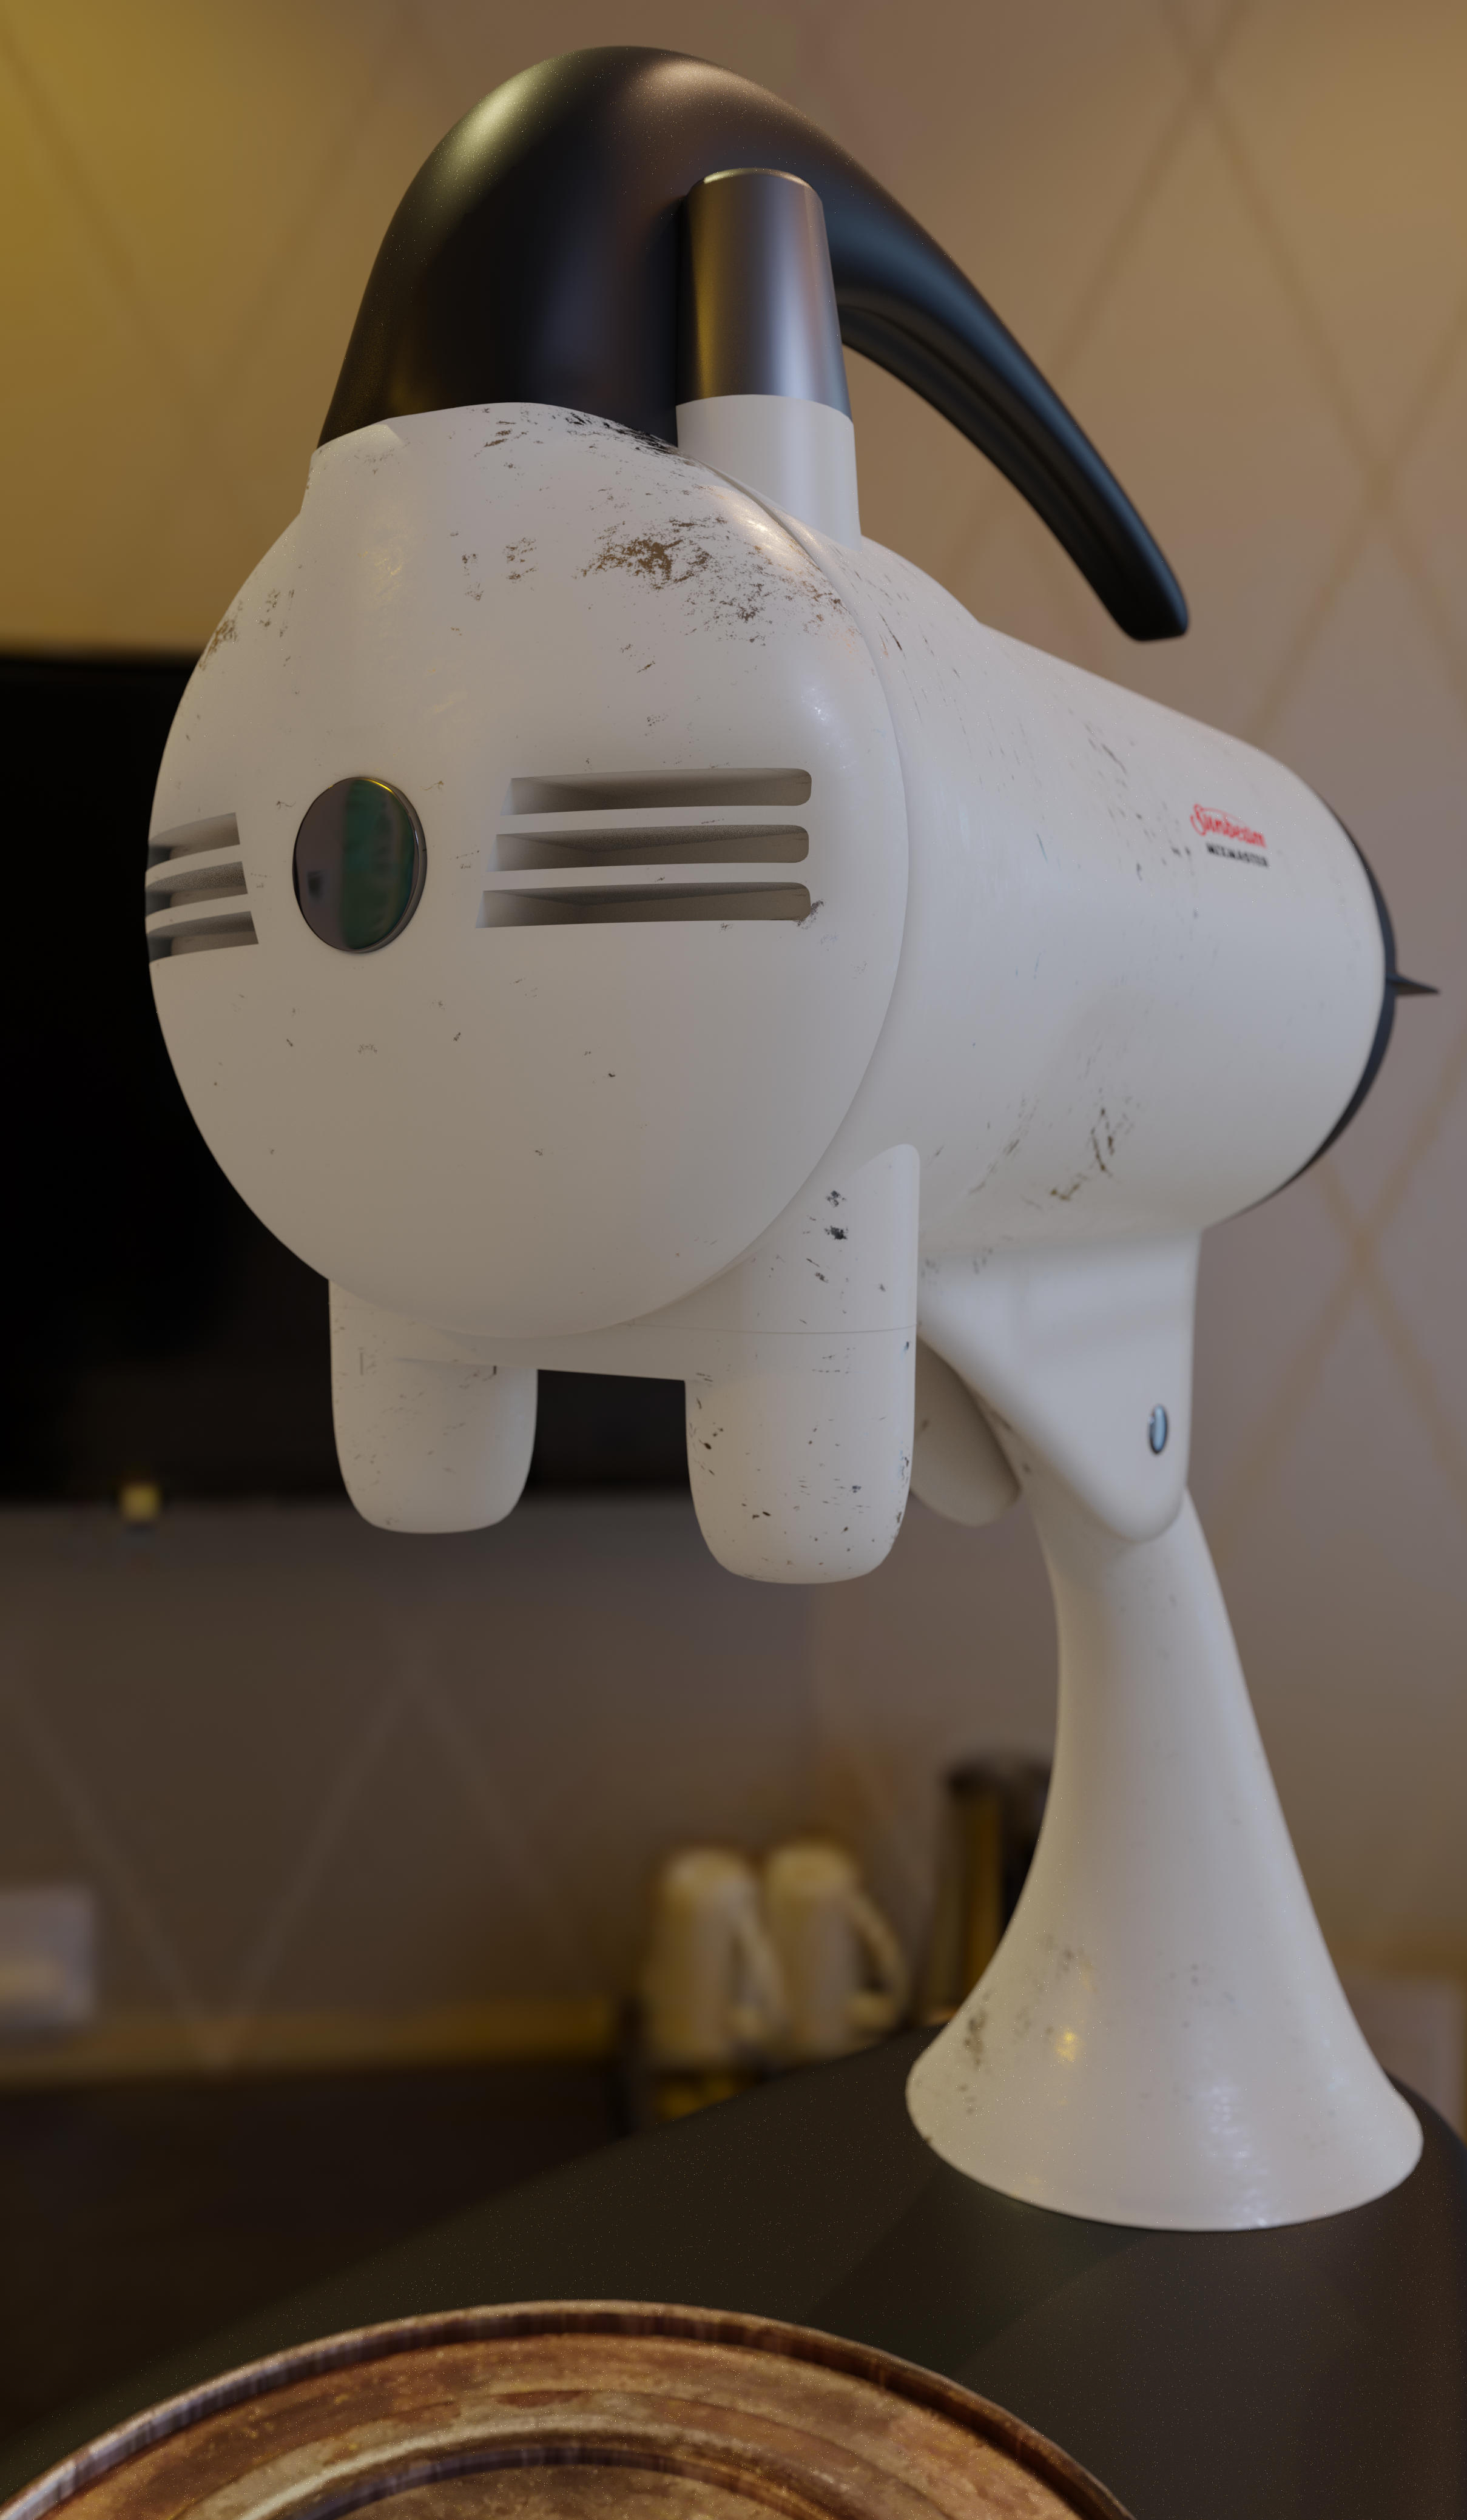
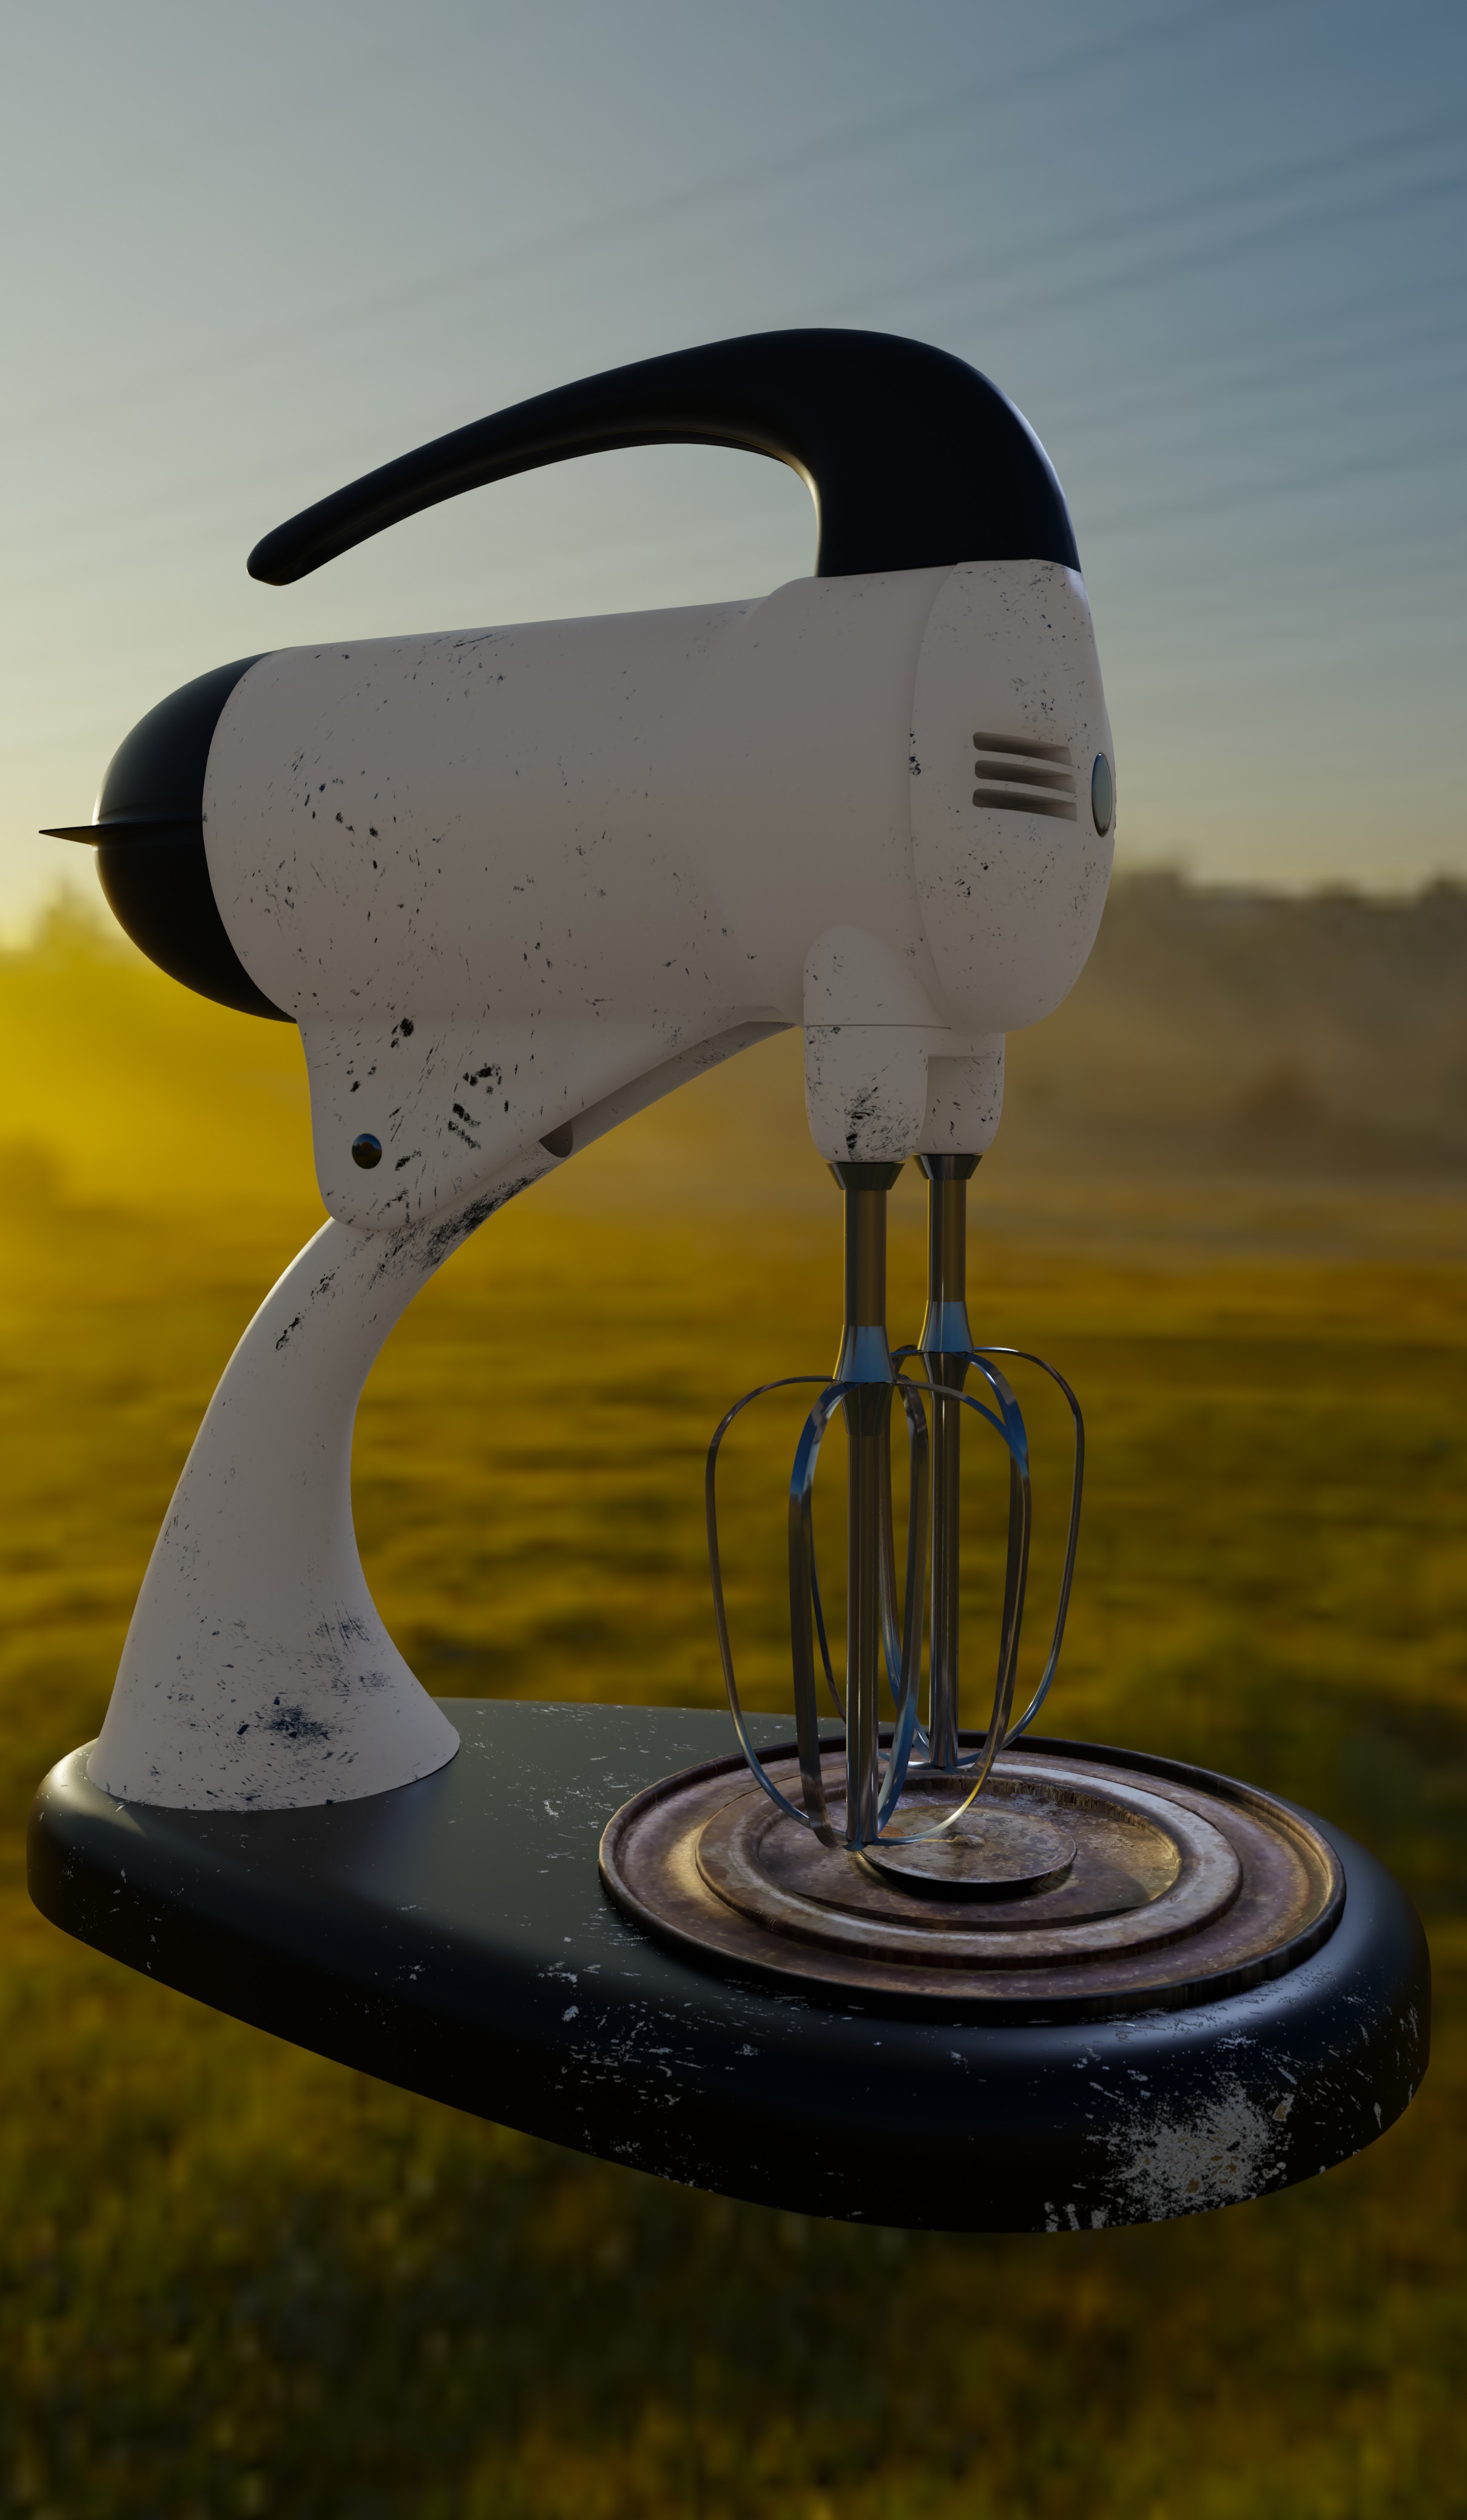
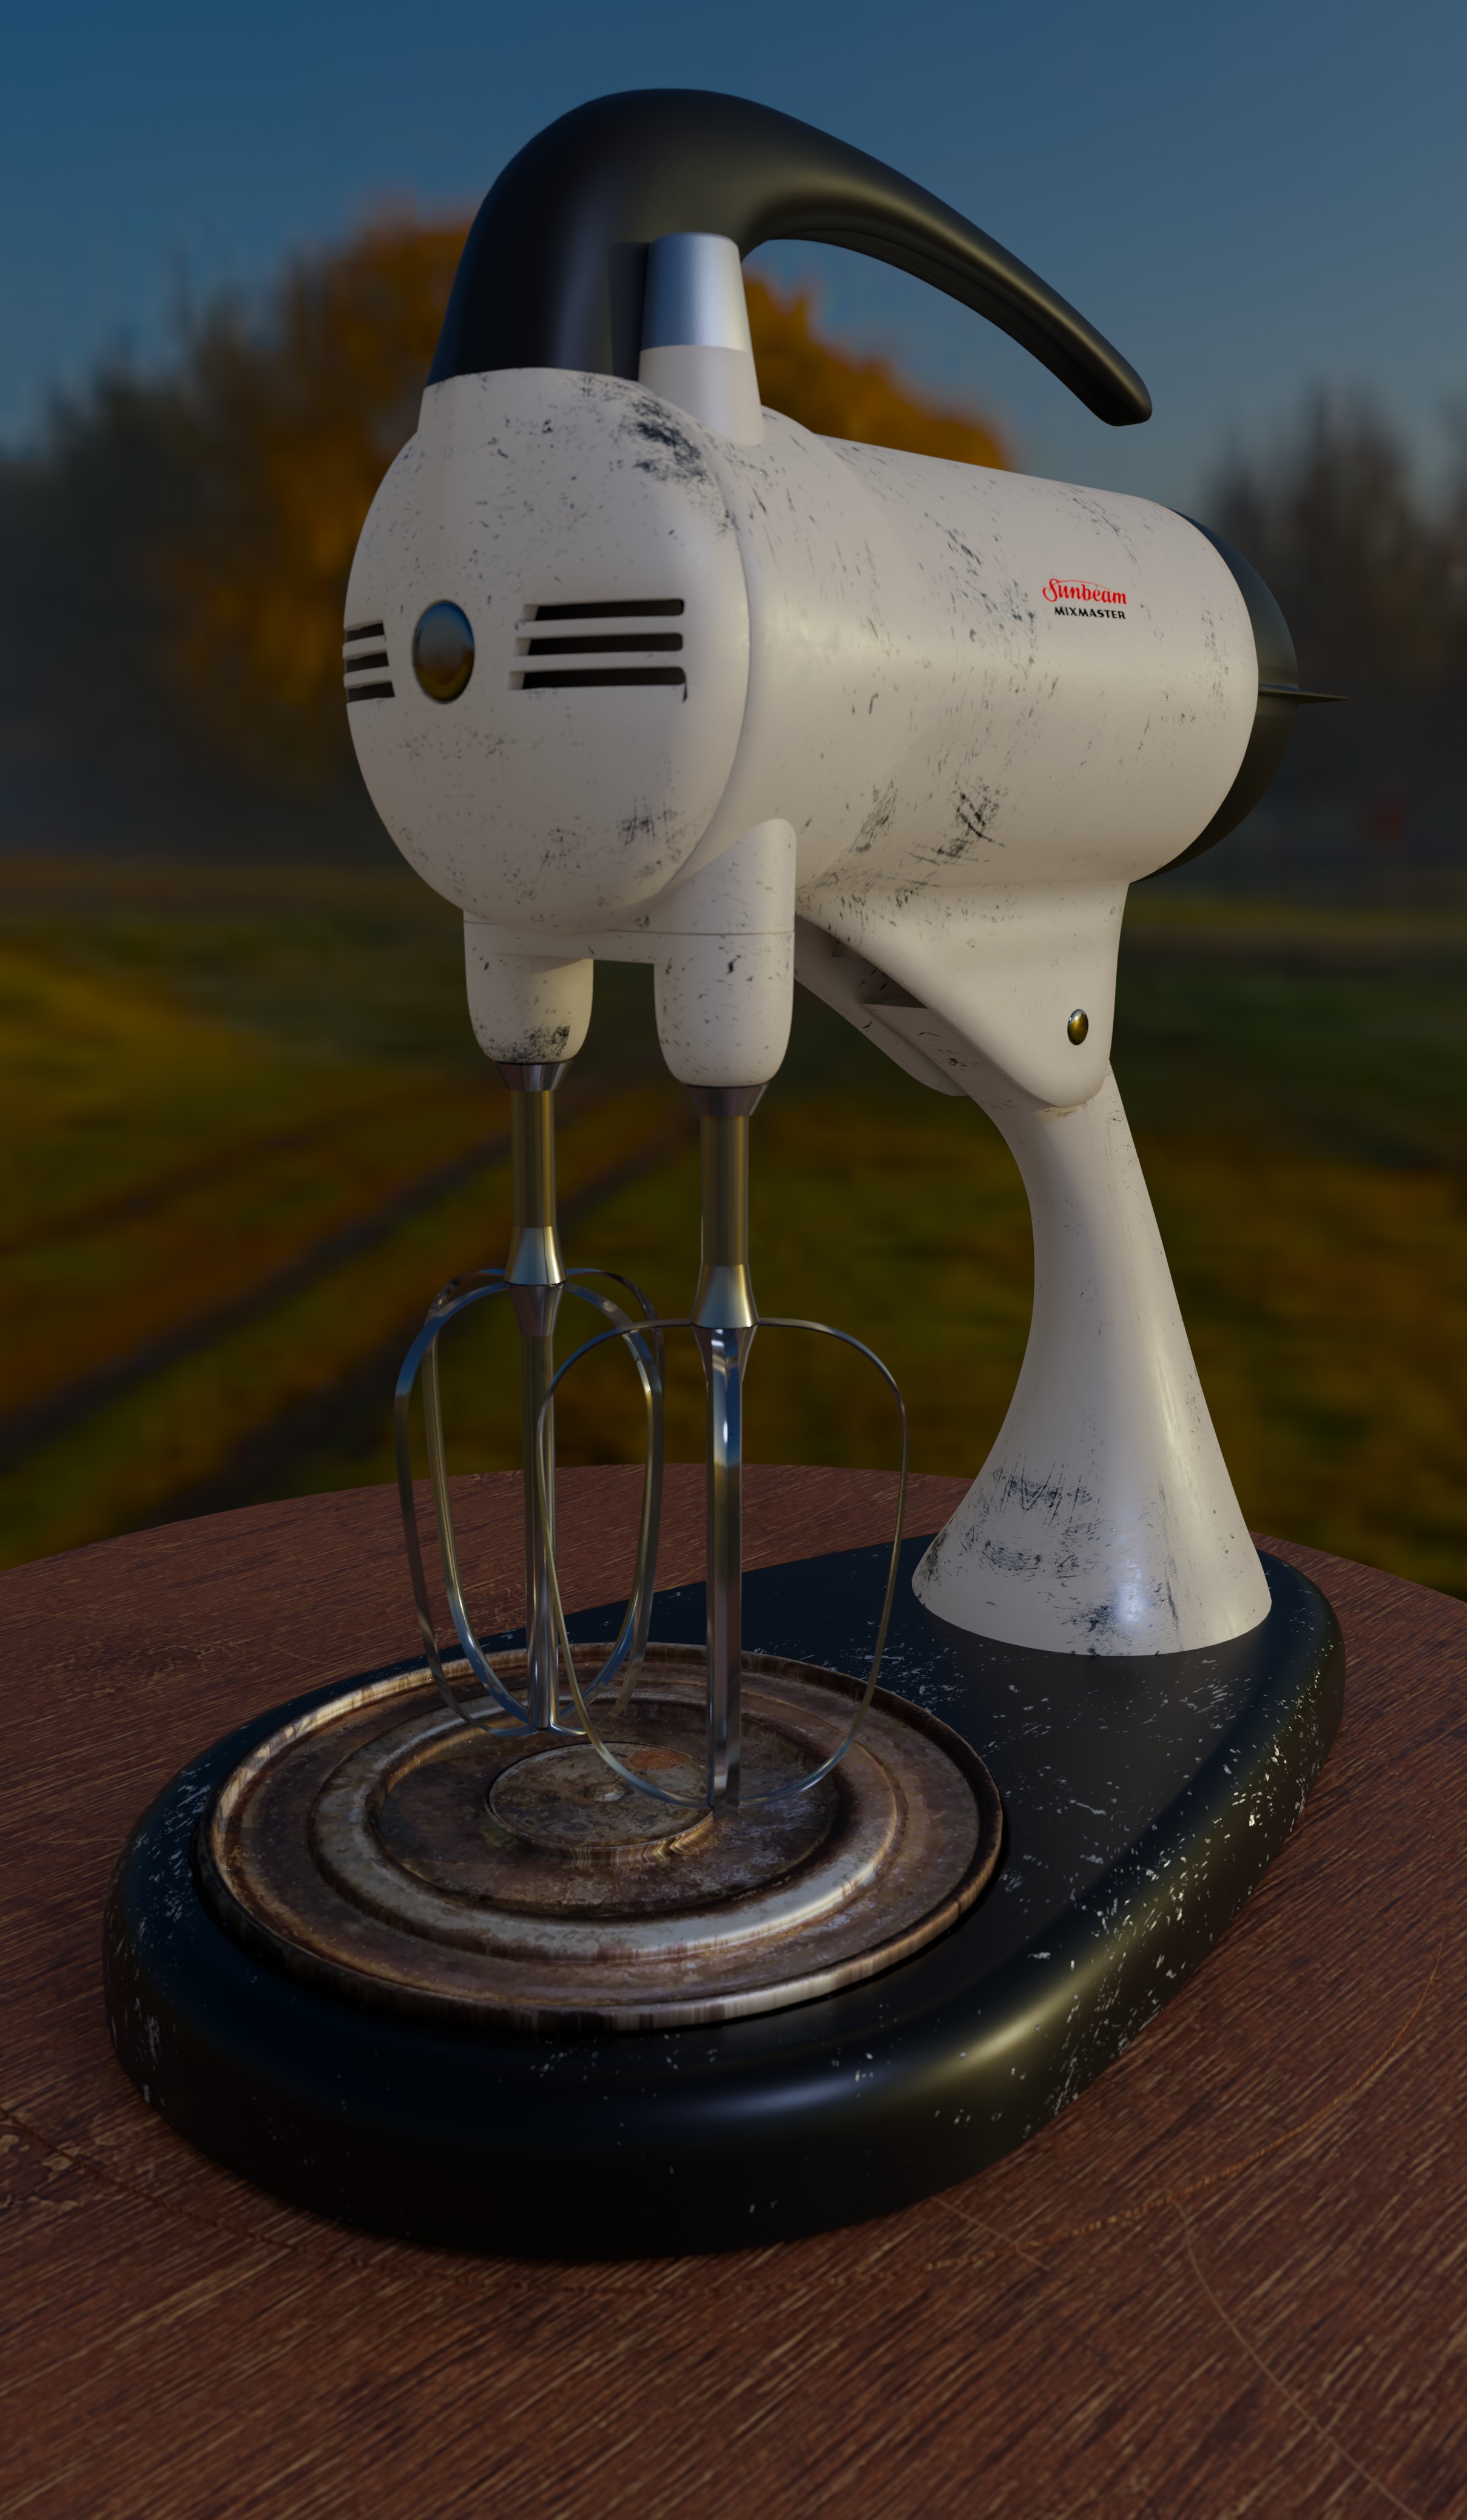
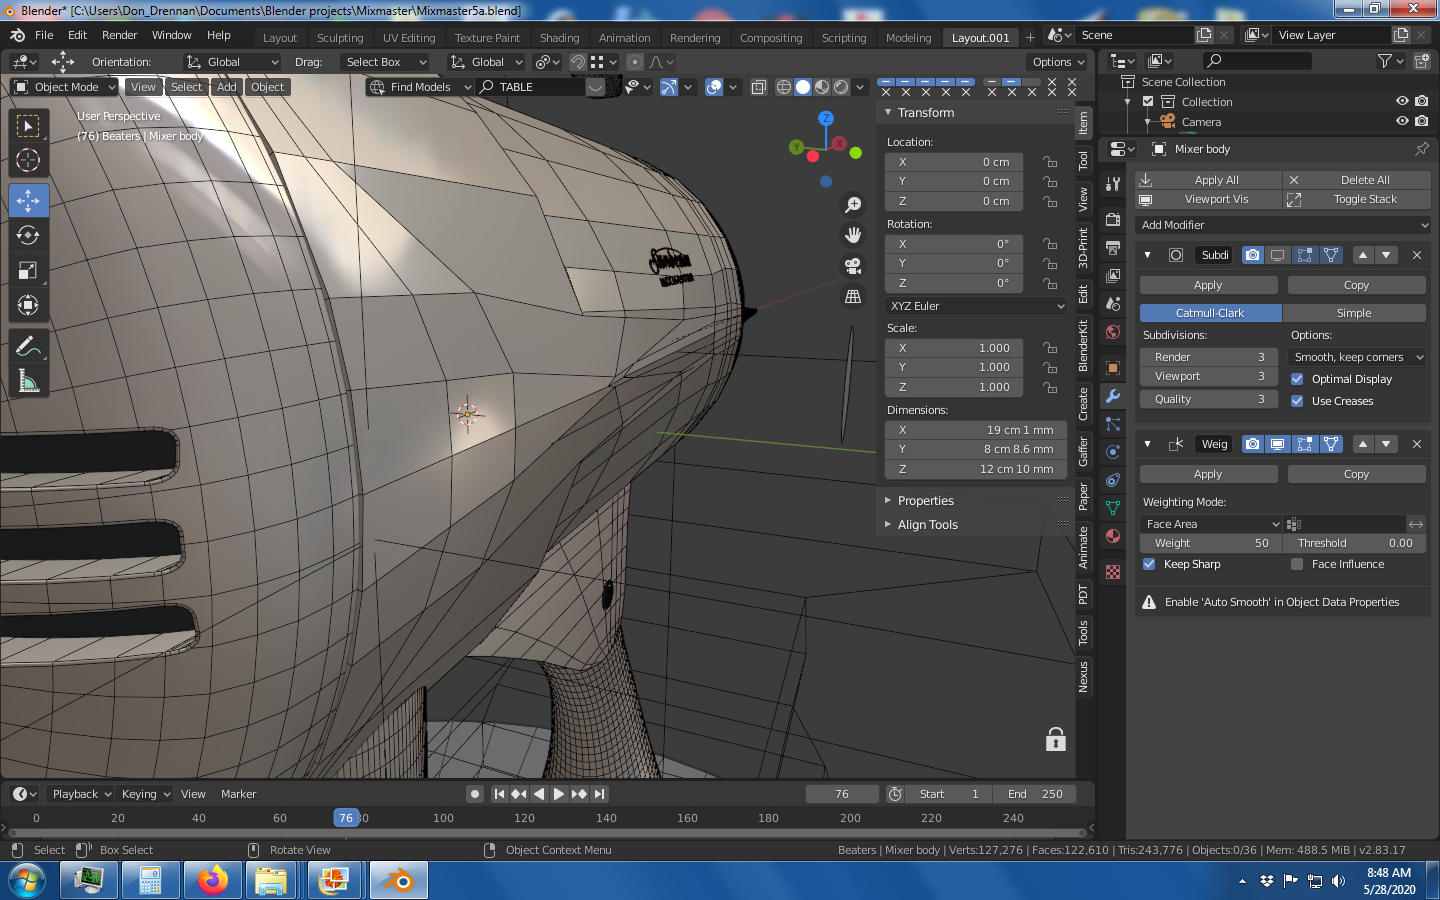
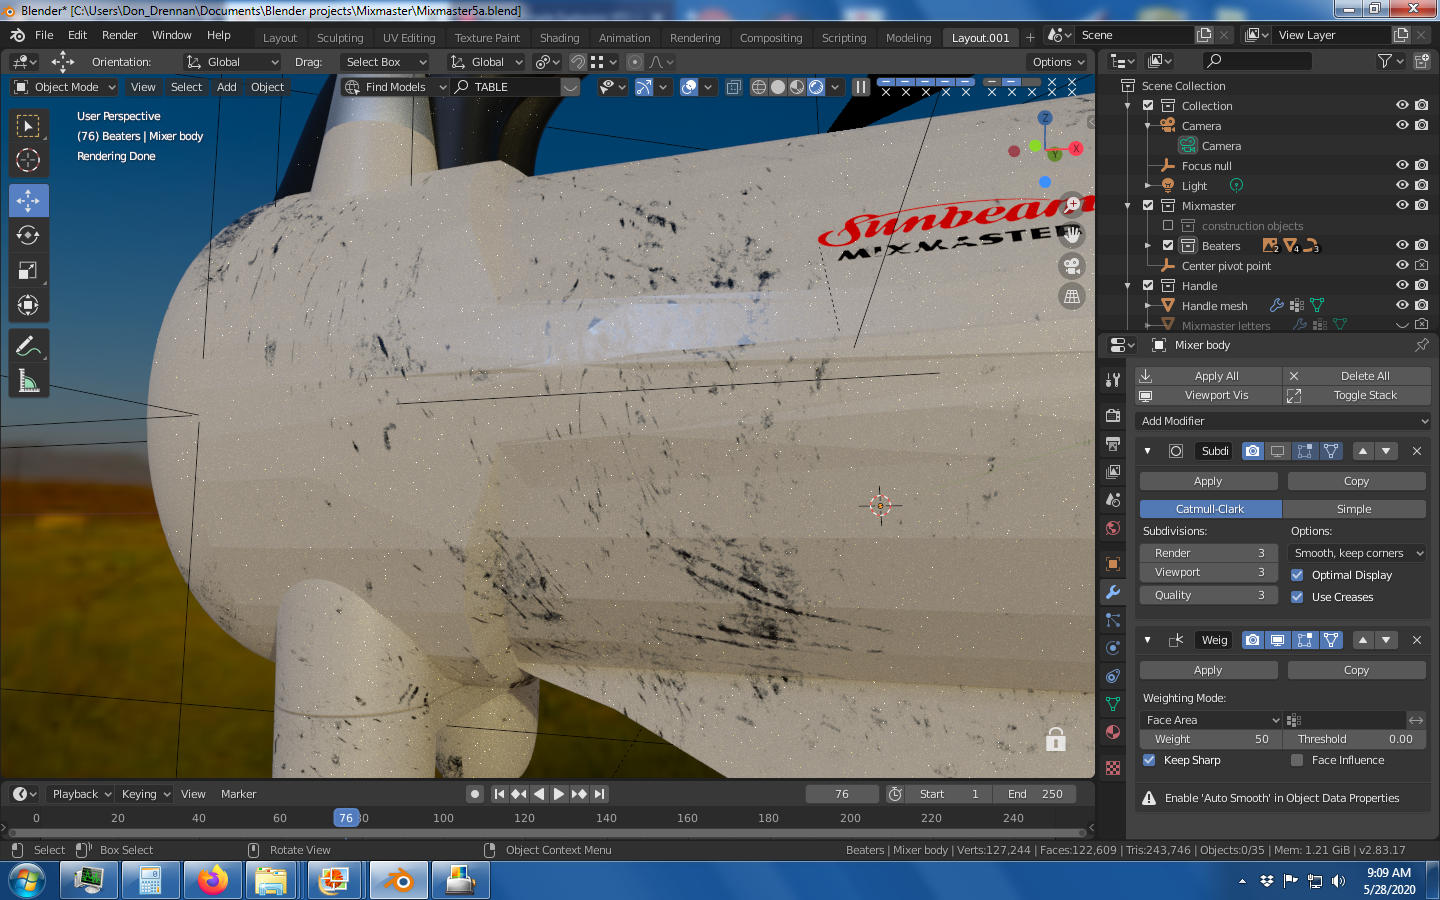
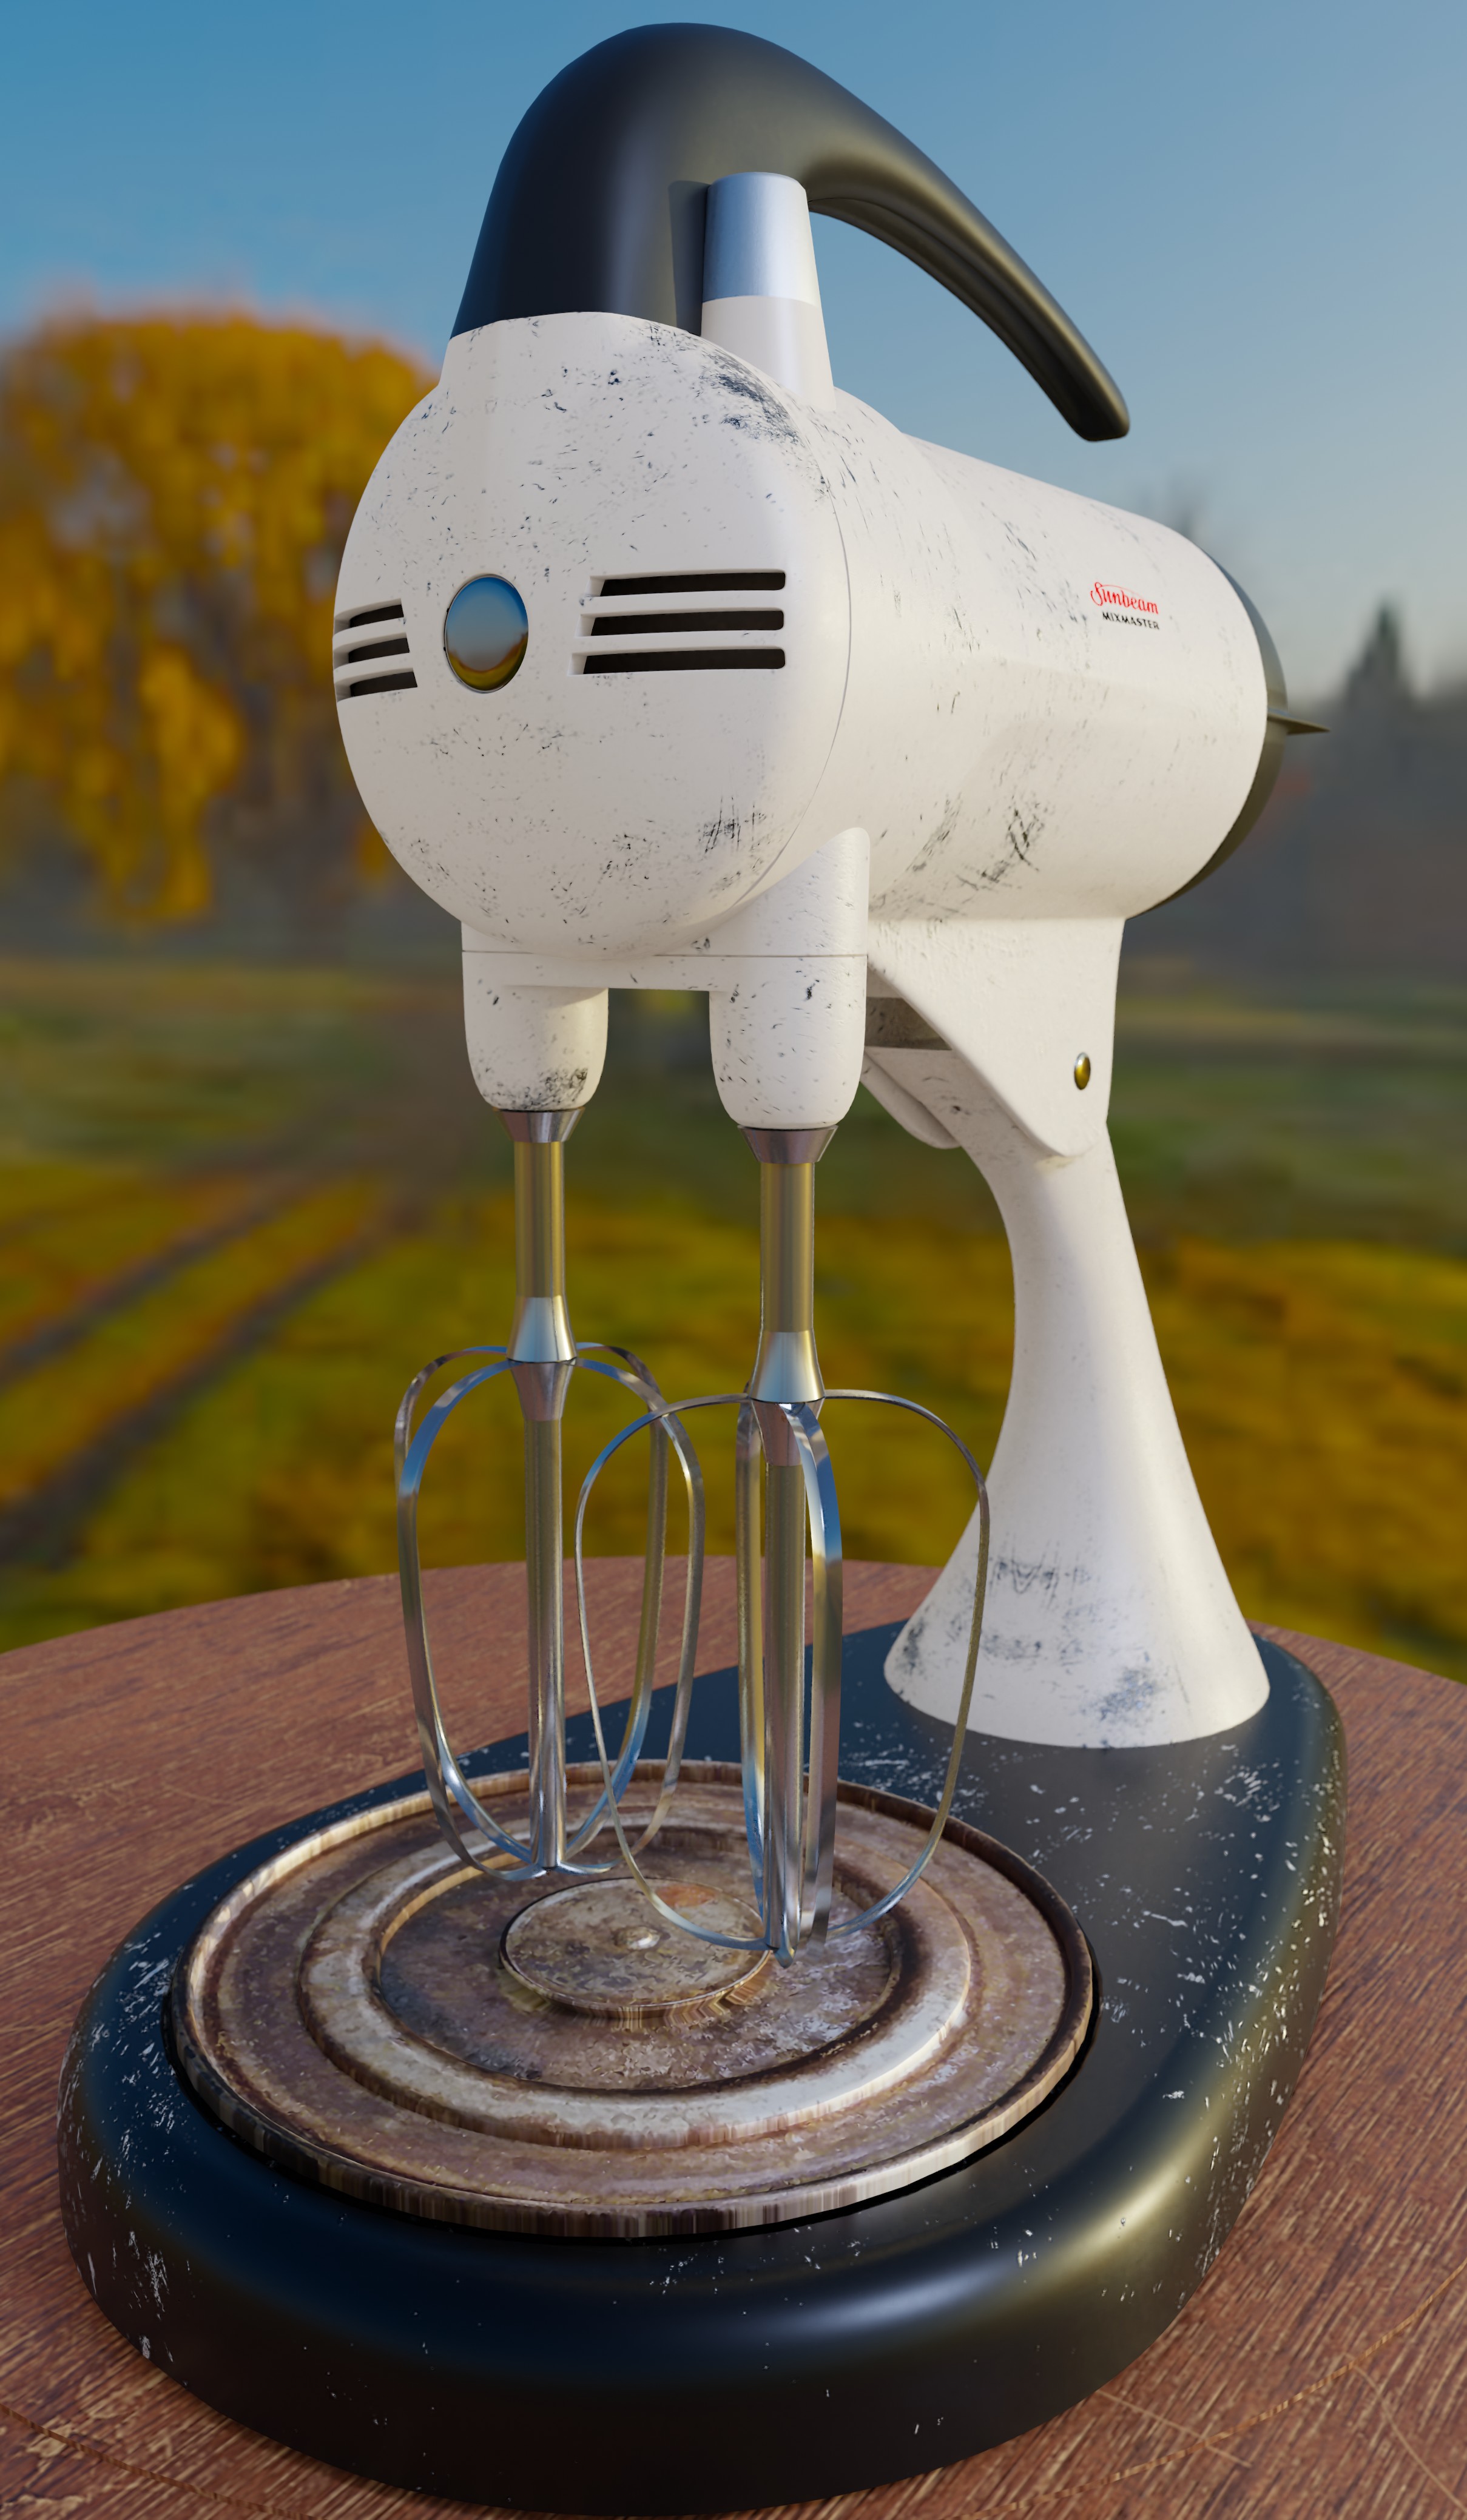
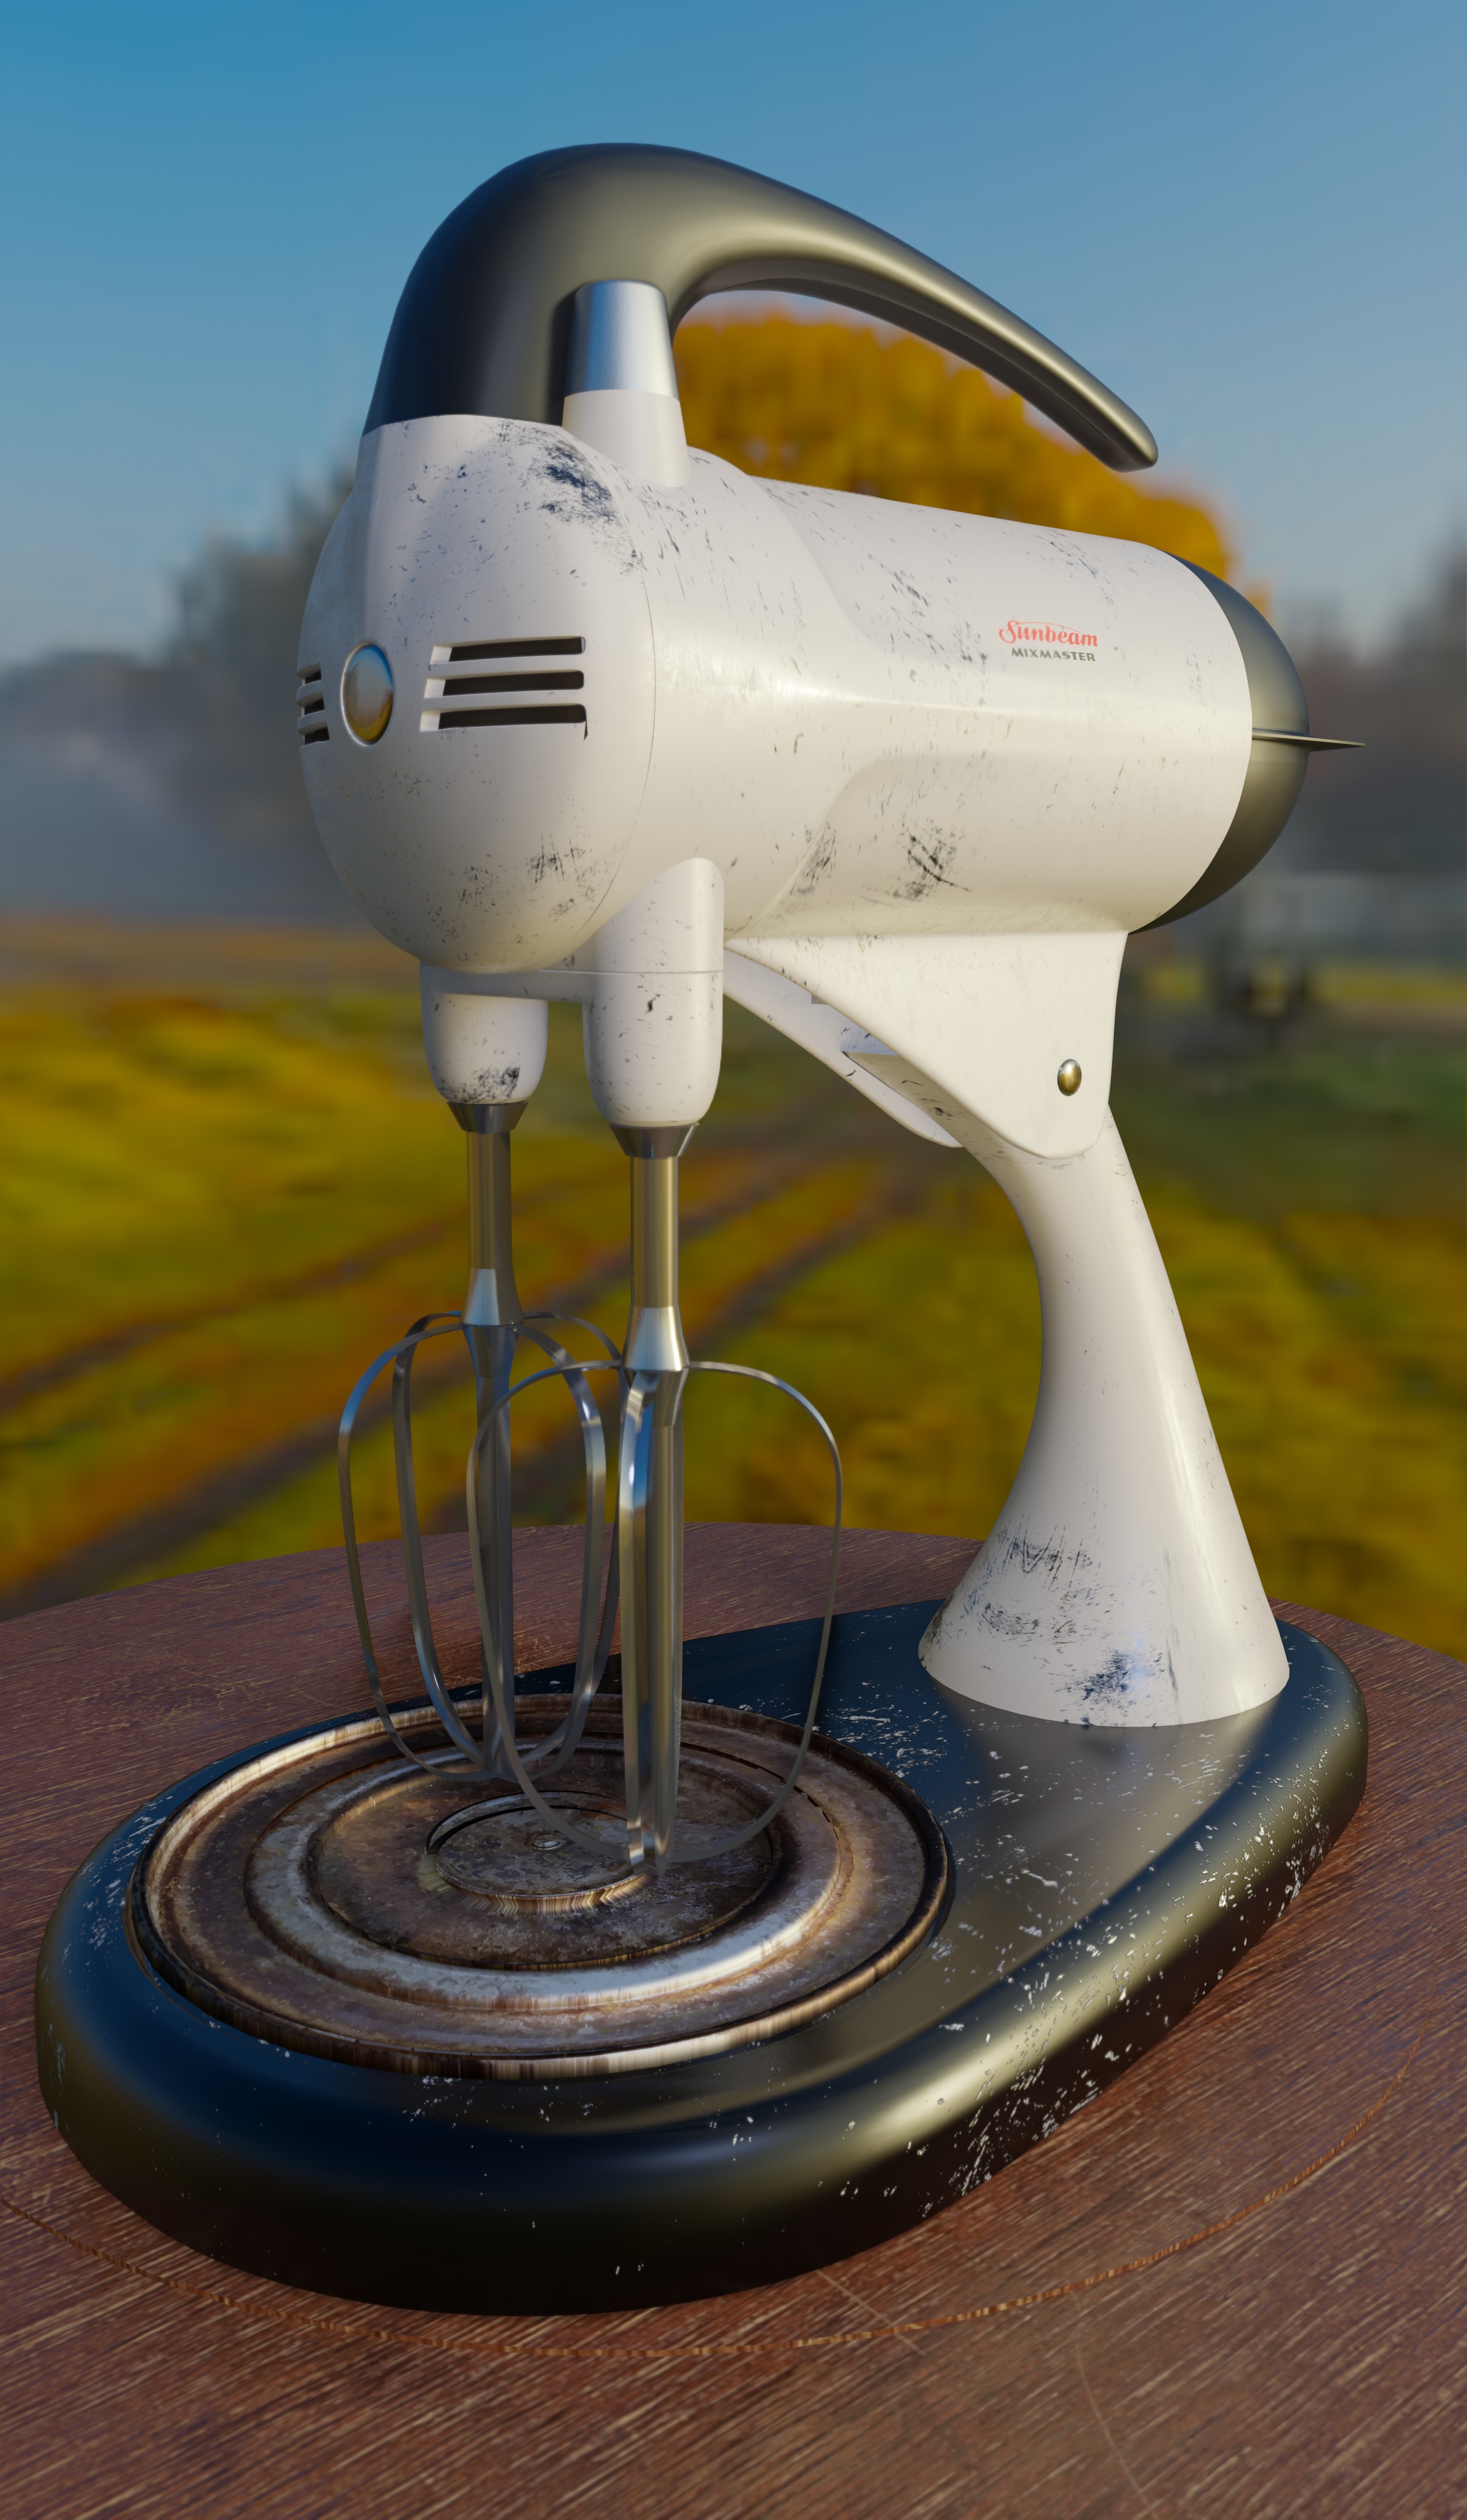
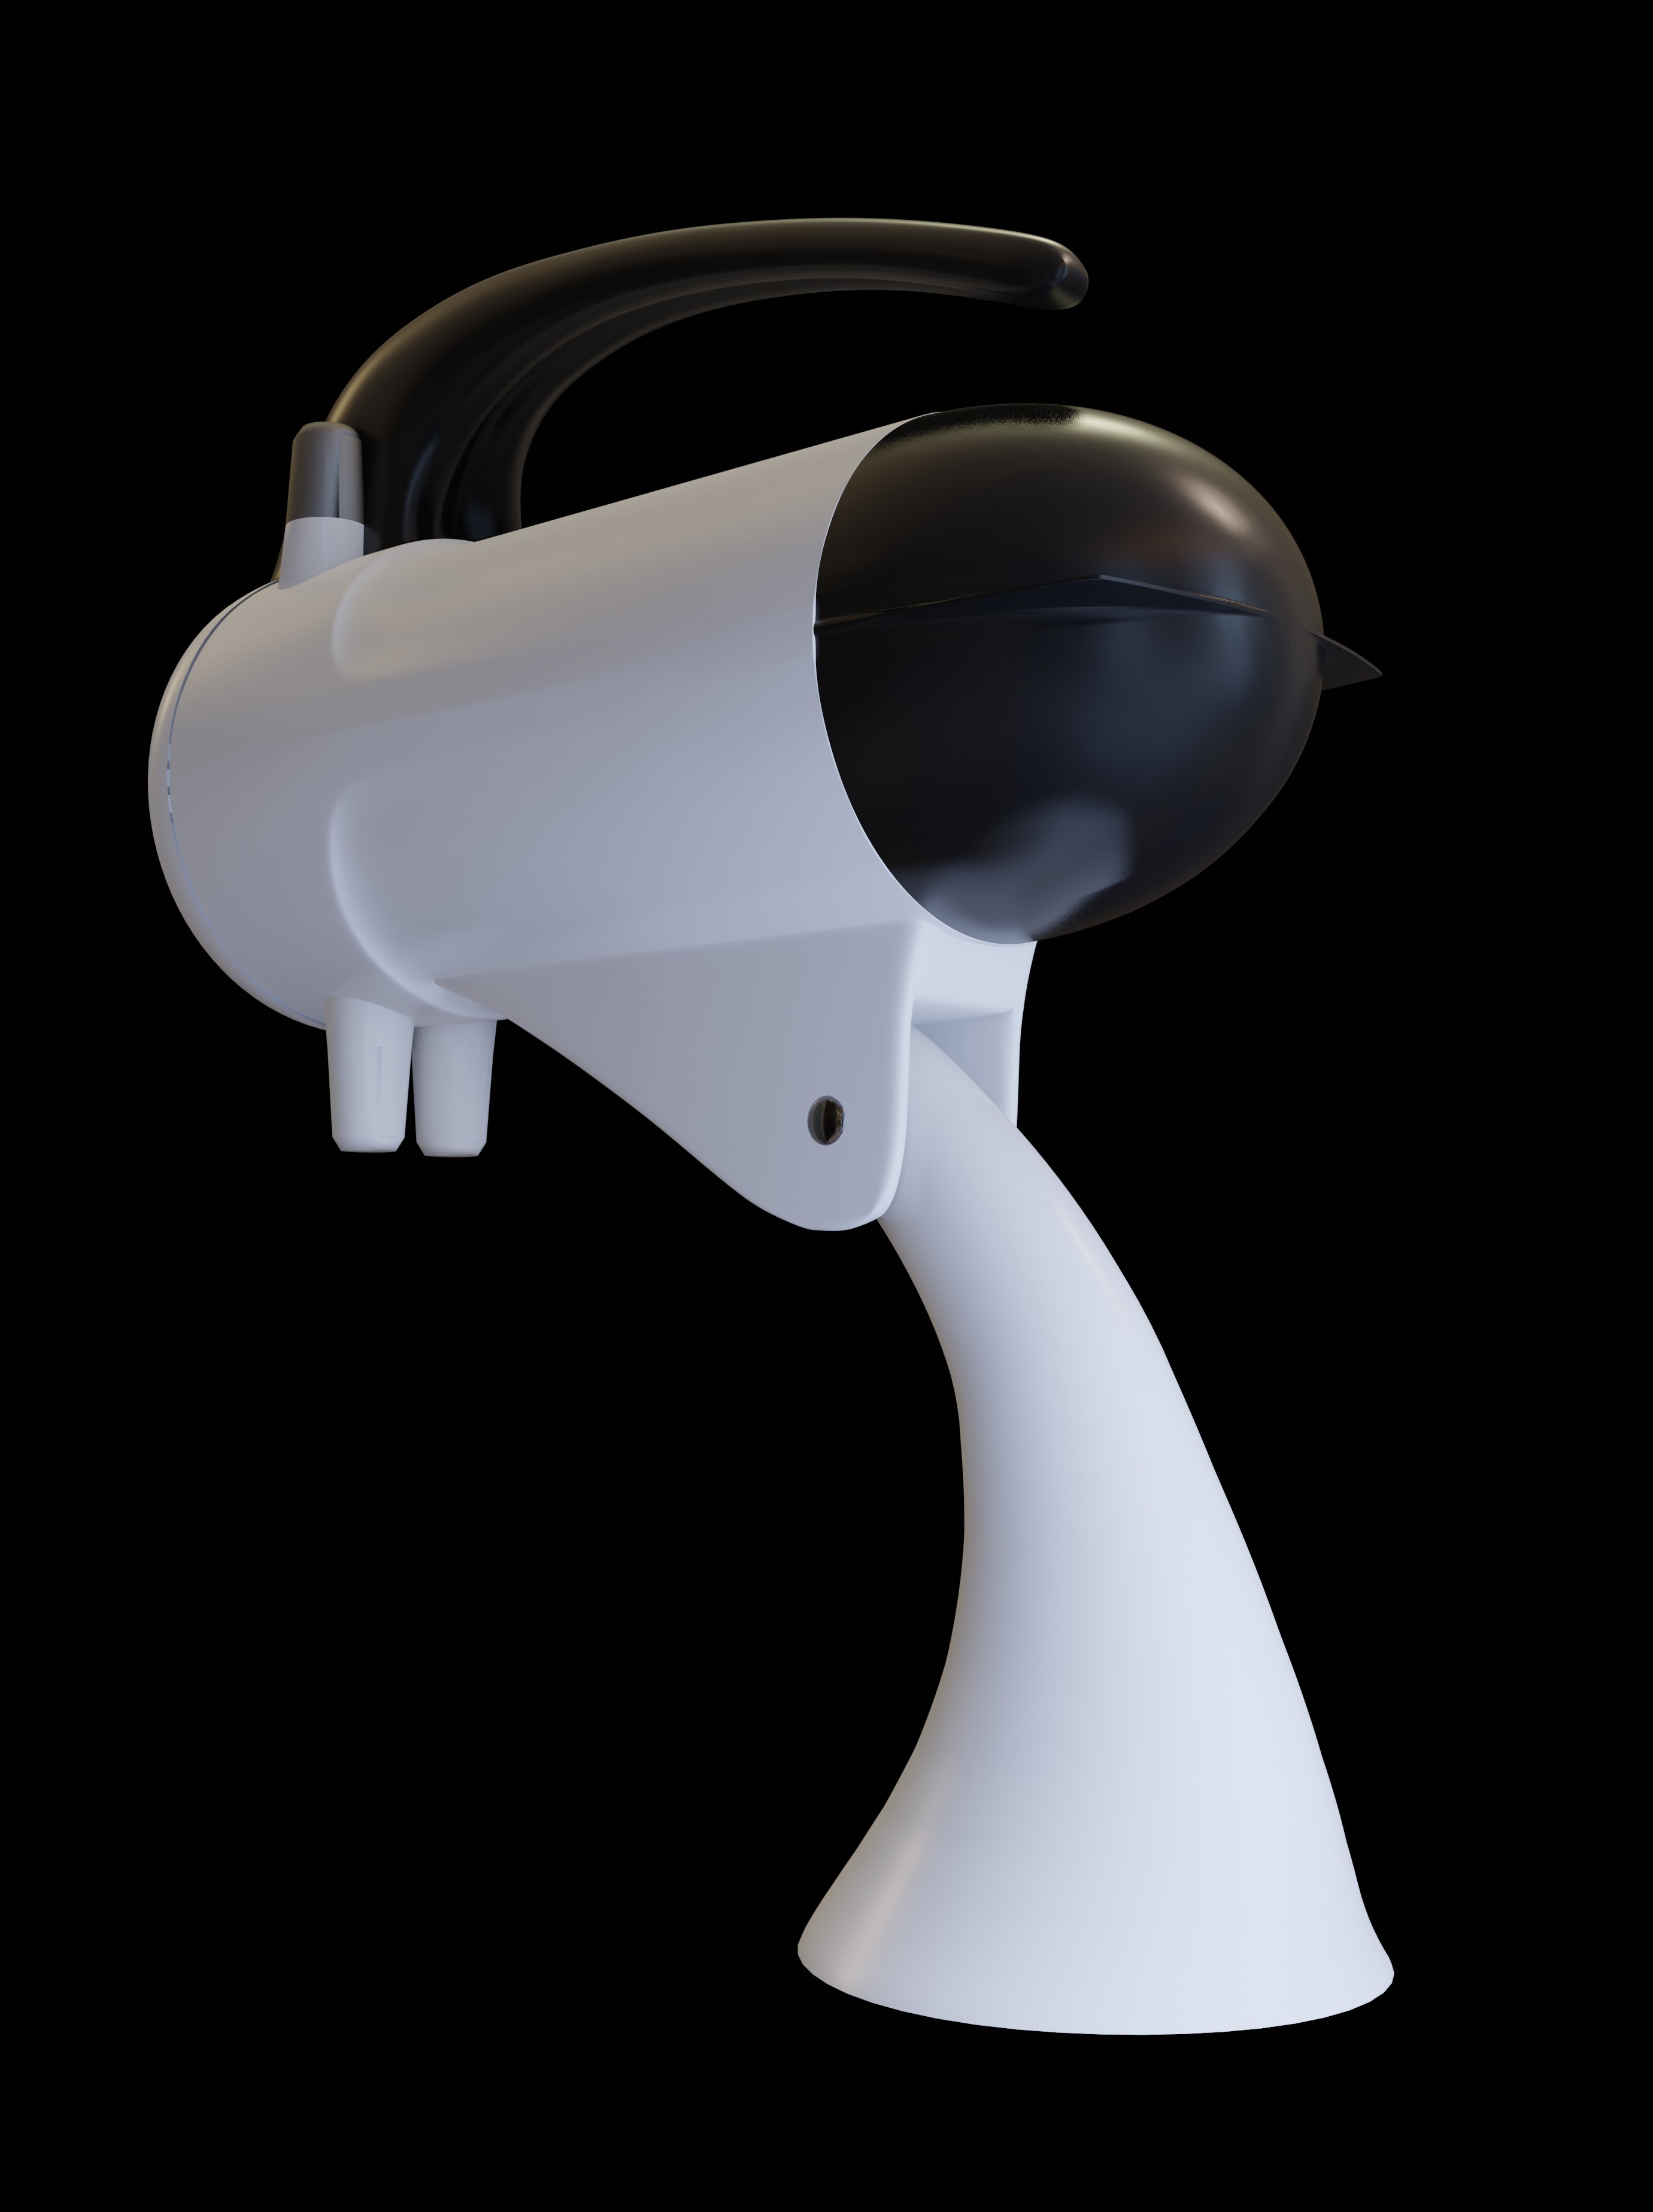
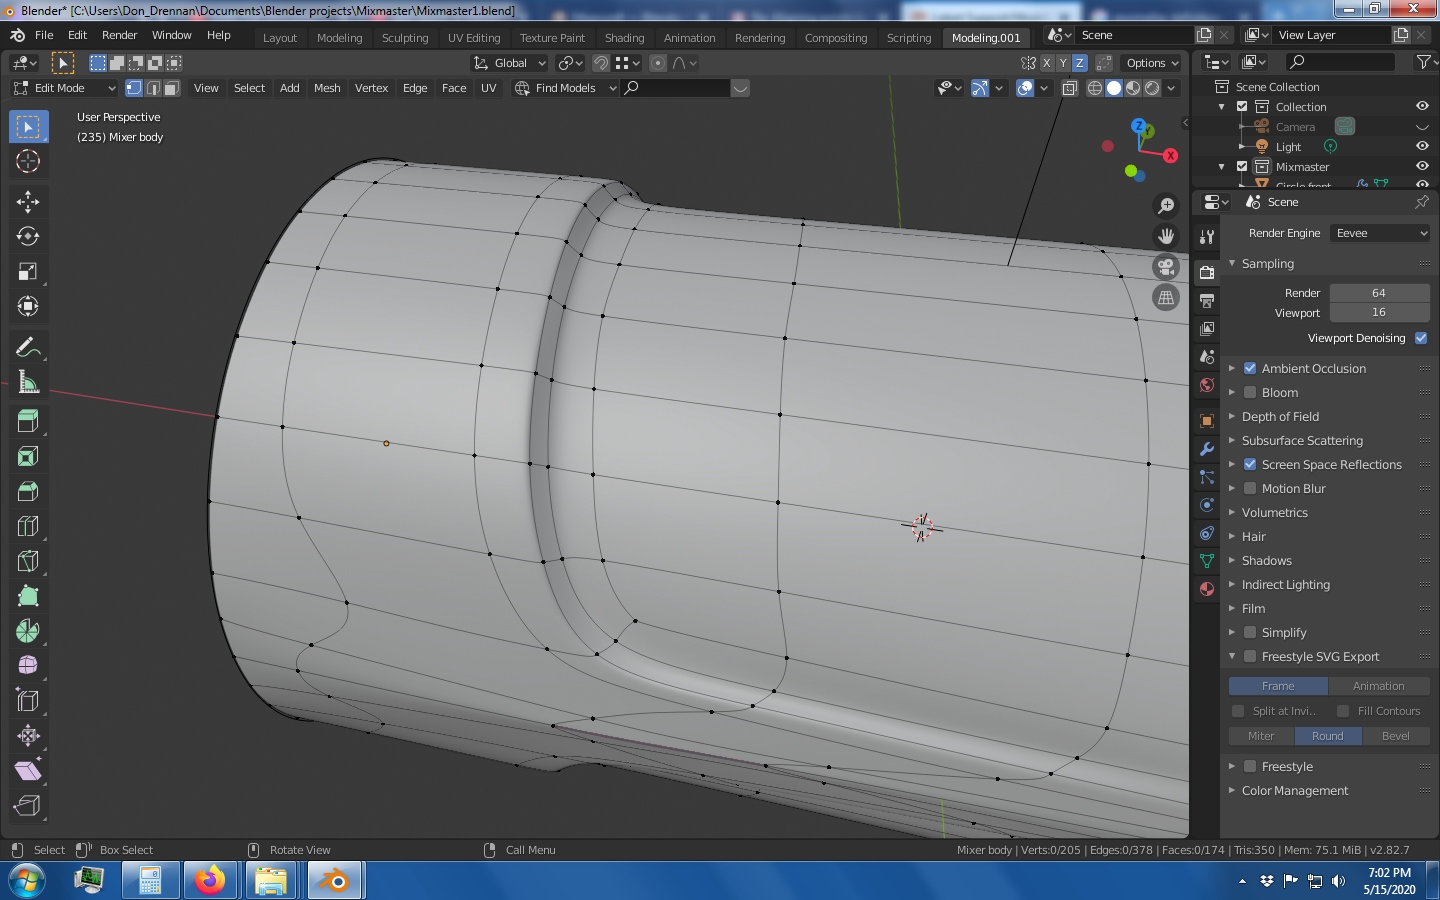
I am working on a kitchen scene, so I thought I’d try modeling a mixer as a background object. I have one of these mixers, so I can take measurements. Mine is missing the handle though, so I’ve had to model that from reference photos. I’m doing this to challenge myself and learn new modeling techniques in Blender. So far I’ve modeled some things with curves, the handle and the base. The body started with a cylinder and lots of modification and mirroring.

(edit: this is my latest update 5/27/20)

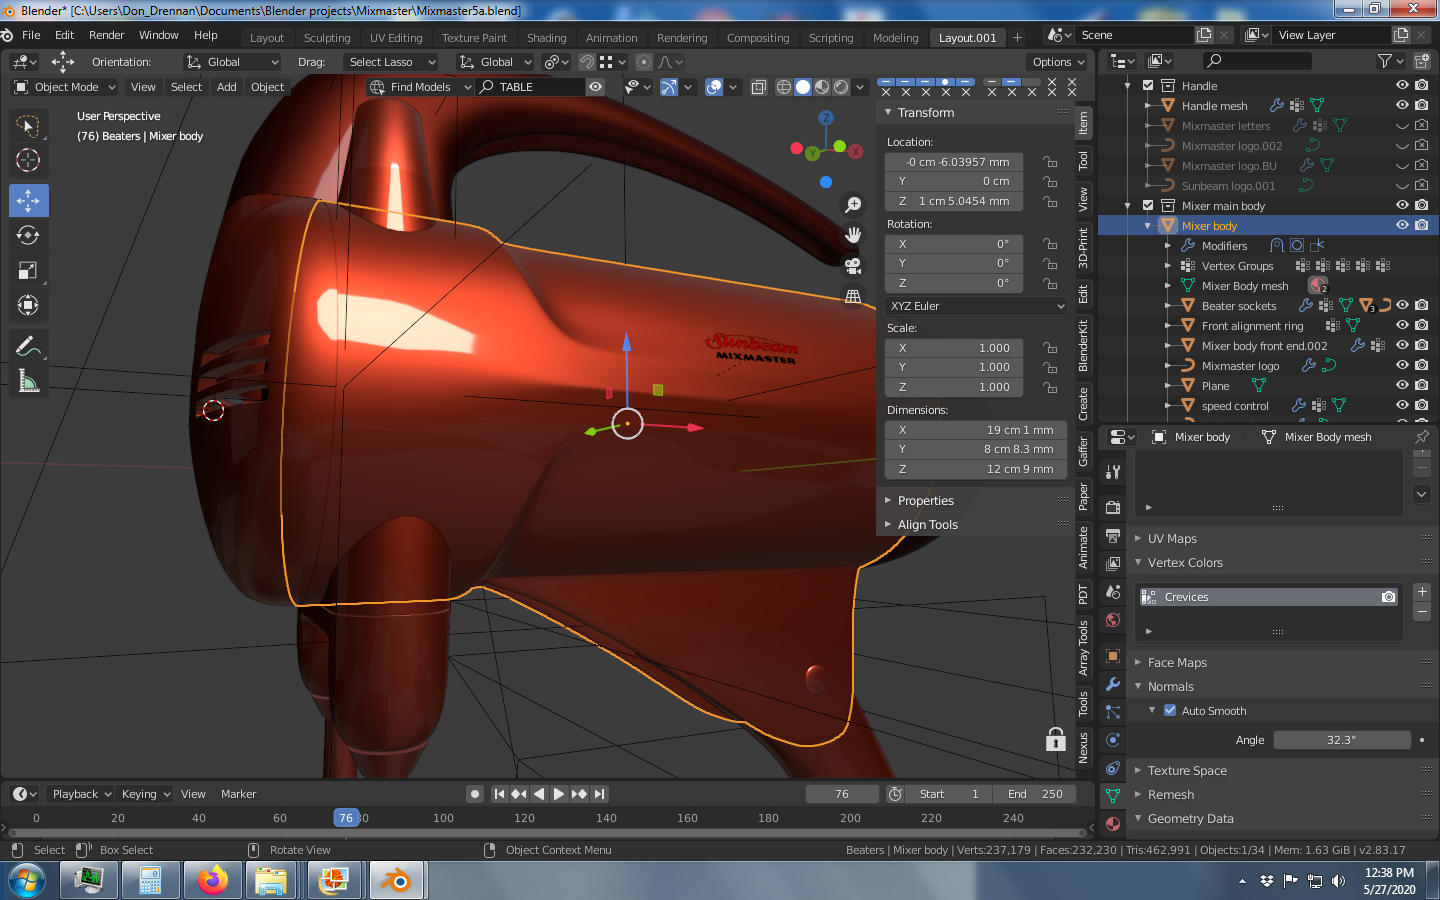
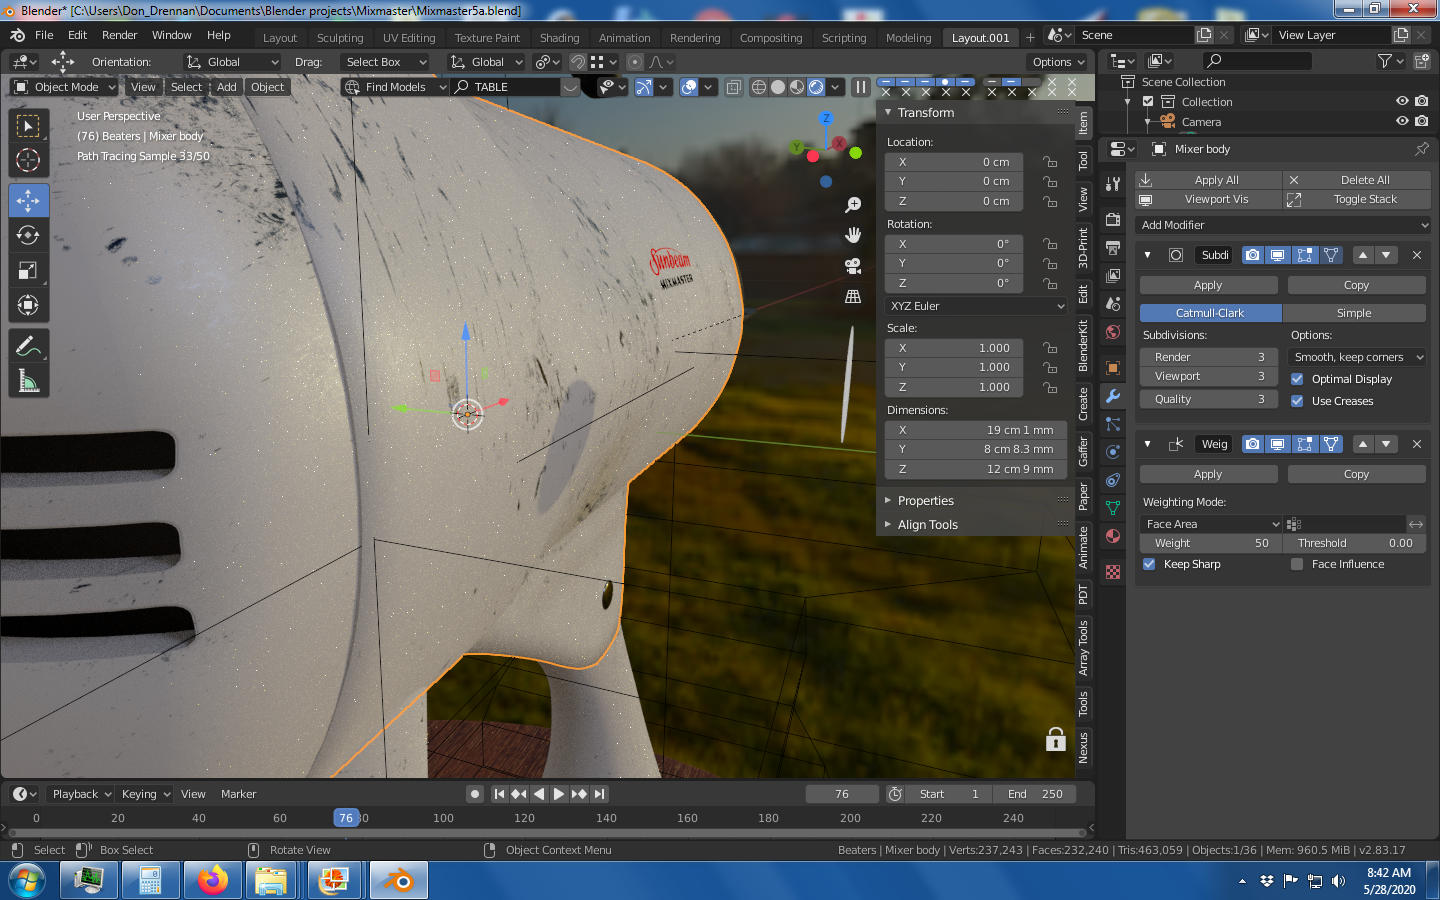
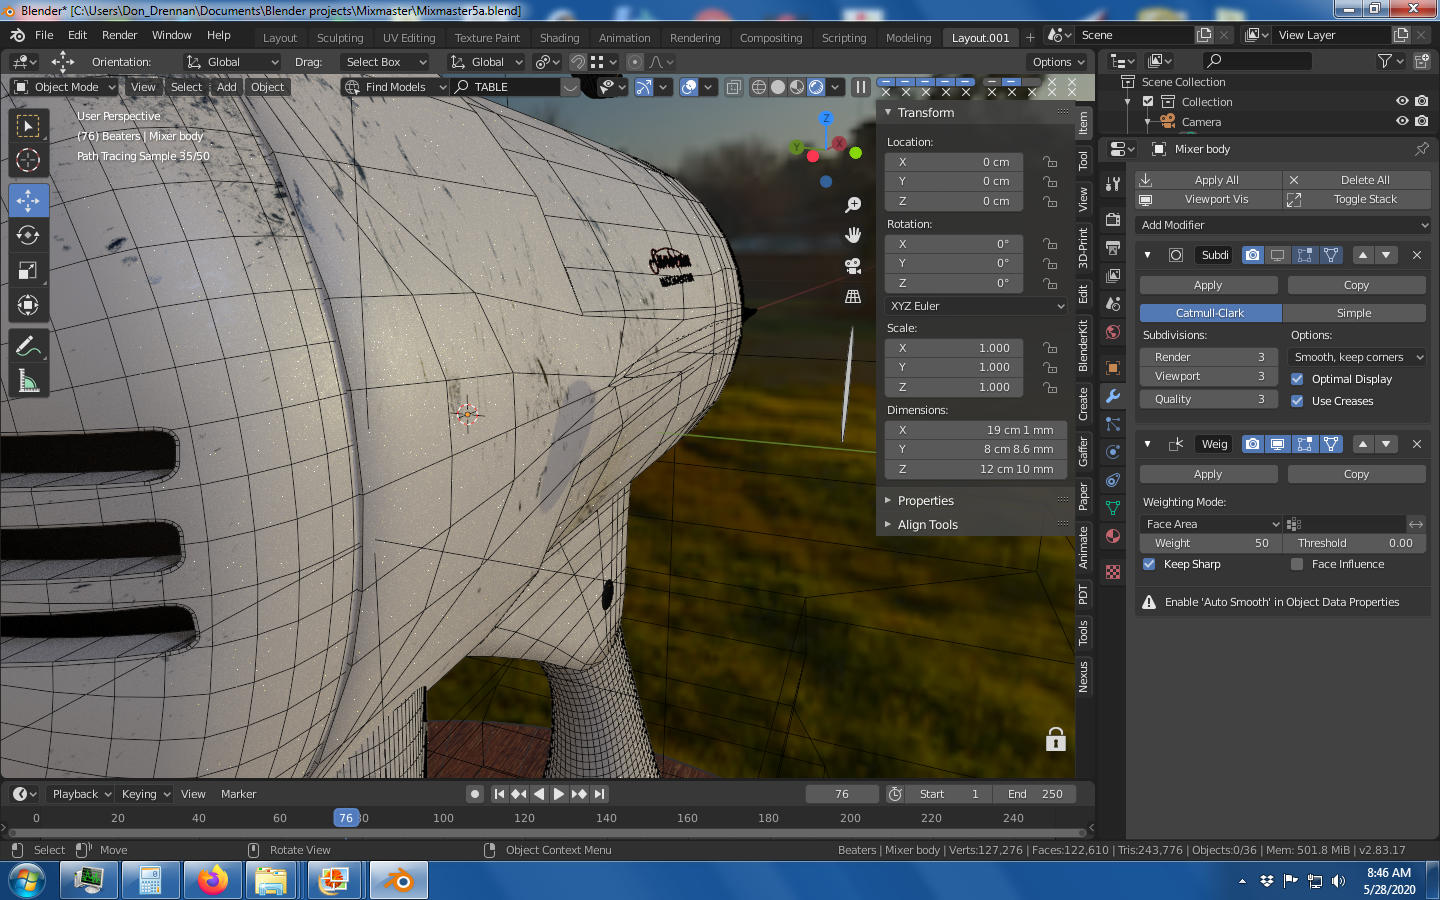
Handle and base support I modeled using curves. Still a lot of questions about this technique, like how to deal with the ends of the curve model. I had to convert the handle to a mesh to shape it to connect to the body of the mixer, and I ran into problems with that, the overall curve not being quite right, and accidentally developing lumpiness in the surface.

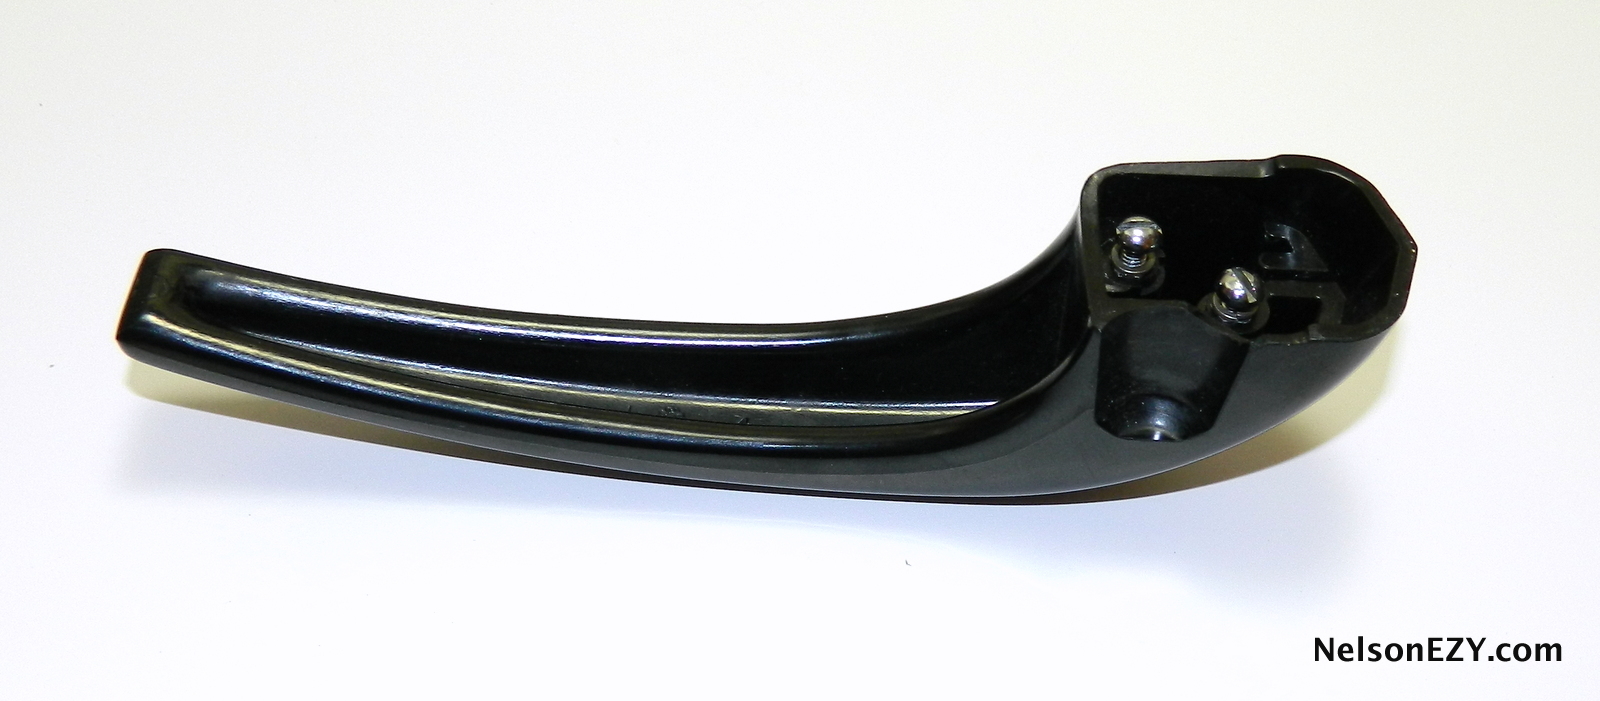
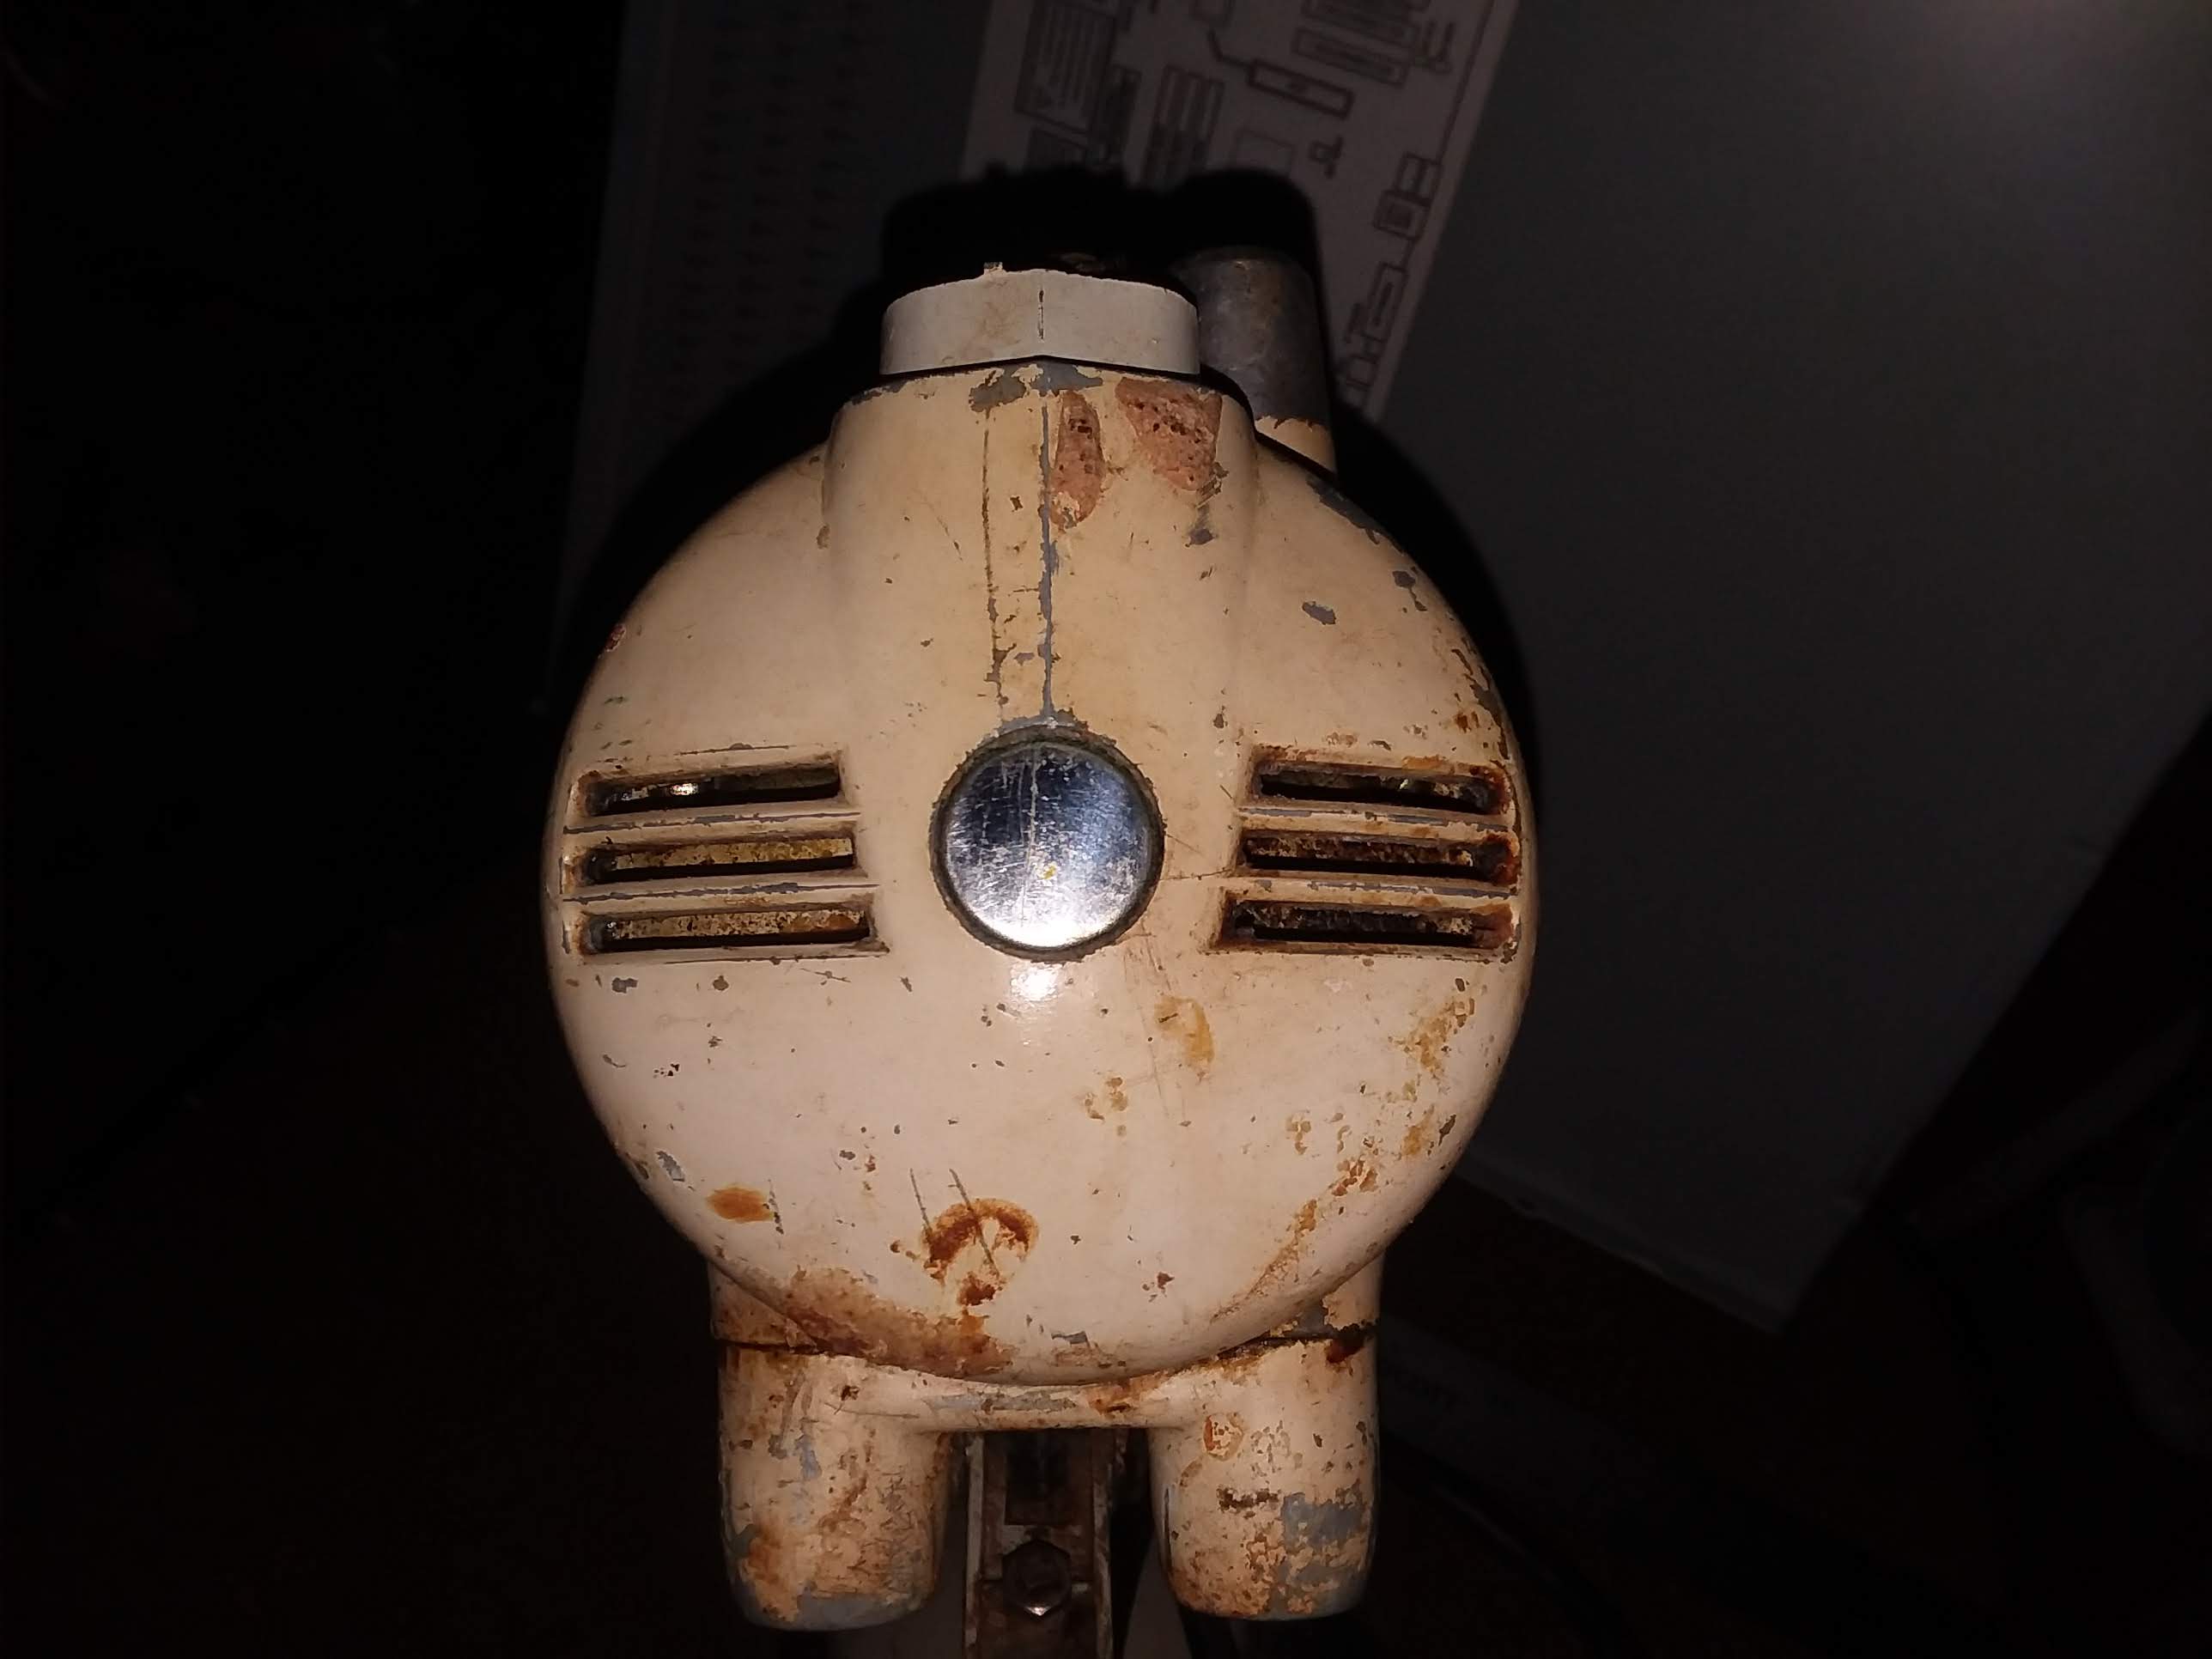
Here’s an actual handle I found a picture of online. Notice it has an indentation on the underside, and the front comes to a sharp point, two difficult to model details. I wasn’t able to make that sharp point on the front. It was also very difficult to make the bottom of it match the geometry of where it connects to the body. I’m using a subdivision surface modifier to smooth it out, but it wreaks havoc on sharp edges.


The base is made from curves, and yet it still has curvature problems. It’s not the smooth graceful curve that it should be. I made a copy and converted to mesh at this point, and I used a Lattice Deformer to shape it. It’s perfectly round at the bottom, but as it gets to the top, it becomes almost rectangular where it connects to the body of the mixer. (I really wonder how this was created. Sculpted? machined? this was made in the 1950s) I wasn’t able to make it quite rectangular at the top. I decided I was spending too much time on that detail.

I worked very hard to get this shape just right, with that sharp surface detail on the side gradually fading off towards the front and back. Also the curvature of that top and bottom indentation going from a fairly sharp edge to a smooth curve. I ended up taking away the loop cut in the middle there.

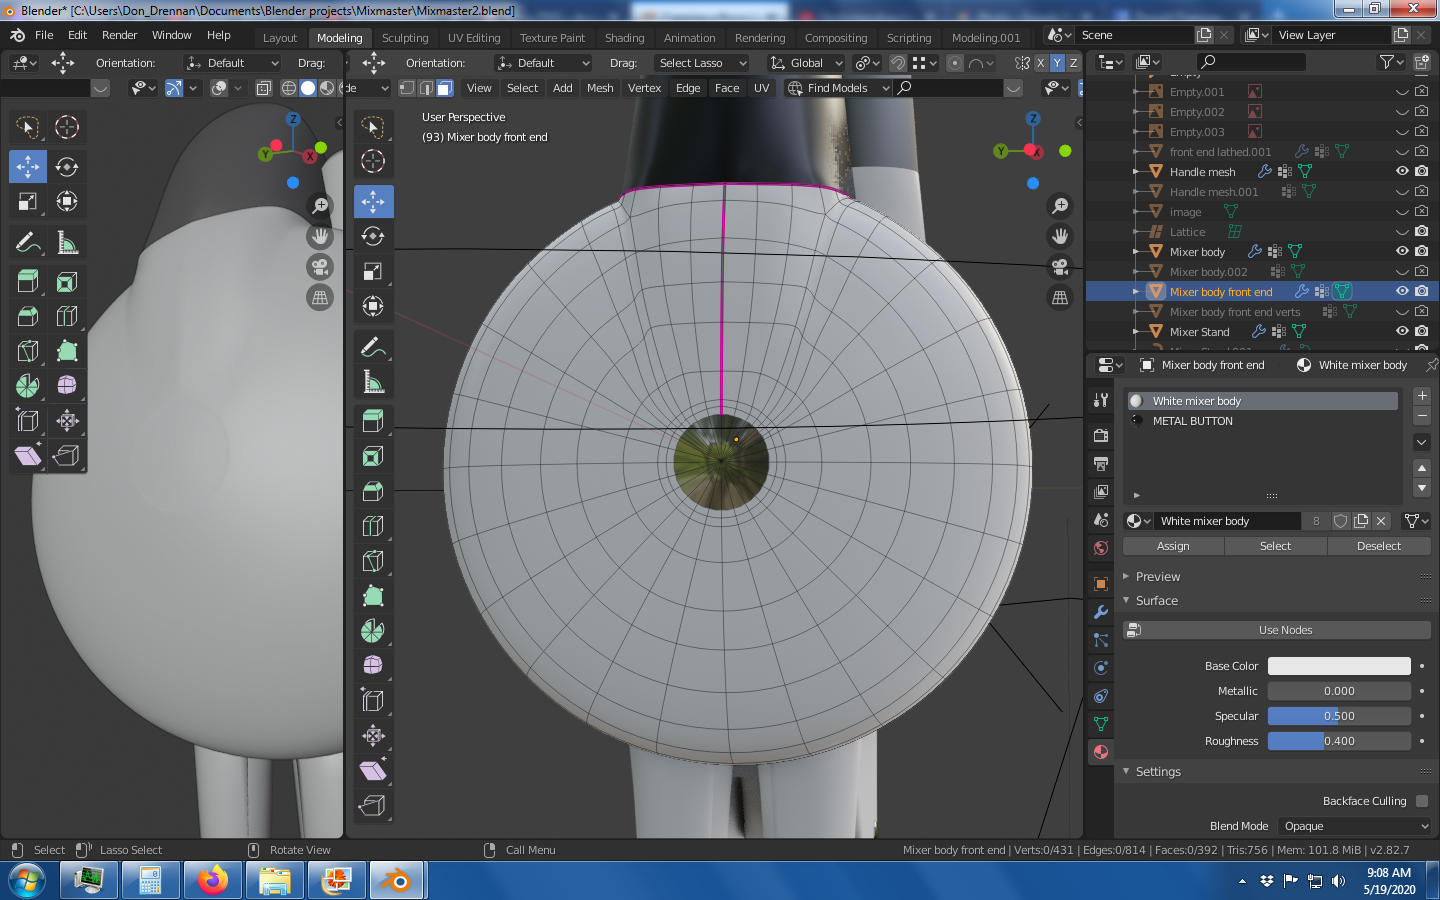
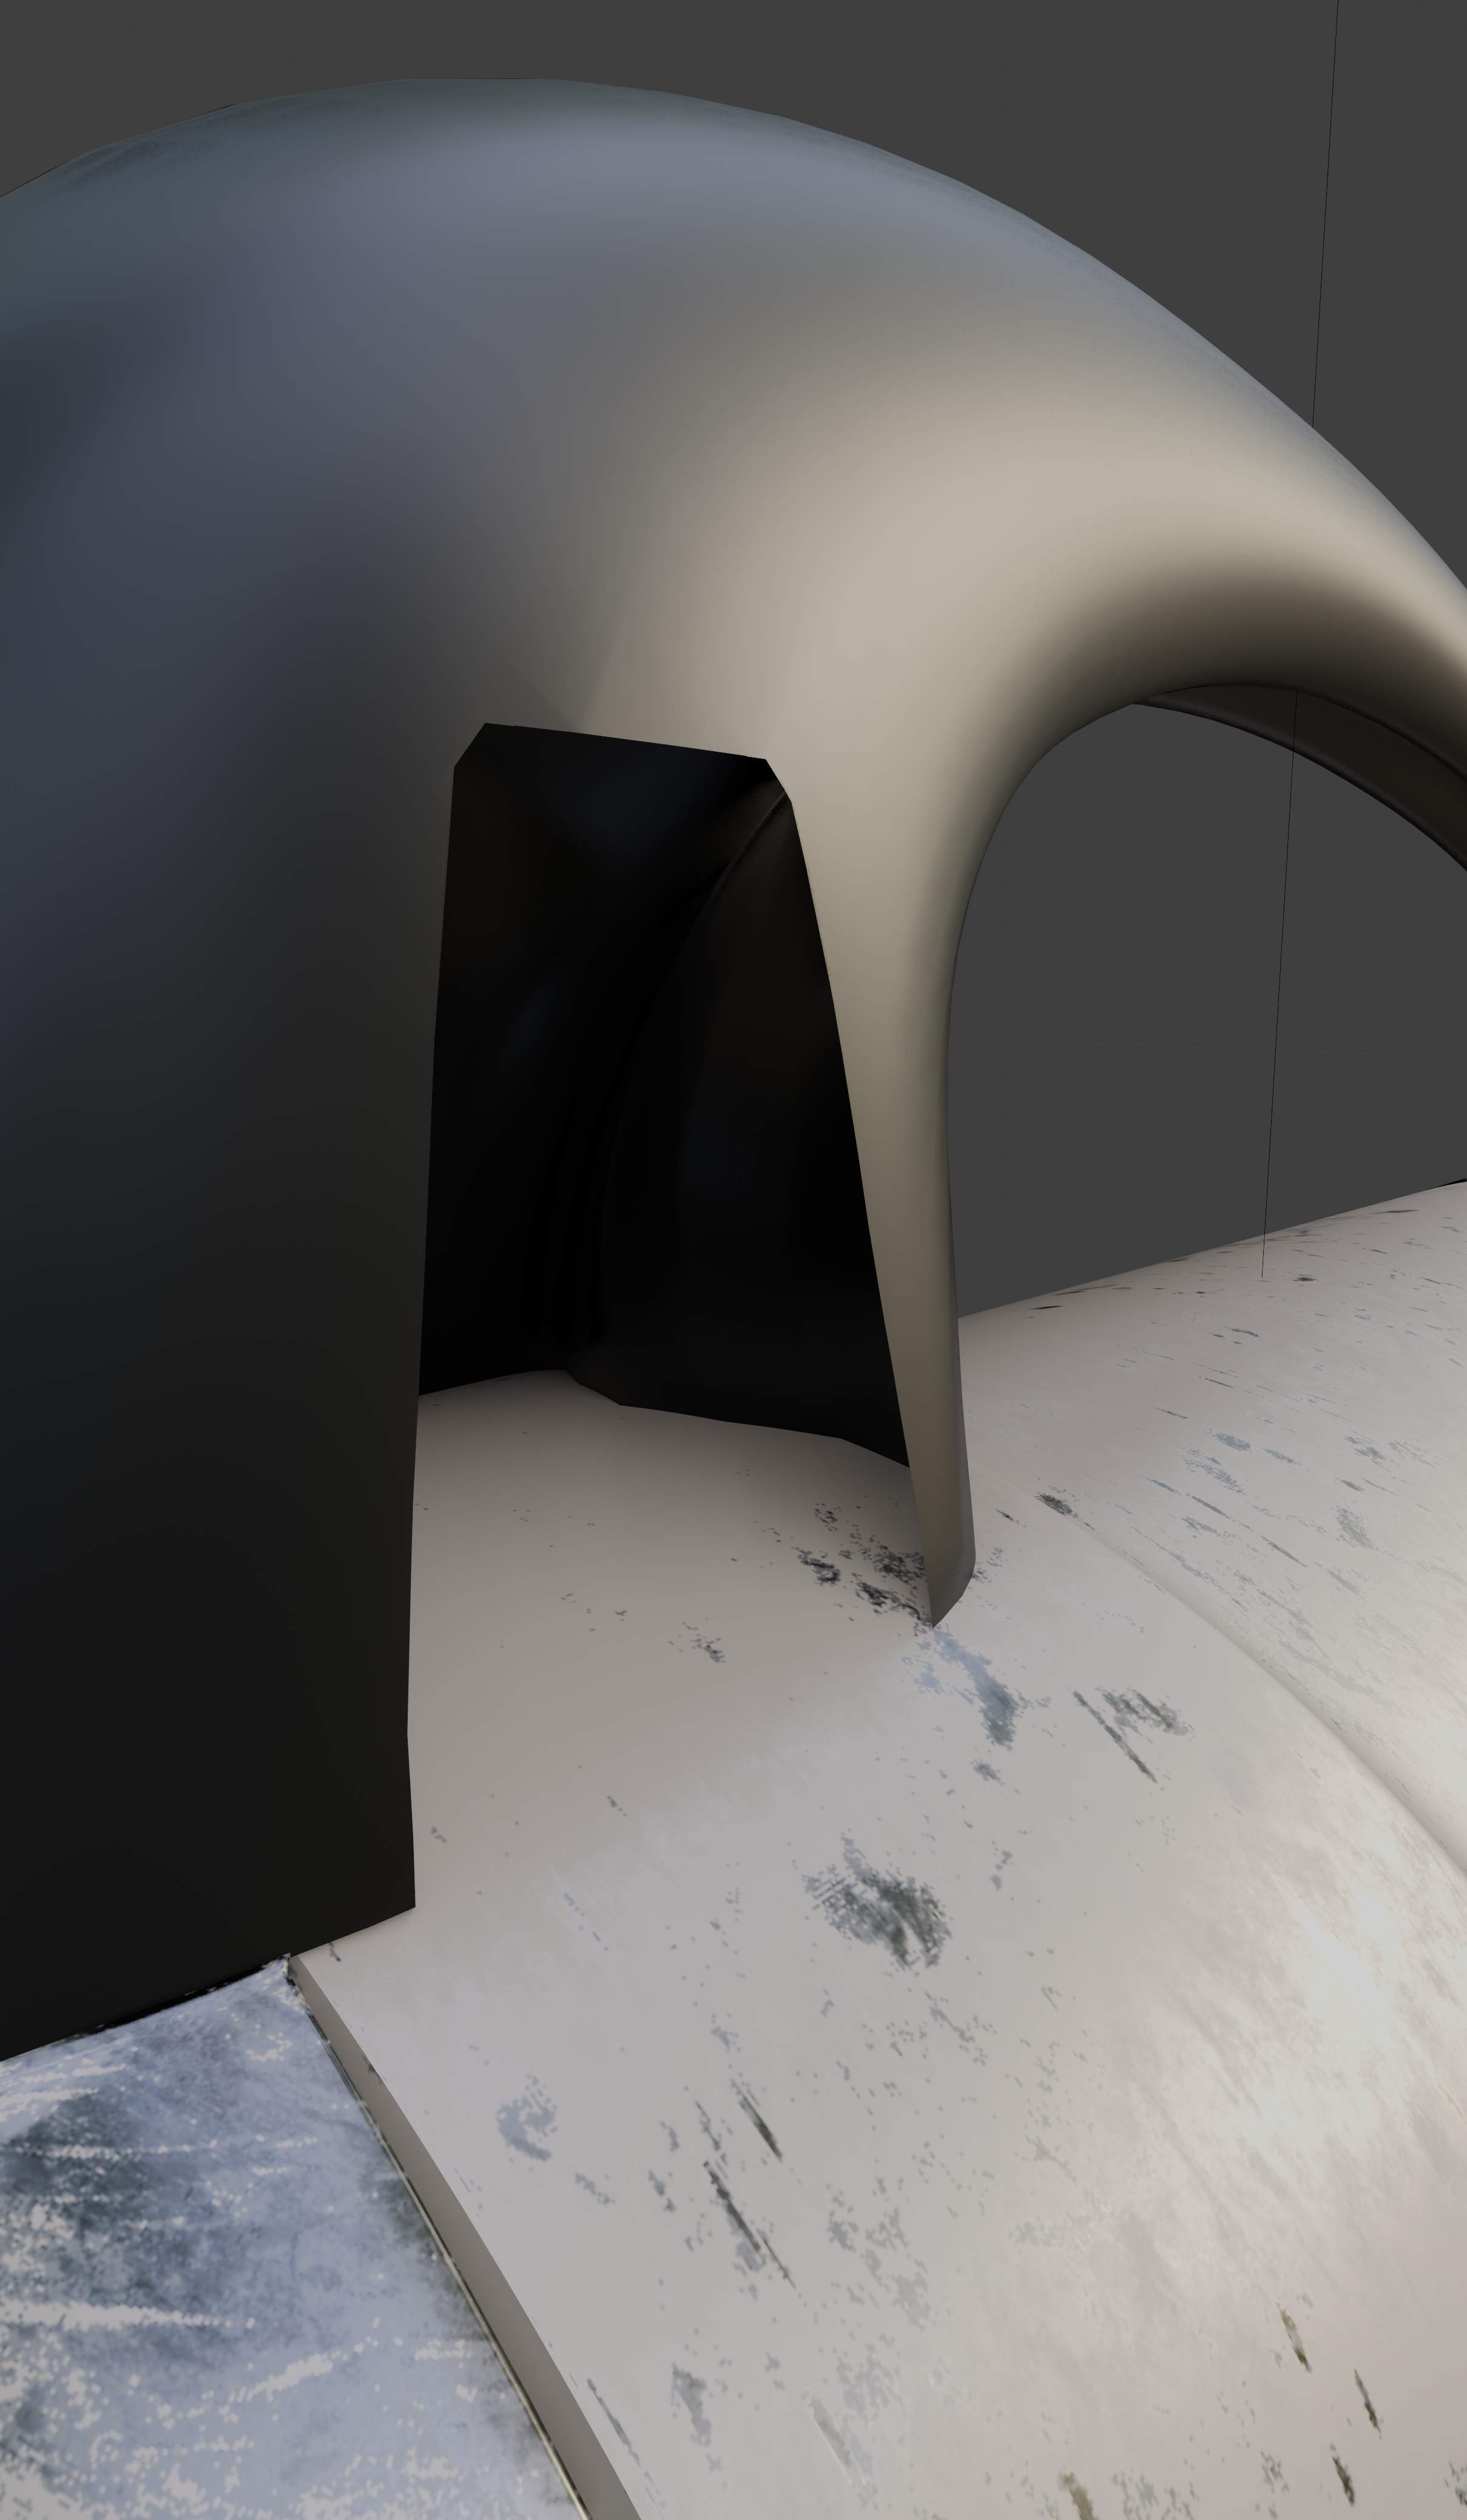
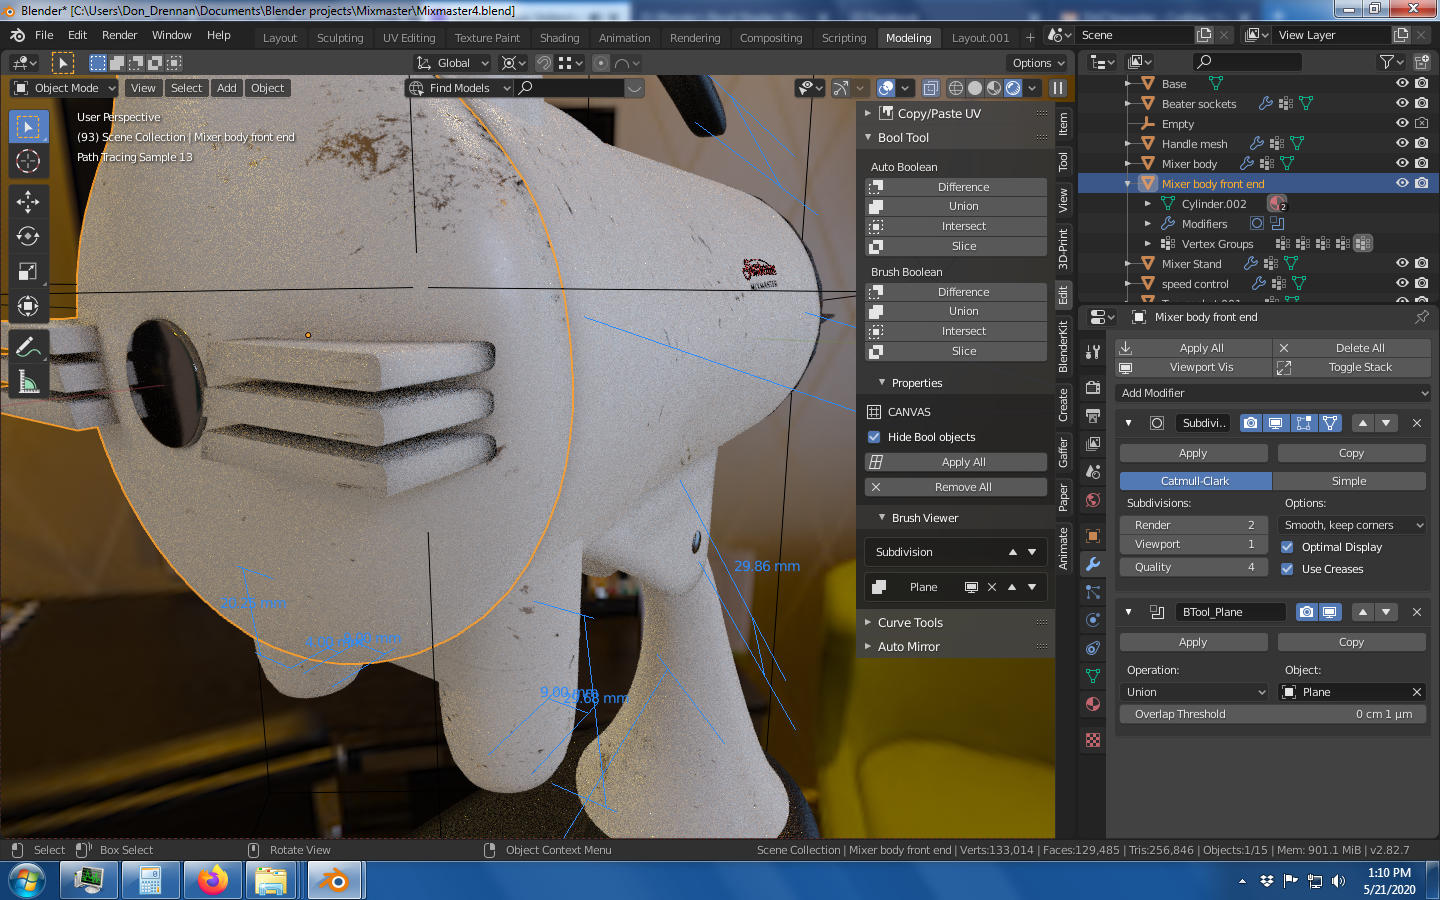
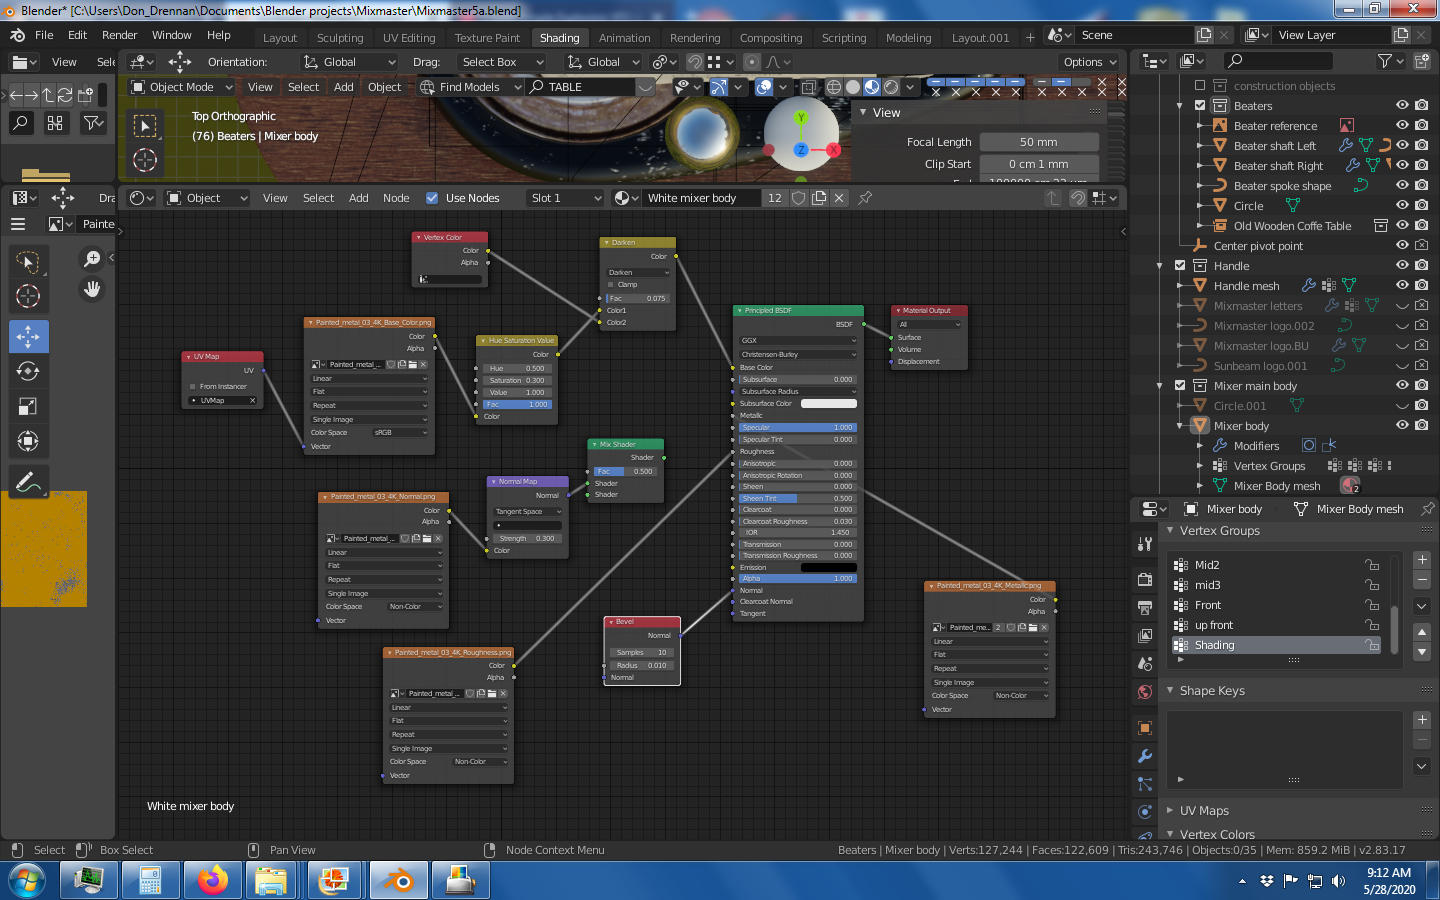
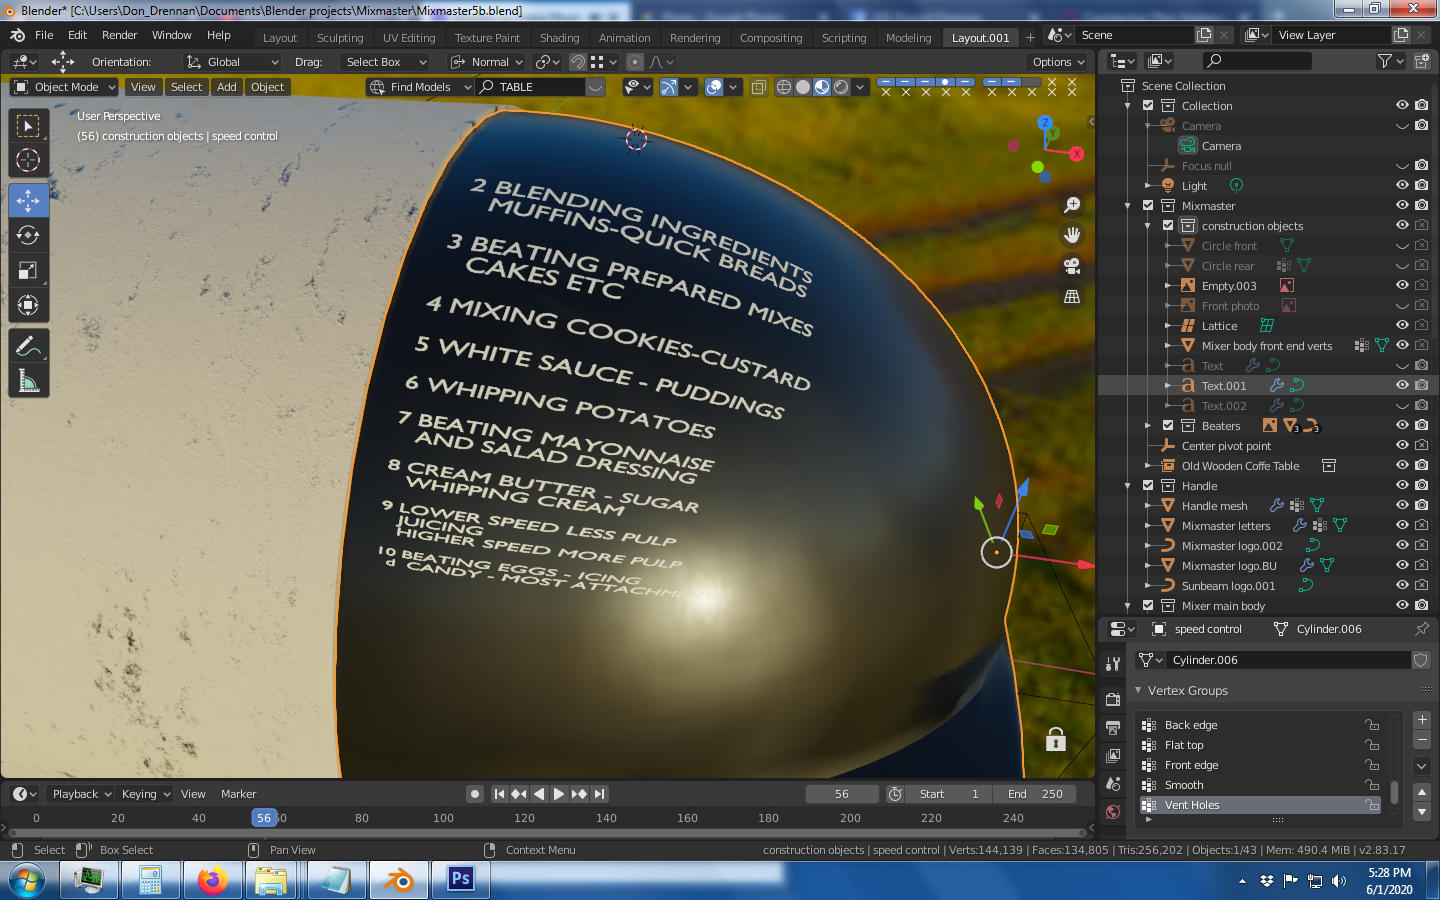
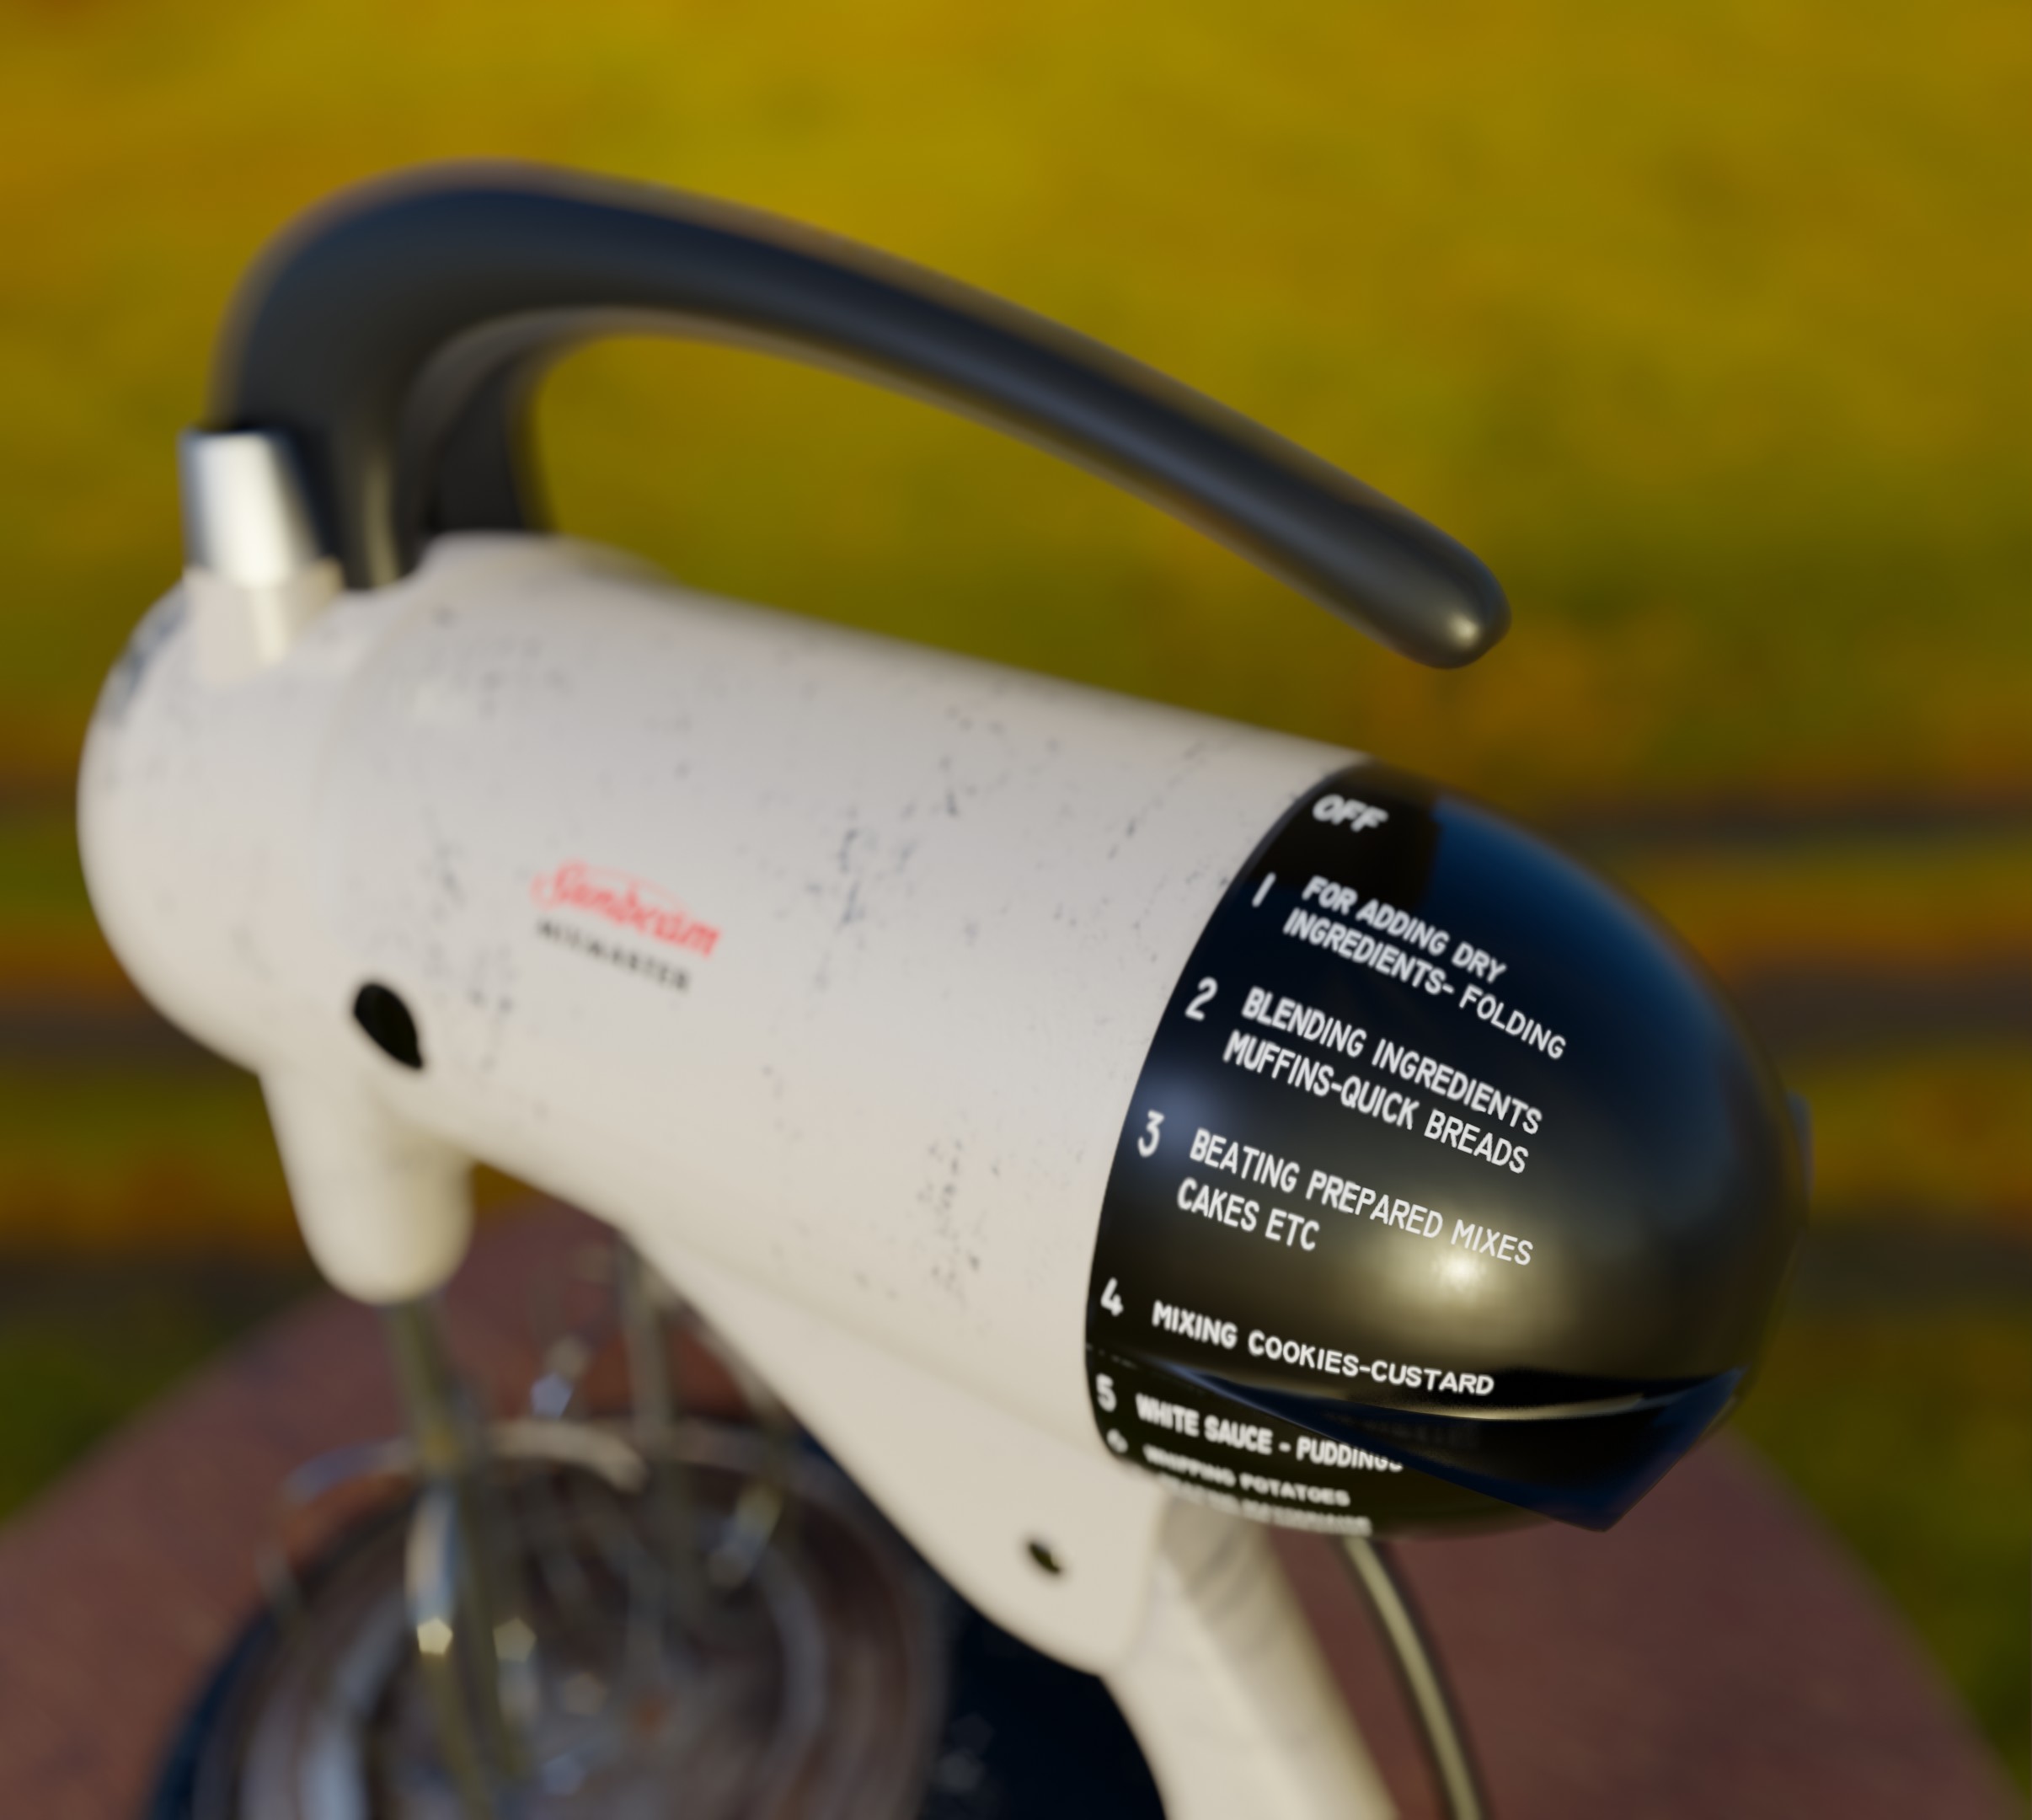
This part is very tricky too. It seems like it would be simple, but with all the fine details it’s not. that circle in the center is supposed to be a perfect circle, not a wavy edged circle. And right now I’m using a boolean modifier, and I found it strange that I have to choose Union to get this result, and it 's still not the result I really want. I only want to cut the surface, not add that geometry inside. I tried all the different choices but the rest of them added my cutting object to the front of the mixer. I’d like to be able to use a Solidify modifier to give that edge thickness. It’s just a vent hole for the motor. Also it should have a bevel on it, but I’m not sure how to add that since I can’t make a vertex group because it’s not real geometry because I’m using a modifier. I’m afraid that making those cuts permanent will cause topology problems and shading errors.


Adding those beater sockets properly with booleans is going to take some work too. Now I see why CAD software doesn’t concern the user with polygons and topology. It’s not a real world problem. I probably should be learning how to do this in Fusion 360, but I decided to stick to Blender for the moment.

For staying free better use blender/freecad and there is an actual development crossover with svershok addon.

I have the free for personal use Fusion 360. The company I work for has the full license of it, and they will be using it with their new CNC Router, so I need to learn that.

However, I am interested in the crossover addon for Blender. I will have to look that up. I would like to be able to build things in Blender with more precision.

Thanks!

Here’s my latest render. I modeled the beater sockets more accurately, refined a few areas, and added the vectorized logo to the side using the shrinkwrap modifier.

Any idea how I can make that boolean in the front work better? I’d like to add bevels to the cuts. I tried applying the bevel shader, but it does nothing.

Thanks.

Hello,
I think I’ve read that bevel after boolean is impossible. But there ist an addon for this operation.
Might be the solution for you:

Let me know if it helps :slightly_smiling_face:

BTW: I also use Fusion360 and blender!

1 Like

Johnhaens,

I have seen people do it in YouTube videos like this one.

For some reason, it’s not working for me. Also, I don’t want to put a bevel on the whole object, just around my cuts, but I can’t select non-existent vertices to limit the bevel to those edges.

Booleans are just not working as expected for me. Here is one behaving strangely. It’s just cutting the surface, not adding the geometry inside from my cutting object. This is what I want in the front piece, but with solidify and a bevel. (which I tried on this piece and it didn’t work)

Also, if you’ll remember from my first post, the Bool Tool was giving me this using Union instead of Difference.

Yesterday, inexplicably, without me changing any settings, it started looking like this:

Update: this switched back to the way it was before. I have no idea why. Other booleans I’ve tried to do haven’t worked. Is it true that doing a boolean on a curve built object converts it to mesh? I tried to boolean the logo into the top of the handle, awful results, and the logo, which I brought in from Inkscape as SVG, converted to mesh.

Render from yesterday. I’m having problems getting that front part to match in size to the body.

In this previous render, it was slightly smaller, and the end of the body was getting shaded rounded off. I added more loop cuts and applied a crease to it and it still looks rounded.

Can anyone tell me why this is happening? Eevee render looks fine, but Cycles wants to shade things round. I’ve marked the edge sharp, I’ve added more loop cuts, nothing seems to help.

Eevee

Cycles

Notice the front edge of the main body is rounded, and the contour lines on the side are smoothed out. None of that happens in Eevee. Is there a setting I’m missing specific to Cycles?

Here it is in MatCap. It looks perfectly fine.

I’ve tried everything I can think of. I removed custom split normals, I added a Weighted Normal modifier, nothing I do seems to have any effect at all. I even set it to Shade Flat, and nothing changed. Really, it looked exactly the same as above, no faceting. I’m tearing my hair out. I’m glad I like the Eevee renders better.

im no expert in hard surface modeling because ive never been properly taught in it. But for those boolean cuts i think the gist of it is that for blender to know how to accurately shade it and create good topology for a boolean difference operation you need to have a lot of geometry to work with… So if you created something as a test and subdivided it to a high amount both the cutter and the object you want to place the cut in, you will notice much better results… Also you might have to go in and clean up around the edges of the topology to fix shading artifacts… And dont forget the auto smooth normals check box.

I was under the impression that having a highly subdivided mesh would cause problems with booleans, because of cuts intersecting with existing edges, so I’ve always avoided that.

I finally came up with a better solution to those front grill holes. I used Knife Project, and it worked very well. There wasn’t even very much clean up to do. Then I inset faces to make a bevel and extruded inward a few millimeters to create the right thickness of that piece.

The problem with the shading above is really baffling though.

Do you use a subdivision modifier? If so, is the viewport and render settings the same?

Yes, and yes. Why? Both viewport and render set to 3.

I have just tried following that video and didn’t work or me either. The only way I could bevel properly after a boolean was to do it manually with ctrl+B

If they where set different between viewport and render it could explain the difference you get in rendering between eevee and cycles.
Maybe you have to crank up the light a little in the cycles render? Eevee have very strong highlights but the cycles render feels dark with almost no highlights. Hard to tell if its the shading or geometry that makes it look smooth.

Edit: I looked again and it it really feels like the subdivisions are set different between eevee and cycles it’s a big difference in the way the geometry looks. You don’t have any bevel shading in the matrerial or so? can you show a screenshot of the modifiers and shading?

It’s the shading. I had a bevel shader node plugged in, which I had forgotten about. I had been experimenting.

That was overriding all my settings. Thanks for mentioning shading. I had not thought to look there.

Smoothing on

Smoothing off

Smoothing and Subdivision off

MatCap, same settings

Shading. I’m sure I didn’t even have it set right. I think I’m understanding how that works now.

After removing

So, that doesn’t have any effect in Eevee?

Thanks!

Here’s the most recent render in Cycles. Much better, although still not picking up highlights on the edges as nicely as Eevee. I have Auto Smoothing set to 30 degrees.

Also, I took a look at this. I had the exposure set to .25 in Cycles, I think because I thought the white looked too blown out. This is set to 1. I think I may lower it just a bit.

I also turned on Adaptive Sampling. That’s helped enormously. Quicker to render, and no “fireflys”.

That’s right, The bevel shader only works in Cycles.

Putting text onto the speed controller.
I was going to do this the same way I had done the Sunbeam Mixmaster logo, as a vector shape with Shrinkwrap, but I found this doesn’t work so well.

I’m going to try an image map. Not sure how that’s going to work.

This is a UV mapped PNG image. It’s okay, but it was tough to get it on there and keep all the letters equal in size, and where they’re supposed to be on the thing. It’s not as perfect as I’d want it to be.