it kinda goes without saying, but if you see something that you think could be improved then feel free to comment that. I’m open to suggestions (and don’t worry, I don’t bite)
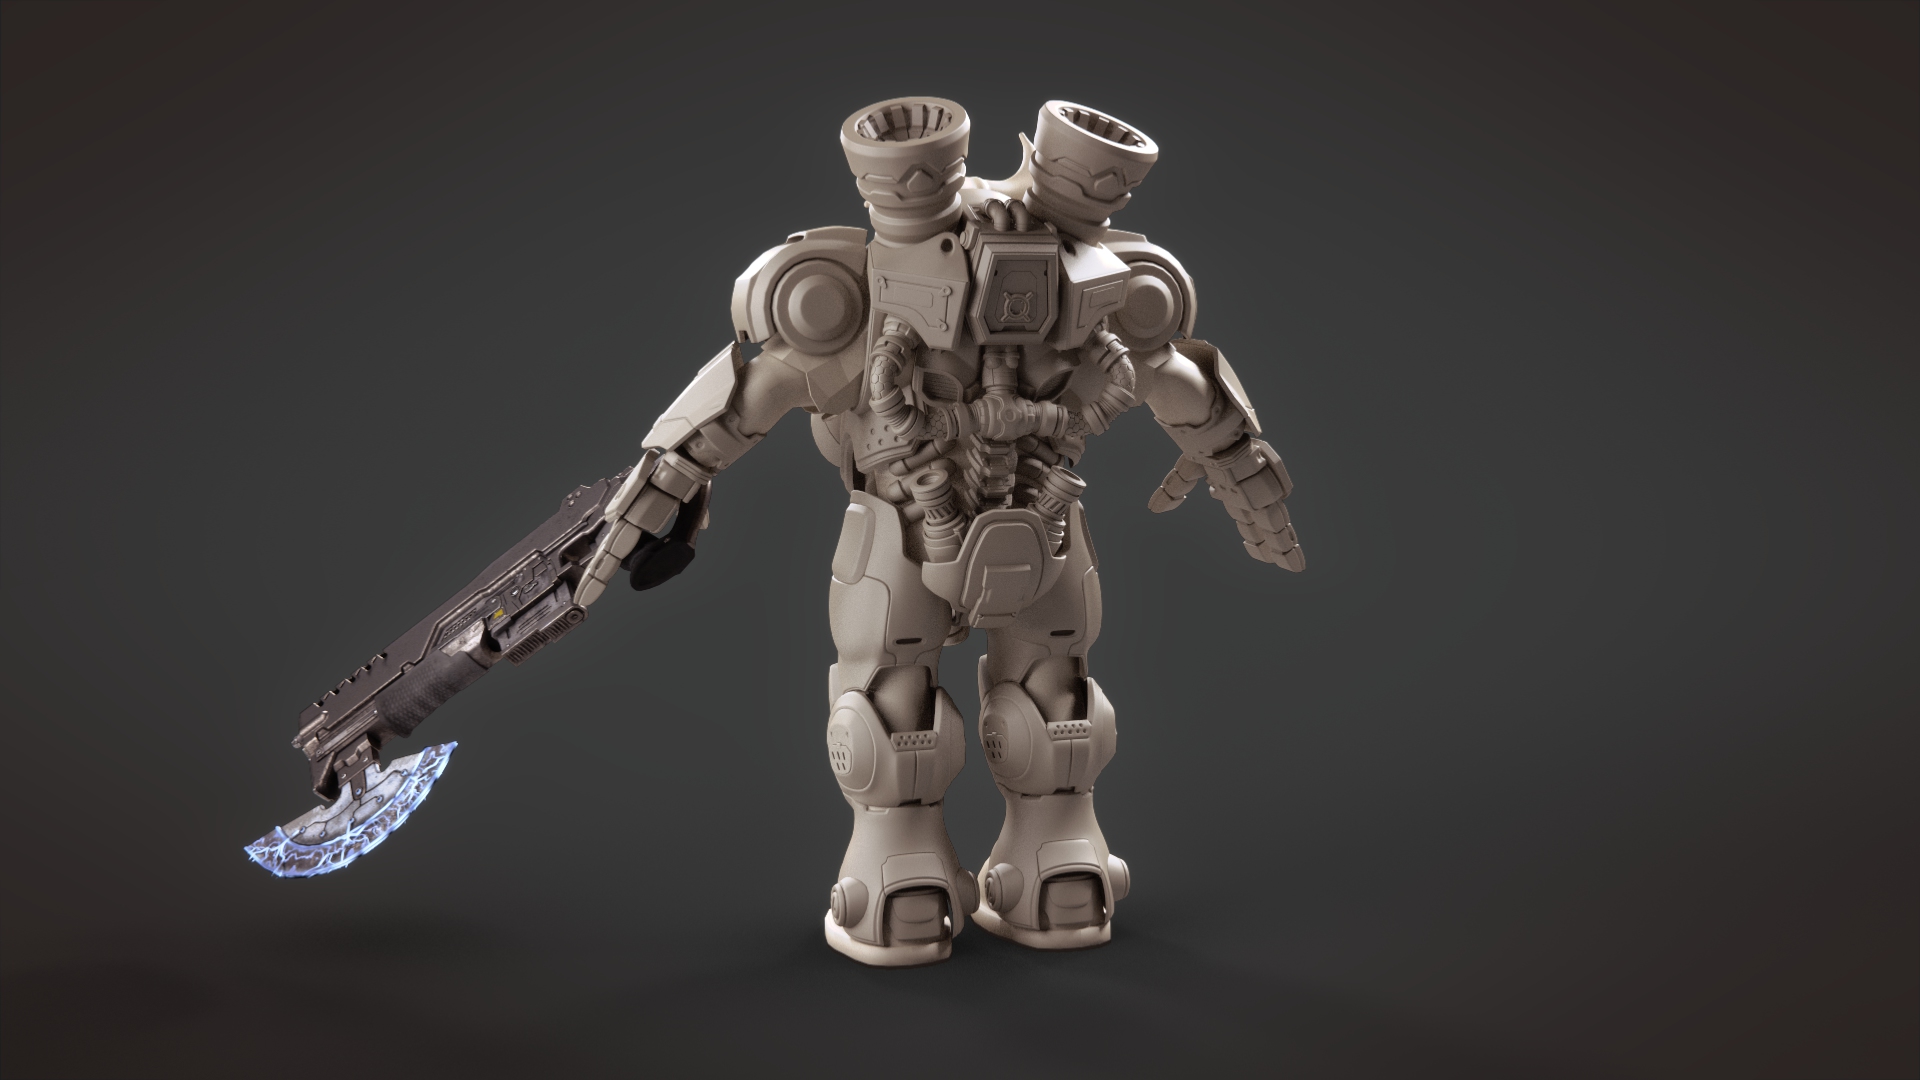
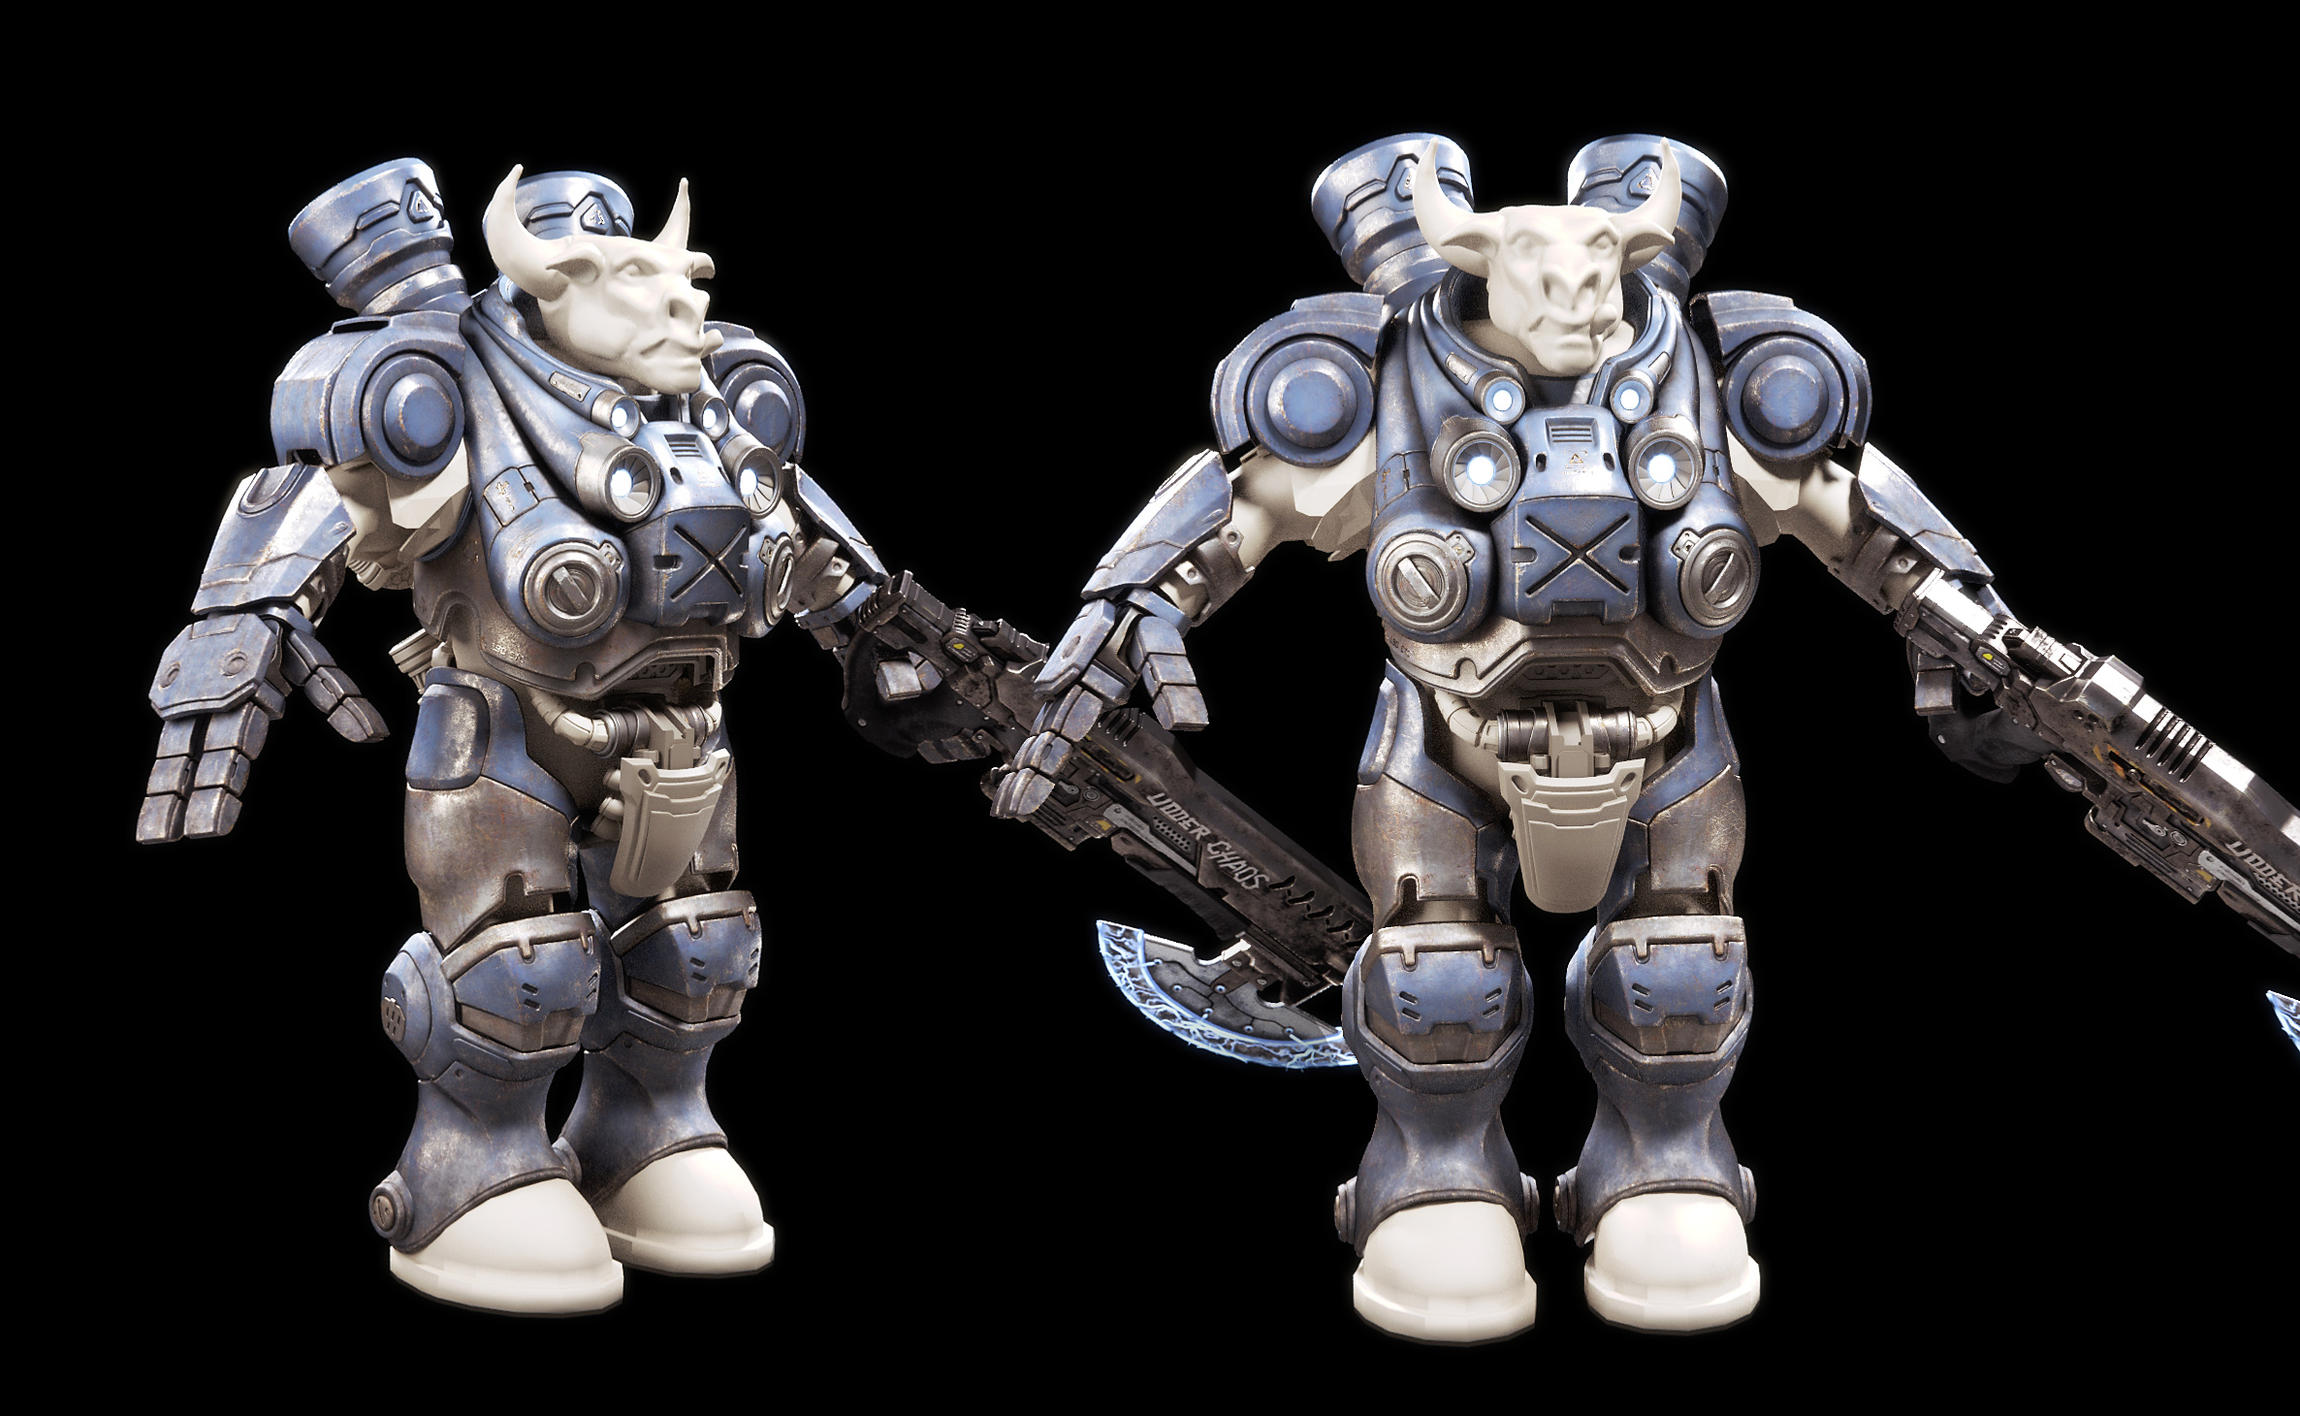
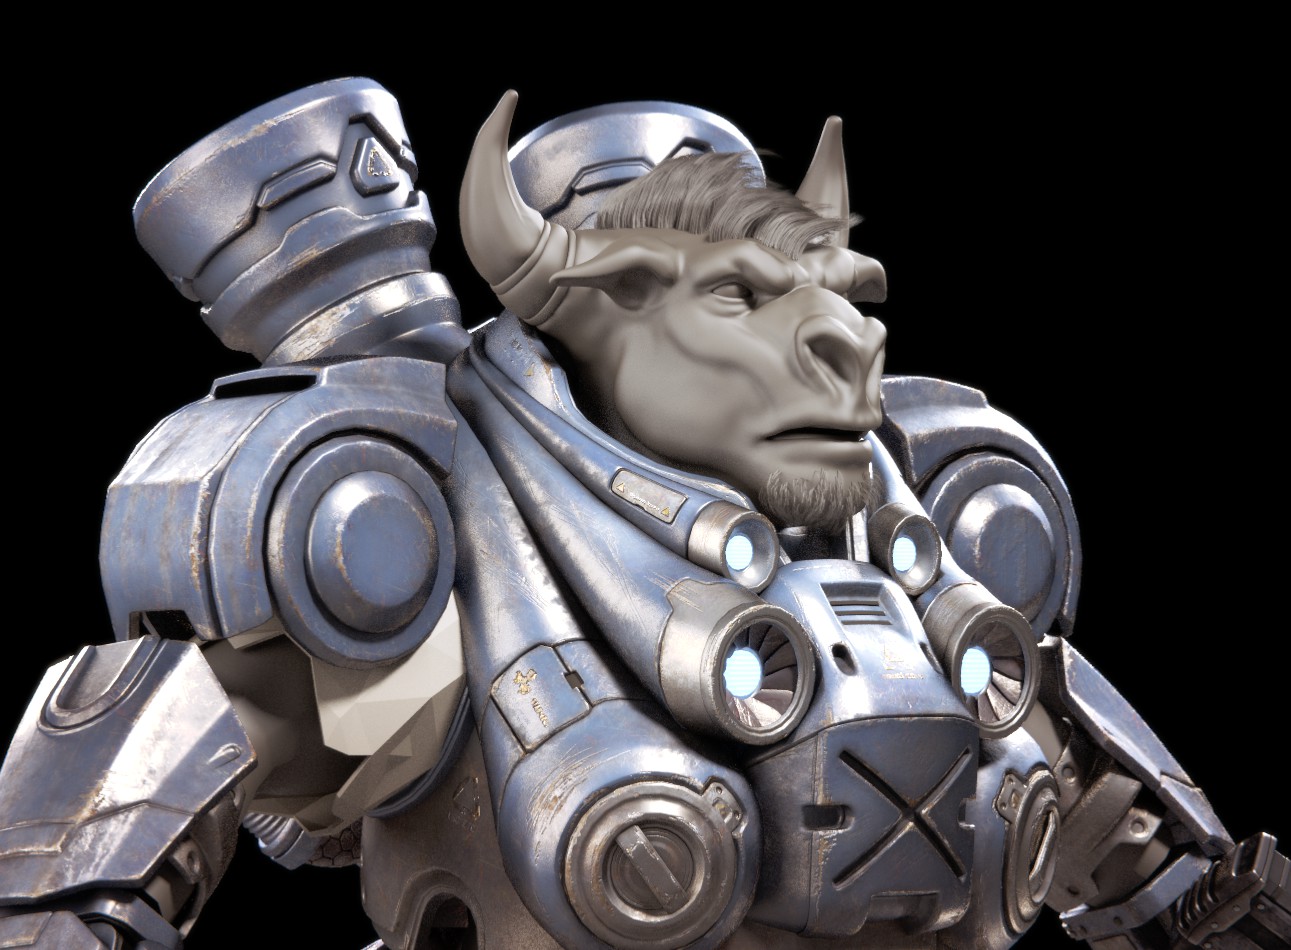
That is just stunning! I love all the detail work, the suit looks awesome!
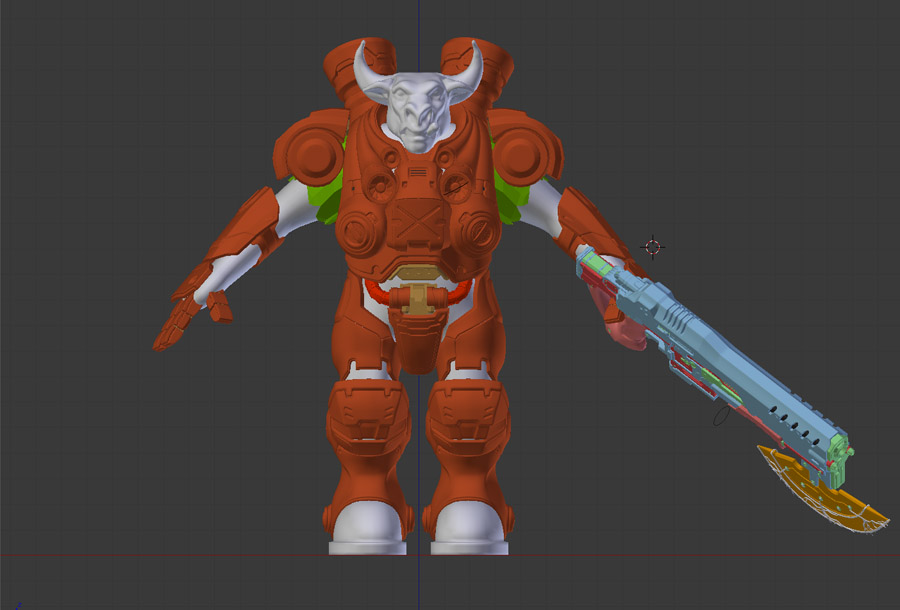
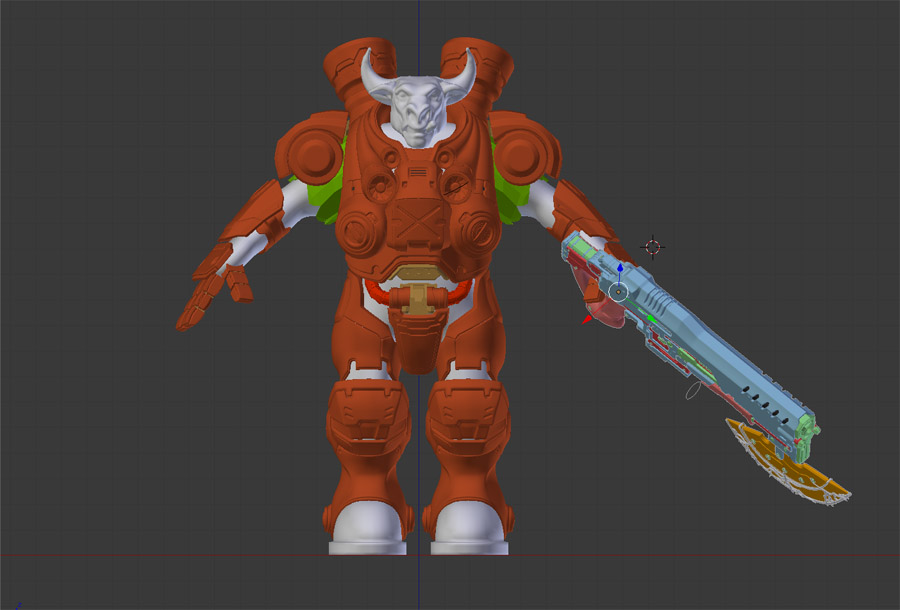
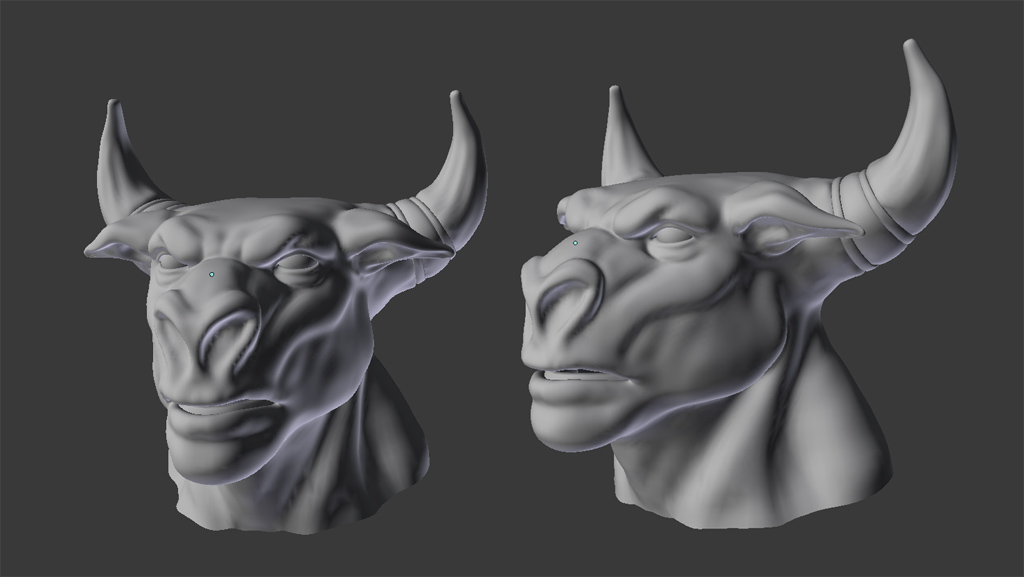
I was just wondering, why it looks so much like a small figurine. I think it is the size of the head. I know that Tauren have huge heads, but if you look at a normal human space marine, their head is tiny compared to the rest of the body. Maybe you can experiment with the head size and see if that changes the look.
On second thought it might also just be the current pose. Maybe once you make a bad ass Raynor-like stance then everything’s cool
About the only thing I can think of, assuming that you are trying to go for an actual WoW Tauren look, is that the ears are behind and slightly below their horns.
Try a Google image search for “wow tauren” and take a look at some of the art. They tend to also have a very massive build (which you could argue for or against, depending on if he is a physical combatant type), large forearms, and a hunch for a neck. Also, the horn style you used is not any of the predefined horn types. Your models horns seem to have a very “U” like look to them, but I suppose we can grant you some artistic freedom here
That being said, I never really looked at the SC2 version of this character in the game close enough lately to remember how they designed it.
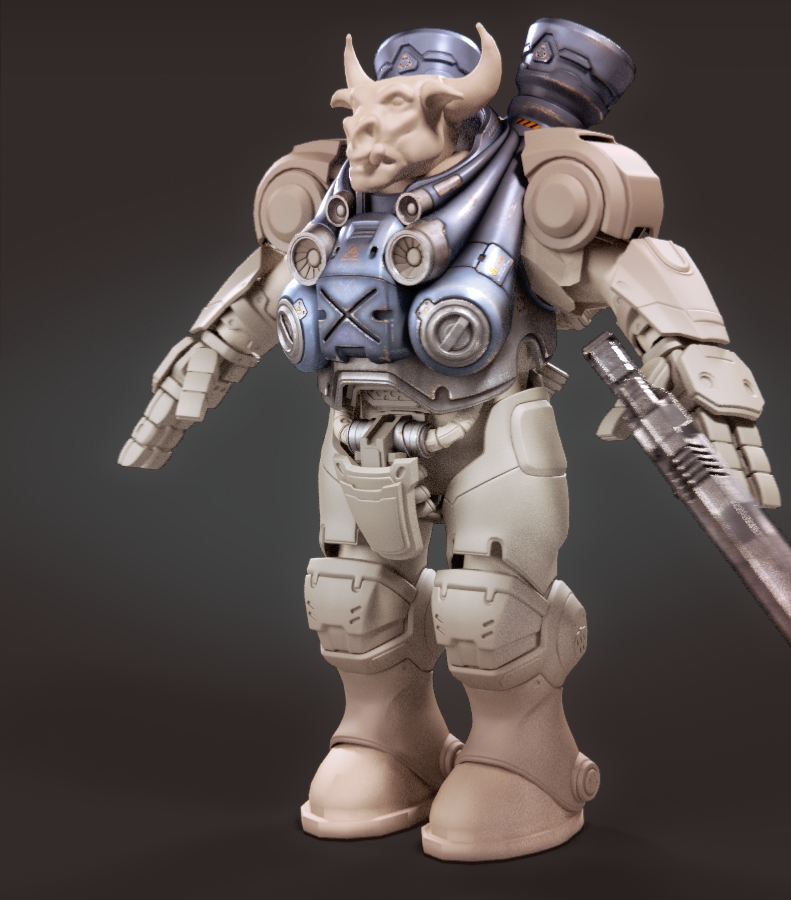
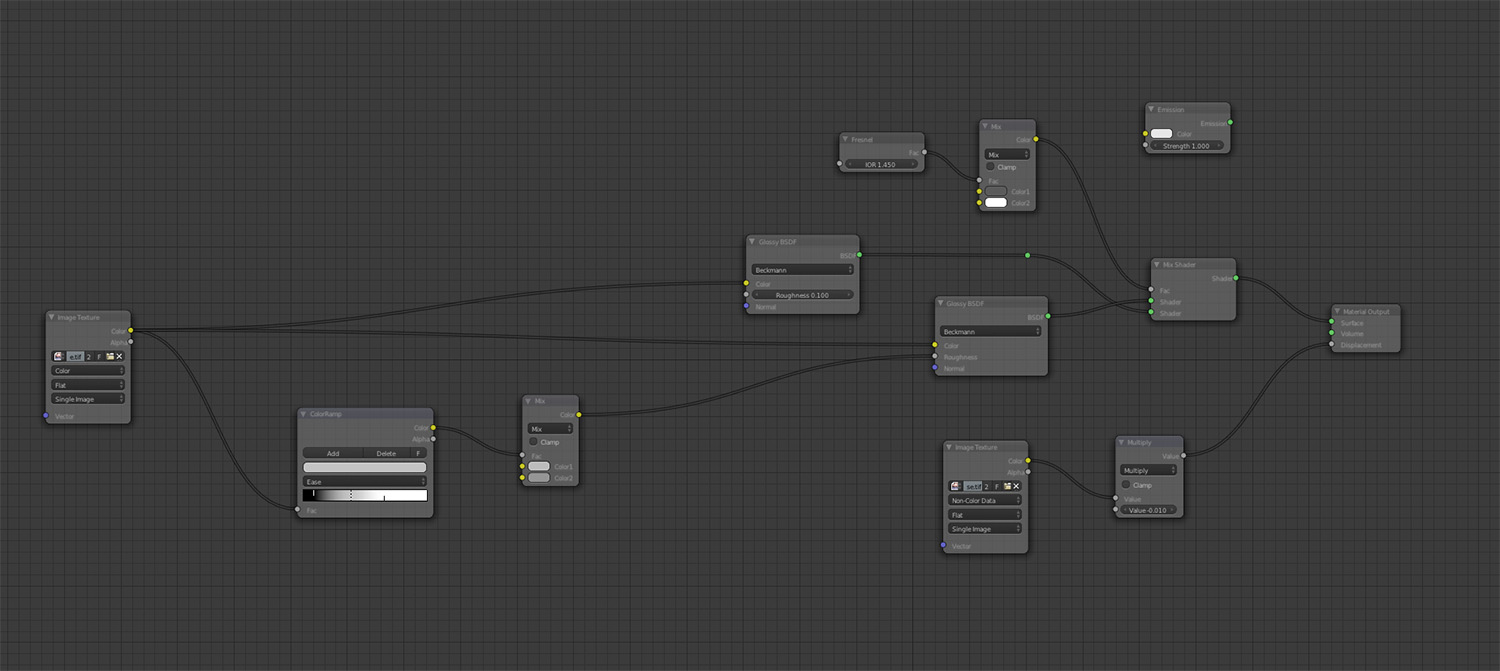
I’ve been busy doing something completely unrelated, but now I’m back working on this guy. I have layed out the UV’s for the torso and in the render above you can see the WIP texture. I usually try to implement the textures into a functioning material as early as possible so that I can evaluate them a bit better. Bellow you can see the cycles-shadertree. It is currently only using one diffuse texture, but i will of course eventually make dedicated bump and reflectivity maps:
the texturing is taking quite a bit of time. I’m aiming for something that can be used fairly close up so this needs to work at close range + for full body shots
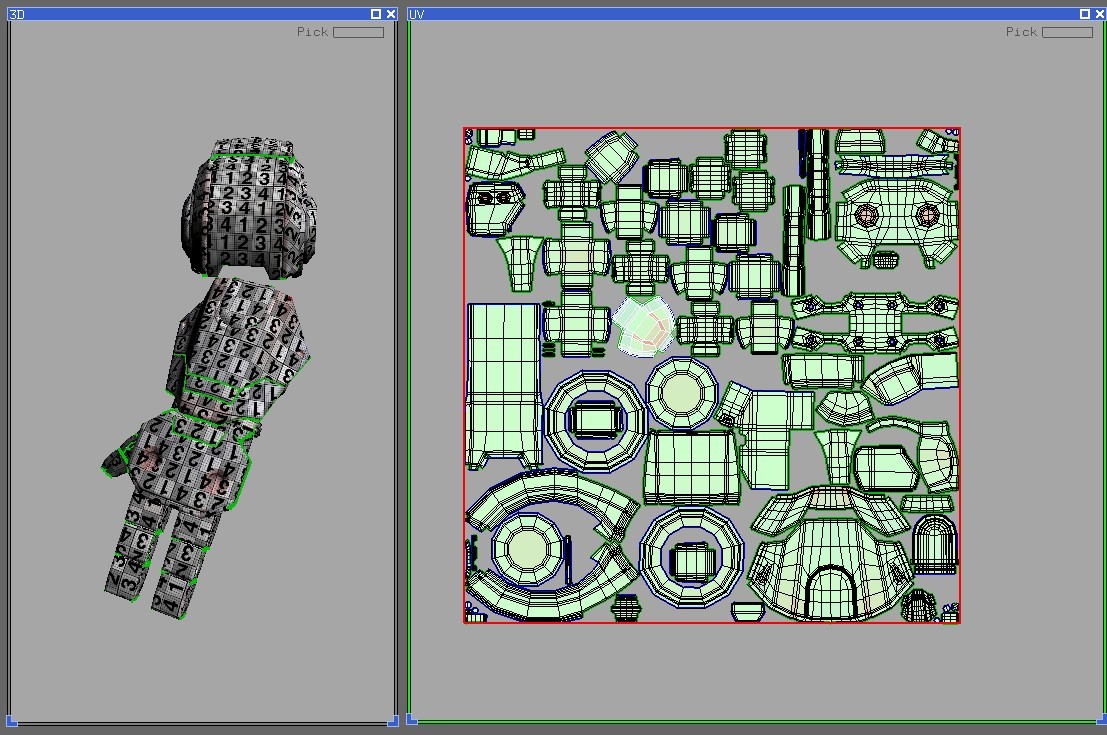
there’s not too much else to say… so I’ll just throw in a couple screenshots of the very exiting UV’s!
(ok… i lied… the uv’s are not very exiting )
Those textures look sick! Can you tell us a little bit about the process you use to create them? I really suck at making textures and I’d love to learn from you
Very nice texturing! The close up almost looks like a photo. One or two big scratches which are visible on the front shot of the model would be neat, though
that’s headus uvlayout. It has a very simplistic UI. Very spartan. The red areas shows stretching, the blue shows compression and light green is good uvs. The primary reason I use Headus is because of it’s packing tools. If you look closely you can see that some uv islands are placed inside of concave areas of other uv islands. Blender’s packing tools doesn’t support that. In blender every island gets a bounding box around them and packs based on that bounding box… or at least that is my understanding of it. I did use blender to create all the seams and doing the initial uvs.
I’d love to go into detail about the texturing process, but it would take me a bit too long to write.
The general idea for texturing is to work in a layered approach. In a Photoshop + Blender workflow you can think of Photoshop as the main assembly, that is where all the layers end up and all the fine adjustments happen. Blender is used in a supporting role as a way to paint specific maps, usually black and white masks for use in PS. But also to paint general gradients and something I like to call “guide maps”. The guide map is just used as a… well, a guide to help you place stickers, decals and text. That kind of map is really useful on complex models. I used that technique a quite lot when I textured the QuadBot and the robot hand for Mango.
thanks you. I agree, some bigger scale scratches would add a lot. I have to see if I can get away with painting it as part of the texture, or if I have to move into sculpting to get a good result. It’s on my list
I’ll do some sketching and tests before deciding on a pose. I’ll probably end up doing something similar to that in the original concept http://images1.wikia.nocookie.net/__cb20080512055846/starcraft/images/a/a6/TaurenMarine_SC2_Art1.jpg
(but minus the murloc ).
The plan is to repurpose a a rig that I made a few months ago and pose him using that. If the rigging stage goes smoothly then I might even be able to do a tiny bit of animation, but that is not strictly necessary for what i’m planning.
I haven’t done a really detailed texture job for a while (hasn’t been required at work so much) but your last few posts really want to make me get back into it.
IF you did have time, in the future, I think some of us would greatly benefit from even a basic rundown of how your texture workflow happens. Kudos on the details and the modeling so far - I missed this til now, but I’m glad I found this when I woke up
thanks Ben! I already have waaay too many books… but one more cant hurt
thanks Craig. I can understand that you want some more info on the texturing. Texturing, compared to modeling, is often a overlooked part of the process.
Proper texturing can take time, but It’s not rocket science. It’s just a matter of starting with a base, then add grime, dirt, scratches, stickers and whatever you can think of that makes sense on top of that base. The key is to keep a nice balance between “clean” and “overly textured”-areas of your model. Too much texture will flatten the model and make it … (in lack of a better word) noisy.


 You’ve got really nice texturing skills!
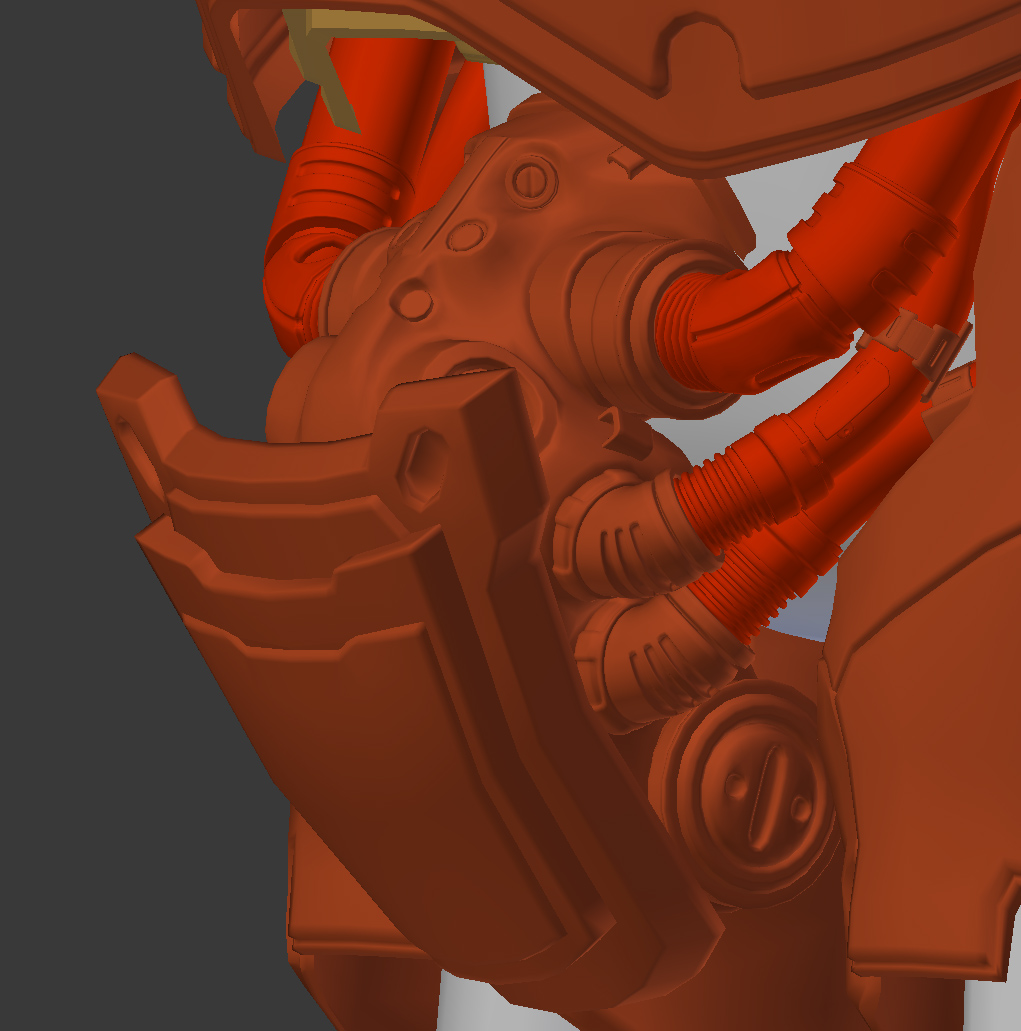