Teen Toon

It’s been awhile since I posted anything so here is what I’ve been working on of late.
I really enjoyed the toon art of Andrew Hickinbottom, and others like Shadosk’s “A Toon Girl”, “Sara” by Ernesto Ruiz Velasco, and Disney’s “Meg” from Paperman.
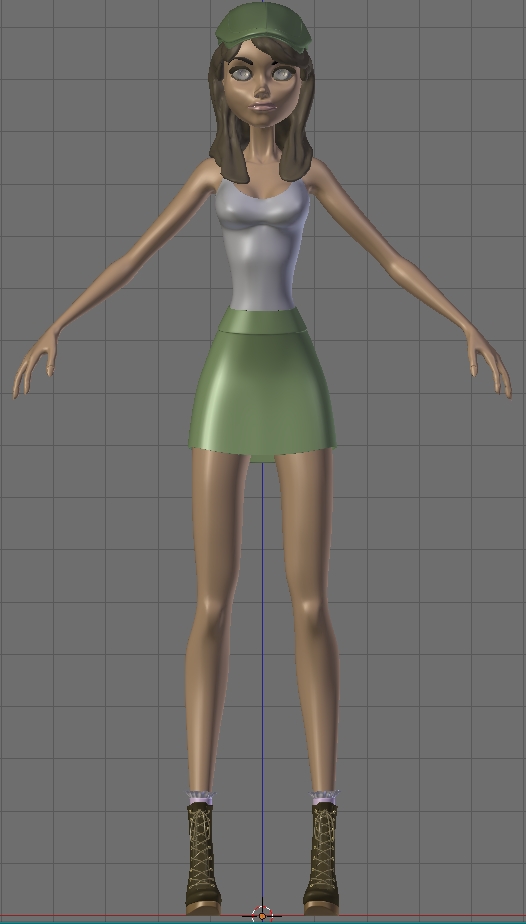
I used them to inspire this model. I hope I did OK without looking too much like any of them.

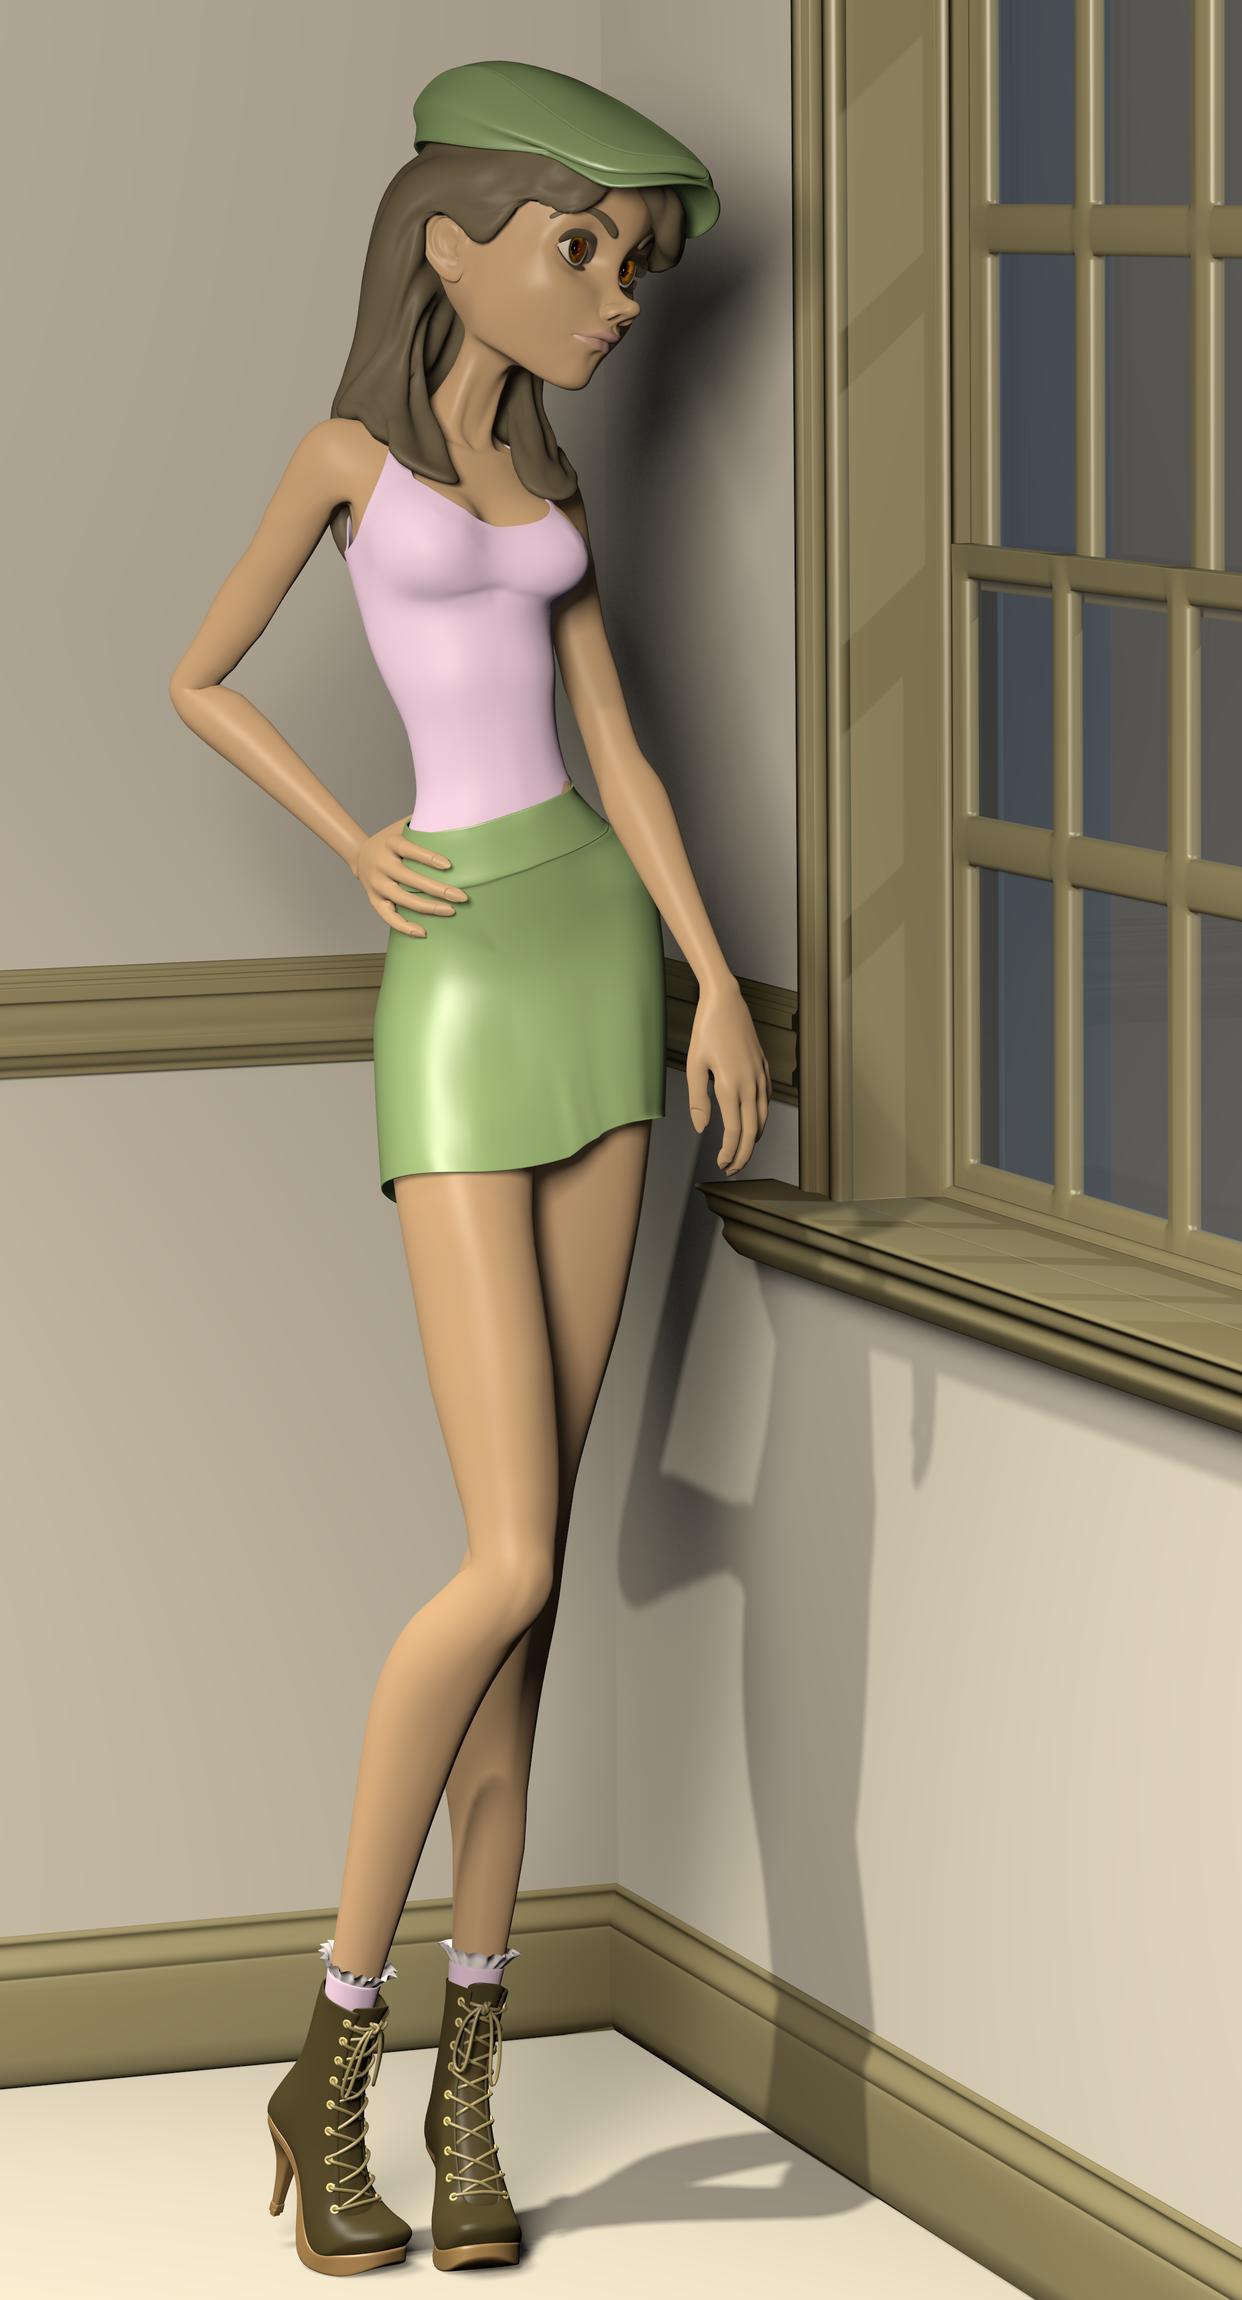
This is the first time I have tried to pose a model and actually make a still image that was not a “T” pose on a flat background.
I am finding I am a little lost and could use some direction.
I want to use my ZBrush to detail the clothes wrinkles and do her hair.
I also need to do all of the texture maps for skin clothes, etc.
What I don’t know is the order of the steps.
Do I finish all the maps in Blender and then move to ZBrush and finish it there?
Do I ZBrush the details and tweak the surfaces first and then bring it back to Blender to do the maps?
I could really use some advise on steps to finish this into a respectable still image please.

Also, any critiques are welcome.


[ATTACH=CONFIG]247130[/ATTACH]

Topology looks great. But in the rendered image, I like to see some emotion. She looks like a mannequin there.

Thanks.
This is just the rough pose I worked out.
Her eyes need to be looking somewhere and she needs some expression with a smile.
That is part of what I hope to be able to finish with ZBrush if I can figure out the right process order.

She’s a bit crosseyed.

Looking good. Very nice model. I think you should complete detailing the model first then go to make textures.

Thanks for the replies.
I finally had time to work on it again and I’m trying to apply all the good advise.

Here she is with some eye work and better hand posing. Still no expression but it will be coming.

So what do think?


A couple more views.
Tried to have her looking out the window.
Critiques welcome.


I really enjoy this from the first post - I don’t DO what you’re looking to do with the ZBrush detailing so take this with a grain of salt. Rough it all out like you have in #7 here out the window and take your best rough to ZBrush already unwrapped.

Sculpt details until your computer smokes. With her pose already set in the rough, all the wrinkles, freckles and thread details will be oriented artistically the right way as you see fit. They go (somehow magically) into displace and/or texture maps that fit the unwrapping or maybe you have to tweak a little here and there. That’s my understanding, I’ve never done it in practice.

*and I’d say add a spiral motion to her pose. Looking out the window is great, let that left arm contribute to a spiral flow and, depending if she’s bored or curious, consider having her lean on that wall integrating the two objects visually.

It’s great, nice job in the design.
The hair solution is also very interesting.

However I think a bit longer forearms would improve her anatomical structure; traditionally speaking, standing up with the arms down vertically, her stretched fingers should be able to reach, not the knees, but close to them. But I don’t know your design intention.

Thanks everyone for the input.
I think I may try to get her resting her hand on the wall. That sounds like a good alteration to the pose.
I also want to thank and credit “montedre” for his window model I found on Blenderswap.

I was using this pose reference to try getting a somewhat natural look. I think the arms are about the same unless I’m just not seeing something.

All input is appreciated.


Well, maybe I’m just having some kind of ‘optical illusion’. One good way to be sure about it would be to pose the 3D model girl character with her arms mostly vertically stretched downward, including the fingers, and see how far it can reach (if it very far from the top of the knees, it’ll be ‘wrong’).

Here is an update.
I’ve settled on a pose I called ‘Anxiously Waiting’ and cleaned up the basic mesh with some correction keys.
I think I have everything fixed that was mentioned in the prior critiques.
Still need to do all the sculpting work and do the UV maps.
(Thanks to those who offered assets on Blenderswap for the objects in the room.)

I’m having trouble with the DOF.
The Max Blur is working but the fStop setting does not seem to have any affect.
Any ideas?


Hope you are liking this.


Critiques are always welcome.

Great pose you’ve picked! F-8 is still a fairly small aperture even in real life being only 2 stops off 16. Have you picked the DOF target? For the sake of example or “proof of life,” in the effect, jam it to F-2 and then work back from that since the depth isn’t vast in this corner scene.

For clarity, can the teddy bear change to a color that’s not so similar to the boots and floor moulding?

I picked the girls body as the DOF target and I’ll give the F-2 a go and see if that makes a difference.
I think you are right about the bear. It needs to stand out from the boots and trim. Maybe I need to give it a little color. I had it a lighter brown and if was too much like the walls. I think I also need to give the floor a color different from the walls.

Wonderful work and great progress.

A very good model and solid posing so far, the last is very expressive. You’ve managed to keep the often-seen thin, elongated (and sometimes called skinny) body shape fairly fresh looking, the mod-nouveau style is very cute.

One thing you might consider while progressing through the detailing and texturing is to move it all into a Cycles environment. Given the emotional content you’re striving for, I think Cycles could be a solid choice to get a very evocative mood to the scene.

Thanks for the comments.
I was trying for a cute “Girls Just Wanna have Fun” look; like she was waiting for her friends on Friday night.

Chipmasque, I will give the Cycles a try. I have not done anything in cycles yet but it looks like its got to where I should give it a go.

Until then I have a lot of other work to do including ZBrush and the UV texture maps.
Here is the beginnings of the ZBrush detailing.
Never done this before either so this project is covering a lot of new ground for me.
Let me know whats working and what isn’t on the wrinkles and details please.


The detailing is looking good, though the prominence of her neck muscles seems exaggerated for such a serene pose. And for some reason, probably wholly irrational, the electric outlet plate below the window draws my eye strongly, kind of a distraction.

Not sure what emotional tone you’re trying to set, but along with the “waiting for friends” vibe I get a very strong, and rather pensive, “but are they going to show up” vibe, as if she’s a little unsure of herself.

Cycles lighting and materials can be daunting at first, but are both in many ways a great deal less complex than BI procedures. With both hair and SSS options available, it’s rapidly catching up to BI’s full capability, and the way it portrays light is much more sophisticated, even for “cartoon” settings.

[quote=“chipmasque,post:18,topic:581308"”]

The detailing is looking good, though the prominence of her neck muscles seems exaggerated for such a serene pose. And for some reason, probably wholly irrational, the electric outlet plate below the window draws my eye strongly, kind of a distraction.

Not sure what emotional tone you’re trying to set, but along with the “waiting for friends” vibe I get a very strong, and rather pensive, “but are they going to show up” vibe, as if she’s a little unsure of herself.

Cycles lighting and materials can be daunting at first, but are both in many ways a great deal less complex than BI procedures. With both hair and SSS options available, it’s rapidly catching up to BI’s full capability, and the way it portrays light is much more sophisticated, even for “cartoon” settings.

[/quote]

Sorry it’s been a while. I had to go help a family member for a few days and cycles definitely has a learning curve.
I addressed the neck muscles but had to redo the clothes details in ZBrush. I could not get the original ones to transfer back to Blender. Still don’t full understand that process but I got it to work. May get rid of the plugs under the window but not sure yet. I do want to try Cycles hair but I have a lot to fix before I tackle that one.

Cycles is the real issue at the moment, or should I say, my lack of knowing how to use it. I can’t get the eyes or any transparency to look right. The window glass needs some help as well. I found a couple threads with example node setups for metal but I am struggling to find eyes, transparency, clothes, the water in the bottle, etc. Any suggestions, links, etc?

This is what I did so far with a Cycles render. There are no textures, just diffuse color and three lights made with planes.
I’d appreciate directions or even links to learn/improve the cycles materials. All opinions are welcome.

Attachments


I can put together a package of various materials I’ve used in Cycles. I generally start with image textures, so it’ll be a fairly large zip file, not sure I can find a place to upload it.

Cycles has a very different methodology and conceptual basis than BI’s materials, and the nodes tree structure is critical, so it’ll take some time to get a grasp on its innards, maybe the samples can help.

The scene as is suffers some also I think because of the almost perfectly flat, shadowless lighting, which Cycles can excel at but isn’t always appropriate. There doesn’t seem to be a key light source, lending an “ultra-studio” look that tends to ring false given the scene content. For a more naturalistic approach, consider setting up light objects that mimic actual indoor lighting – usually a floor lamp or overhead, a single key source, probably with a few smaller incidental sources, but most of the fill resulting from bounce off surfaces – Cycles is very good at this kind of bounced fill.