Tern's Landing

Welcome to Tern’s Landing!

This peaceful beach is home to a large population of seabirds :penguin: :bird: :duck:

Art Breakdown

The vast majority of this work was done in Blender (about 75%), while some painting was done in Affinity Photo.
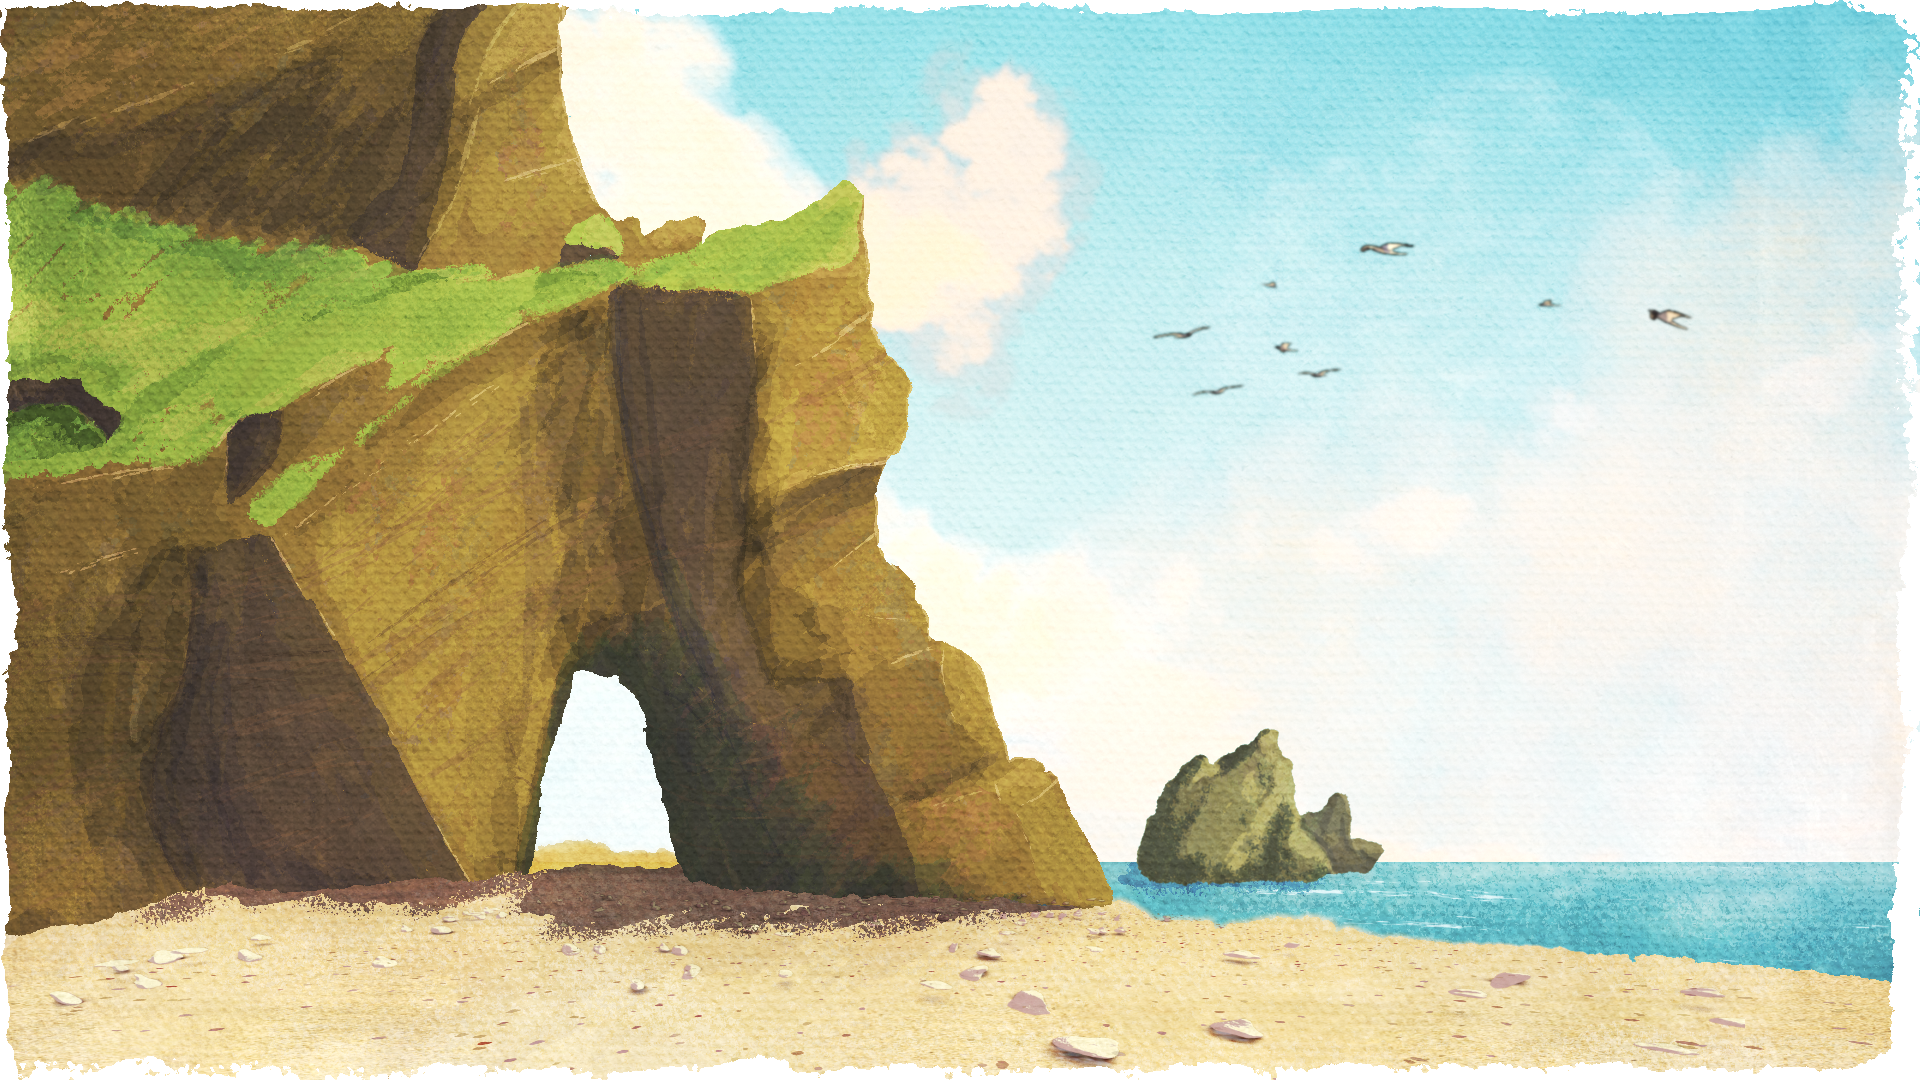
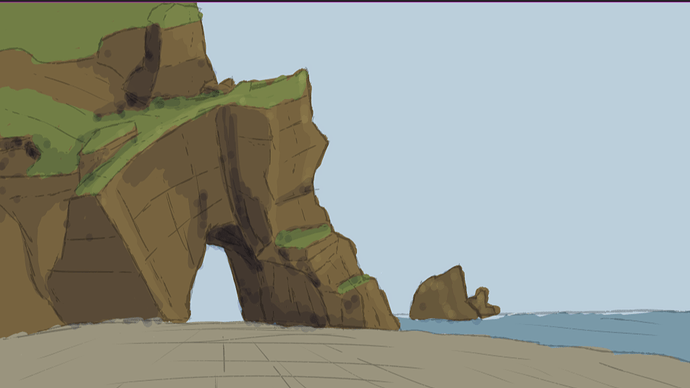
Background

The background was painted in Affinity Photo. I started with a simple sketch, then colored it in:

image
image

Seabirds

Simulation

The paths of the seabirds were done using simulation nodes:

Each path uses the following nodes:

The paths randomize themselves at the beginning, smooth themselves out over time, and slowly randomize themselves over time as well. The seagulls use a Sample Curve node, as well as some angle correction, to follow their path. Each path has one of three base seagulls, which allowed for the animation to be offset.
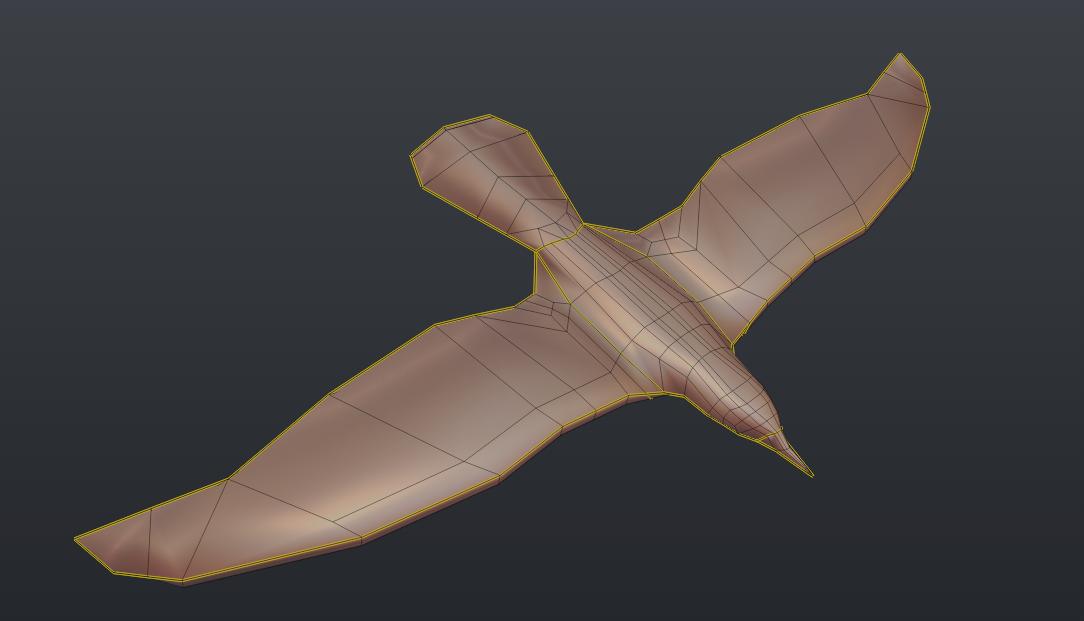
Modeling

The seagulls were poly-modeled in Blender and painted:

They’re low-poly, only 600 tris. I didn’t use any subdivision, as I liked the more angular look of the wings. Here you can see a wireframe:
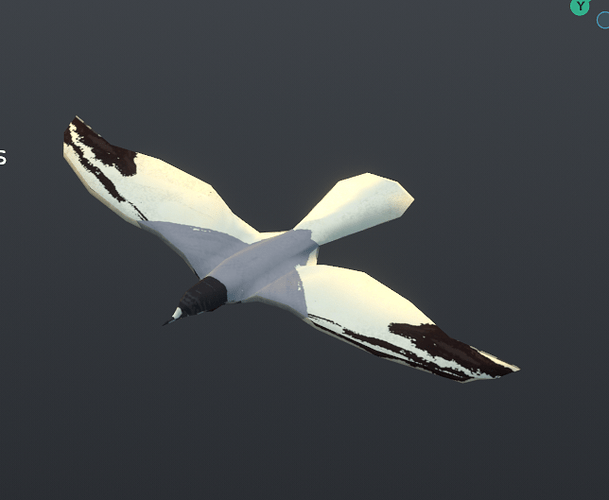
Painting

You can see the UV seams on the model above. I hand-painted the seagulls and gave them simple cel-shading:
0ddcd9b11789180ba4aa9ade6202d1a07a8c2368_2_609x500

Animation

The seagulls were then rigged in Blender and animated in Blender. The skeleton was kept very simple:


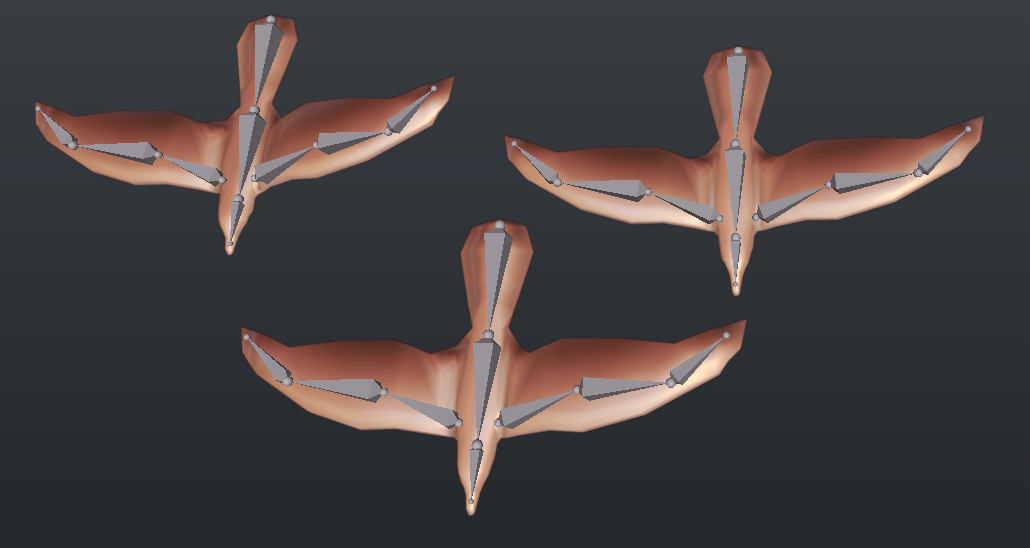
The seagulls mainly just coast, while occasionally flapping:

I added some subtle noise to the wing bone animations to replicate the effect of small wind currents you can see on real seabirds (I used slow motion video reference as I was animating.)
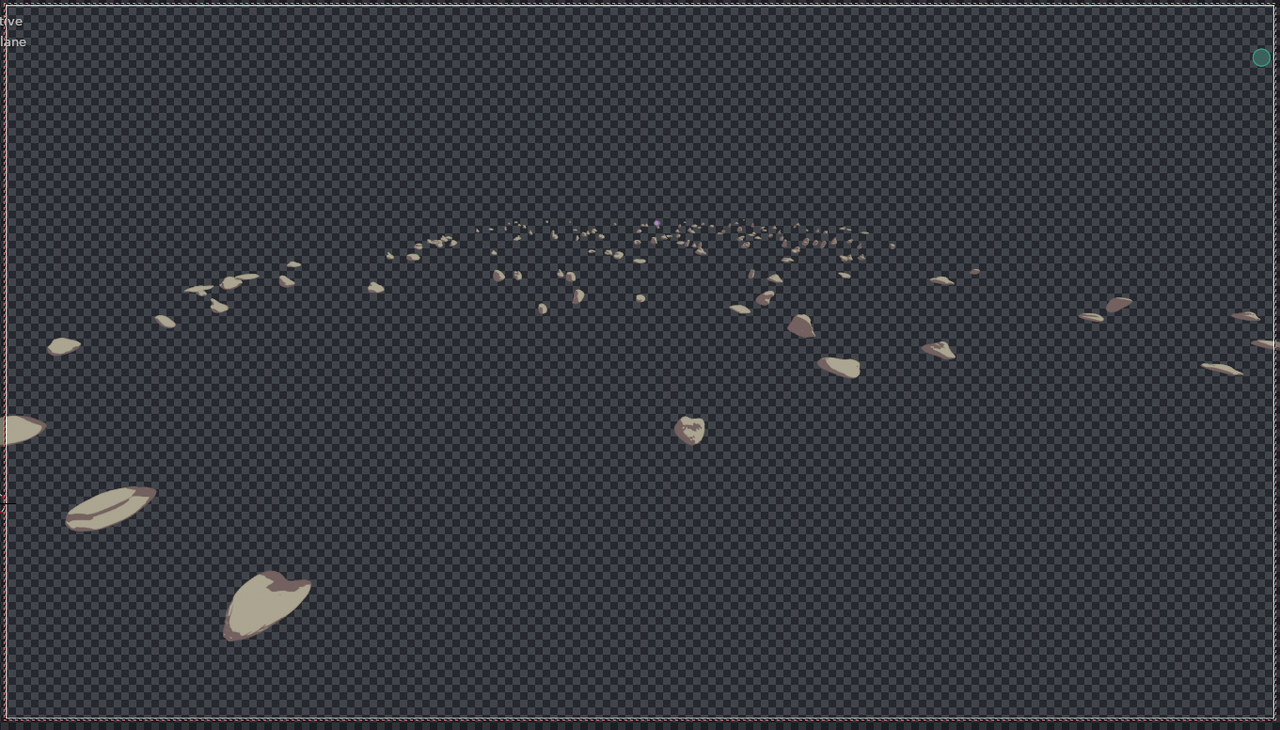
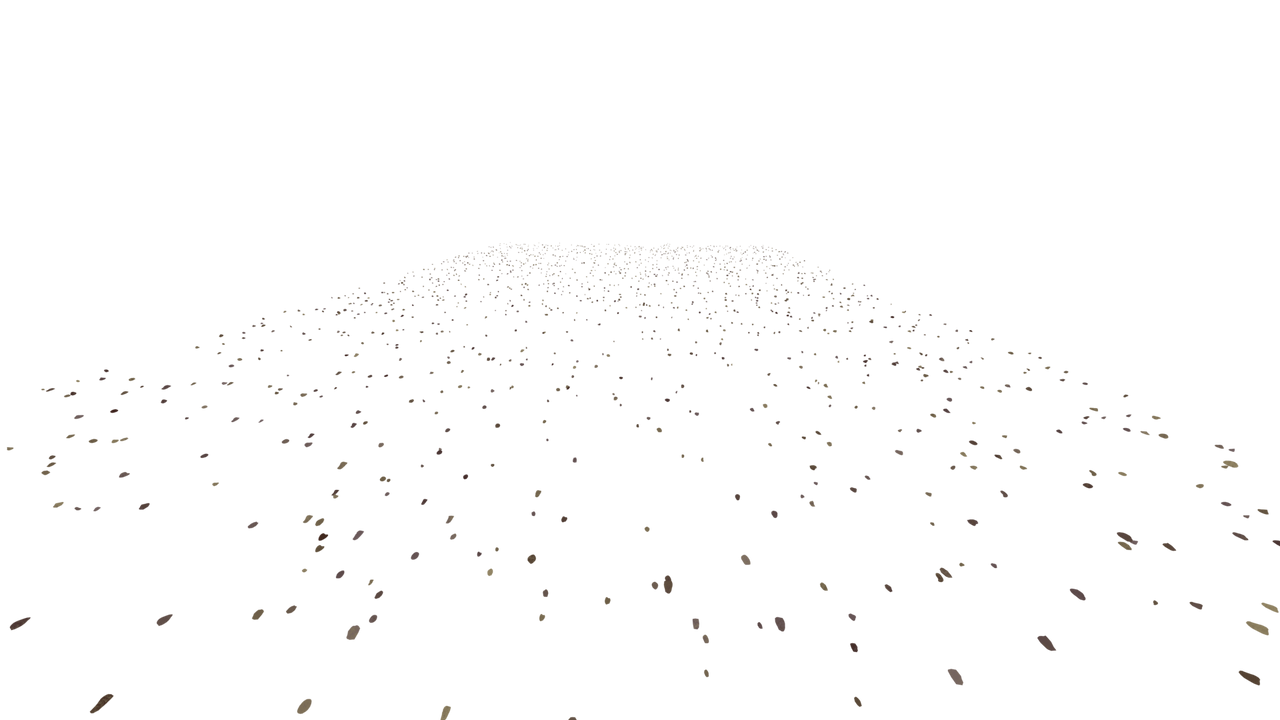
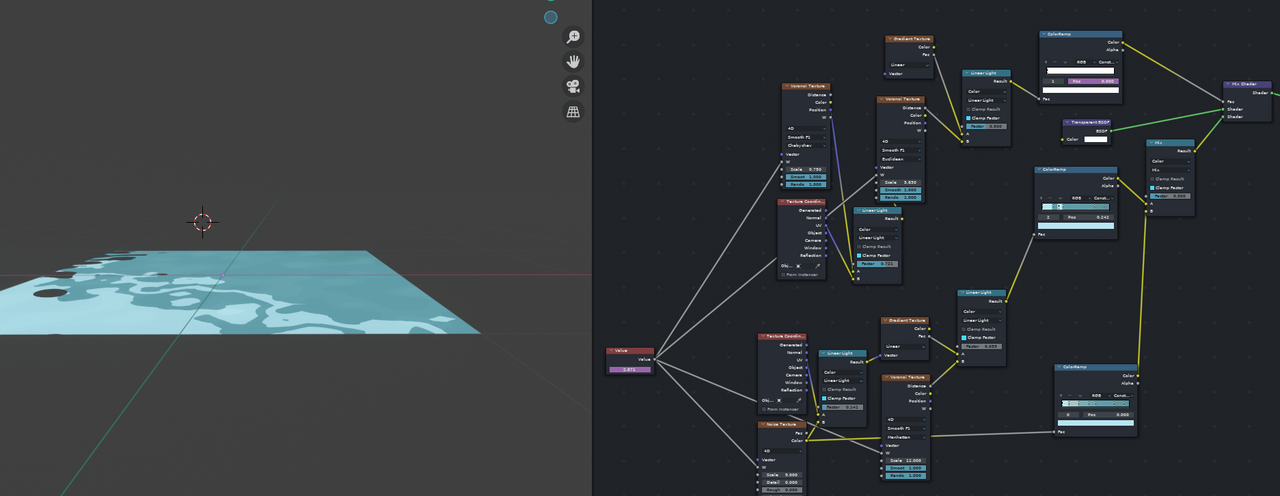
Rocks

The rocks / sand texture was added in Blender. I sculpted a few quick rocks and used geometry nodes to scatter them on a plane:
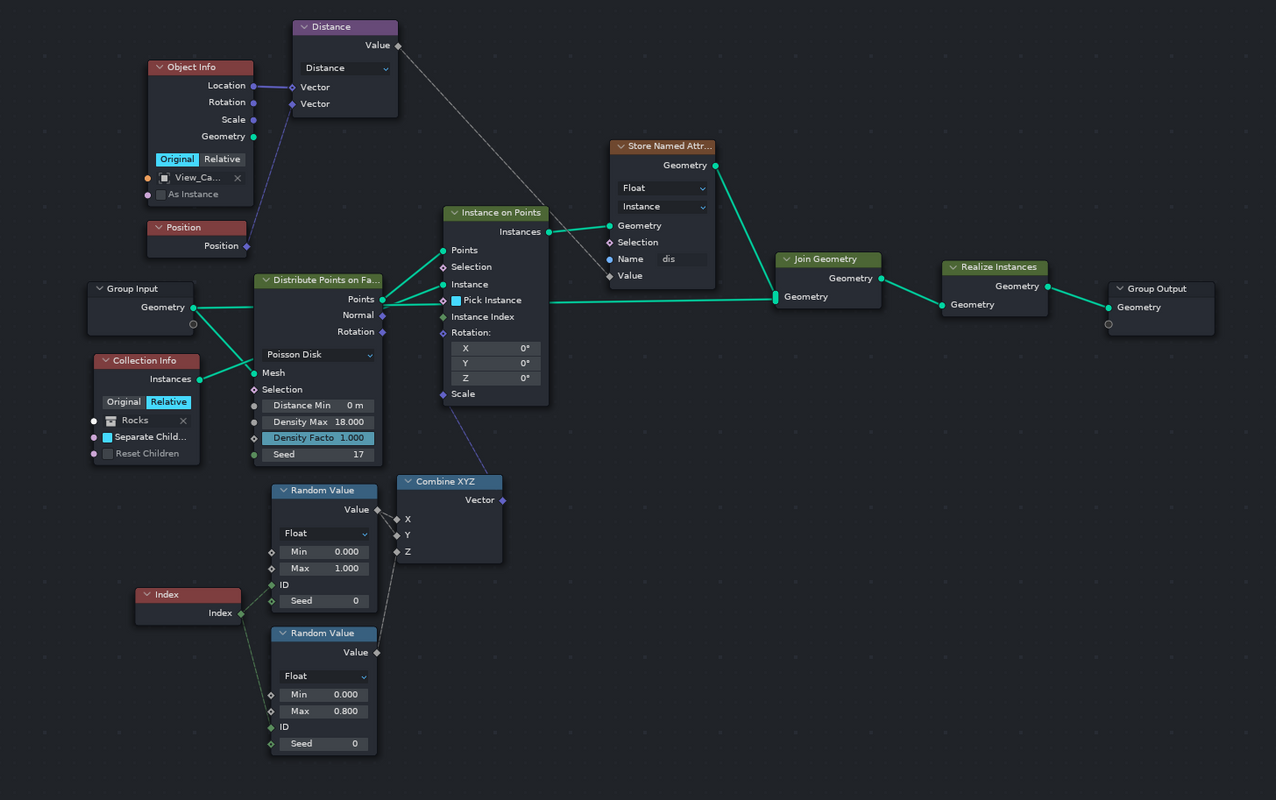


The dis attribute is used to capture the distance from the camera- I used this both to add aerial perspective (using the nodes below) and as a W value to drive random noise.

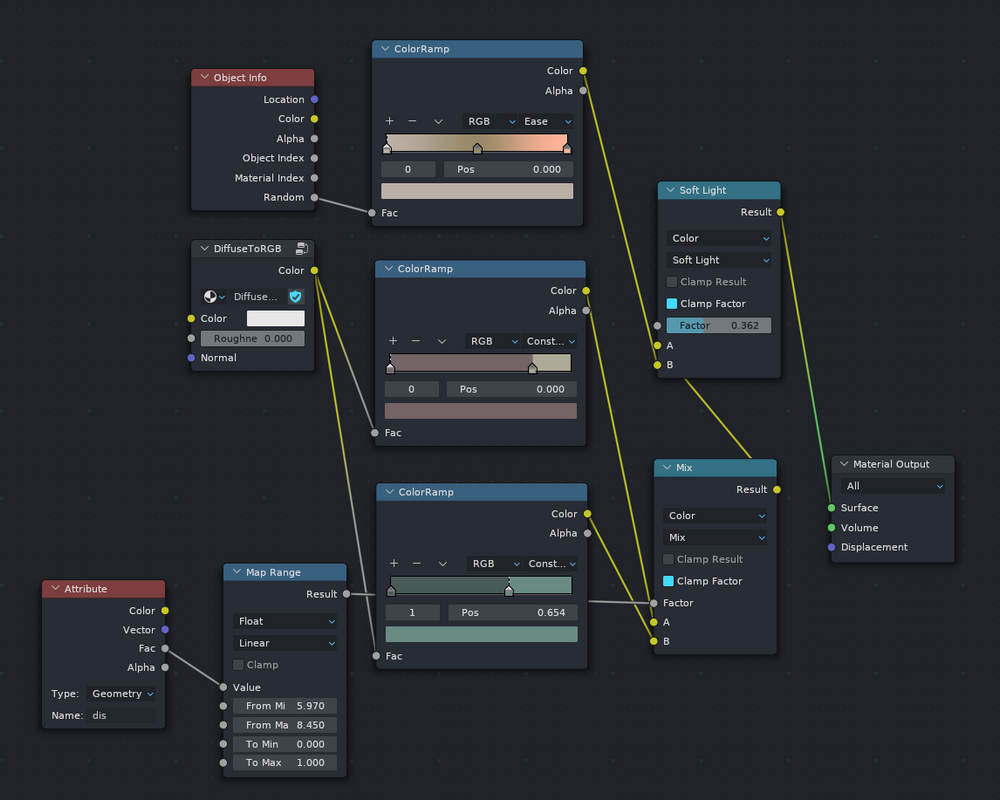
I added a second layer of smaller rocks with greater color variation using this noise:

You’ll notice the rocks have a cast shadow, I did this using ambient occlusion mixed with transparency:

Water Sparkles

The water sparkles were made first on a flat plane, then rotated in 3D space for the appropriate perspective:


The nodes are extremely simple:
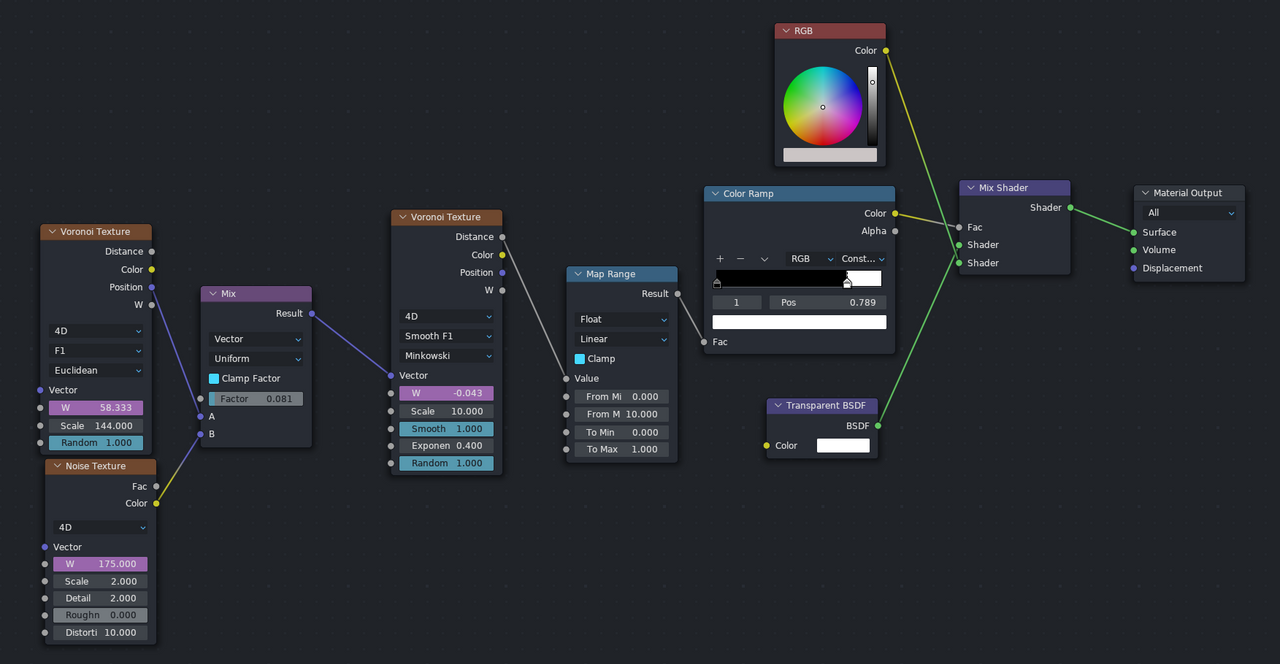
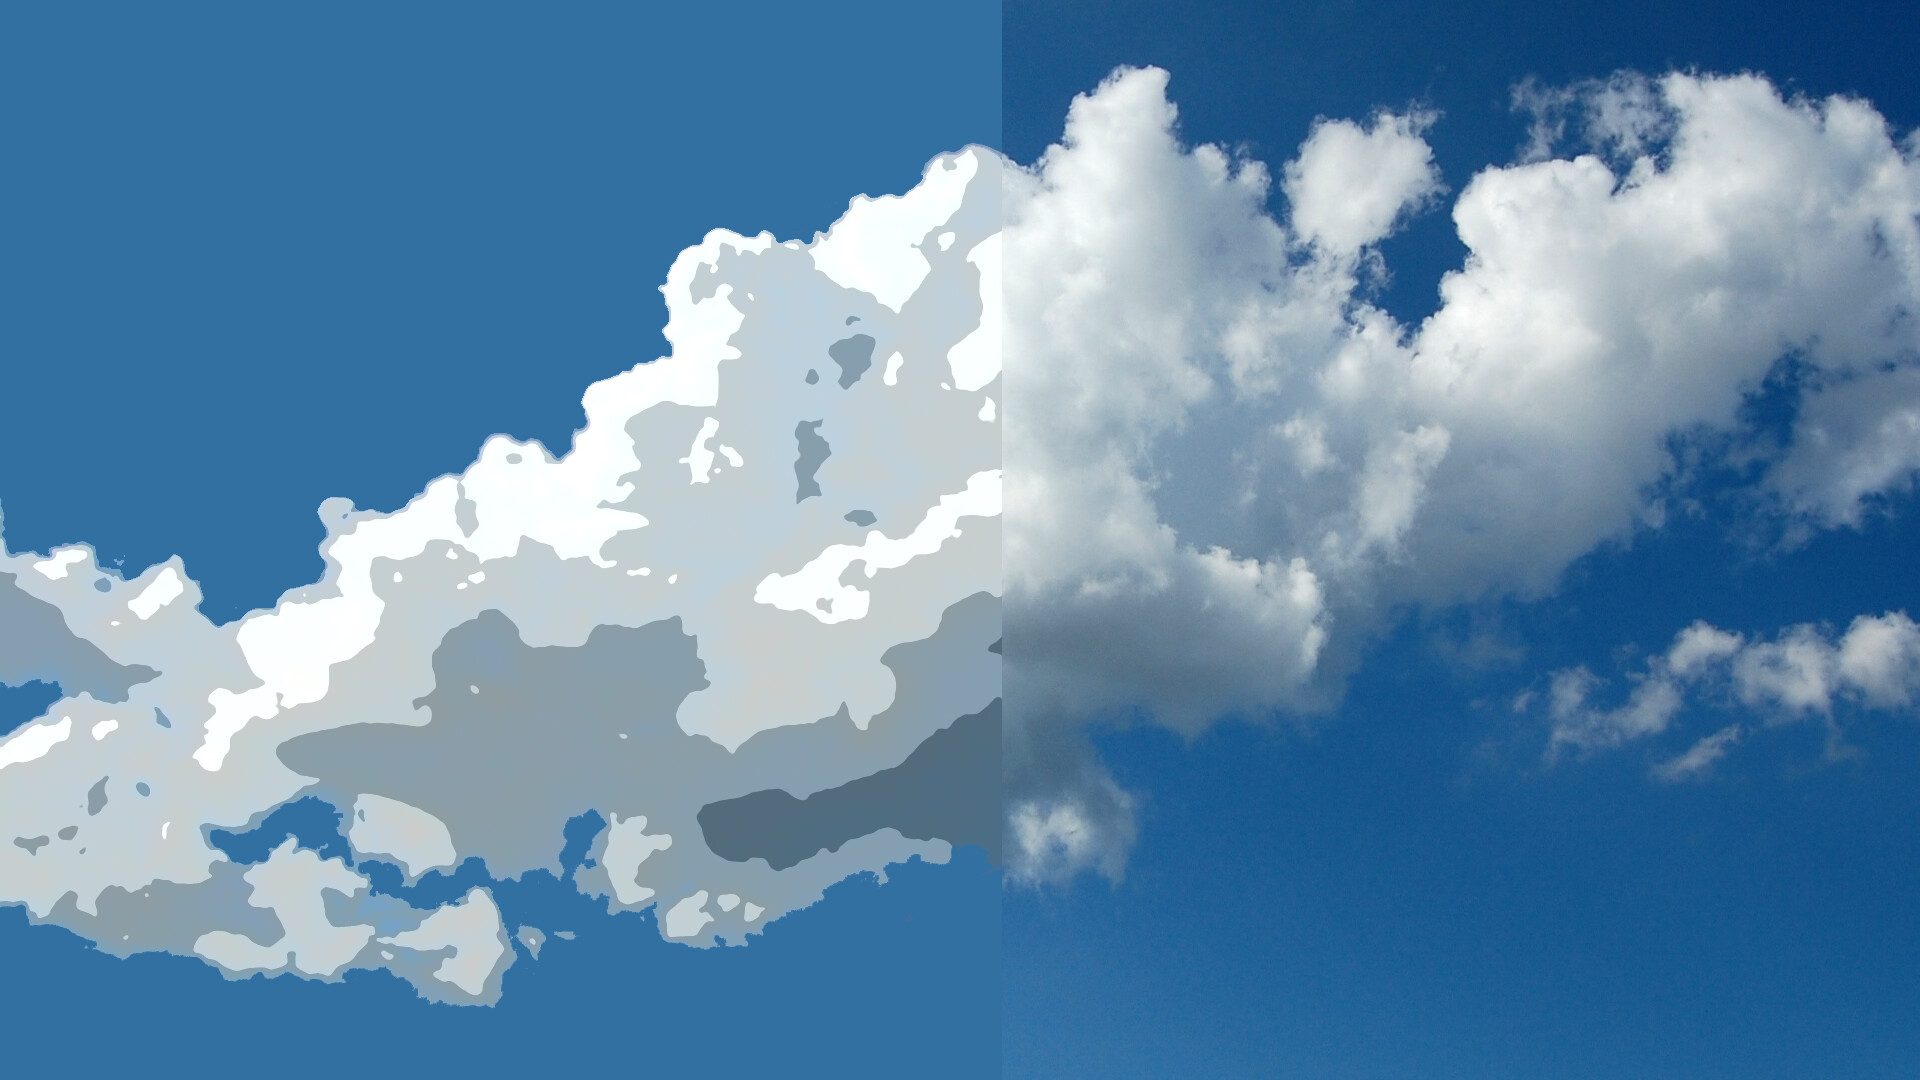
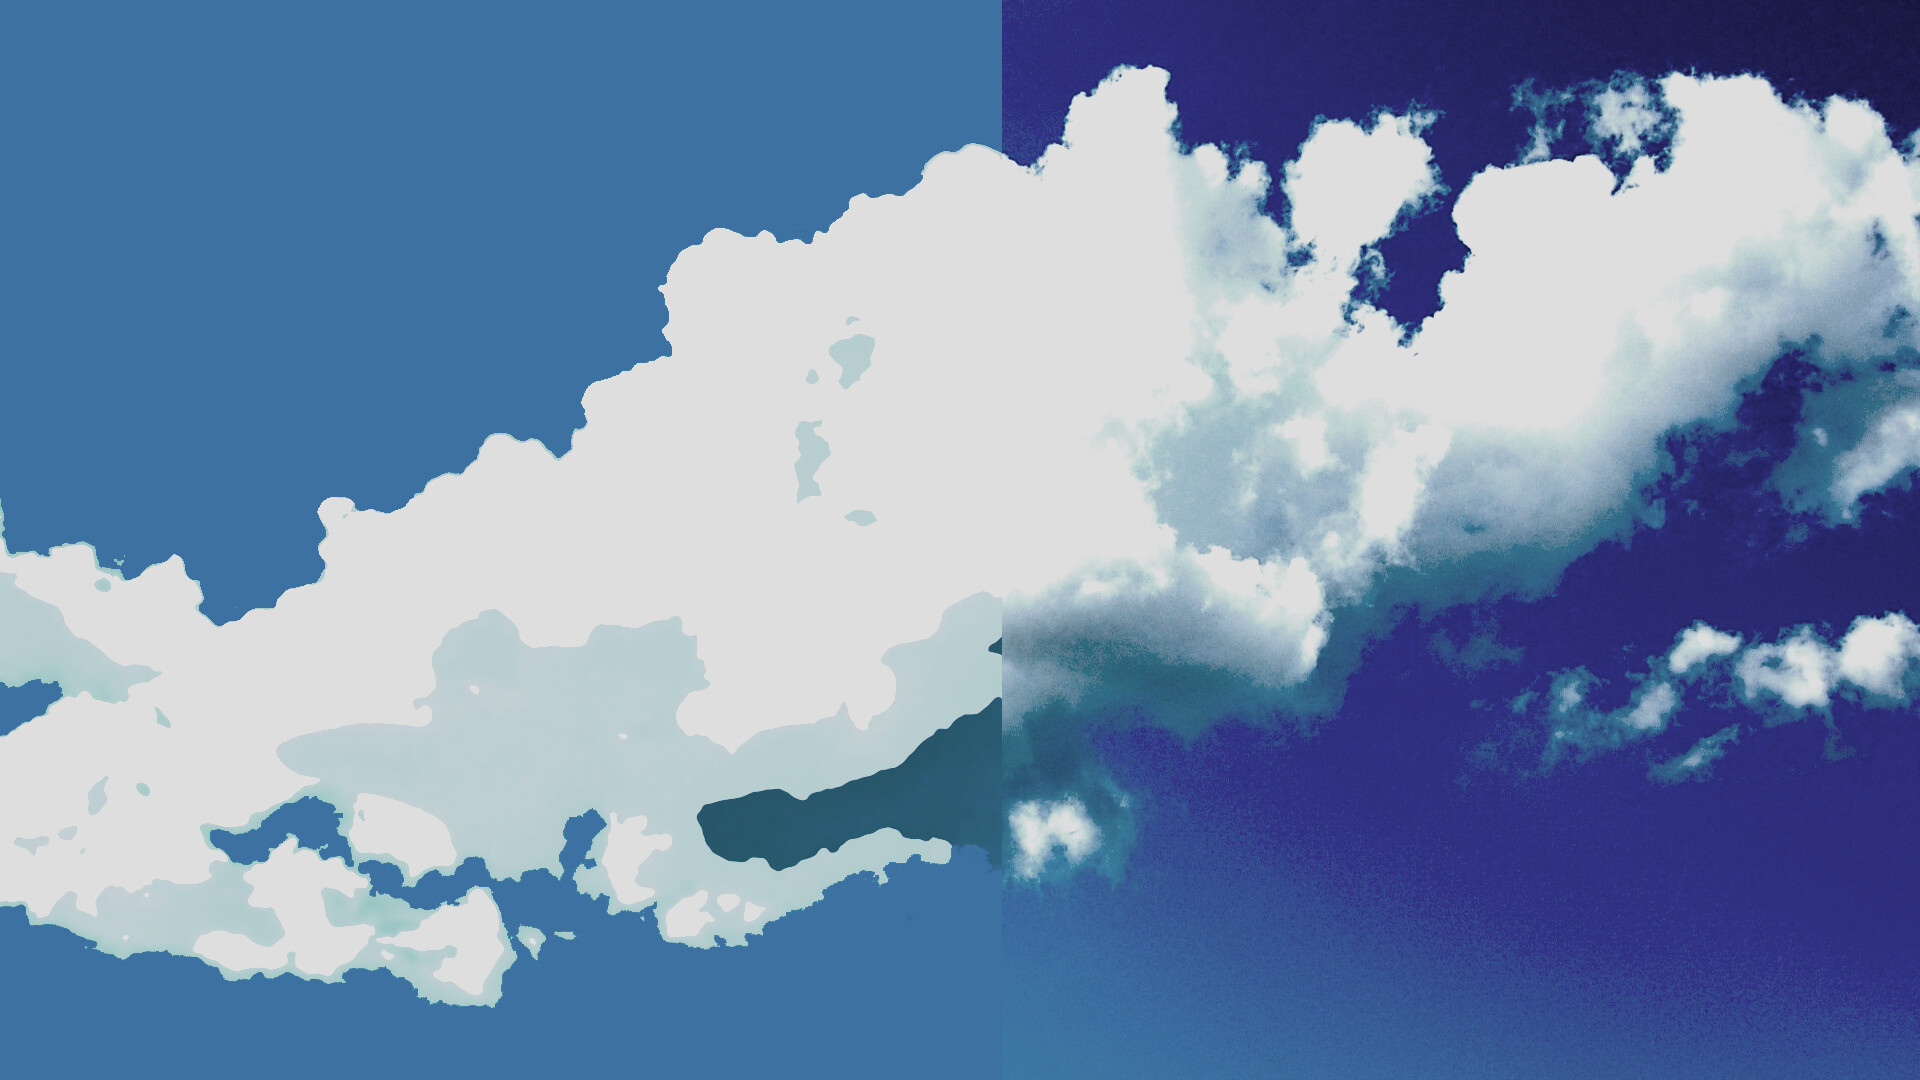
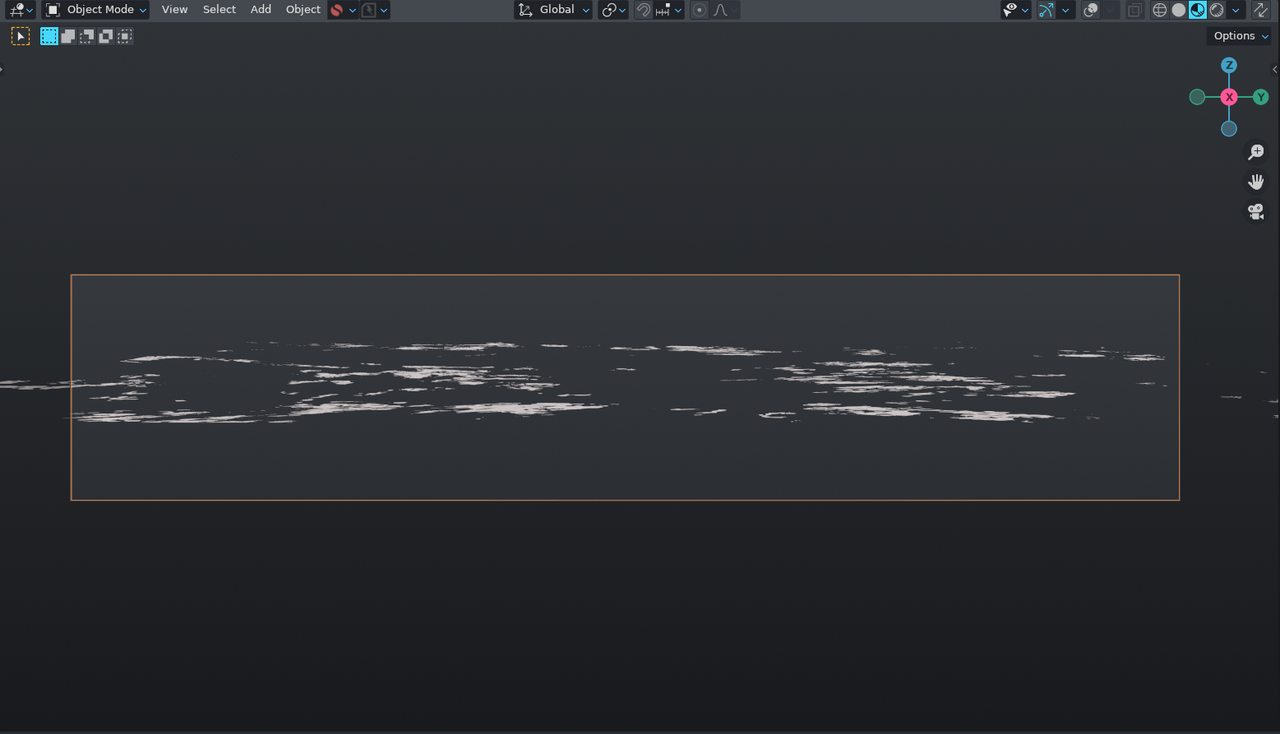
Clouds

I made the clouds as planes in Blender, layered in space for parallax:


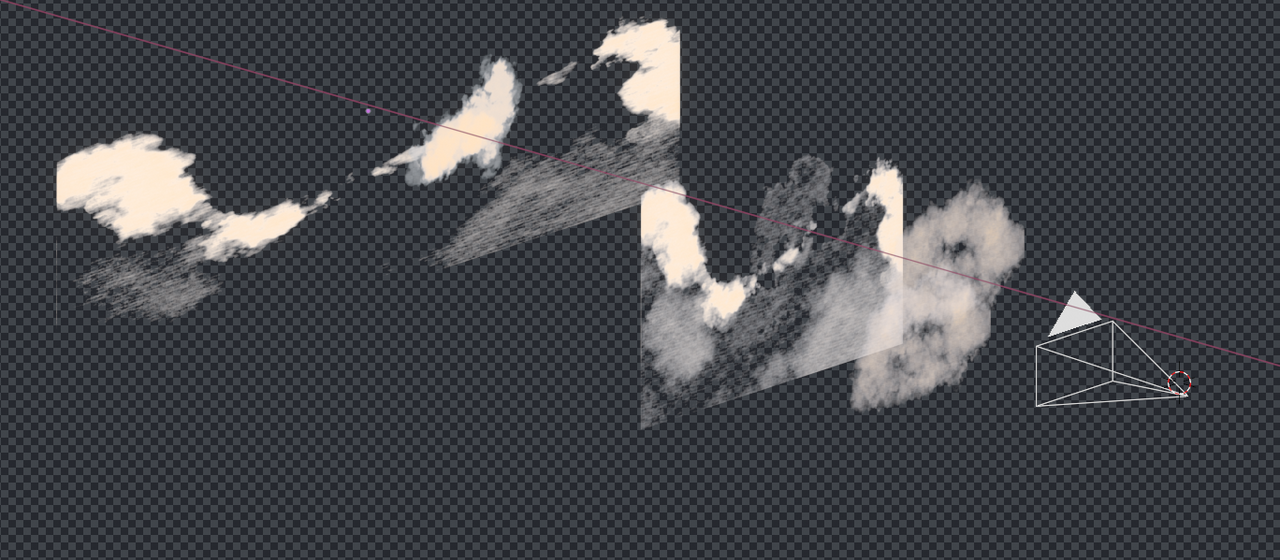
The shading of the clouds is also done in Blender. Rather than moving the clouds, I simply move the camera past them.

Waves

Same as the sparkles, I started with a flat plane and rotated for perspective:


Compositing

All the compositing and post-processing was done using Blender’s VSE. This is an in-progress shot, the final sequencer had even more layers:


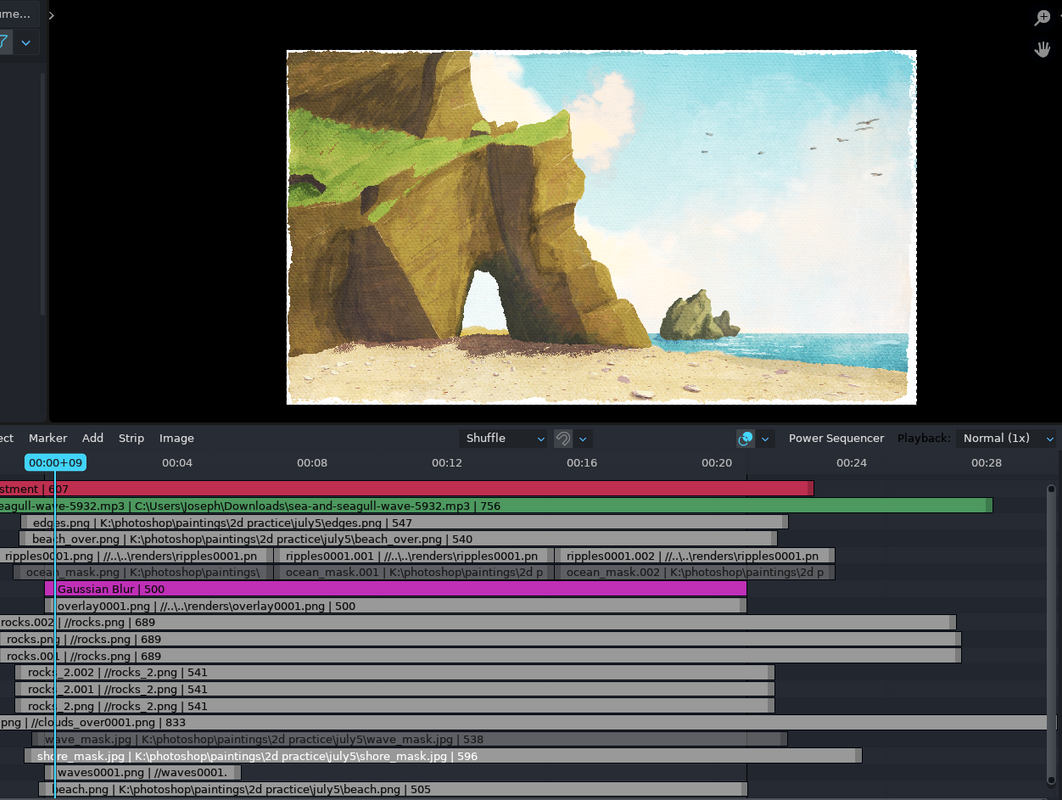
I used masks on pretty much everything to get things to layer correctly.

Sound

The only thing I didn’t make 100% myself, from scratch, was the sound. I acquired it from Pixabay, under a royalty-free, attribution-free, license.

Closing thoughts

I’ve been working on this since July 5th, there’s probably 30 or more hours of work here. Getting all the masks to render correctly took many, many, many tries :grimacing:

I’m really happy with how this turned out, thanks for looking :grin:

61 Likes

Massive thanks to @zeroskilz and @Blender_Fun1 for their help with the geometry nodes, and @VANDERHORST for their advice with the background painting

1 Like

Are they terning, or are they landing … i’m confused. >grins<

really neat, both the animation as well as your process for approaching it. thank you for sharing! :slight_smile:

6 Likes

What an atrocious pun. You got a chuckle out of me, nice work :grin:

@piranha4D this pun feels like something you would say, I had to double check who I was replying to

3 Likes

Awesome work.

This is something that’s probably down entirely to taste, but the only thing I could suggest would be to throw in some variation in the brush strokes and texturing on the landscape each frame so it doesn’t seem so static. Give it that living painting look.

2 Likes

That’s a really good idea, I did consider it but honestly getting this to render correctly at all was pretty much a miracle, and I’m not sure I could replicate it :sweat_smile: I’ve seen every possible variation of glitching, crashing, and data corruption I think there is while trying to render this (admittedly behemoth) project, so I decided to call it a day once I had a good looking render and not push fate any further. Maybe someday, with a better computer, I’ll revisit it :slight_smile:

1 Like

So long as you have the masking done, and you don’t change the silhouette at all, the only thing you’d have to do is paint 3 or 4 very slight variations of the same scene in AP, then cycle between them frame by frame in Blender. All you need is just enough to give it the jiggle.

1 Like

That’s true, but it also sounds like a lot of work and I’m feeling lazy :wink: I will do that next time I try this style, though

1 Like

Nice work! All the elements come together to give that seashore feel. And the rendering of the rocks is such that I would have assumed that they were part of the painting, if wasn’t told otherwise.

Sidenote: a retro point and click adventure game in this style would work really well.

2 Likes

Thanks :grin: I never really played many point and click games, but I can see what you mean. A friend of mine told me it looked like an antique postcard, and I can see that too. I love how much room for interpretation there is with something heavily stylized like this!

P.S. the rocks blend in nicely because they’re not directly added; they’re mixed with several layers of Soft Light blending :slight_smile:

5 Likes

Real nice. And yeah, I’d play that game. Lots to learn here, excellent – thanks for the breakdown! And hey, I understood the water sparkles without straining my brain.

To everything, tern, tern, tern, there is a season, tern, tern, tern… (thank you, Pete Seeger). Yup, @KDLynch is a person after my own heart.

4 Likes

I actually have you to thank on the sparkles- a post in your sketchbook a while back reminded me how useful mixing Voronoi algorithms is :grin:

1 Like

I think a weak point of this work is the clouds- while they have some nice depth, they don’t really have the overarching 3D look you see on real clouds. I noticed this morning as I was outside how clouds really seem to wrap all around you, but I can’t figure out in my head how to make this kind of effect using painted stylized clouds like this. Any suggestions are welcome :slight_smile:

I think it’s mostly about contrast. contrast between the white in the clouds/blue in the sky, contrast from the white edges to the darker ‘center’, etc.

1 Like

in the red circle, the cloud bank there has very little contrast, and thus looks very flat. this is much like the clouds you have in the left area, right above the ocean.

even in the blue circled cloud, while the contrast against blue is good, there’s no internal contrast, still leaving it fairly flat looking. like the cloud peaking out behind your cliffside.

in your cloud setup above, there’s much more contrast than in the final render… is it possible to get some of that contrast back? or alternatively, a couple more planes for contrast, that move almost in tandem with what you have (a bit of parallax to create some ‘movement’ within the cloud, perhaps)

1 Like

Interesting, I hadn’t thought about it like that, but you’re totally right! I’m going to play around and see if I can implement better contrast now :slight_smile:

it helps to have varying levels of contrast within the cloud as well. for instance:

vs

(‘postarized’ on the left, for a look a bit closer to what you’d be after / photo on right)

3 Likes

Interesting, I’ll have to experiment with that as well :slight_smile: Thanks for your input, I really appreciate it!

1 Like

This is amazing !
I love the visual style :smiley:

Happy blending !

2 Likes

Thanks :grin: the visual style wasn’t my original plan, this project has gone through a lot of changes. Honestly, though, it was nice working with something that had so much flexibility

1 Like