This is my first time attempting texture painting. I followed this tutorial https://youtu.be/u9nE2Xg6Jgk but now I’m stuck. Firstly, I don’t think a UV map has been made of my object because no matter how many times I try and make one, it does not show up in the left side of the Texture Paint workspace. I did sculpt my object if that has any affect on it at all.
Two, after making an base colour, no matter what size the brush is, it colours in the entire object. I then tried just making lines on the left hand image to see what happens and well, the image below is what I got after drawing circles on it. Only a few random spots under the object get any sort of extra colour.
So I started over, tried making the base colour 2048x2048 and I crashed blender, but right before the crash, only those small areas changed colour yet again.
Please help. I’m not sure what I’ve done wrong. I’m loving blender and the sculpt mode but this has got me stumped. I really, really want to get this right!
Edit: Why is this being flagged as advertising? This was a problem I was facing.
Everything you’re describing sounds like a UV issue. Take your model into Edit mode, select everything, press U, and choose Smart Unwrap. (It may not be the best unwrapped method, but it will at least allow you to paint.)
I’ve compiled some other texture painting problems in this video:
I’m too lazy to type them out, but you may find them helpful
I press U, select smart UV project and click ok. I would have thought it would show up in the UV editor in the top right, but I’ve got nothing so far. I have done a test to see if it works with a basic cube and it does.
I’ve watched the video and checked all the basic things and nothing seems to be amiss. I think it is the creation of the UV project that’s throwing it off.
Edit: Why is this being flagged as advertising? This was a problem I was facing.
No, what you see in the top right corner of the image is the UV editor and that’s all you see, there is nothing there. It does not show up at all. I’ve tried the same thing with a basic box and it works. No idea what’s going on with my object.
Can you click on the Object Data panel on the right hand side (Green triangle - second from bottom) and then expand the UV Maps section. Do you see UV Map with a little camera icon next to it?
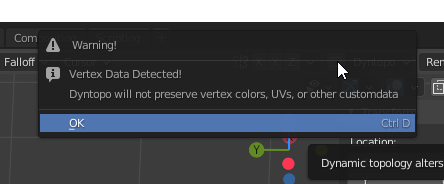
Looks like you’ve used Dyntop while sculpting. Using it destroys UV layouts among other things. You should get a wee popup telling you this when you try and turn it on with a UV’d model. What happens with an existing UV map is that any areas touched by Dyntop sculpting get removed from the UV map. I say removed, but it’s actually the case that these are completely new faces that have never been unwrapped. The faces they replace get removed from the UV layout as they don’t exist any more.
If you’ve covered every part of the head in Dyntopo strokes of one kind or another then your UV map still exists… but it’s empty.
You’ll have to re-unwrap it by doing a Select All in Edit mode followed by U and I’d imagine Smart UV Project
You might also want to consider looking up tutorials on doing retopology. Most people I imagine after sculpting would then use the sculpt as a base to create new clean topology which can be properly UV unwrapped in a way that makes texturing things like faces and heads easier
See, I knew this was going to be an issue, which is why I’ve been using the Smart UV Project, but I’m just not seeing anything. I’ve done it so many times now I’ve lost count with the same result. Nothing.
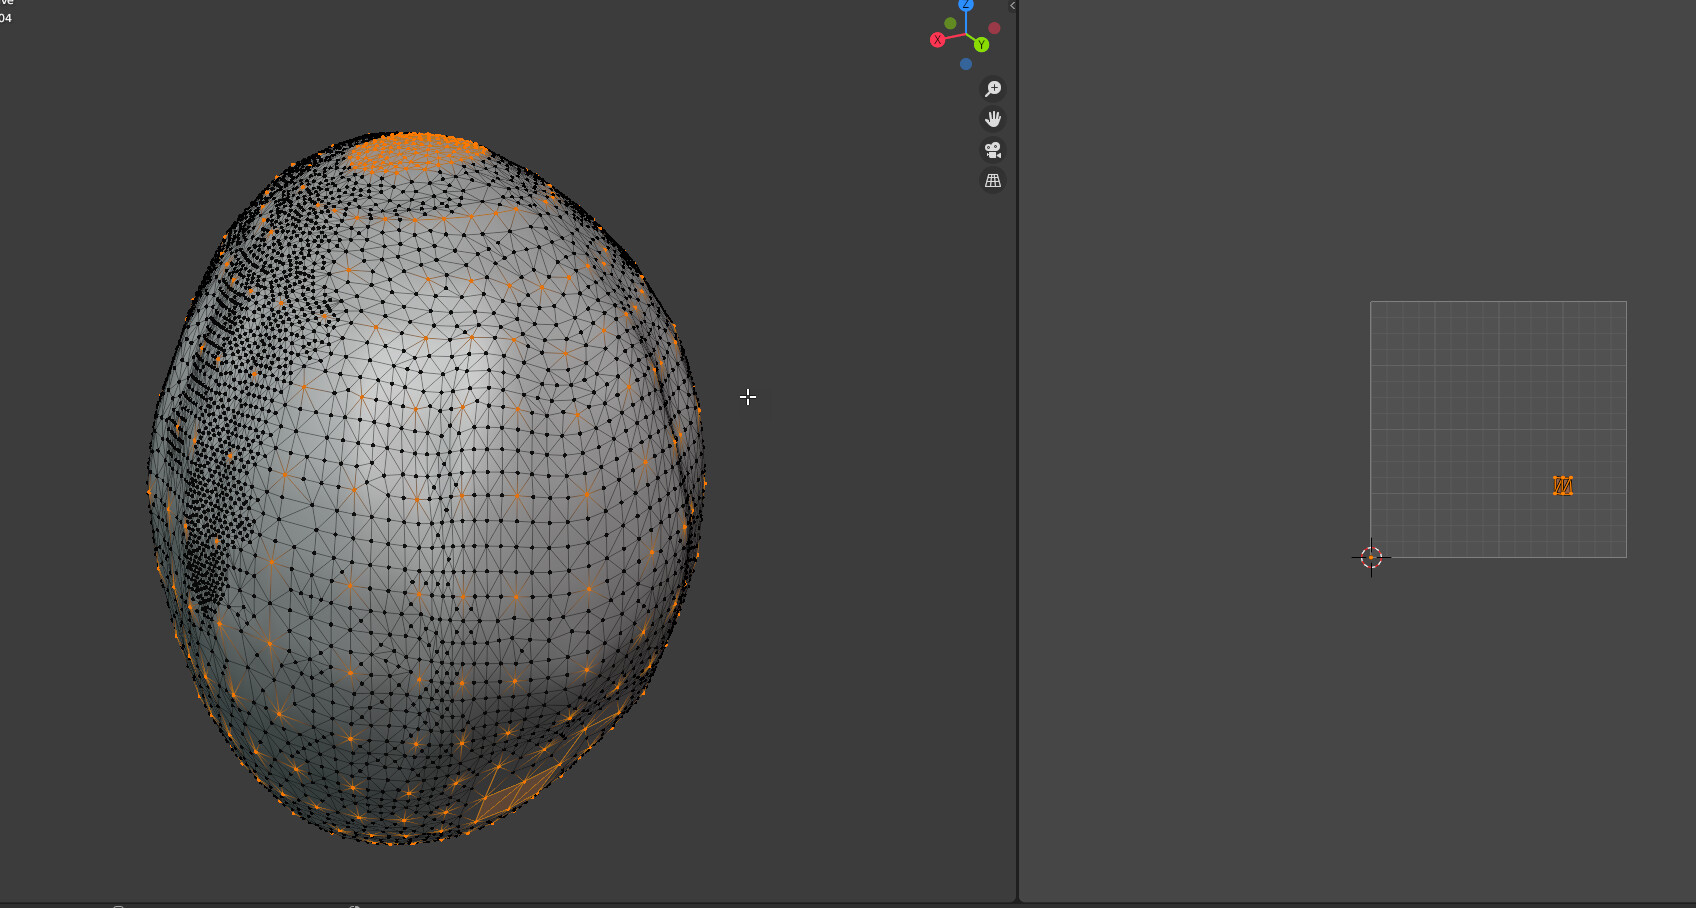
When I open your file it’s in Sculpt mode with Dynotop turned on. If I switch to edit mode I see the situation below. Basically the selected verts are the only ones not touched by the Dyntopo and are therefore the only ones surviving on the UV layout.
That would seem to be enough for you to start texture painting on at the very least, but as I said above, you might want to consider retopology after finishing the sculpt. Beware that if you go back into Sculpt mode and use Dyntopo again your UV layout will be trashed and you’re back to square one.
EDIT: Just noticed I was looking at the hair, but the face has the same issue.
Yes, I will be looking into learning retopology. I watched a few videos on how to do it, it looks like it would really help my projects look a lot more professional. Thank you so much for your help. I’m just a beginner and I’ve only just delved into 3D software, I’m used to using clay!
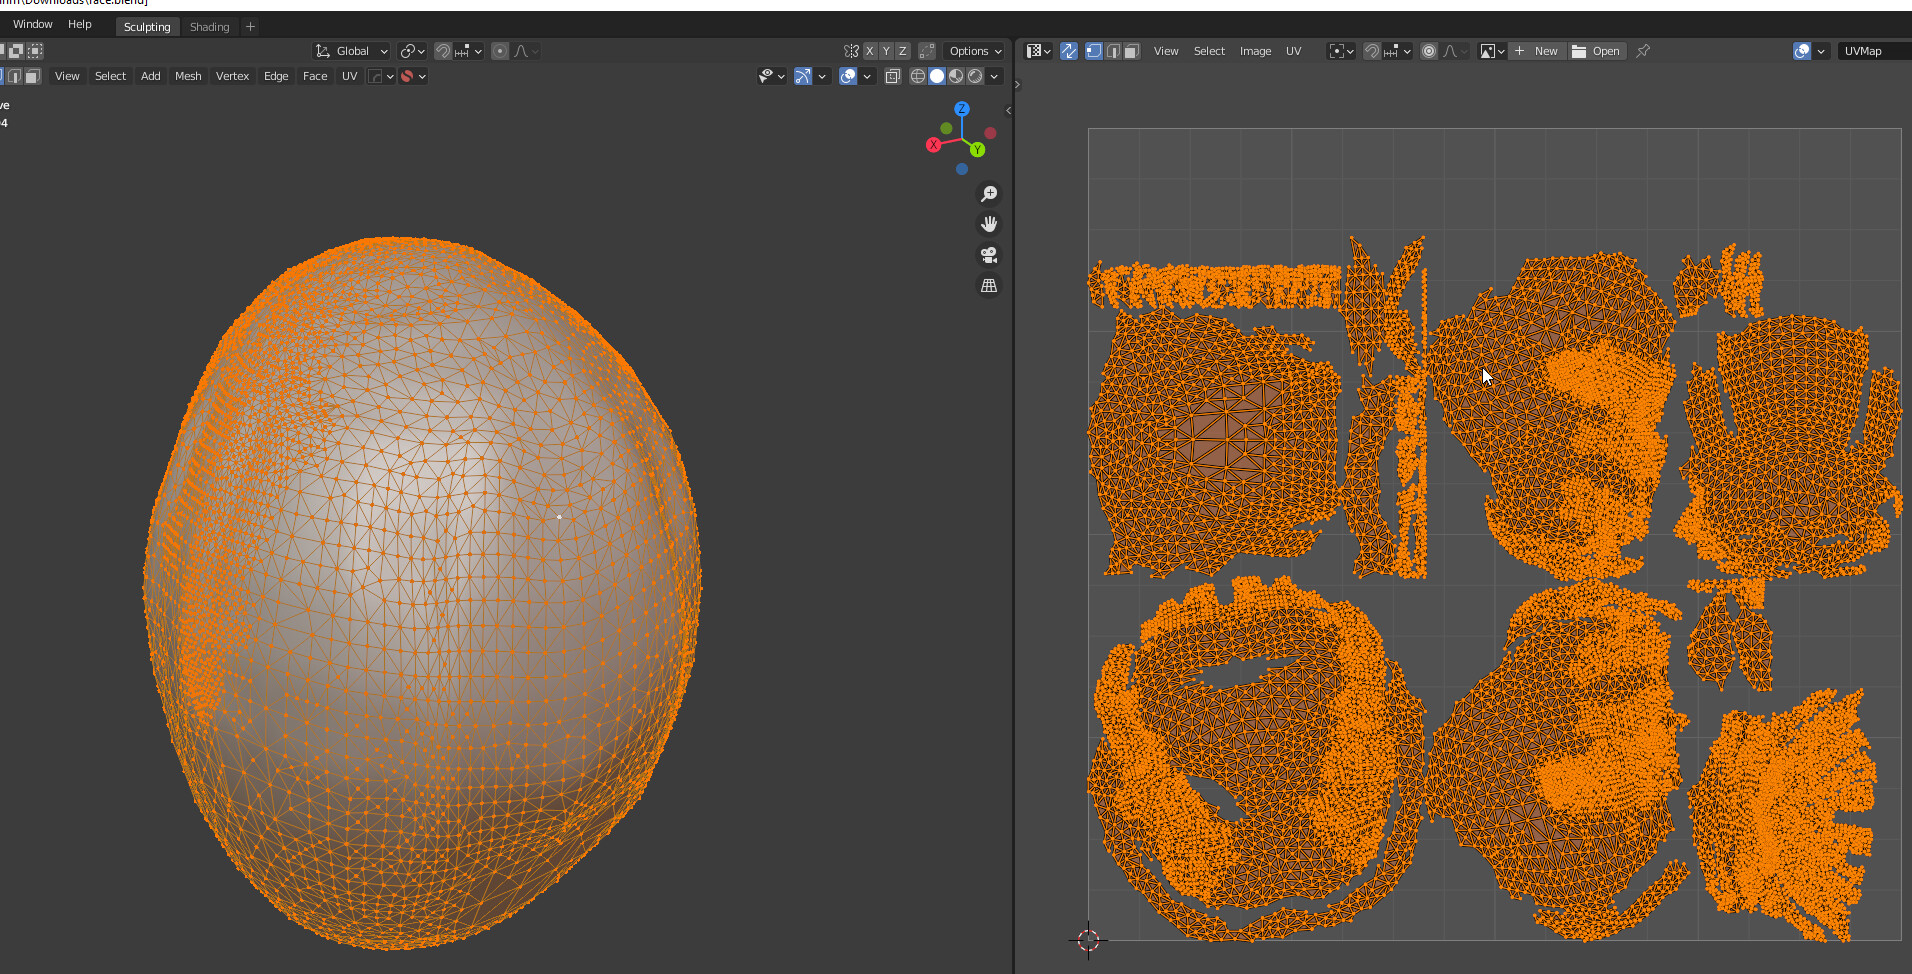
I was able to texture paint on your model after doing what I said to do above :P. One issue you will run into by using Smart UV Project with the kind of faces Dyntop tend to make is that because it just kinda chops up your model and has UV islands all over the place you might keep finding wee unwanted specs of paint appearing in places you didn’t intend.
Yes, I already noticed that. I’m ok with it for now as I’m just learning. My next model will 100% look a lot better! Hopefully I won’t destroy a good piece with dyntopo!
")