So, I have a hair object now that I made with a lot of flat meshes and I have a “hair strand” texture and I’m not sure how I go from point A to point B to make this like the kind of hair that DAZ and Poser figures have. Can anybody point me to a tutorial or is it something relatively easy because I just don’t really know where to begin here.


hmm, i dont know the full details, but you need to create a uvmap for the hair. you need to assign each hair “strand” to the uv map such that the bottom of each strand is the bottom of the texture and the top of it to the top of the texture such that the texture follows the strand. i dont know an easy method for this, but i may also be overcomplicating the problem as i dont do this sort of hair often >.<
nice model btw. i know you are after the hair to look like the daz hair textures, but thats not entirely anime-esque. you should search the forum for some toonshader examples here for a more 2d anime look rather than a 3d anime look, but its up to what you are after^^
You may want to go the strand route.
http://www.blender.org/development/release-logs/blender-240/hair-strand-rendering/
And less relevant but may help.
http://www.blender.org/development/release-logs/blender-246/hair-and-fur/
This is less animae but still particle hair.
http://www.hamsterking.com/blender/particlehair.htm
Atom, thank you, but those are all for particle hair, what I was wondering about is the way that hair is in Poser and D/S, when I import the .obj it looks like strands of planes in the rough shape of the hair. Is this actually just particle hair with the width turned way up?
most hair strands are actually modelled as nurbs surfaces and then converted to a mesh, which is what your hair is. i cant find any tutorials in a basic search, but i remembered i did a file that used a similar technique years ago that should help you. you will have to edit it a bit to get the same thing for yours, but the idea is there and the settings.
here is the link to the blend file. its a megaupload link, but the file is a .blend in a zip file. the textures are packed and should be ok. once you get it, render it to see what you are sorta after, and then click on a hair ‘strand’ and look at the settings in the material and texture tabs, it should point you in the right direction.
what I would recommend, is making some particle hair, then taking a render of the particle hair to use as a UV texture for your mesh hair.
Holly, I think I’ve copied the settings from your model faithfully and I made the four layers of textures like you had, but all that’s showing up is the bottom-most texture for some reason and also, when I render, the texture is stamped on the whole thing very flatly rather than following the geometry. Do I need to have every strand a separate object to make this technique work?
Edit: sorry, forgot to attach the files.
Attachments
hairhelp.blend (202 KB)

well, the file i uploaded was a few years old, so some things needed updated for your model since the hair is all one mesh rather than a single one.
below is your file with a few changes to get something close to what you are after, should point you in the right direction.
heres what i changed:
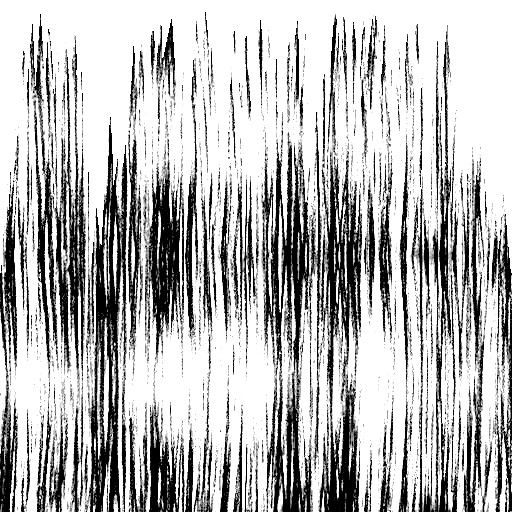
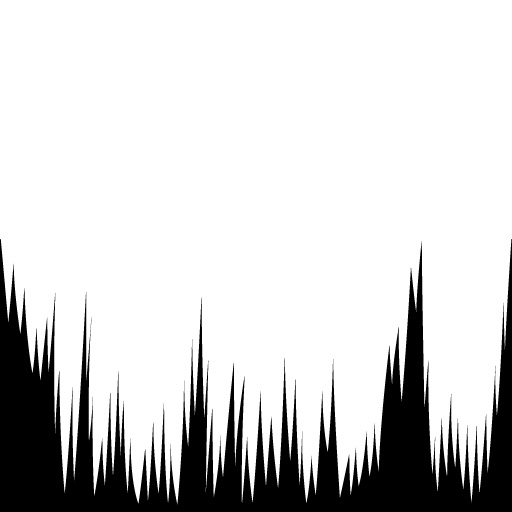
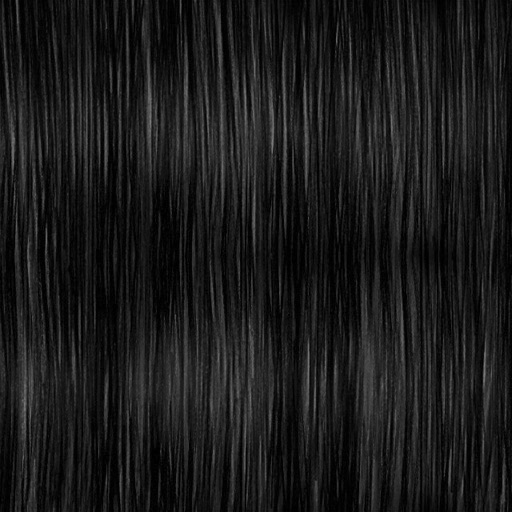
- under the texture tab, for each of the alpha textures, i ticked “calculate alpha” and “use alpha”. these are important for textures that vary alpha. since you are using jpegs, you need calculate alpha. the alphaed parts are a lil blocky because you are using jpgs, save your alpha textures as .png with an alpha channel should help there.
- under editing “f9” i created a new uvmap for the object, this is necessary to uvmap a texture.
- under materials, i changed the mapping for each texture channel to “uv” and set the uv to “UVTex” which was the uvmap i created. this tells the texture to follow the uv texture coordinates than orco as orco doesnt always work right.
- i went into edit mode for the mesh and started to unwrap the hair. i did 2 for you to show you (the front 2). i basically selected that hair strand (using L button), pressed U(unwrap) and just used the first option(unwrap). with a uv/image editor window opened, i edited the vertices in it to cover most of the texture(you can see yourself if you press L on the 2 strands to see what i did). the texture followed this direction.
- because of the hair alpha textures, i set one of them to map as alpha and the other as a stencil (cuts out from the next texture, ie the second alpha map. it doesnt work right otherwise, ive tried). this created the sorta look you are after.
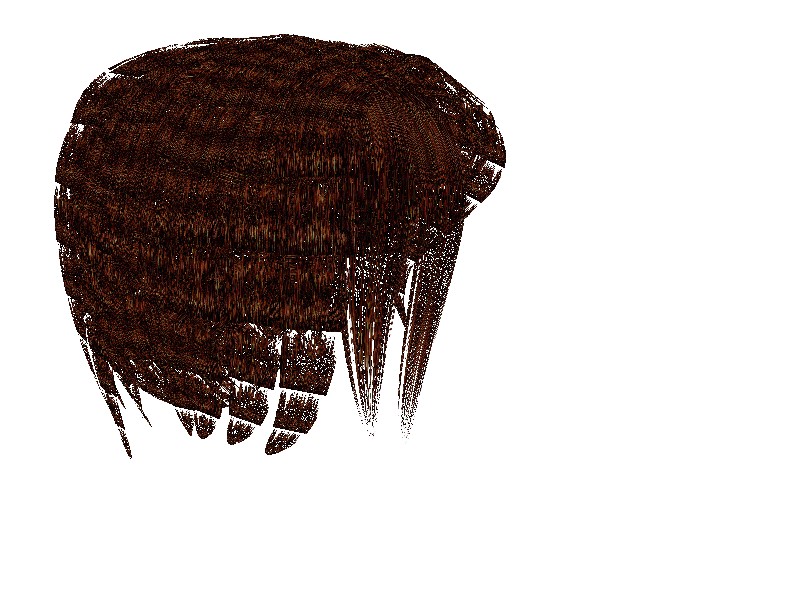
look through what changes i made to your file and you will see how to continue with the hair. try clean up the textures and make the alpha ones as pngs to get better quality. hope this helps^^ ill offer any more help if you need it hun! the image below shows how it looks with the front 2 strands, you still need to do this for all the strands for it to look right 
ps, you dont need to upload your textures separate from the blend file, theres a button in the texture tab to “pack” the image into the blend file so it can be sent with the blend file good for games.
Attachments
hairhelpb.blend (172 KB)