A consequence of that would be to tick several options if you are sculpting on several objects, switching from one to another with object transfer operator.
Or you will have to switch to object mode to select them all and tick option while pressing Alt.
Show Overlays button is about global viewport overlays.
Texture stencil is a brush overlay.
Contrary to others mappings of texture, Hide/Show button of this overlay is not available for a reason.
If you don’t see where the texture is, you can not use the brush.
To get rid of this overlay, you just have to set its opacity to zero, to switch to another active tool or another mode.
That is the case in texture paint mode.
That was not the case in vertex paint mode. Because original purpose of that mode was to paint low poly mesh. So, mesh density was not high enough to allow a resolution where that is useful.
But that should not be the case for experimental paint brushes in sculpt mode.
Although that probably requires a lot of deep work, that would not be against Blender rules.
Blender allows Knife Project operator to select a curve as stencil while editing a mesh.
That would not be shocking to have equivalent in Sculpt mode.
But we probably are far from that because there are so many other priorities.
Currently, as long as you do not release left mouse button, effect is not applied.
What is not really intuitive behaviour while using a stylus.
So, I understand that use of F9 panel would be welcomed.
It is forced to be hidden for these brushes and filters.
It is available for transforms. But it does not work.
If it does not work, it is better to keep it hidden.
But ideally, it should be present and working for Filters.
Change the setting in the brush area to a dropdown with these options: Obey Multires Modifiers’ Setting, Force Fast Navigation on for everything, Force Fast Navigation off for everything.
If I’m sculpting on 1 object but have several high poly objects nearby, I’d want the objects I’m not sculpting to be in fast navigation. My main subject needs to be clearly visible as I roll it back and forth in the viewport trying to decide if I need to work on that area more or not.
Also at 4 subdivisions my laptop doesn’t have any problem navigating the viewport with these 6 million faces on the object. At 5 subdivisions my computer crashes. I think I said it earlier, I suspect most people’s computers will crash long before they actually need this feature for performance purposes.
It gets in the way of the interactive decision making process. How hard should I press when I can’t see the result of what I’m doing until I finish the stroke and move the cursor away from the 3d viewport. Thanks for telling me about the opacity option. That should solve my problem… if only I could find it … found it. “Don’t show overlay during a stroke” is really what I wanted.
There doesn’t seem to be an operator for this. There is one for the built-in brushes like “Grab” (wm.tool_set_by_id), but it won’t recognize the custom ones like “HELLO” and “WORLD”.
There is none.
And it is more problematic since expansion of brushes amount, brush modes and brush settings by Pablo.
Dynamic brush menu helps to retrieve a kind of global palette.
Asset Browser may help.
But there is a lot of work that is waiting to be done to manage brushes.
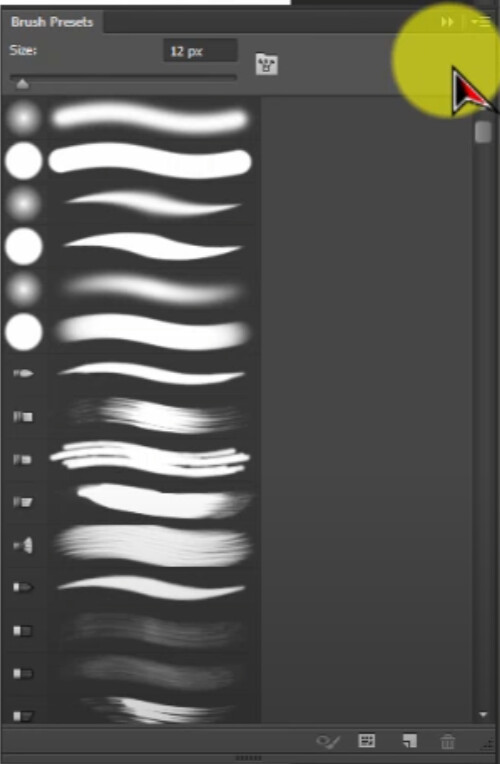
The most ideal brush management system is the Photoshop system. It is for a very good reason that it has been the standard for digital painting for decades.
ZBrush also does a lot of things right with its brush management, but Photoshop is still the best at it. As long as it is easy to sort brushes, making categories, naming brushes, and can be easily accessed right under your cursor or with keybinds, you do not need to be able to keybind every individual brush in your list.
I’m really not a fan of how Adobe has kept the same disconnected UI for their brushes and really it annoys me a lot. Left side for this, right side for that, do this here do that there - but it’d be great if what is good about there brush handling could be improved on, like how Krita has a dynamic options menu under the cursor to a hotkey that allows more control.
Blender could be the Bruce Lee’s Jeet Kune Do of brush management and keep what works and skip what is pretty but useless - that would be awesome. That’s why I hope they don’t just rush through but seriously try things out here and there to compare the UX.
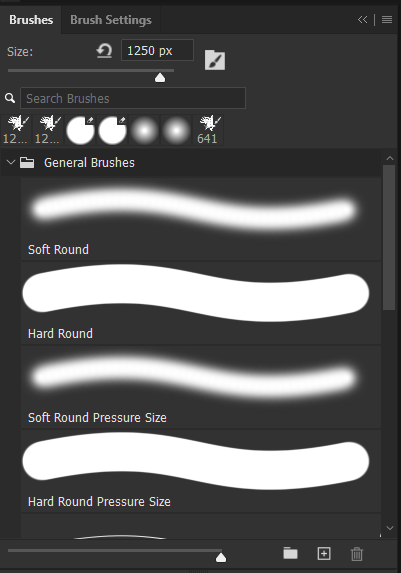
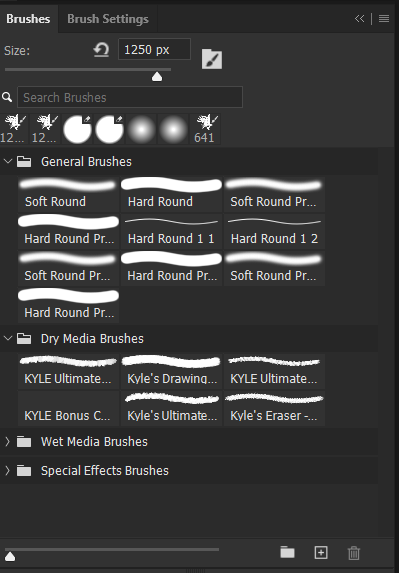
The bottom slider scales the brush UI, which is why they’re different.
Creating brushes is pretty much the same as in CS6, although Photoshop has never been known for having a super fancy brush engine that emulates all sorts of real life brushes. They have always had a pretty solid brush engine for photo manipulation and for creating digital art. Not to mention that you have direct access to all of them through the R click menu. If it isn’t broken, don’t fix it.
Not sure what you mean by that honestly. There are only two panels for creating brushes that you can move wherever you want and a couple of menu operators for creating brushes from your canvas. One panel is for finding and sorting brushes and one is for editing them. That’s it.
Their UI is also pretty well laid out where only the important parts are present. By default the brush panels are just two button icons you can access next to the other panels and you can just press R click to access one of the panels with all your brushes.
Then there is one of their more advanced features where every single tool has Tool Presets. You can have very specific settings for some brushes that are dedicated for a certain tool, including the upper toolbar settings.
The only aspect that I think Krita does better when managing brushes is the R click menu having the colour wheel and other canvas settings like rotation. However, I am not a fan of the brush selection wheel it provides. You can at most have 10 brushes available at a time and switching categories just isn’t good enough since they have the same limitations. To me it is either have a brush list or go home. For some it may be enough, so I would suggest implementing both as options for those that prefer working with either or.
FWIW in the settings you can increase the max brushes in the pop-up palette for Krita.
I find the differences between Photoshop and Krita as far as brush management to be fairly minor. I’d really be happy with something similar to either of them. Then again, even GIMP does brush management way better than Blender does.