It is possible to make cloth with non-destructive thickness and bevelled edges using Multires → Solidify → Subdivision Surface in that order. Could be a nice and simple trick to add to Multires.
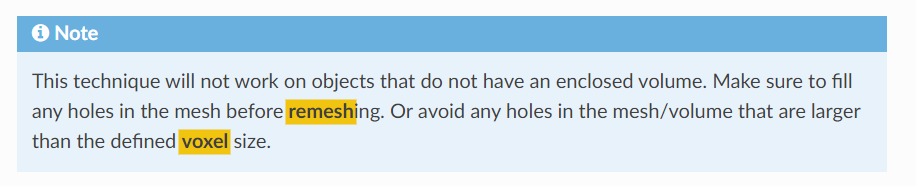
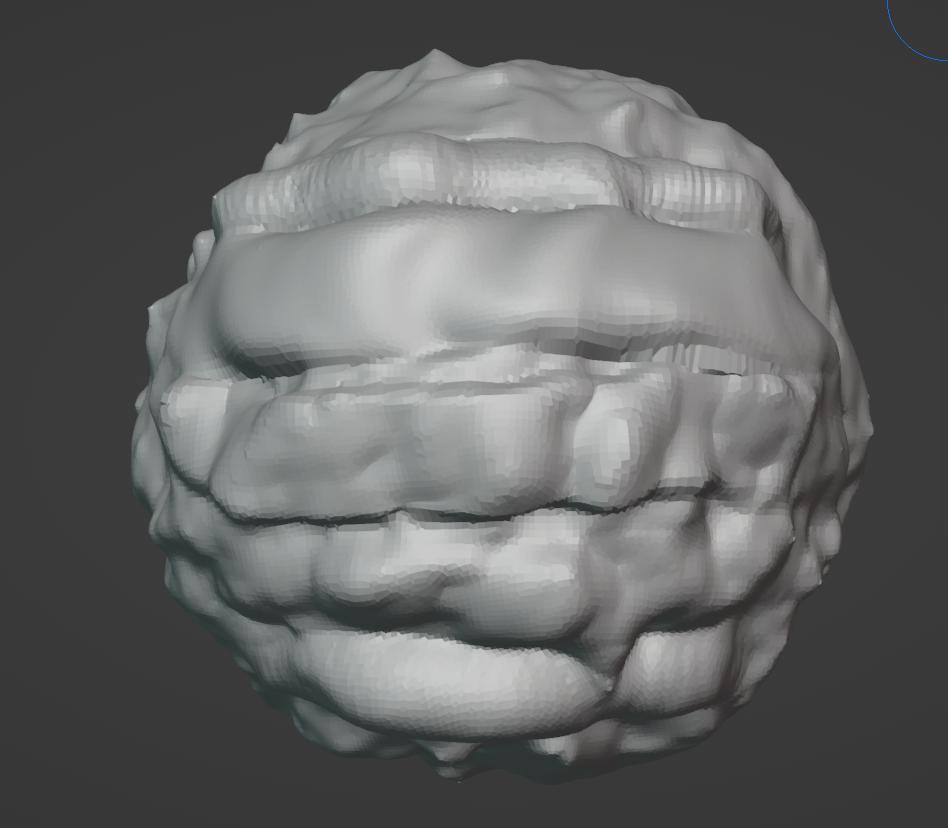
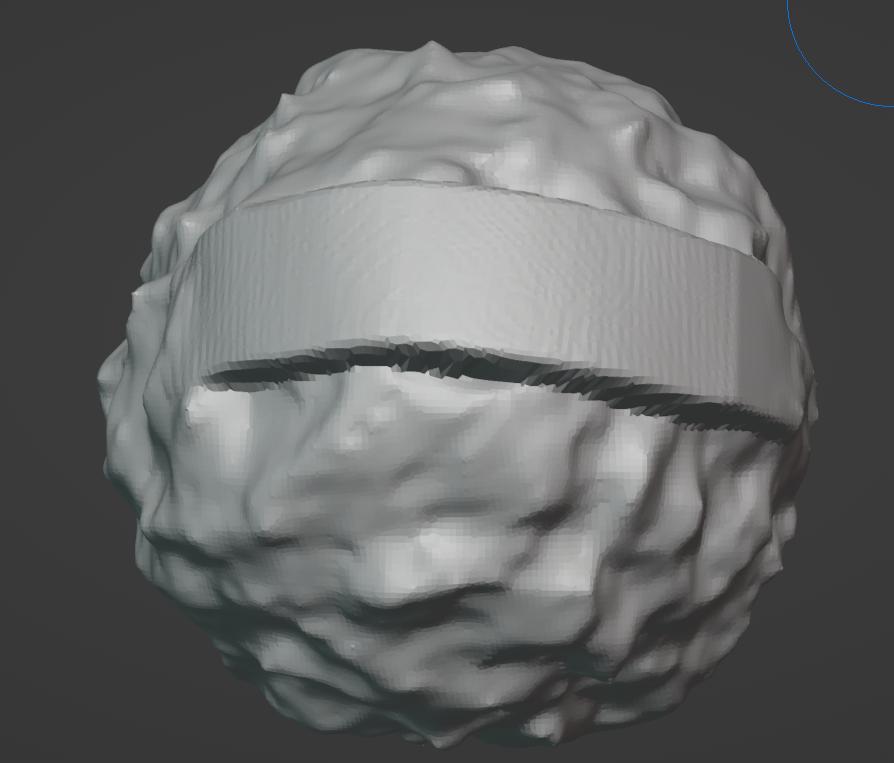
For Voxel Remesher, I suggest expanding this section to include that you can close the mesh by using Mask → Mask Slice and Fill Holes. If you do not mask your mesh and just press this button the operator will fill all the holes and create face sets automatically for them.
Using cloth physics on your brushes or using filters with Multires level will give different results. If you go down in levels your cloth effect will get less wrinkly than when using a higher resolution.
The Slide Relax Brush can be used for smoothing out geometry for your retopology (wished it existed in Edit Mode as well) or to be used as a smooth brush that retains volume better than the regular Smooth Brush. Adding some Auto-Smooth to the brush can regulate its intensity of retaining the original form.
Just a few ideas off the top of my head. Might post more later.
Hi Julien, I know this is not a place to report bugs but this is still broken at least on windows with nvidia cards. Thanks!
here’s an old report: https://developer.blender.org/T89942
Thanks for the feedback @Frozen_Death_Knight ! I’ll make sure that these are added.
@Xorrito I would like to add more notes about features that are currently unsupported. Especially for dyntopo & multires this is important for people to know. But bugs should just be fixed. I’ll check that one out again.
Perhaps it would be worth noting that the Smooth brush is more abrasive when the mesh has a low resolution, and that the Deformation/Surface attribute prevents volume loss.
On the other hand, indicate that with Shift the Smooth brush is called, but to reduce its intensity you have to select the active tool.
Btw, wouldn’t it be possible to add few seconds GIF images for some tips? For instance, you will be able to combine Dyntopo and Face Sets in the future to sculpt hard edges, so could be nice having a quick demonstration similar to how Pablo Dobarro used to do on his Twitter or Joe Eager on his YouTube channel.
HI Julien, first of all great work and all that.
Now, one of the things that I think it is basic to me and it is usually hard to discover is the stroke methods, maybe the dash ratio and the jitter too, I use jitter a lot to add small detalis like rust pimples
wear and things like that with the draw brush.
A small explanation about how to work with textures in the brushes would be also great for new users, the workflow is a bit confusing since you have to work with the property tab, one of the most hiddens things there is the work with image sequences as brush mask to add variations, Craig_Jones has a great video about that topic, a small explanation about how to do alpha brushes or decals with the render engine would be great too.
It would be nice to add which brushes are meant to be used in medium-low poly like the pose or the booleans
I like to say something about this description ( Clay Strips brush ) …
The same as the Clay brush, but more aggressive with a square falloff. A common standard for building rough volumes.
The sculpt offset of most (‘add’) brushes still propagate the slopes of the surface.
Example … Draw / Clay / Layer / Inflate / Blob on a noisy surface.
Really, I did not notice until now. That is a sad move then. It is very helpful when sculpting very large objects, I used to use it for locating precise locations and rotate arounds.
This is now finally clarified in the Transforming section of the manual.
If it’s still unclear, let me know. Visual example are also still good to add.
To be clear here too: The 3D cursor is not meant to be used in sculpt mode for transforming. The 3D curosr is a workaround that many started using.
Sculpt Mode instead has its very own pivot point (sculpt-session pivot), which is able to
snap automatically to the mask border & mesh islands and
can be moved together with the transformed mesh
There are still bugs and missing features but the essentials are already there.
If you set a shortcut (like Shift RMB) to “Pivot to Surface Under Cursor” you can place it essentially like the 3D cursor. This should become a default shortcut at some point, as well as the option to move/rotate the pivot without moving the mesh.
Using the 3D cursor and the object origin for transforms could still be an option in the future, but it’s not the intended or most efficient way of using the tools.
You know we can’t freely move the gizmo/pivot without transforming the mesh, (unless you mask everything beforehand)… so we are waiting for this Sculpt: Option to transform only the sculpt pivot to be able to do this…
… so until then, yeah, the 3d cursor is a hacky helper for that…
In fact, sculpt mode pivot is forced to be snapped on surface.
Except, if we place it on origin of object, user does not really have freedom to place it where he wants.
That is not ideal to rotate or scale.
A more complicated workflow with face sets + Pose brush can be more satisfying for that.
But it is less easy to discover, takes longer to set-up and is less efficient for a temporary selection than a “place pivot anywhere” option.
It is great to have a pivot location for mode following transformation of mesh in object mode.
But a Set Pivot to 3D cursor operator would be so much more valuable than a Set Pivot to Origin or Mask Border.
Plus, 3D Cursor should be visible and able to be moved, to easily use annotation tools, present in sculpt mode.
And for symmetry tools, that would make sense to be able to use a reference, for plane of symmetry or center of radial symmetry, that is not origin and not pivot of transformation.
Ok, I still don’t understand why the sculpt pivot and 3D cursor need to be separate things. They both serve the same function of a point in space that helps in transforming geometry. The only difference seems to be that the pivot moves along with the transform, and the cursor stays in place. That could just be a new option for the 3D cursor: “Move Cursor with Transform”.
I think it would be better if they were merged and developed as one universal feature, so that other modes could benefit from the improvements.
The problem is that you need to store 3D Cursor location as pivot of transformation and to be able to update it when transformation is validated.
And if you expect to restore previous location by canceling transformation, according to undo steps wanted in your undo history, you may have to increase memory consumption by storing a lot of 3D cursor locations.
Current pivot for sculpt mode is just storing a location per mesh.
Contrary to 3D Cursor who is one reference for objects of scene, sculpt mode pivot may be different for all separated parts sculpted.
This might be a trick but if you go to object mode and set pivot to 3D cursor, then you can go on sculpt mode and move the cursor by shift right click and drag.