The Lamborghini Gallardo Project

Hi all
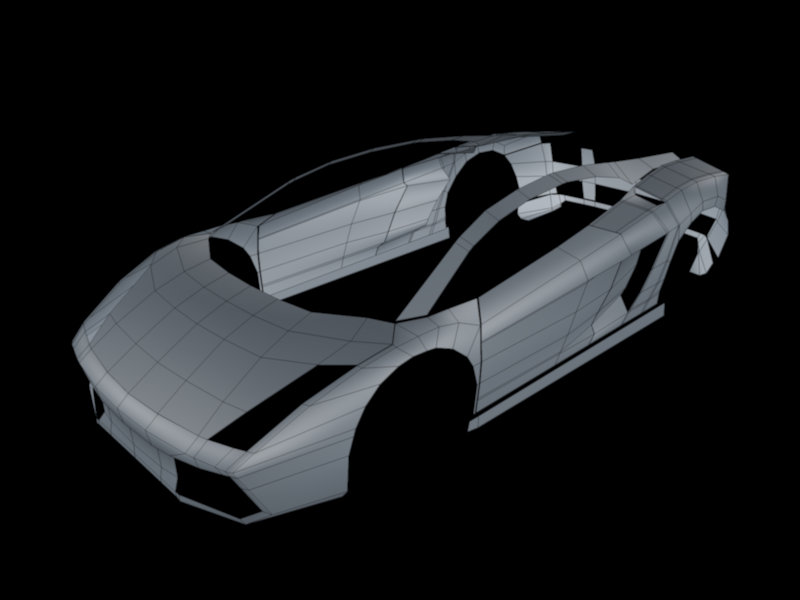
This is a series of video tutorials on how to model,texture ( and maybe even rig and animate) a Lamborghini Gallardo from scratch.After modeling and texturing is complete,compositing a scene and combining rendered Gallardo (as foreground object) with a real-world background,is coming next.
We’re going to be discussing a broad variety of hard edge modelling,composite material using nodes,rendering using Cycles,compositing even rigging techniques.

Here are the links to those of the parts that have been published so far >

YouTube >
Part One > http://www.youtube.com/user/PeterDraculic?feature=mhee
Part Two > http://www.youtube.com/watch?v=KP-tuZ5TSes&feature=channel_video_title
Part Three > http://www.youtube.com/watch?v=chhxJEElKVk
Part Four >http://www.youtube.com/watch?v=ezdtD-TwrlM
Part Five >http://www.youtube.com/watch?v=UByMwcytTc
Part Six >http://www.youtube.com/watch?v=M3FHFNKPPqs
Part Seven > http://www.youtube.com/watch?v=qb8dWxJLK1w&list=UUKDe8_5
-j7HvyS6p0QLlaA&index=1&feature=plcp

Vimeo >

Part One > http://vimeo.com/37243659
Part Two > http://vimeo.com/37377499
Part Three > http://vimeo.com/37494591
Part Four > http://vimeo.com/37778136
Part Five > http://vimeo.com/38096700
Part Six > http://vimeo.com/38137788

The blueprint for modelling Gallardo has been created and is courtesy of (and kindly offered by) Simon Gibson,graphic designer and artist,based in UK,here is a link to his site:
http://www.simon-gibson.co.uk/
Thank you so much Simon!

hope you’ll enjoy this tutorial series and you’ll find it helpful somewhat
Peter

Hi Peter,

Thanks for the tut, and also thank too to Simon Gibson for the Blueprints. Although I’m resonably clear with modelling a car now, it’s going to be interesting to see another aproach (just downloading the vid now). What I’m really looking forward to is the compositing a live background with the vehicle in Cycles - can’t wait! :wink:

thank you Jay for commenting the support,greatly appreciate!Hope you’ll enjoy it! (just,please,be patient with my English…:))

Hi again Peter,

I’ve just watched the tut and its good - similar method so far compared to Blender Cookies Porsche, your English was better that a lot of English speaking people I know :wink: - All I’d suggest is a better mic.

I can see from the tut that you’ll have a lot more parts, could you give me a ball-park figure when the compositing section will be available to watch, will it be a while off?

The reason I ask is that I’ve been trying to composite some models on a photo for a while and trying to sort out the workflow to get reflections for the car paintwork with Cycles using the background image I’ve taken - so far I’ve had no luck and no one here seems to be able to fill in the gaps. I just so want to composite a car with a real photo, so much more reaslistic that a 3D backdrop as I’m sure most people will agree :wink:

Hi again Jay
thank you for all your very encouraging and supporting words about my level of use of English language,it means a lot to me and,let me assure you,I’m constantly trying to get better as for this.

Yes,indeed,there going to be quite a few parts till the compositing part;according to my (rather optimistic) planning,and trying to keep it “short”,in terms of average tutoring time (at about half an hour average time,for each part) it should take some good five parts before we get to the texturing/materials part.But since no serious UV mapping work is needed,this (texturing /materials part) should be covered in a single screencast.
Allow it,then,one additional screencast for organizing/preparing our scene (layers,lighting,brief introduction to the basic compositing concepts,brief presentation of the technique) before the “real” compositing part is out.So,you could safely expect this to be out at about No .7 or .8 screencast.

Of course,I will do my best to keep a “tight” timeline without dropping the quality,so (hopefully) this could have a planning horizon of a couple of weeks.

As for the background image’s reflections,now : of course we’re not going for a simple “backdrop” but for a realistic background image instead,very true!Here are some personal thoughts on this :
-the technique will be,primarily,based on the so called “multi-plane compositing” technique
(widely used in “stereoscopy”) ,that is,the background image would be rather an “assortment” of “alpha channel” enabled images properly arranged around the car instead of a simple backdrop.
This would be a good alternative to the lack of a “panoramic” (and spherically (Mercator projection) mapped image) from my side.
This would also allow for a simple “parallax” camera movement along the Z (depth) axis should that be the case.

Now,having in mind this would take a while I have uploaded,here in this thread,a very simple scene with a composite material,using the newly added Render Passes Cycles’ functionality,which I’m,currently,experimenting on.Please consider downloading the zip file below.
Also,please have in mind,we can control the render result by adjusting both the material nodes and the scene nodes.
Please feel welcome to send some feedback and/or any critique/thoughts/corrections/improvements on this.
For the textures all you need is to just apply a “panoramic” (360) sky texture (let’s say from cgtexture.com) and a simple texture for the “terrain” plane(s).I have not “packed” them together with the .blend file,since I am not sure about the copyright issues.

As for the “pearl (pearlescent) paint” material,I have published,recently,a relative tutorial on my YouTube and Vimeo sites.Here are the links to it >
YouTube > http://www.youtube.com/watch?v=cay4gIpDnsw
Vimeo > http://vimeo.com/37104685

please do feel welcome to send any feedback,critique,suggestions.

Thanks again for all your kind words and support from the bottom of my heart!
Peter

Attachments

ReflectionsUP.zip (111 KB)

Thanks Peter for the detailed info, I’ll check out your file today if I have time - nice to see someone going into detail about things that others rarely touch.

Jay :wink:

peter any chance you could give us the file with the pre prepared image planes to get us started :slight_smile:

watching for more videos with anticipation

Thank you for commenting and support stvndysn.
The blueprint I am using for this tutorial series is courtesy of (and kindly offered by) a UK based artist and designer named Simon Gibson.On his site (here is the link to the “blueprint” page : http://www.simon-gibson.co.uk/?p=18 ) he says he’s “giving it away”,so,I’m pretty sure,he wouldn’t deny your request for downloading it for “personal,educational use”.I,personally,wrote him a letter asking his permission for using it in my public tutorial screen-casts;he immediately responded to my request in a very kind manner .It is really just a couple of clicks away.
Thanks again,Peter

Following this one, really good tutorial.Thanks.

thank you Ooze27 for commenting and support,happy you appreciated it! Peter

Hello Peter, i thank you very much for the video tutorial, but i’m currently following it using cinema, it’s kind of complicated with hypernurbs, but i guess i can follow along just fine, btw is it okay to post my WIP here?

i’m currently downloading the part four right now, thank you again for your effort, and pardon me for my bad English.

oh,but of course dizzydeez!that would be my pleasure!also do feel welcome to ask me about anything you’d wish me to explain about this tutorial!
as for the HyperNurbs,I would suggest you to start using them a little bit later,when the basic topology and shape have been created and you are just before trying to pull some hard edges (defining the creases and the lines),for the moment it would be better to keep modeling without having HyperNurbs generator enabled.
The concepts are the very same,so you can very easily follow along,I think!
Also your English are just fine,I am not a native English speaker me too,as well…so…:slight_smile:
Thanks again,hang in there!..:-)Peter

Thank you for such an encouraging reply, i almost wet my eyes:o, it’s feel nice when you have a pleasing welcome in a new community. Back to topic :stuck_out_tongue:

i only toggle hypernurbs (you can toggle it on/off) to see how the face is smoothed out, and how rounded it will be, the modelling process is quite alright, i can follow along your epic tutorials, but it’s getting complicated at the back of the car, so i’ve decided to work on the upper part first, as for this part, do you thing it will be better to have them separately?, and there is nothing like 100% accurate blueprints isn’t it?

And here’s my WIP, please be advised that this is my first attempt on car modelling, so it will be quite a mess :evilgrin:, and oh Peter, is the 5th part of your tutorial has come out?


oh you’re welcome!:eyebrowlift:
let me first congratulate you on the result,as far as I can see,it looks quite the nicely modeled car,good (almost squarish) and of even size polygons,smooth edgeflow…I would only recommend to try modeling them as separate parts (the door,the chassis etc)…this way you can make sure that no unneeded subdivisions (due to edgeloops running across the whole surface) will occur and ,thus,you have a better control over the total poly count…
as for the “accurate” blueprints,we should not forget this is an educational tutorial and,thus,presenting more the basic methodology of making a car model than anything else and ,also,according to the author of the blueprints,he achieved an estimated 95% accuracy in this one.
But,generally speaking,the rule-of-thumb for blueprints is that you cannot go much deeper into detail than their very “lines” (the width of the ink itself!) allow
the 5th part of this series has just come out.
Thanks again,greatly appreciated!Peter

number 7 is now out

Hello peter, how are you doing, it’s been a while, and wow you’ve already finished the 5,6 and 7th part, i’m downloading them right now. Wow on the 7th tutorial you have a much much clear voice Peter, smexyyy :stuck_out_tongue:

Few days ago, i’m still working on this car model when suddenly the entire town electricity goes down, and the next thing came up after, my HDD is error so i have to work on this all over again:(

But any way here’s my wip, this time i decide to model it in parts, but really working with hypernurbs is very tricky, i almost got my brain jumped out of my head:evilgrin:

i’m eager to any tips, suggestion, and correction.

Thank you, hope you’ll have a great day, and sorry for my bad English.

I’m voting this thread to be stickied

Attachments


Mr. Drakulic,

Just wanted to say Thank You very much for this tutorial. In fact, for ALL of your tutorials. I have been following you on Vimeo for the last few months, ever since I discovered your bicycle tutorial quite by accident. Even though I will be 68 next month I am very much a newbie when it comes to Blender. Just wanted to let you know how much I am enjoying following your tutorials and Thank You for helping an ‘old dog’ learn some new tricks.

-OldMan44 aka Danny Wentzell

looks really well done to this point!:slight_smile:
as far as I can judge from the attached rendering,the overall geometry looks really well subdivided.Of course there are some connections (like the front pillars) still to be done,but I think it would be a piece of cake for you,judging from this result!
Keep up the good work and hang in there!:slight_smile:

Mr.Danny Wentzell,

Let me assure you,I greatly appreciate your words,it really means a lot to me…actually,this is one of the greatest and most valuable feedback I’ve ever had!
Please accept my deep respect and most sincere Thank You for having appreciated my efforts,feeling truly honored
Yours Sincerely
Peter Drakulić Pugachev