Heiya everyone!
Inspired by the artwork of master Goro Fujita, I’ve tried to re-create one of his amazing illustration in Blender.
Goro Fujita is an absolute master and I’d like to thanks him for being such an inspiration to me.
The image has almost no post production, as the “painted” effect was achieved by using custom materials and multiple render layers : )
The render was also super fast due to the lack of any realism of the scene, and took under 2 minutes to compose the full scene at 4k resolution (Cycles).
C&C are welcome!
Peace,
Davide
I recommend to everyone interested into this style to take a look at others Goro Fujit artoworks you can find there:
I am very interested in this technic, I think that’s very potential. i never knew that this kind of painting style could be achieved by rendering, could you simply explain to me or give me some key words that I can go for search some tutorial on internet?
I noticed that you have posted some printscreens of your materiale node in your previous work, from a single picture I can hardly understand how every nodes work together, you invented this methods yourself? or there is a name for this kind of rendering technic?
I didn’t know Goro Fujita before, and I roughly browsed his artworks in your link, personally I like your work better than his, maybe i just prefer your art style.
@bartv
Thanks so much Bart! I’m super happy to be featured up there in the gallery!
@MartinKlekner@Okavango@rombout@xumu
Thank you guys for your interest into what I’ve made there!
Since a lot of you were corious about how I’ve made it, I’m gonna try to breakdown this in some key steps right there:
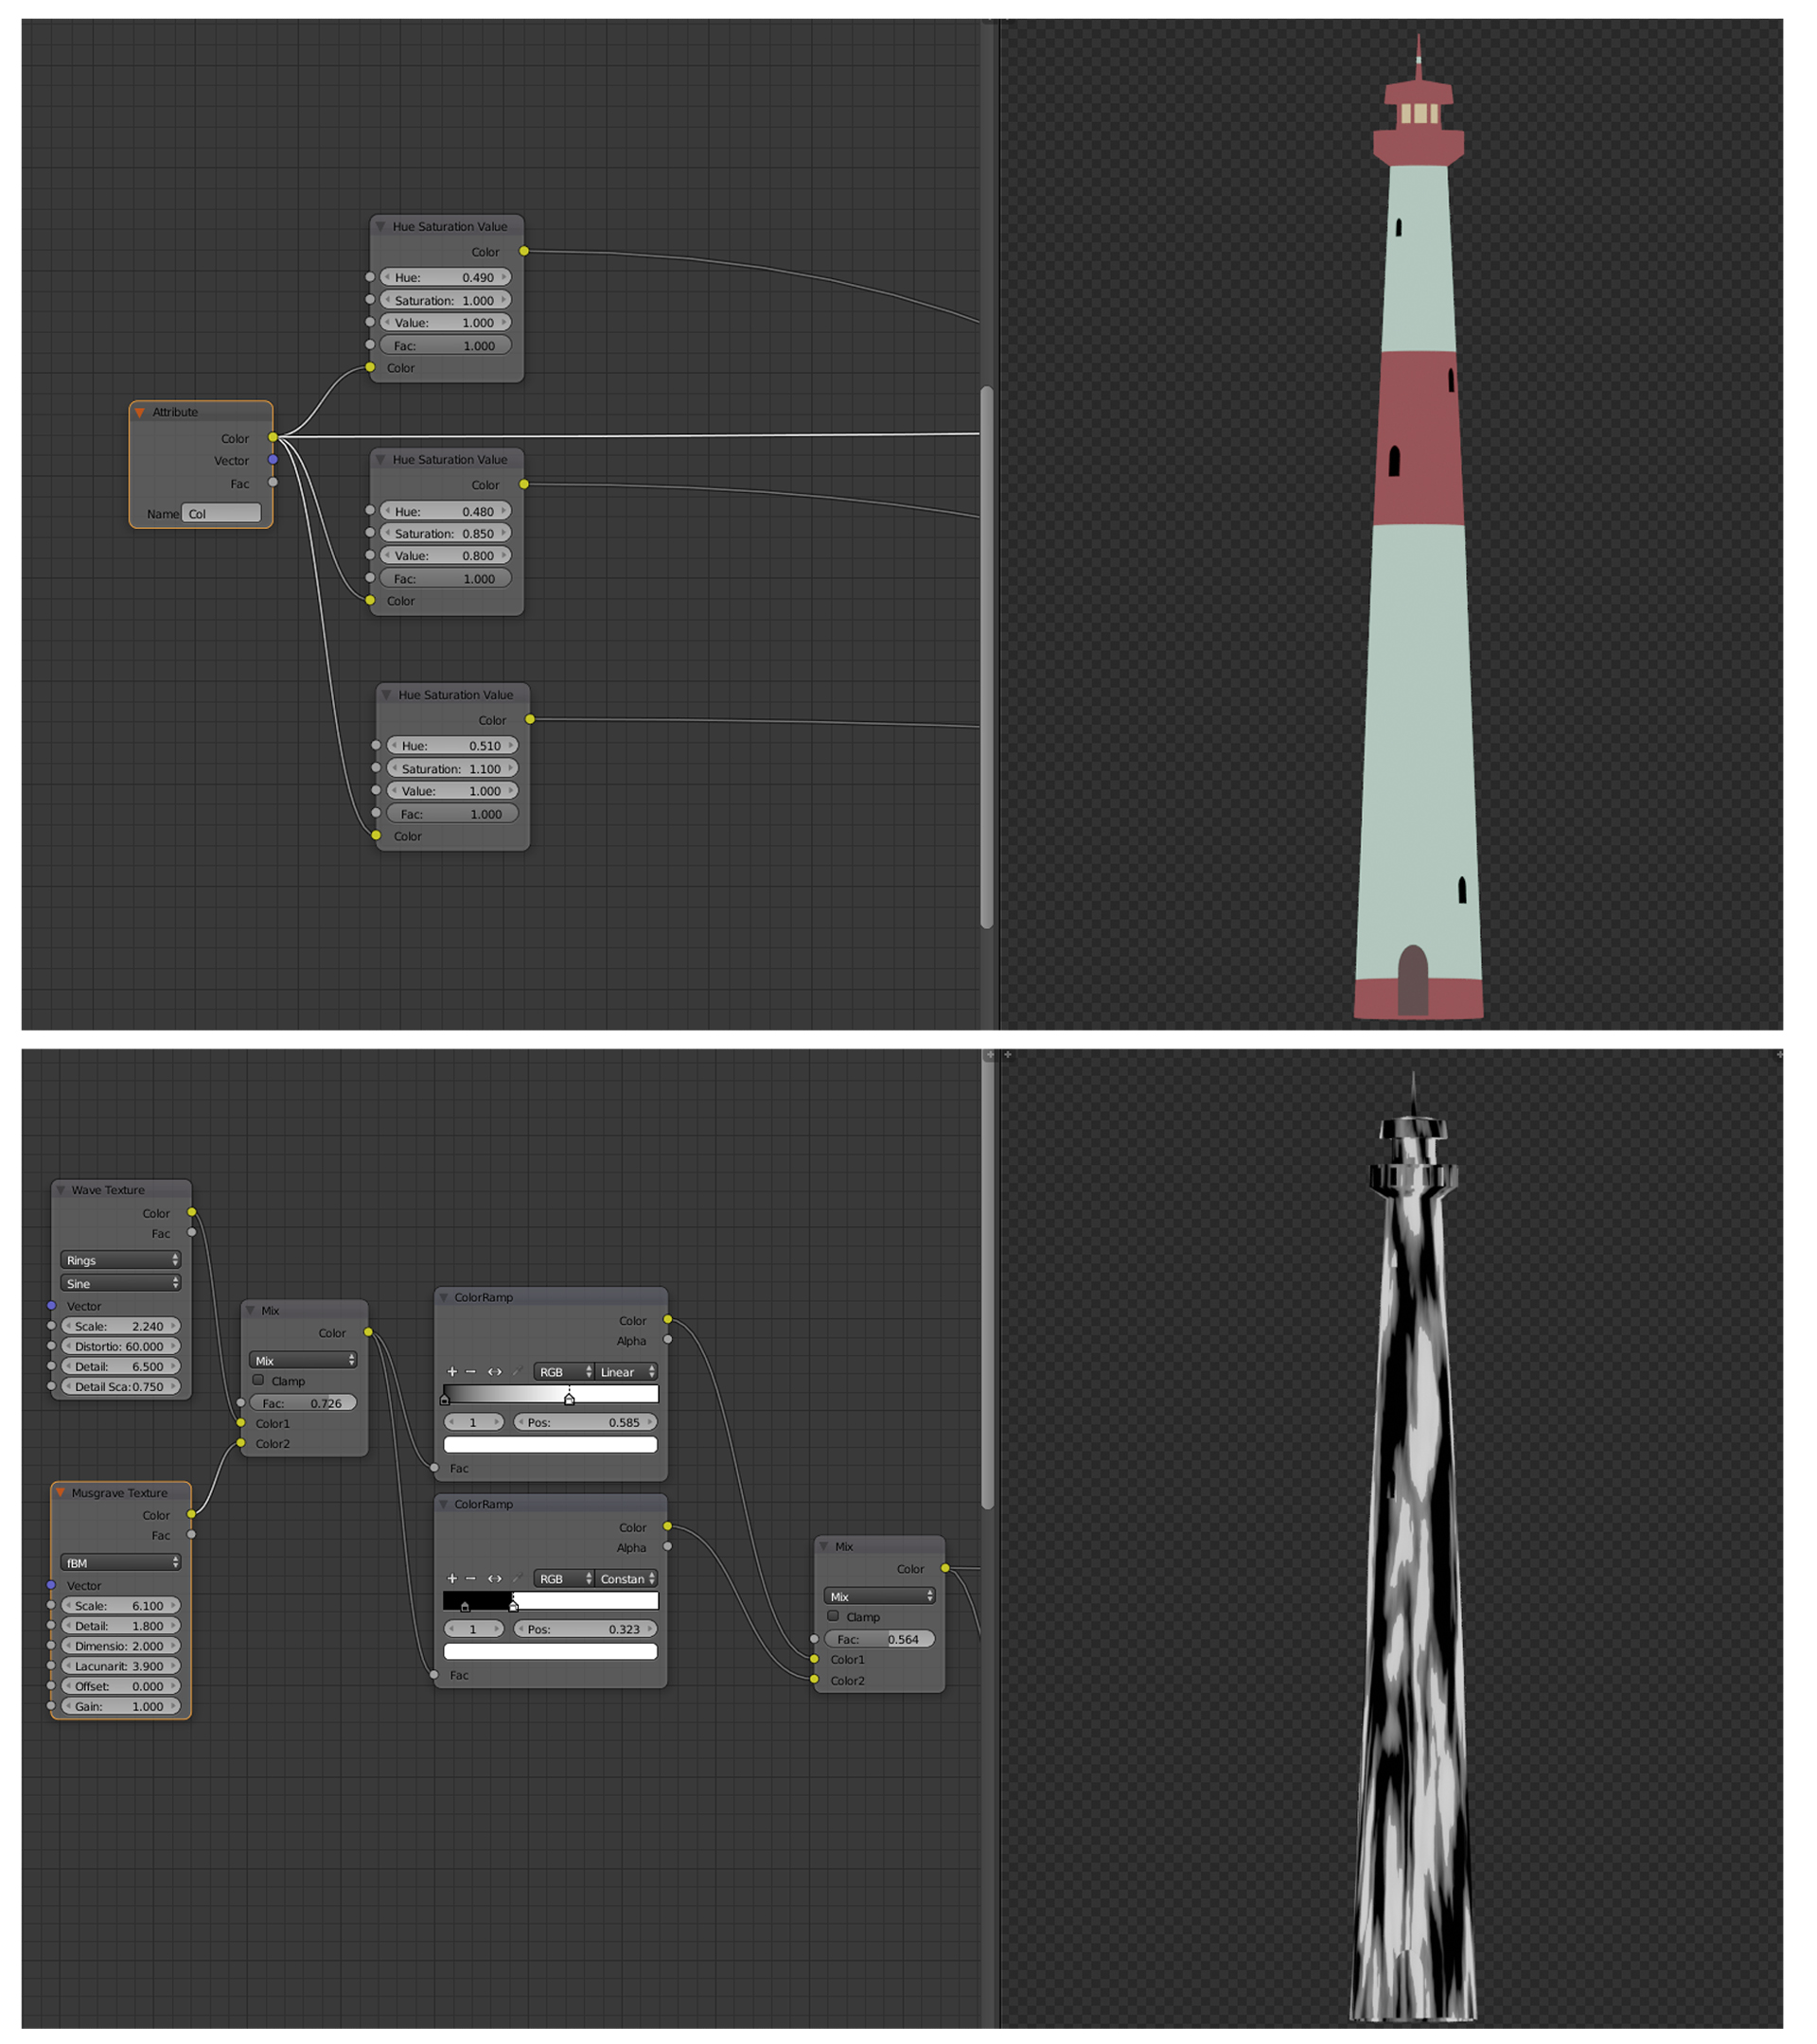
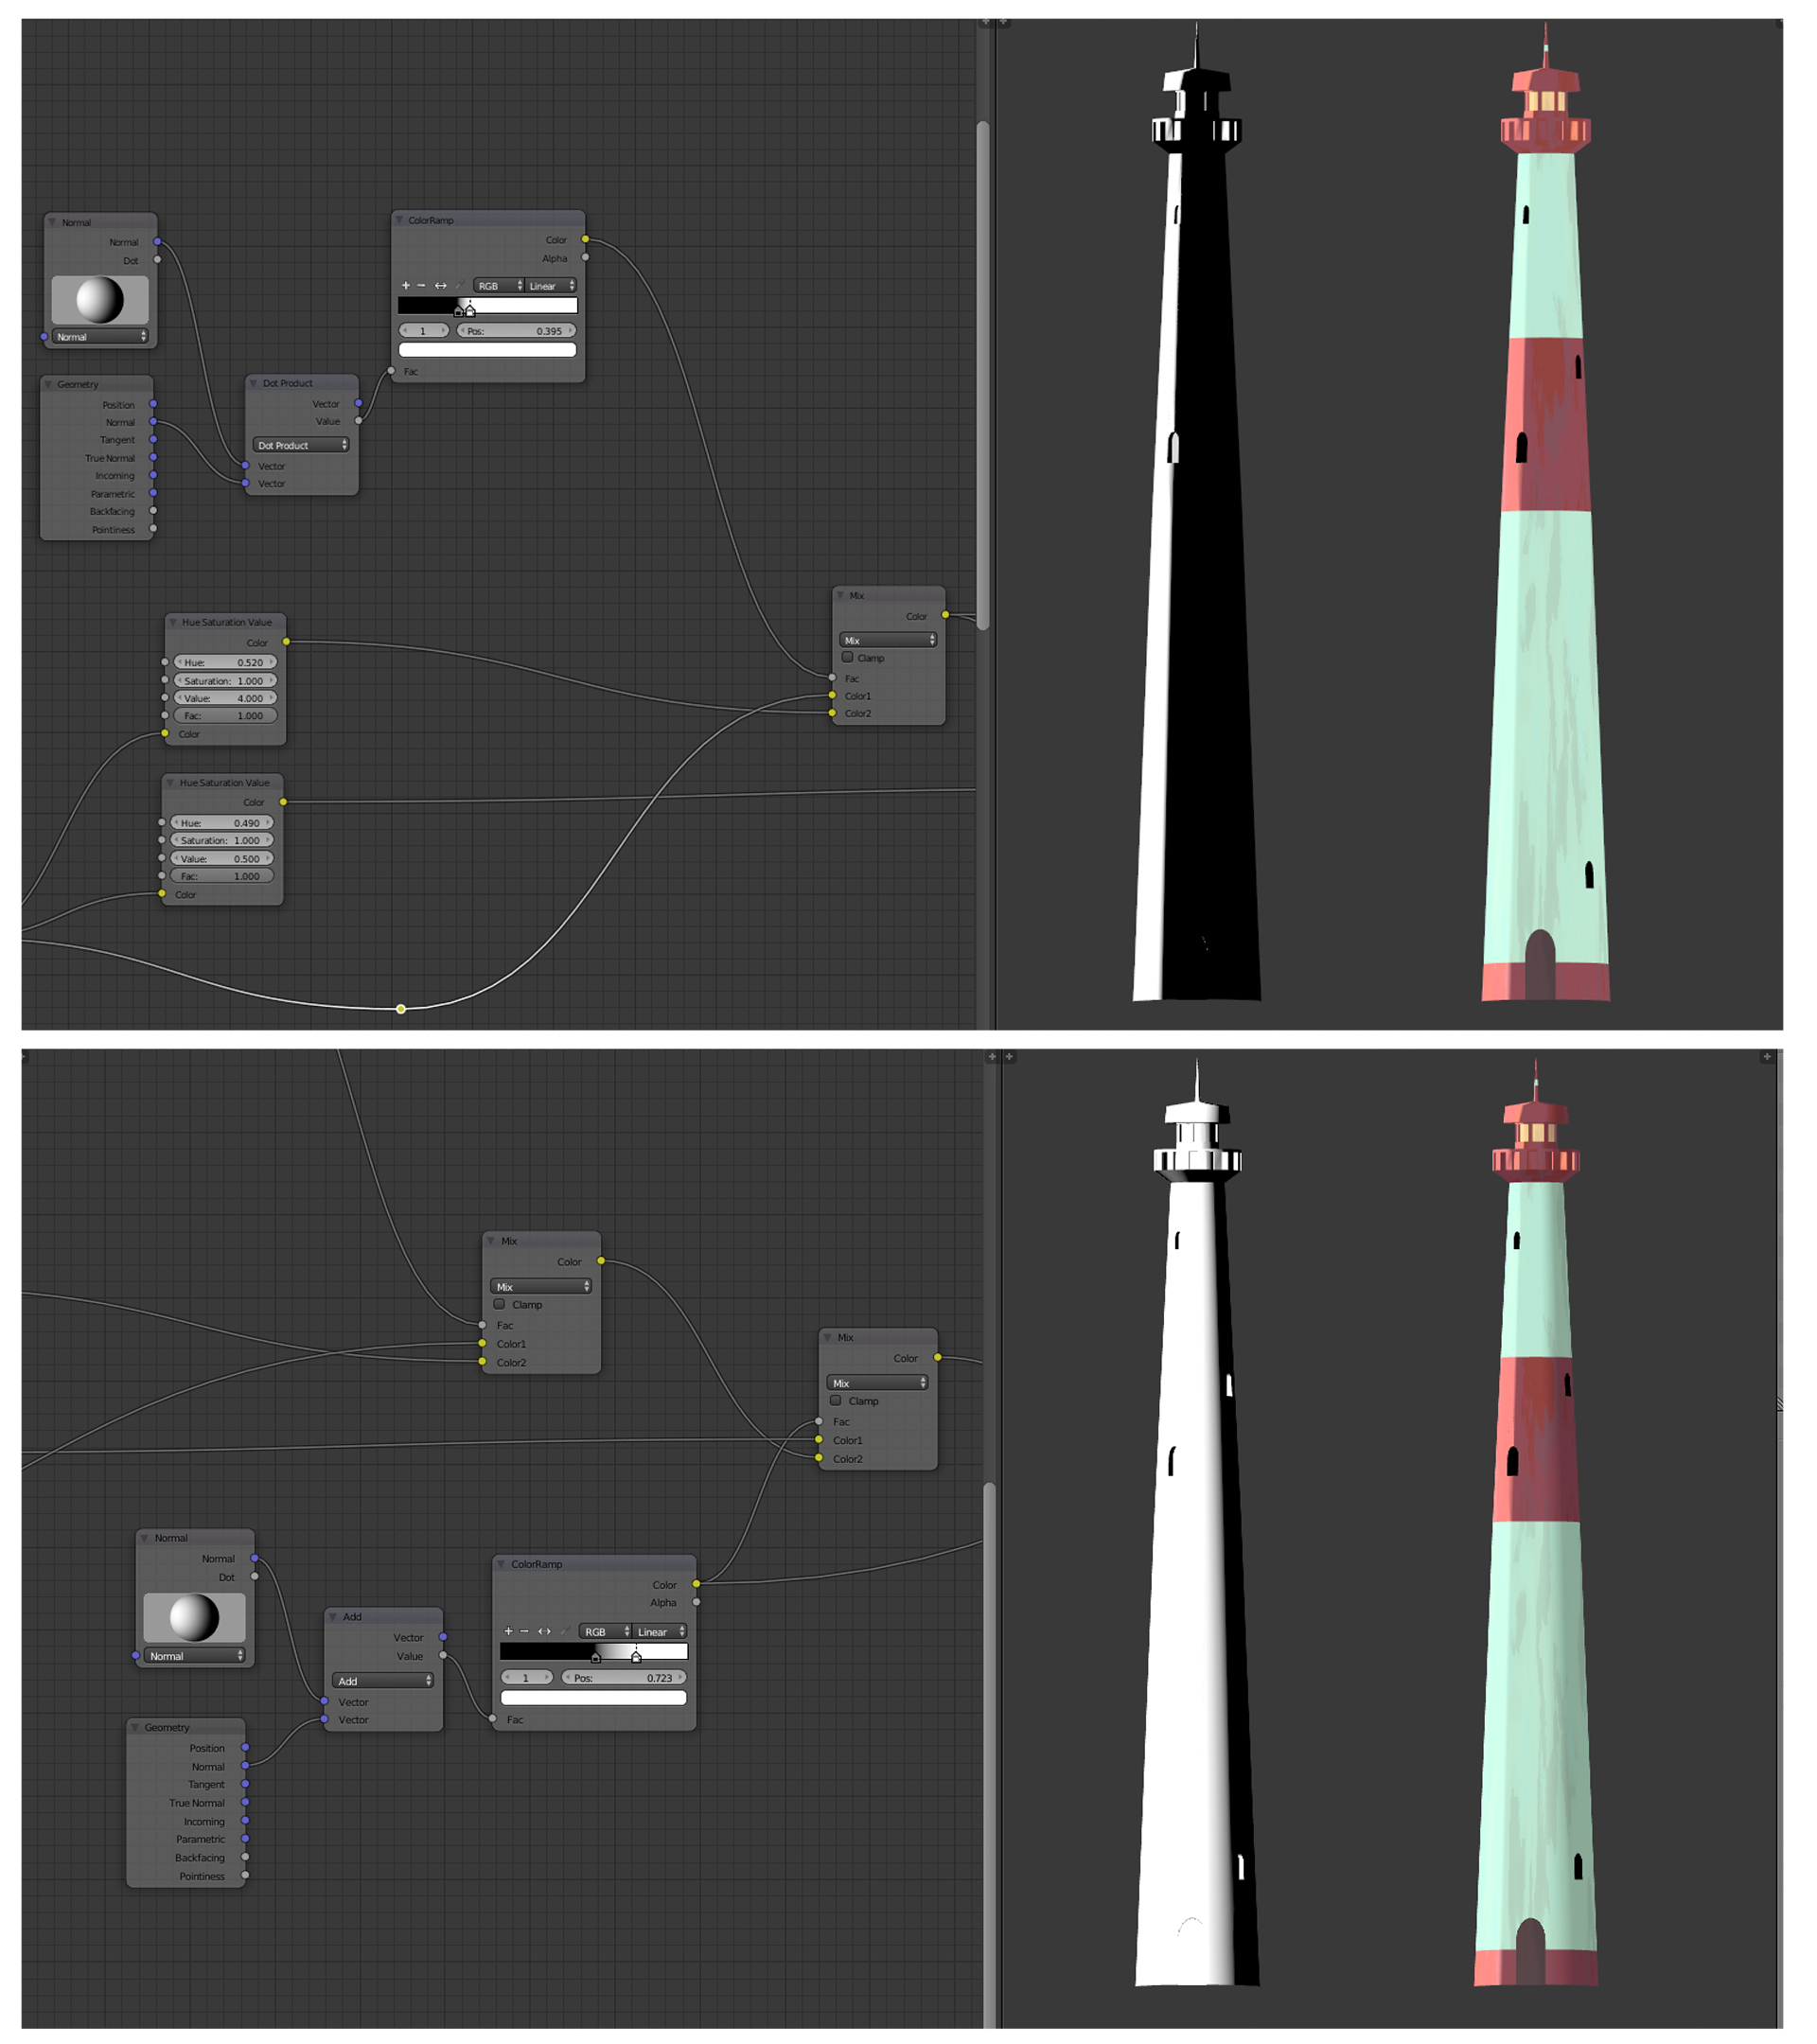
(note: Materials are just FLAT - NON EMISSIVE shaders, so the actual colors are just vertex painted colors over the mesh)
There are 3 different HSV shading of the base vertex colors there are mixed by using procedural textures:
Playing around with Noise, Musgrave, Voronoi and Wave allows you to make some sorta of “hand painted” strokes. I’m just using the BW texture as a mask for the fac of a mix node within i put the base color and a different HSV variation of it ; )
Use as much variation and mask as you like, usually 3-5 shading are more than fine to achieve that random painted effect : )
Making different mask for each different object ( or group of them, just as for the clouds) will help the scene to look more “random” and less procedurally generated!
Since materials are flat-non emissive, there are 2 custom nodes branches working on the rims/highlights (1st pic) and enhancing the shadows (2ns pic). As above, normals are used as a mask to mix the base with a darker/lighter variation of itself : )
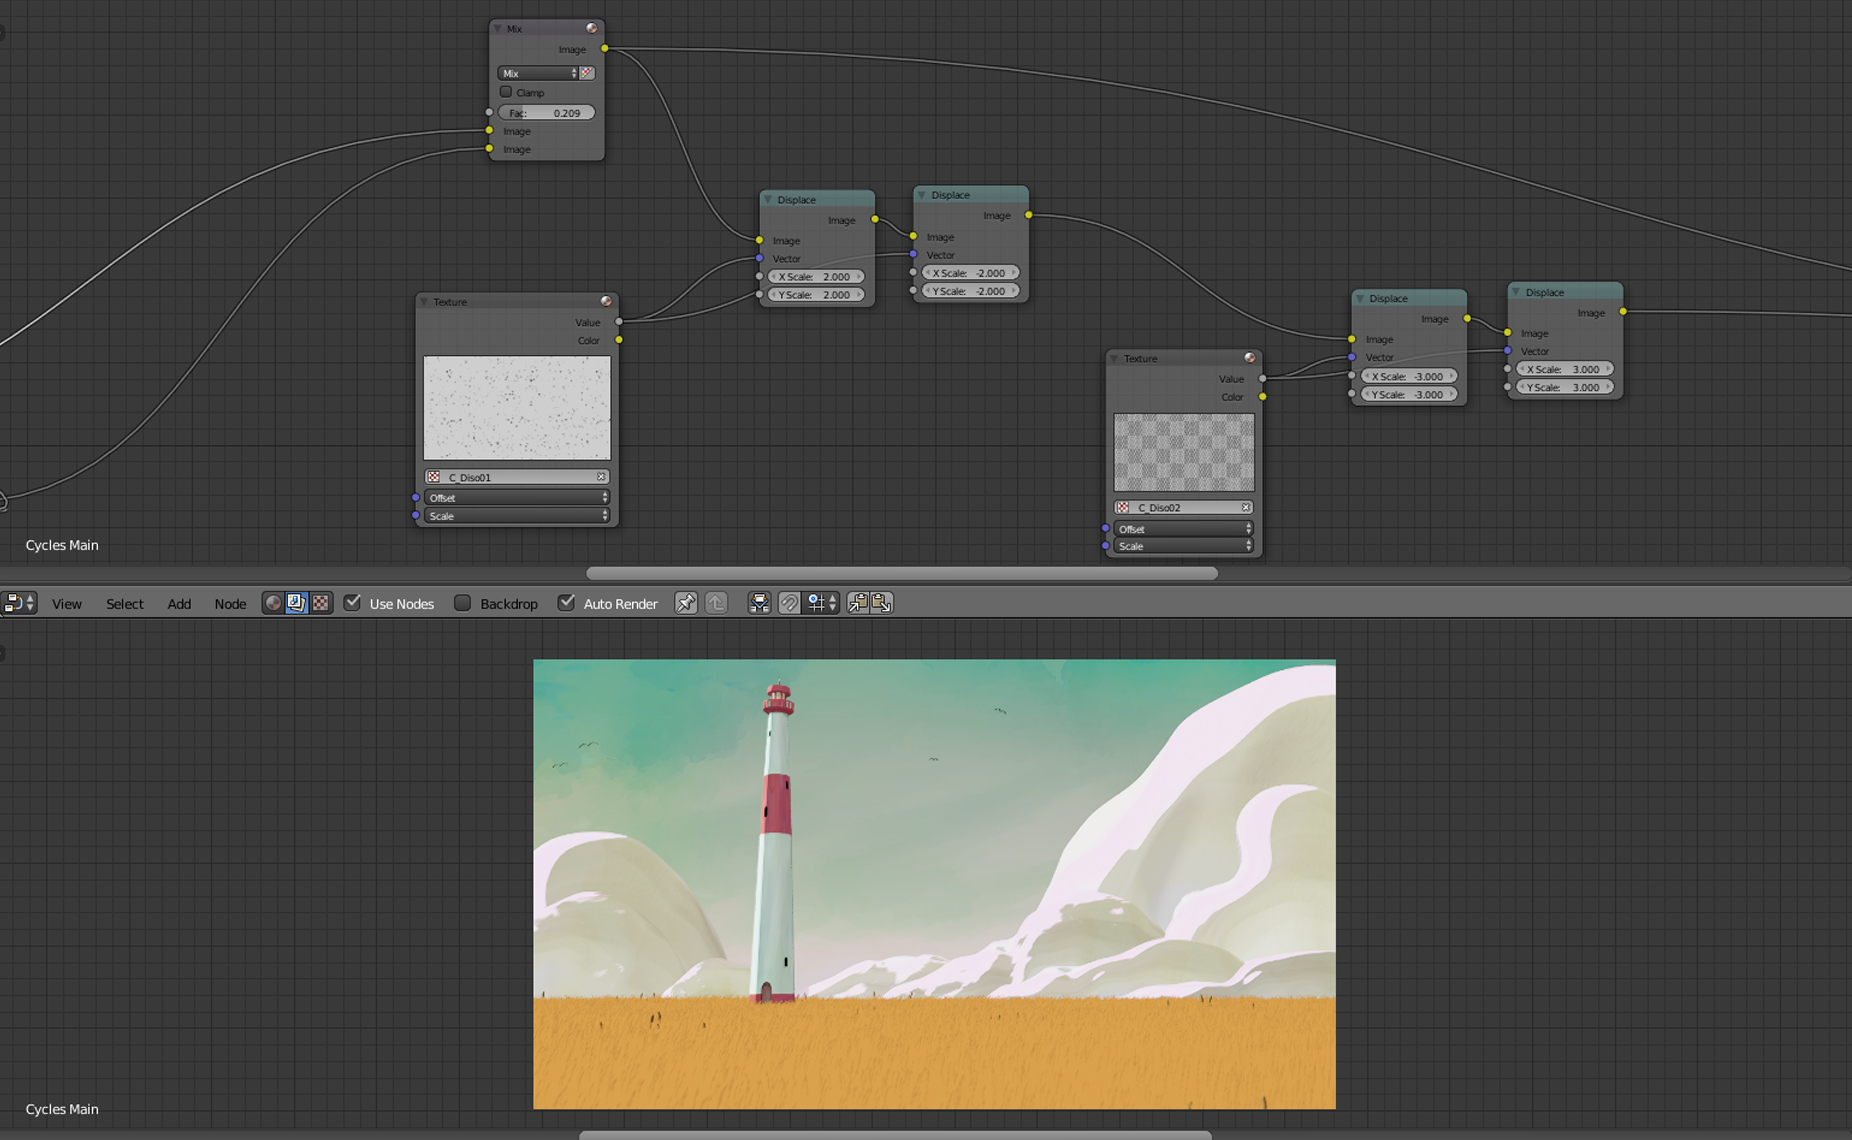
In compositing there’s a specific trick I like to use, which is using noise/grain texture to displace the final image by some (little) random values. This will “mess up” most of the borders of the objects, blending the colors just like a real painted illustration : )
I know this is a really “short version” of the whole process, but I hope those little hints can help you figure out the basics of the process and make a your own version of it : )
Amazing painterly style, beautiful light, simple illustration but with great impact. I have been following master Fujita for long time now on Instagram, he is an amazing artist.
Thank you for sharing your technic. I would gladly pay for full tutorial. Thanks again.
I had to read better, you already state that you applied a mask to each mat. Very cool man
So for good planning it will be easier if you make group for that rim light effect. That way you can apply it faster to each material i guess. Perhaps add some handles to the placement so it can be adjust fast