Nice! What are you doing with the windows to make them look so good?
Thanks ![]()
Obviously, the overall effect is parallax mapping… but originally, the interior textures were fully built and lit - ie, furniture + you would normally light a room, with shadows and highlights and falloff. But, used in this manner - it ‘broke’ the flat look, and was difficult to get each window to vary in intensity the way I wanted.
For a very long time, I avoided the redo because i didn’t want to rebuild 10 interiors. (There’s 10 unique ones, and they’re also flipped to get a starting bank of 20). Then it sort of occured to me - it doesn’t need to be actual lighted furniture. It needs to be 2D art.
So instead of building the room in 3D, the furniture/doors/etc are 2D shapes in Illustrator. Everything greyscale, with different values on walls and ceilings to vary the luminance. The shader itself takes care of the glow/room color (blue or gold, or whatever.)
4 Likes
Wow, that’s genius! ![]()
1 Like
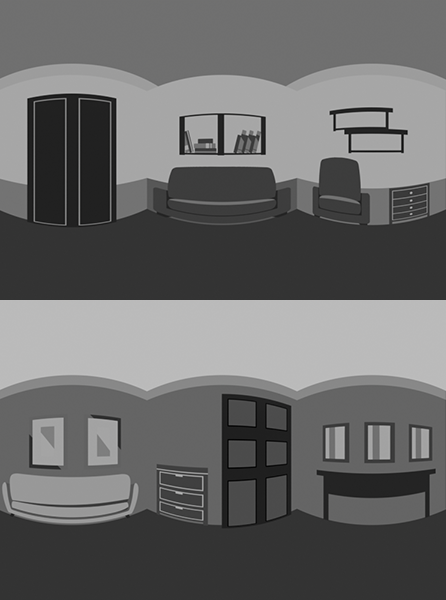
Here’s a straight workspace shot, so it’s a bit more obvious what the mechanics look like without all the lighting and glow.

2 Likes
Not really a sketch, but more of a tip -
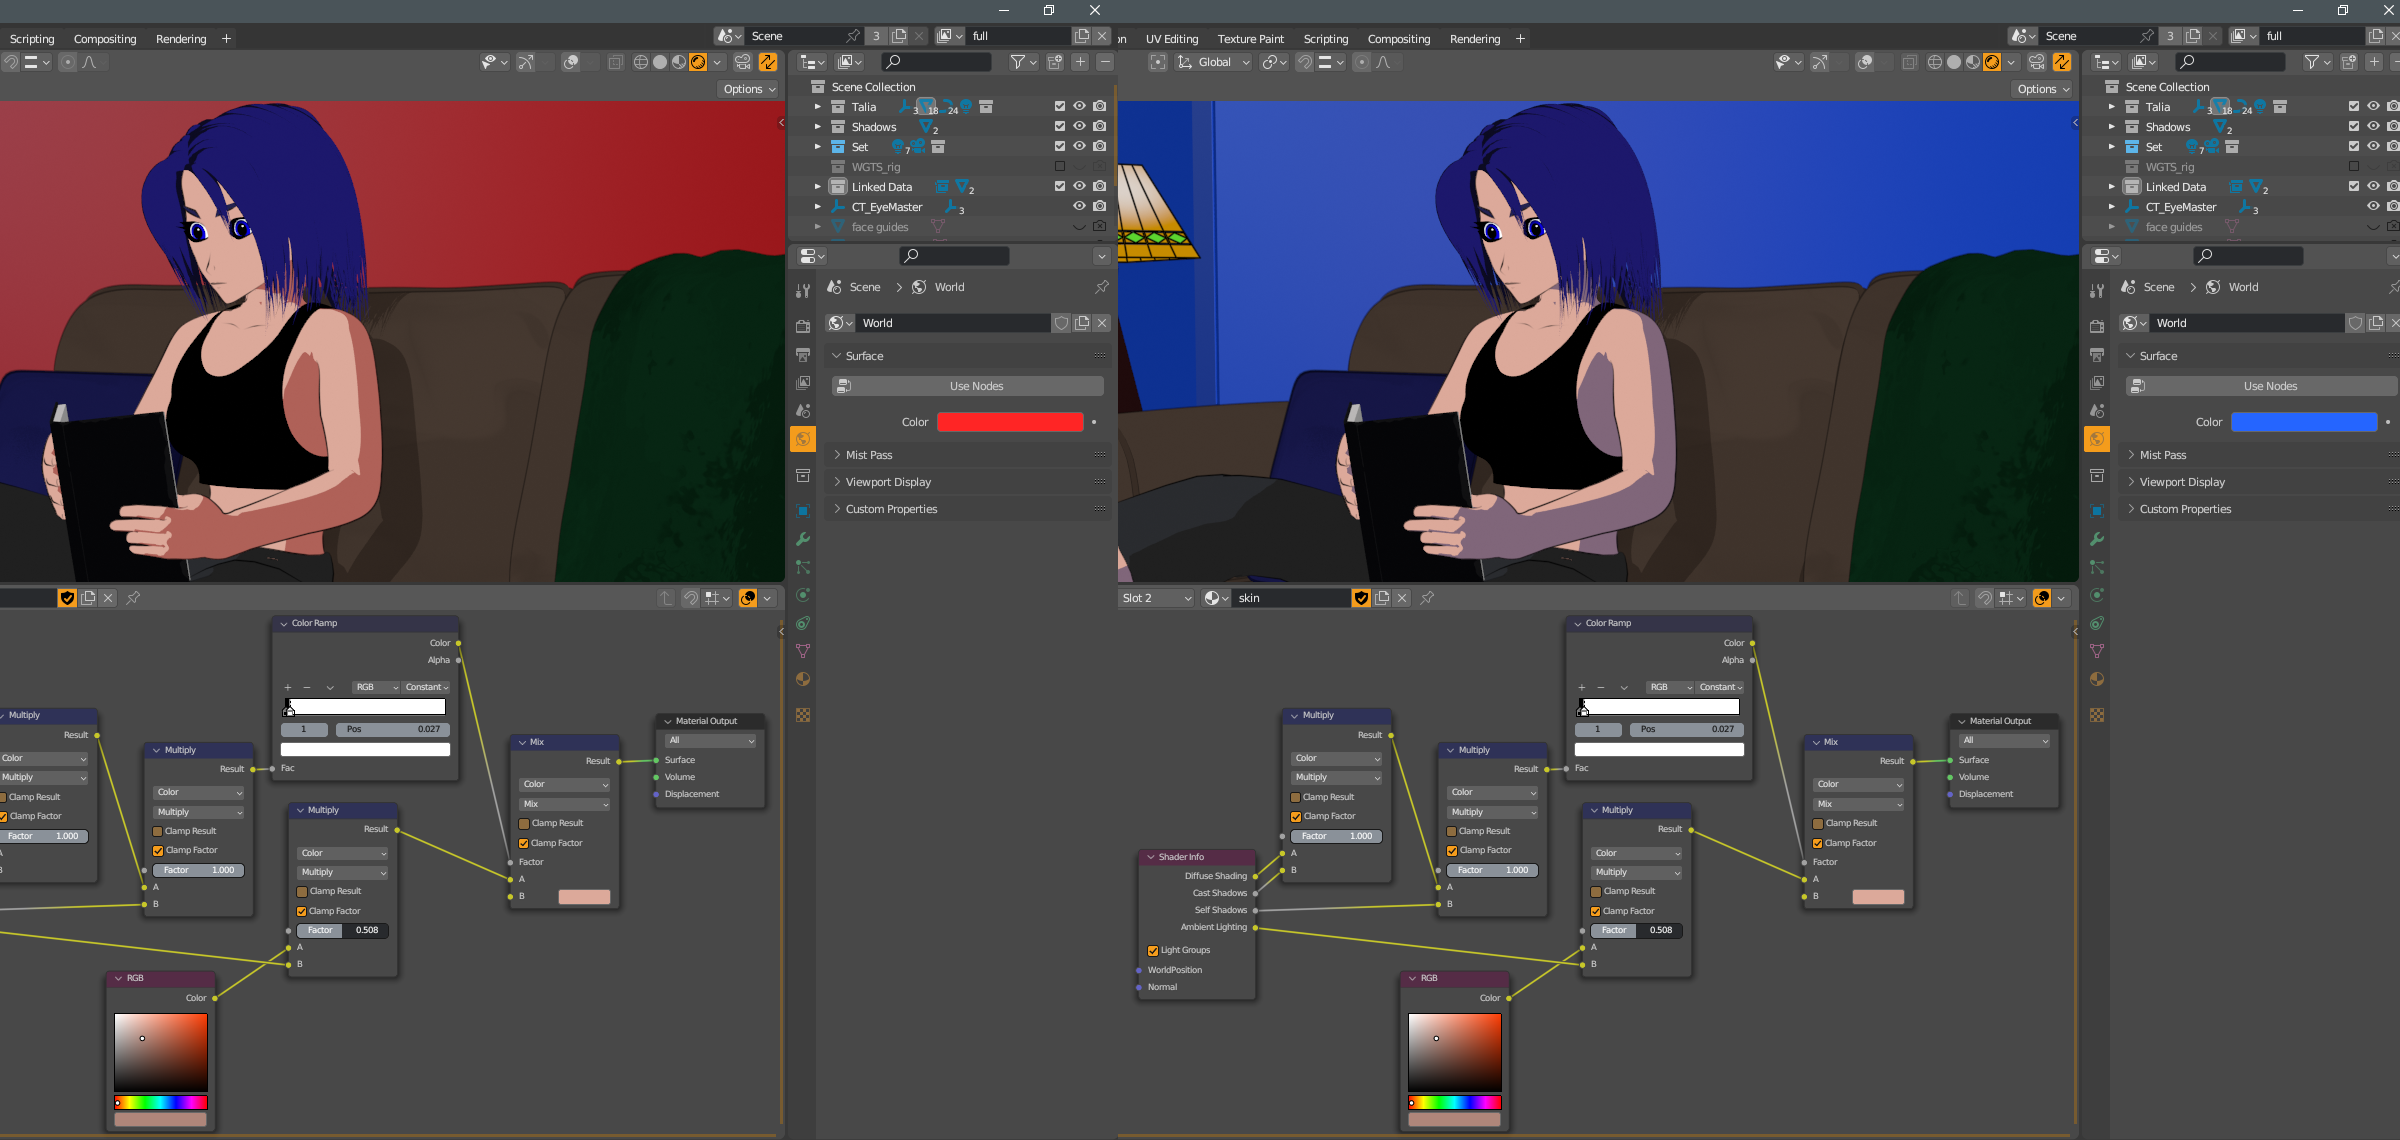
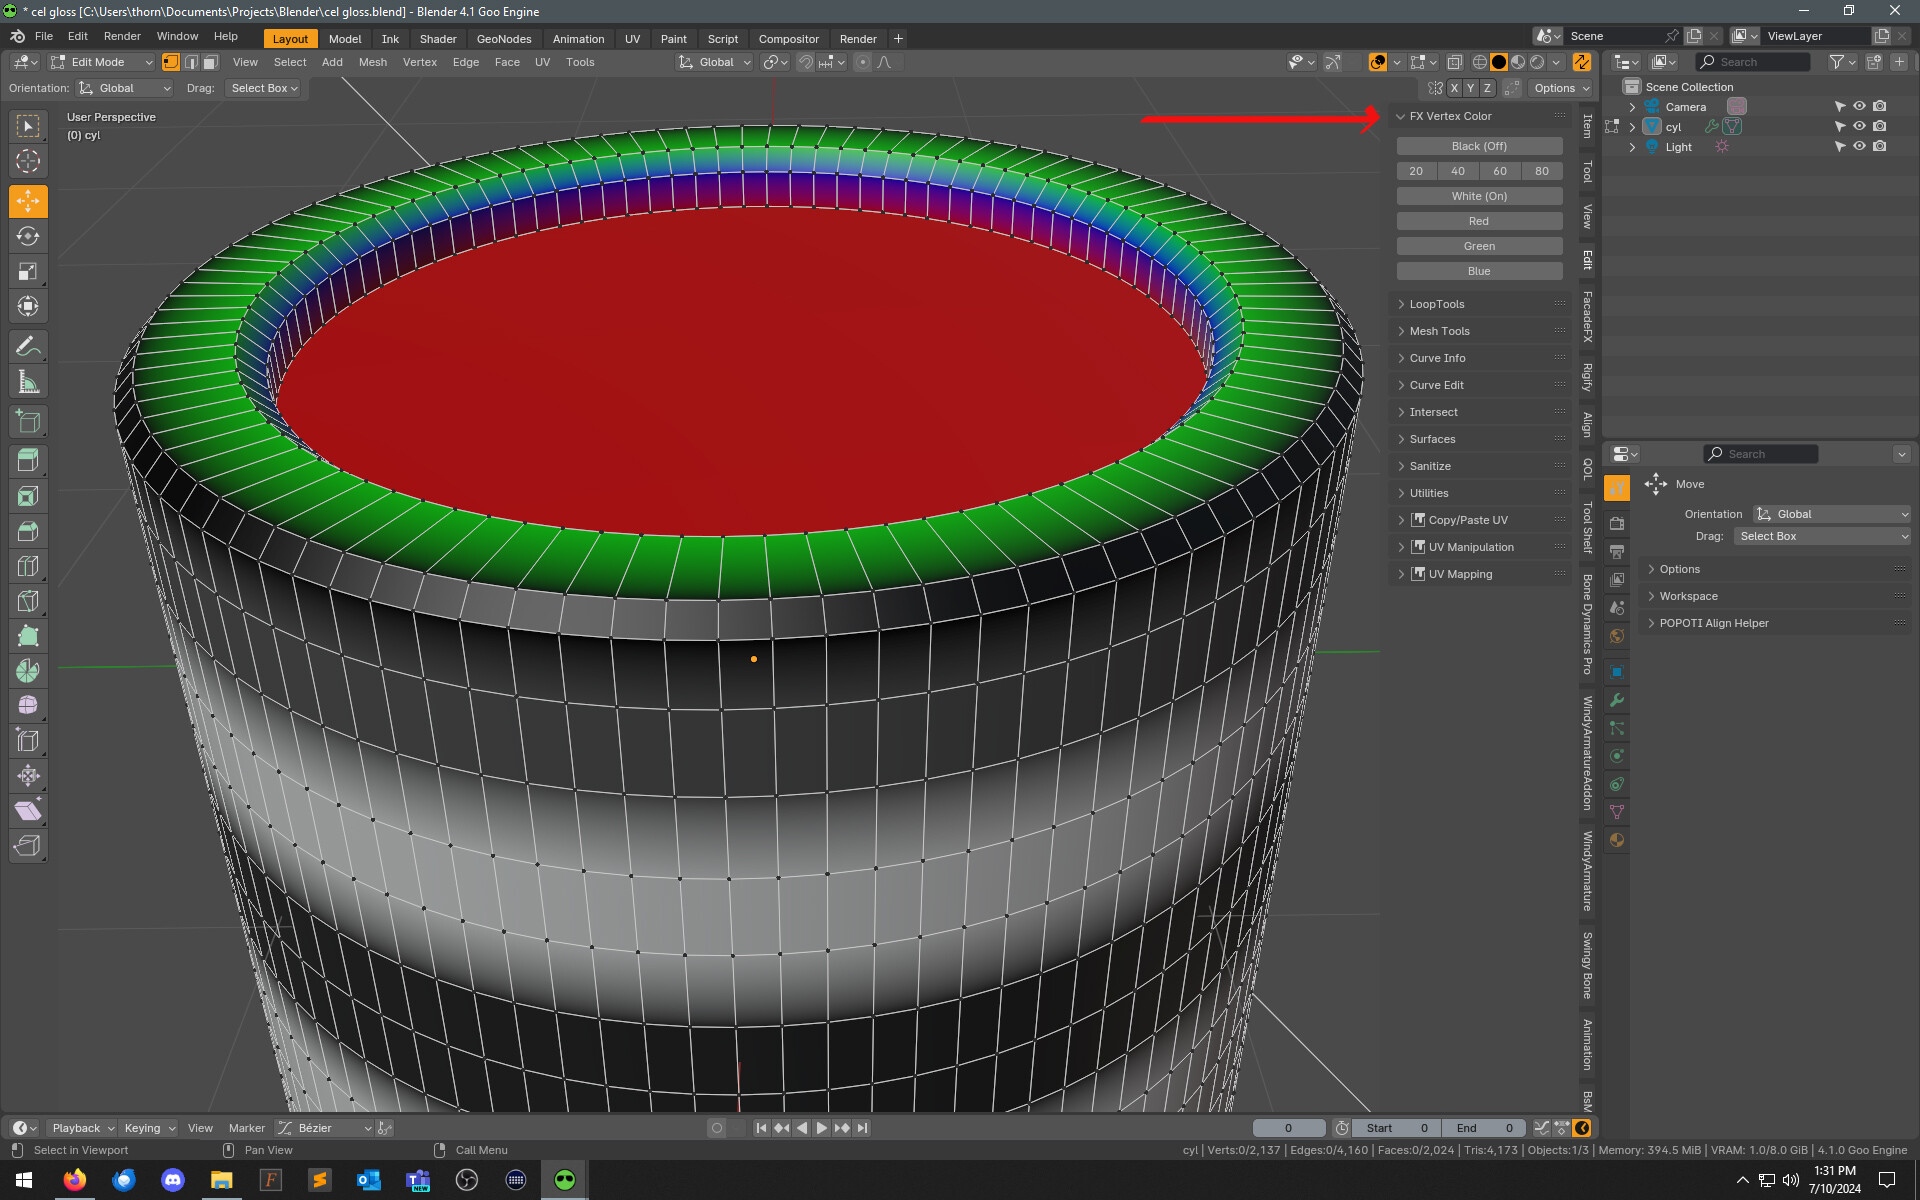
Minor discovery today… have been exploring ways to make more use of color in diffuse falloff and shadowing, while not adding too much overhead to everything.
GooEngine does a few tricks to give the artist more control over these things for characters, but sort of requires you to learn a different way to light a character. TLDR: light color affecting shader color can be done, but I’ve not found a way to make it… production-elegant.
But, I wondered how hard it would be to just have shadowing change hue based on the scene’s ambient color - without having to adjust a ton of shaders individually. Turns out - not hard at all. Shader setup below, for the GooEngine enthusiasts out there.
(I really exaggerated the walls and skin shadow to make it obvious. I wouldn’t normally make the walls look like that, but didn’t feel like changing a BSDF shader and re-linking the room. ![]() )
)
4 Likes
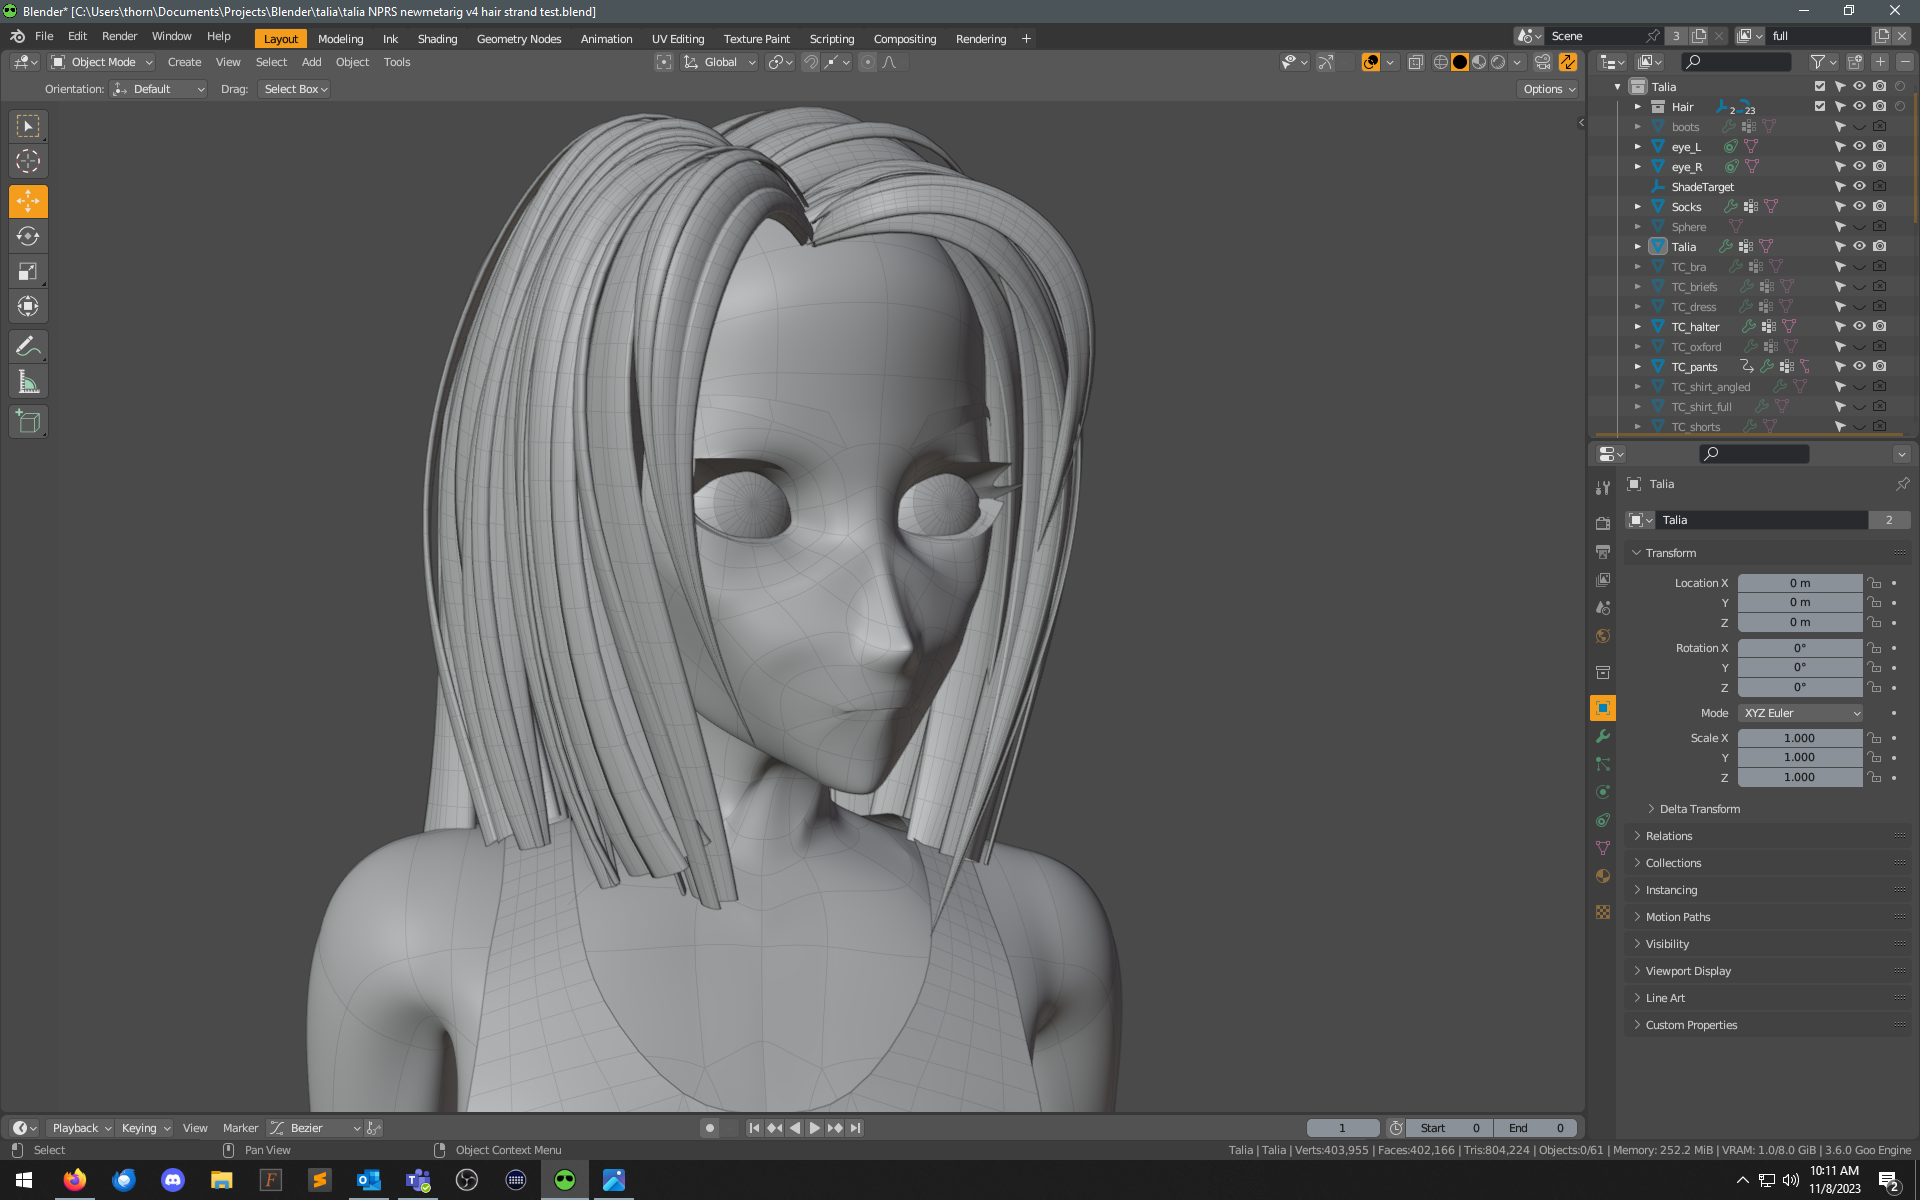
I’m really an admirer of Icaro Carvalho’s work, and this recent piece that he posted inspired me to spend some more time refining my own work. So, last night I spent a couple of hours on hairstyling. Not a complete remodel (oh, please no), but some tweaks on the curve profiles and shaping.
I’m sure I’ll edit this at least 138 more times in the future, but I’m much happier with how it’s feeling now. Previous on the left, new on the right… and hey, a wireframe - because why not.

6 Likes
awesome to read that, man!
keep up the good work! ![]()
and if you need anything, you can always reach me out on instagram!
1 Like
Seems like just yesterday, I was posting an update… oh, wait…
Too soon for another? Might be. Ah well. Had some pieces and bits that I’d be working with (noted above), and last night finally pulled them all together into a full composite.
For the “sketchbook” type of thought - I watched a few of the BCON2023 presentations, and this one discussed some things I’ve already been pondering - how to make things look less 2D. So instead of moving the camera itself, and letting perspective and parallax do it’s thing - I decided to try letting the background be a still and fake the zoom in post.
I’m not completely sure if I’ll keep this approach… I’ll need to do some A/B comparisons, and consult some other artists for their opinion. But, something about it is feeling right - or, at least not “gah, that’s awful.”
Renders were several passes - base color, neon color, windows, and ink. Glows, flares, vfx, etc added in AfterEffects. To match the flares to the lighting, i used the BlenderAE addon which absolutely completely rocks.

7 Likes
I feel like this looks very 2D, nice work! I think my only critique would be that the gunship feels like it moves with a speed, smoothness, and agility that doesn’t match the weight- it feels like it should be jerkier, especially as it’s re-balancing per the initial drop-in
2 Likes
Oooo, love that feedback… so does it look like i’ve made it less agile than it should be, or more? (No wrong answer, just didn’t know how to interpret it).
I tried to pay a lot of attention to making the rotation timing offset from the movement, so that it looks like the movement is caused by the rotational shift of the blades/craft (as in reality), but the weight wasn’t something I thought about. Thanks, that’s a great point.
(Note to self: let’s study some apache helicopter vids on youtube…)
1 Like
I think more- while obviously this is sci-fi, my intuition tells me this ship should look heavier; I.e. move more slowly and less precisely. One thing that might help is overshooting movements and correcting them- this kind of elastic easing is pretty similar to how the helicopters I’ve observed tend to move
2 Likes
I think maybe we should rent a helicopter to confirm. They’ll probably let us fly it, too.
2 Likes
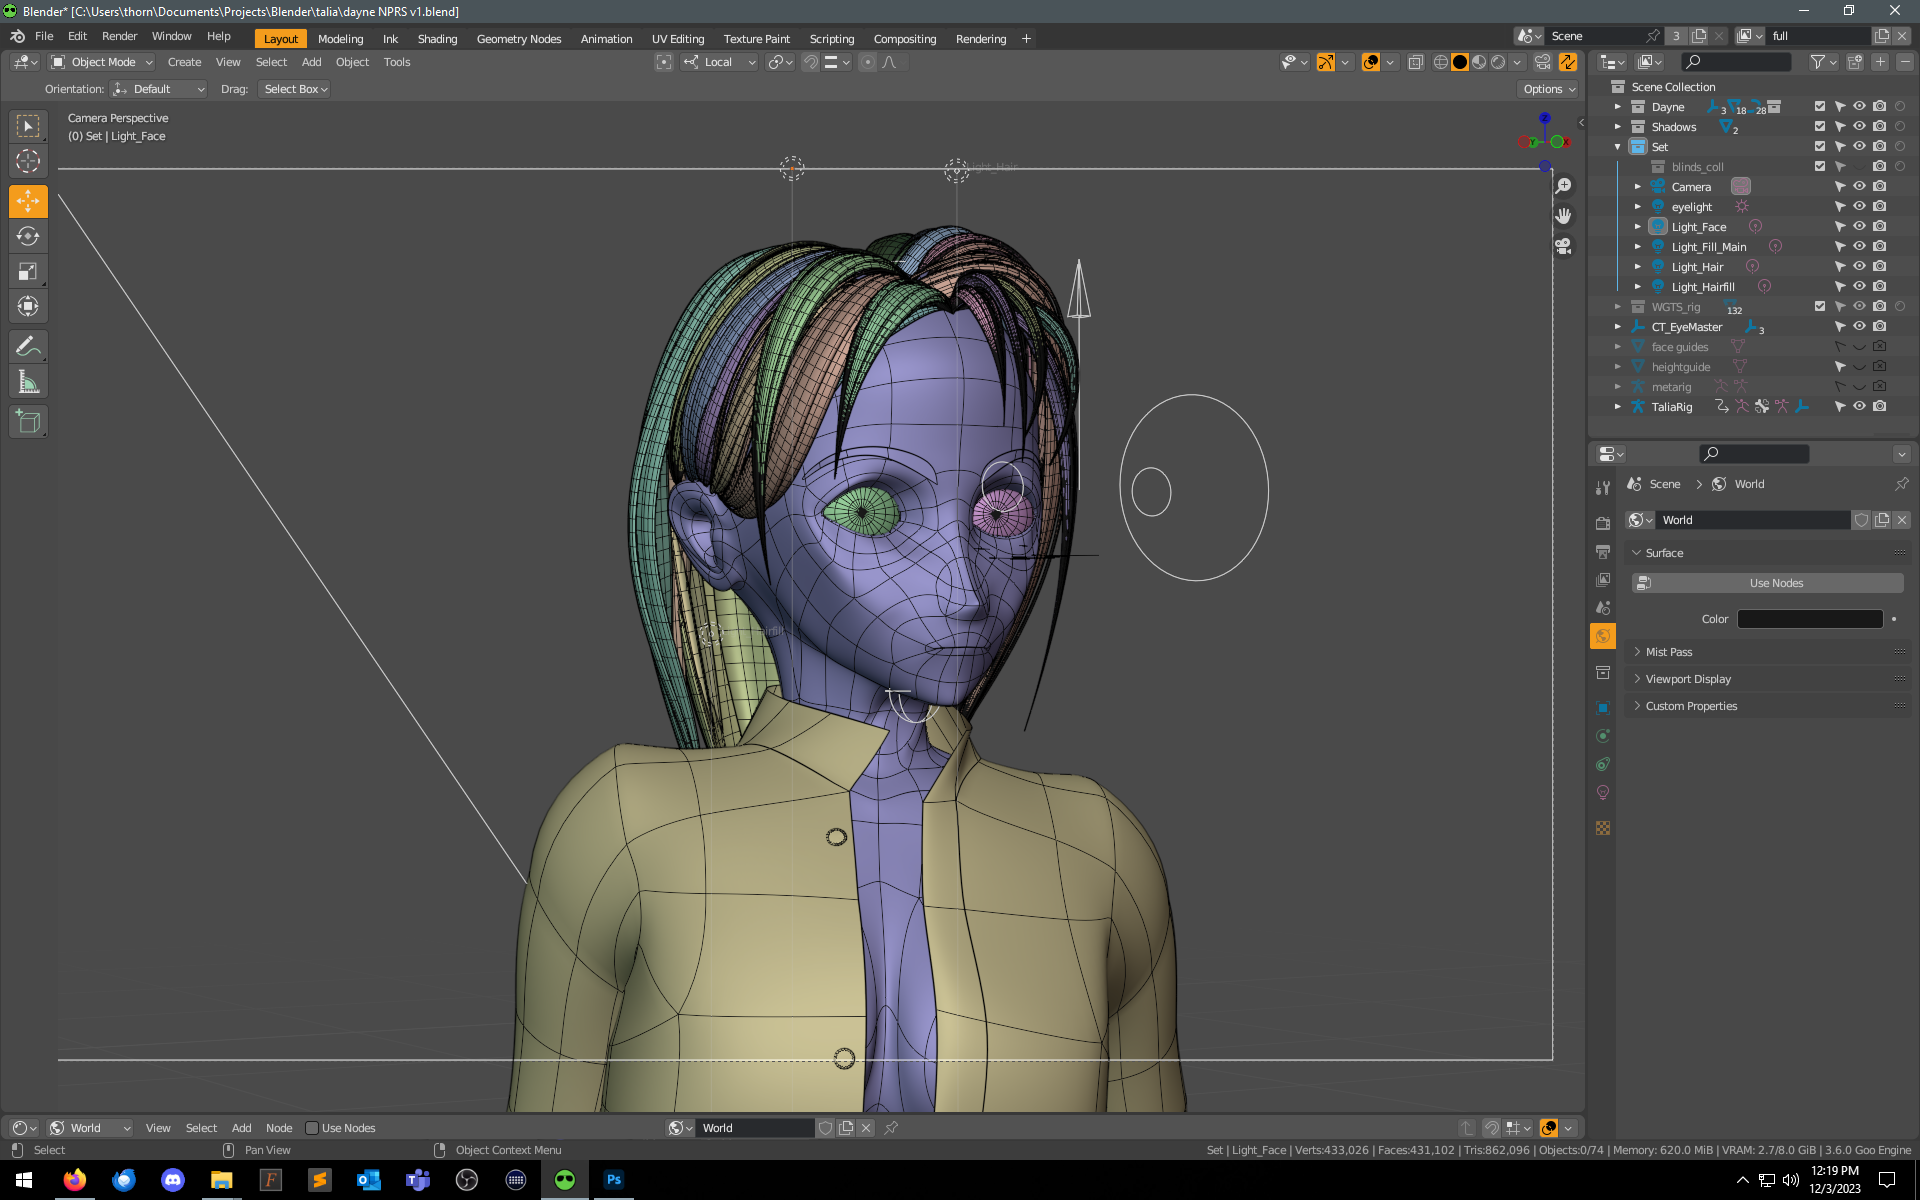
Now that I’ve sort of got a grip on how I want do model and work with hair, I decided it was ok to start working on my second character. Scrolling up in the thread, one will note that the body mesh is the one I’ve been using. I’ve adjusted it here a bit, making the face slightly more rounded and the eyes larger. I’m still pondering the shape of the eyebrows, but I think it’s close. Once all of that is settled I’ll work up the eyelashes as well (which always seem to be the most troublesome thing to tweak for me…)
Not shown here, but a few modifications on body proportions as well - i wasn’t looking forward to that, as I knew that down the road this means a ton of work redoing various things with rigging and weights and poses and the rest. Blender’s various modes for everything don’t really make such adjustments a joy.
An unexpected solution to this has appeared, as I’ve started working with Cascadeur the past couple of days. Due to the pipeline workflow I’ve worked out, the rigging and weights are far less involved than with a fully generated Metarig, so I have a feeling that mesh adjustments are going to be a lot easier to deal with.
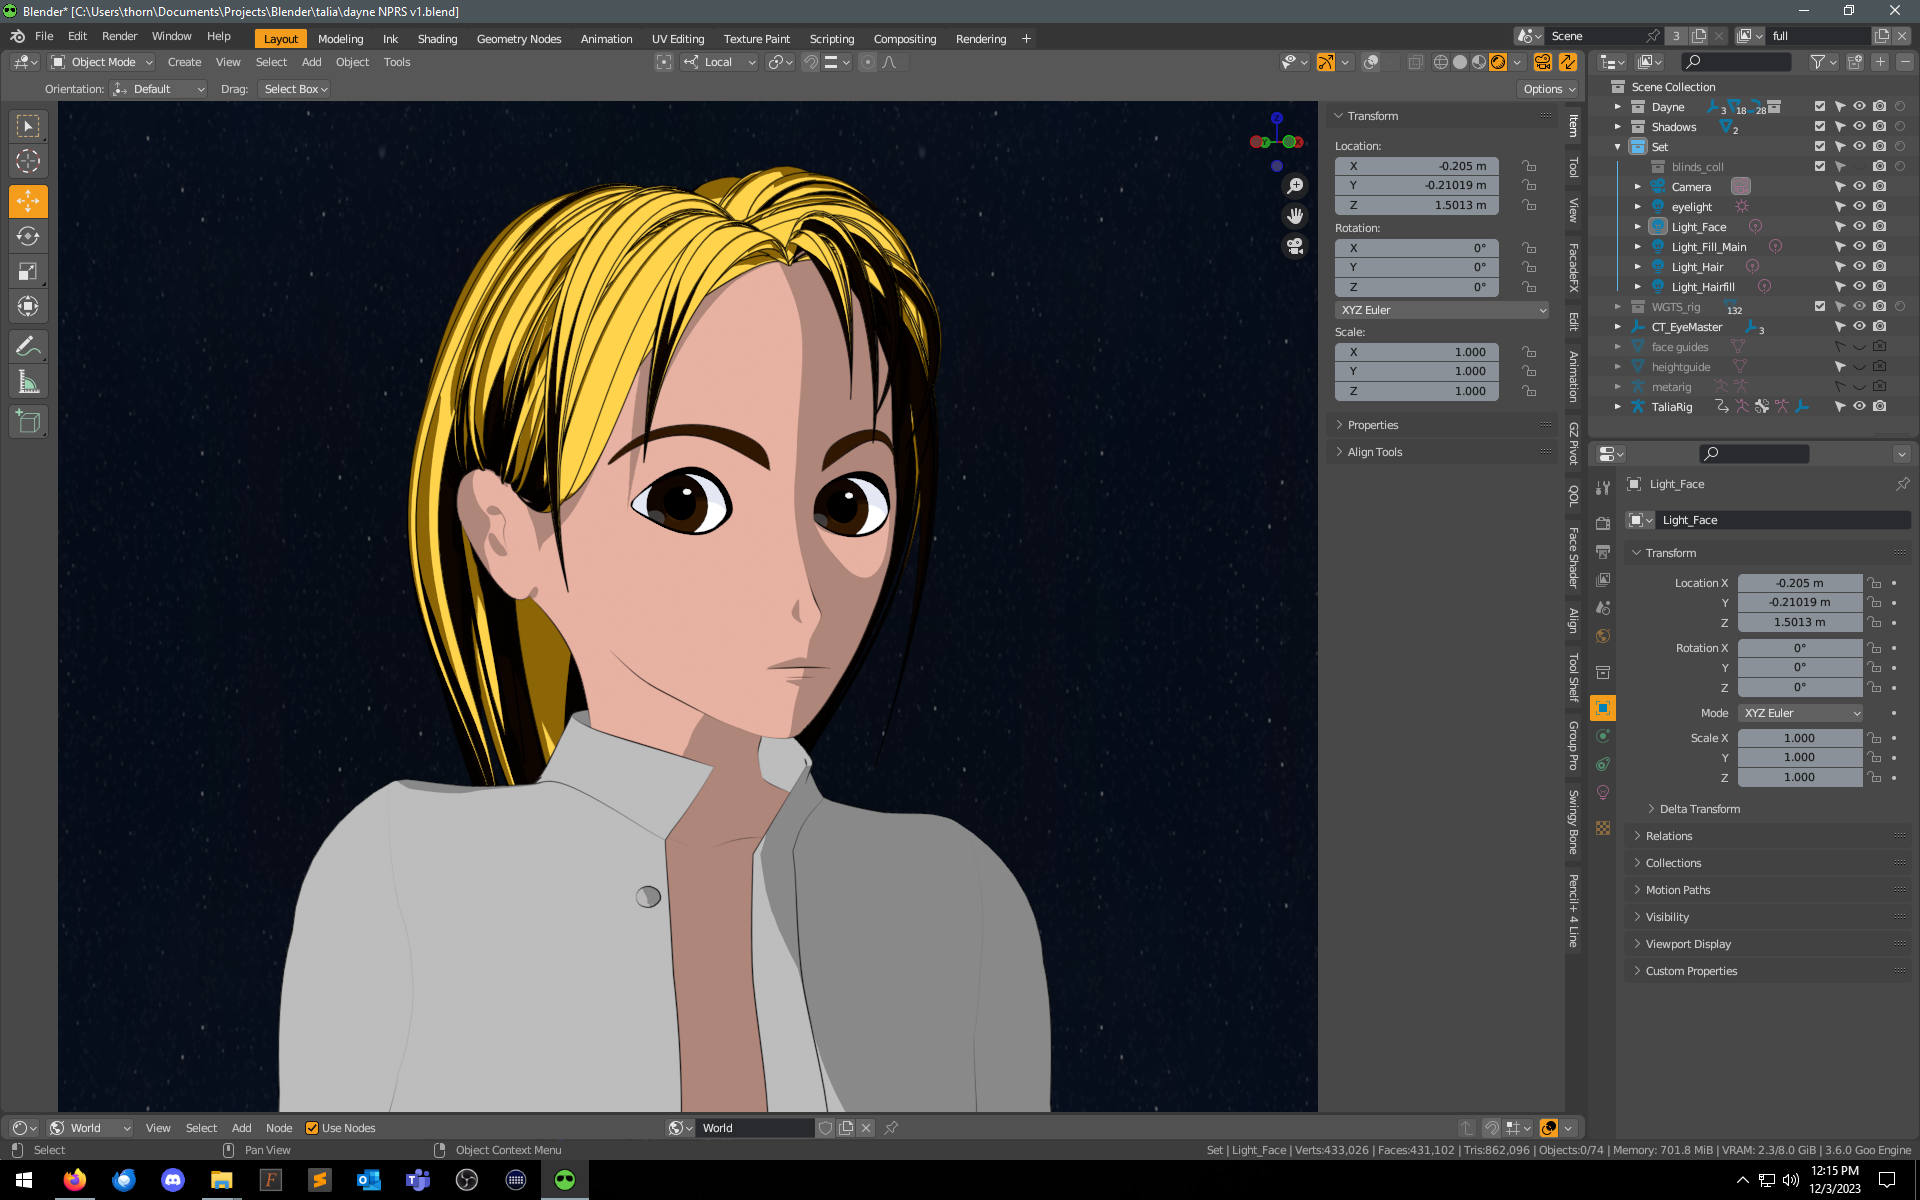
As always, wireframe for the heck of it.
6 Likes
Over December, started taking my first steps into getting comfortable with Blender’s animation toolset. Among the many skills I may have as a digital artist, animation has never been my biggest strength to say the least. Tools can make it harder or easier, faster or more aggravating - but at the end of it all, perfect animation lies with the skill of the artist who brought it to life, no matter what software they use. (You know who you are. You inspire me to try harder.)
I didn’t have a particular scene in mind, and didn’t want to do a walk cycle. I also have been working rather hard to solve the problem of animating hair. There are a lot of ways to make hair, lots of ways to rig it, etc etc… but, finding a combo that I liked took a it of time.
I also wanted to focus on getting timing down, and a few small things like eye movement and basic shapekeys. So in the end, I decided a short basic dance animation was the way to go.

The embed probably won’t work here, due to the copyright restrictions on the music track - but thankfully, The Weeknd does allow his music to be used in this fashion… so if you’re interested, click through. ![]()
5 Likes
Pretty good! FWIW the embedded video worked for me.
I really want to do a good anime walk cycle, simply because I’m on an anime watching binge, and there are so many bad ones out there, which surprises me – this is all professional work, how come it’s not better? But that would probably be biting off too much for where I am in my development.
4 Likes
Hard for me to say, as ironically I really don’t watch much anime.
I do watch anime clips on Youtube, sometimes for reference. I’ve seen good and bad walking there, but I suppose the quality level of the animation just comes down to - how skilled was the animator, and how much time/budget did they have?
I think also - walking is something that really goes to the physical build, personality, and mood of the character. Even how they’re dressed, actually, and where they might be going. I suspect a lot of people who aren’t that skilled at animation (such as myself), make the basic pose cycle. Feet aren’t slipping, no weird pops, it cycles, ok we’re done. Might work for a character who’s doing their morning speed walk, but within an actual story - there’s more nuance to motion, and something that needs to be considered when keyframing.
2 Likes
Nice!
It’s a little amusing (in a good way) how serious she looks while moving ![]()
I watched a couple of seasons of “The Dragon Prince” and it caught my eye that the characters do everything else pretty well… but as soon as walk cycle happened, you could see it. Like “Oh, that’s the Walk Cycle”. There was something so rigid about it, felt kind of inconsistent with the rest of the animation (at least back then, these shows tend to improve technique with time). It happened a lot in various shows for some reason. Maybe they didn’t feel it was as important… or I was seeing things.
3 Likes
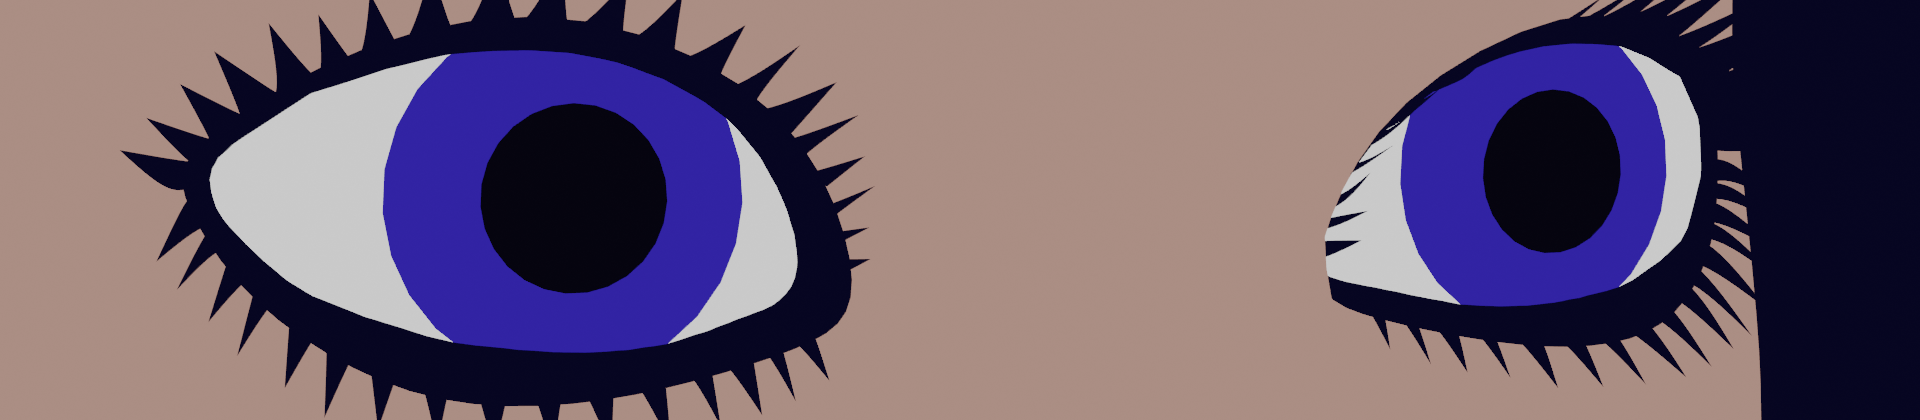
The evolution of eye shading…
Dec 22:
Day One of Blender was a straight import of my original mesh in 3DSMax - cel shaders were rather limited, to mostly just a 2-3 flat band, with a bit of control over the diffuse positions. And, of course didn’t import into blender.
Many artists like to use UV coordinates and map the entire eye with a single shader, but I prefer to keep the white a separate material than the inner. At this stage, the pupil was a third material as well.
Jun 23:
Several months later, I’d done a lot of work on the body and hair and decided it was time to start tackling the eye shading. While I knew this wasn’t my end goal, it got me to start experimenting with layering different ramps and coordinates together, to find ways to get the coloring to break within the iris.
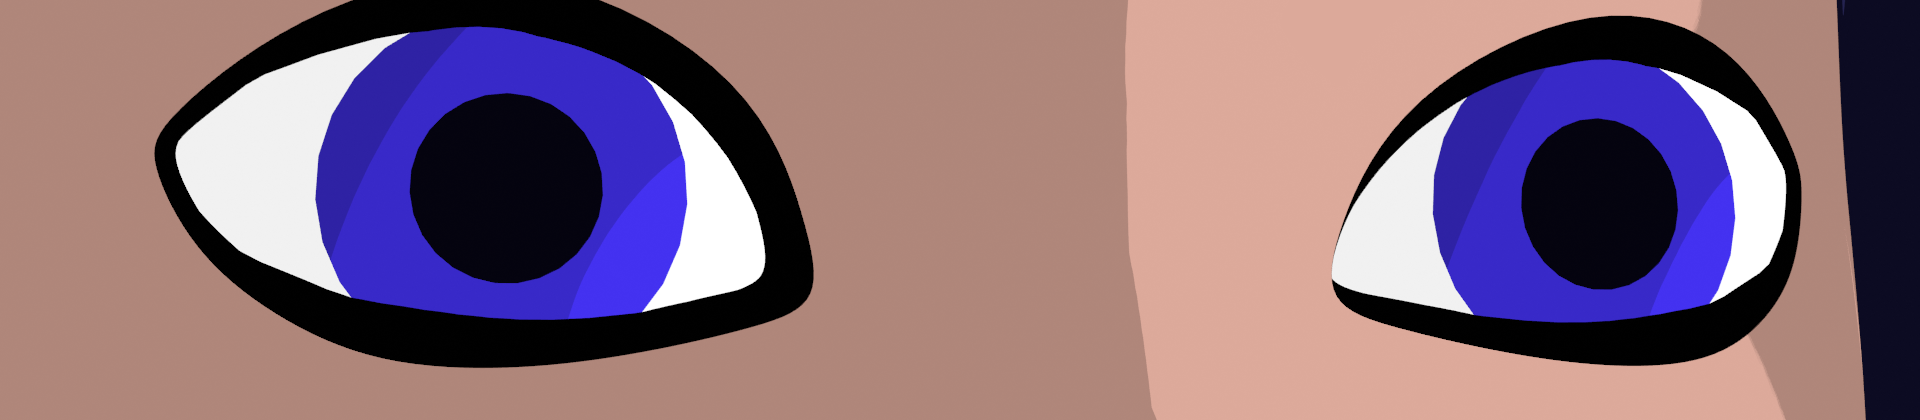
Aug 23:
At this point, I was far more comfortable with using multiple diffuse nodes within a single shader. The pupil and iris were combined into a single shader, and I realized that using SDF nodes could work well for adding specular highlighting that didn’t rely on the light intensity itself for sizing.
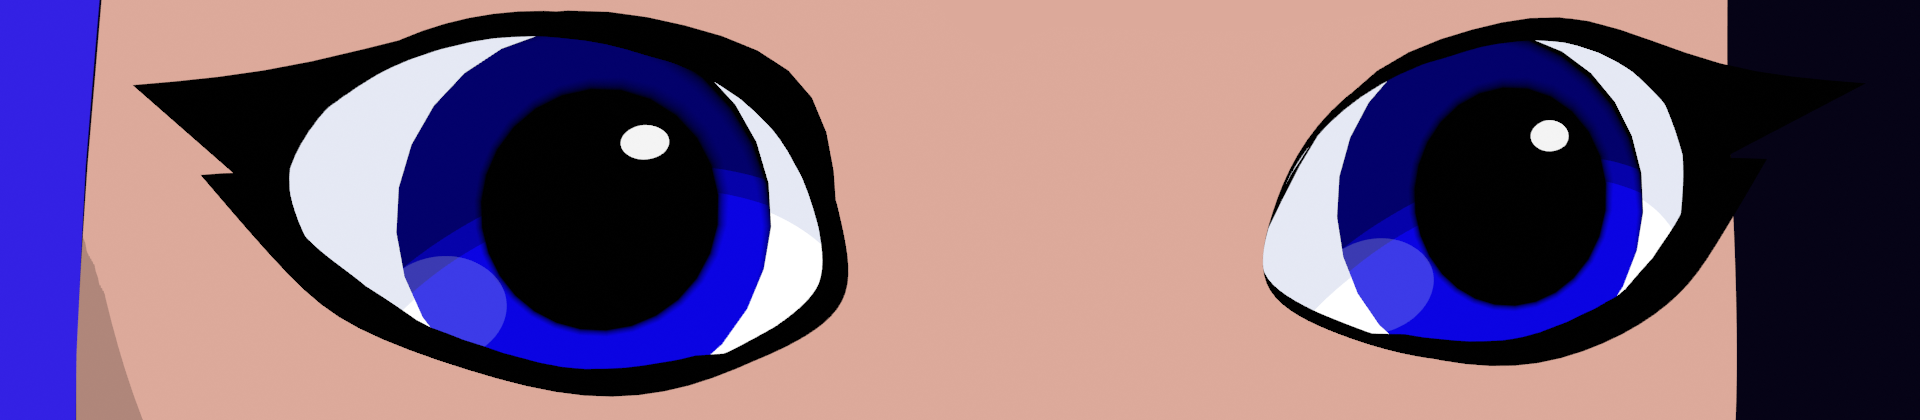
Jan 24:
The final tweak was rather simple to do, but for some odd reason hadn’t occurred to me earlier. I read a random tweet from rukikuri on twitter, and she mentioned the phrase “reflection channel” when showing her own latest shader. That hit me like a bolt of lighting, so with a few clicks I was able to tweak various components - suddenly the character went from looking like “mannequin in motion” when animating, to more “alive”; the speculars are less matching now, and aren’t positionally static on the eye.
While I was at it, also added a bit of rim color detail for extra spice.
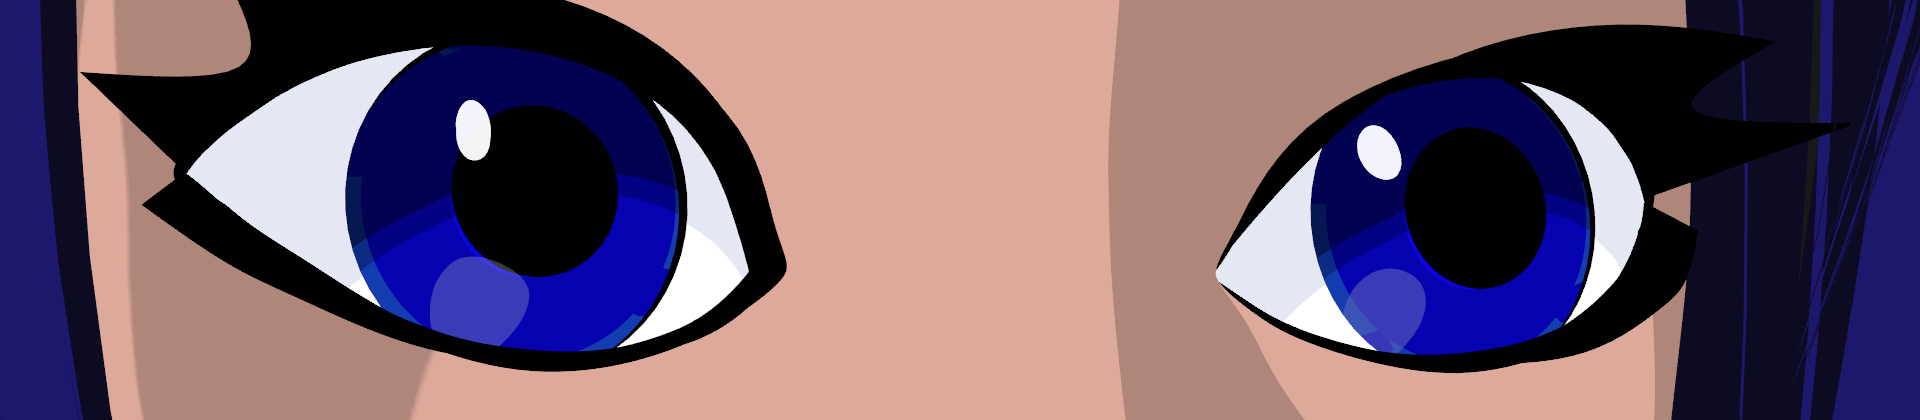
So many other unrelated things remain to be done, tweaks to be made - but, I’m in a place that I feel completely satisfied with this particular bit, and can move onto something else without that mental splinter.
5 Likes
A small update to the addon I posted last year… over time, I found that I wanted not only black and white as a color choice, but some grey fractions as well - so, added some extra buttons for common percentages.
As always, use at your own risk. I barely know what I’m doing when coding in Python, but haven’t noticed any bad things happening.
FX_VertexColor1.1.zip (1.4 KB)
1 Like
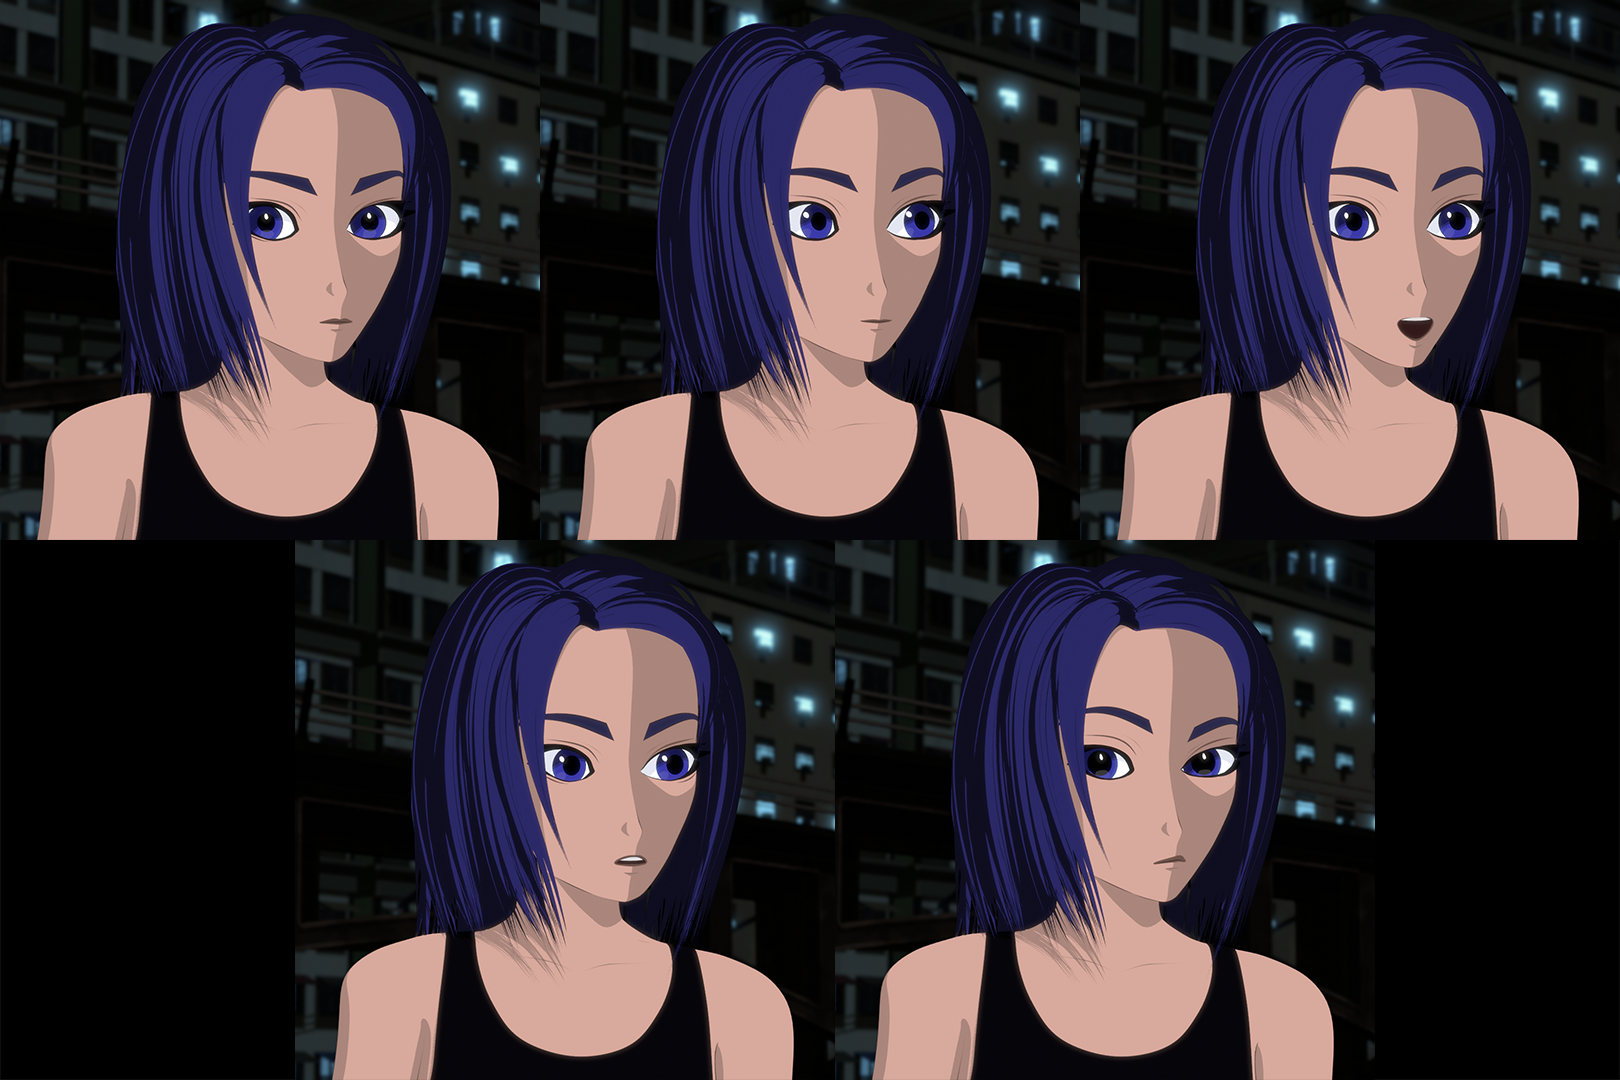
A sketchbook WIP update, partially just to remind myself that I actually do have my own personal projects in Blender that I should spend a few more hours each week on. So on that note, spent some time this weekend correcting some modeling mistakes, and ended up with some improved expressions.
Today’s tip/reminder : don’t always work in full modifier subD view. It will mislead you on where the vertices actually are. Just becaue it looks fine in fully subD mode, doesn’t mean it is fine.
1 Like