Hello! New to the forums here, but not (entirely) new to Blender. I’ve casually used it off and on for years but not enough to be really advanced at it.
Anyways, I was curious what tips people may have for setting up a scene that’s not intended to be rendered but instead to be referenced from multiple angles for drawing. I’m preparing for a long comic project where many scenes occur in the same locations and I want to create references for these so that they are consistent.
I’m using free use objects downloaded from various directories (sketchfab, blenderkit) as well as a few I made myself. Since I don’t plan on rendering these, I’m ok with some of the objects being a bit mismatched in style, etc. I’m trying to keep every object to less than 10,000 polys, but idk if that’s good or not?
Mainly, I’m looking for any advice on:
-How to manage memory in scenes with a lot of clutter (for example, a bedroom with many details on the desk, etc)
-Light setups/managing lag in lighting (my computer isn’t terrible, it can handle a lot, but it gets very slow when trying to have more than one light in a scene. They don’t need to be perfect, but I wanted some lighting to reference too.
-If anyone has any tips specifically for creating layouts meant for this kind of reference, I’d appreciate them!
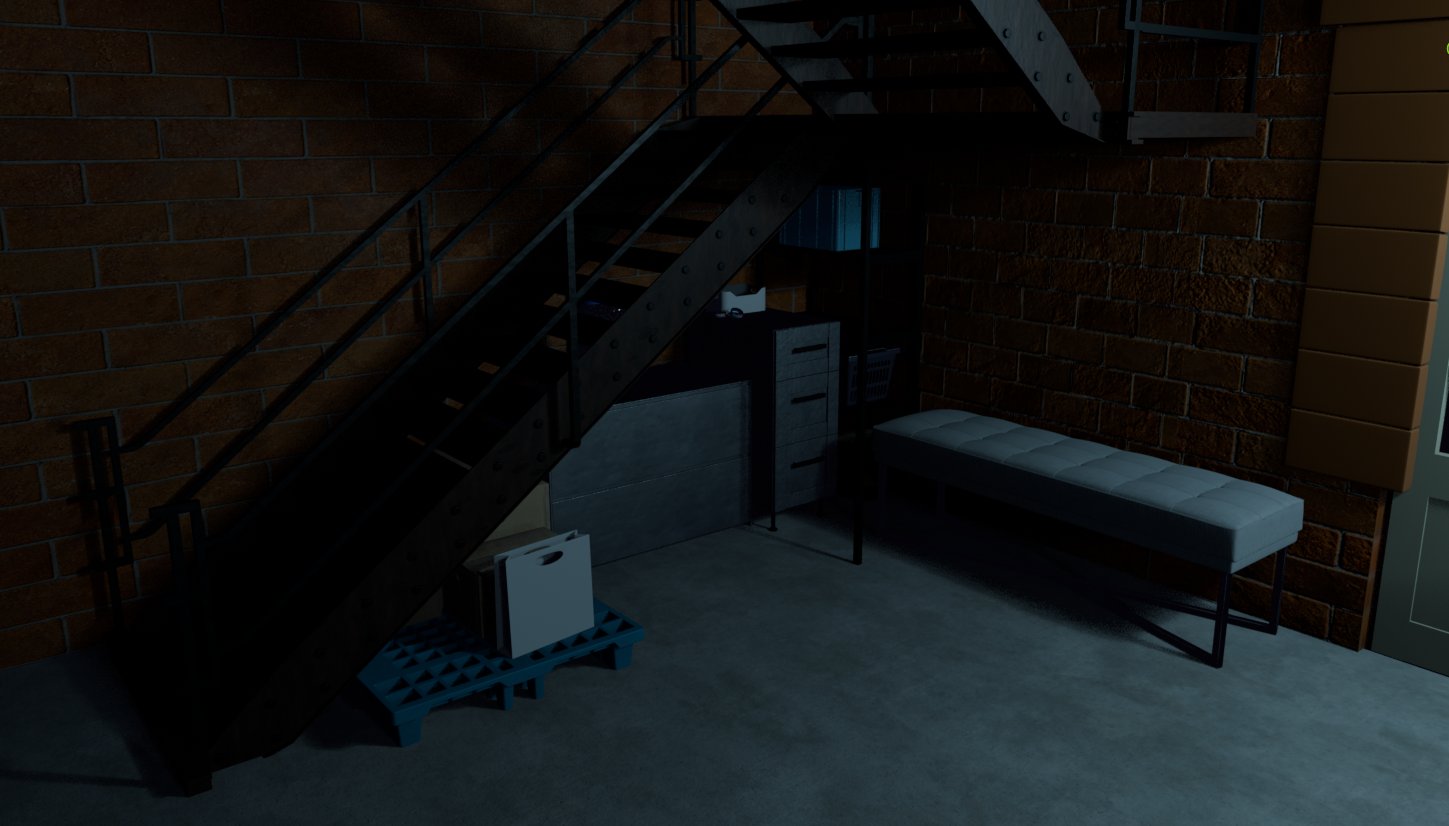
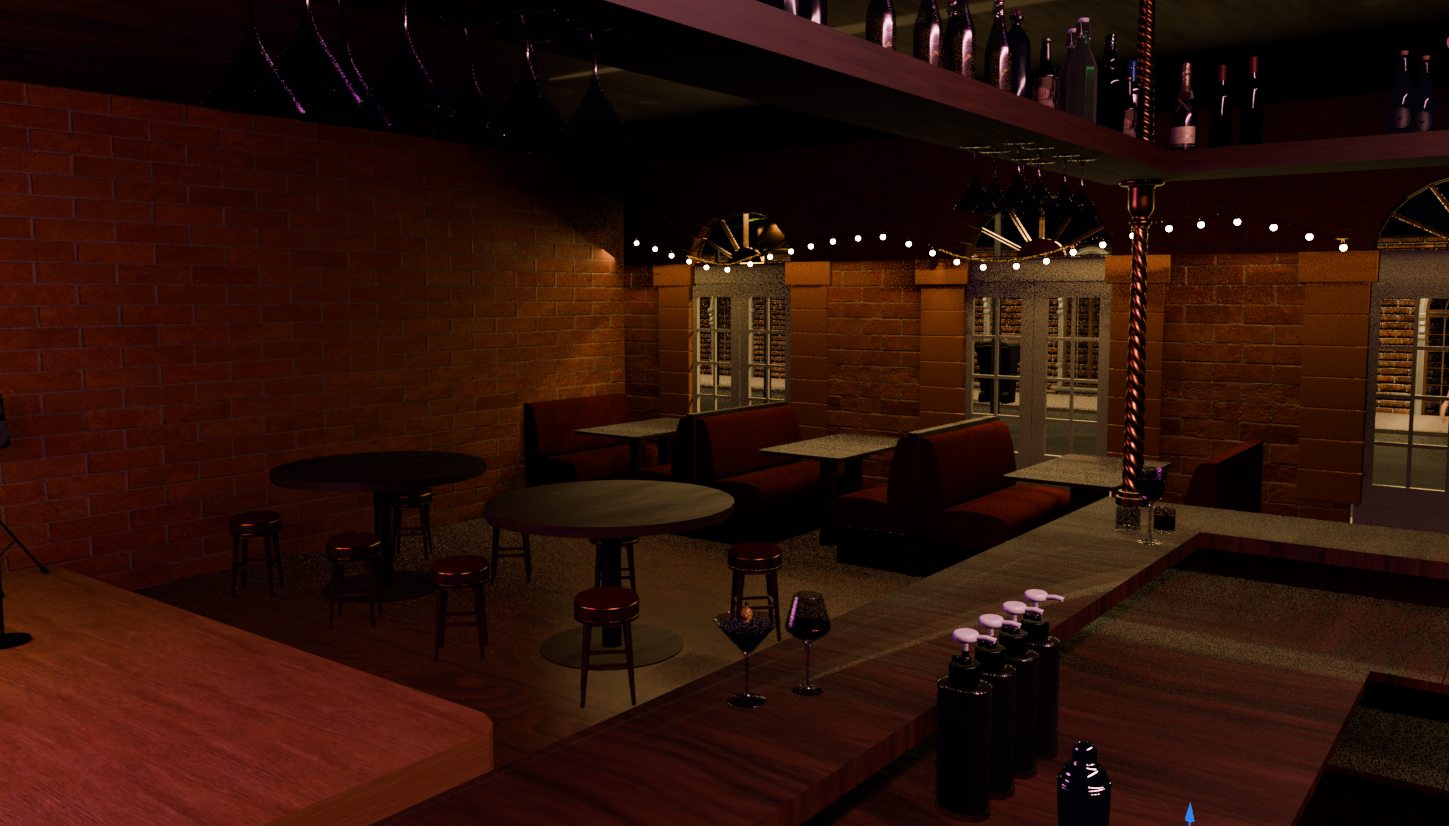
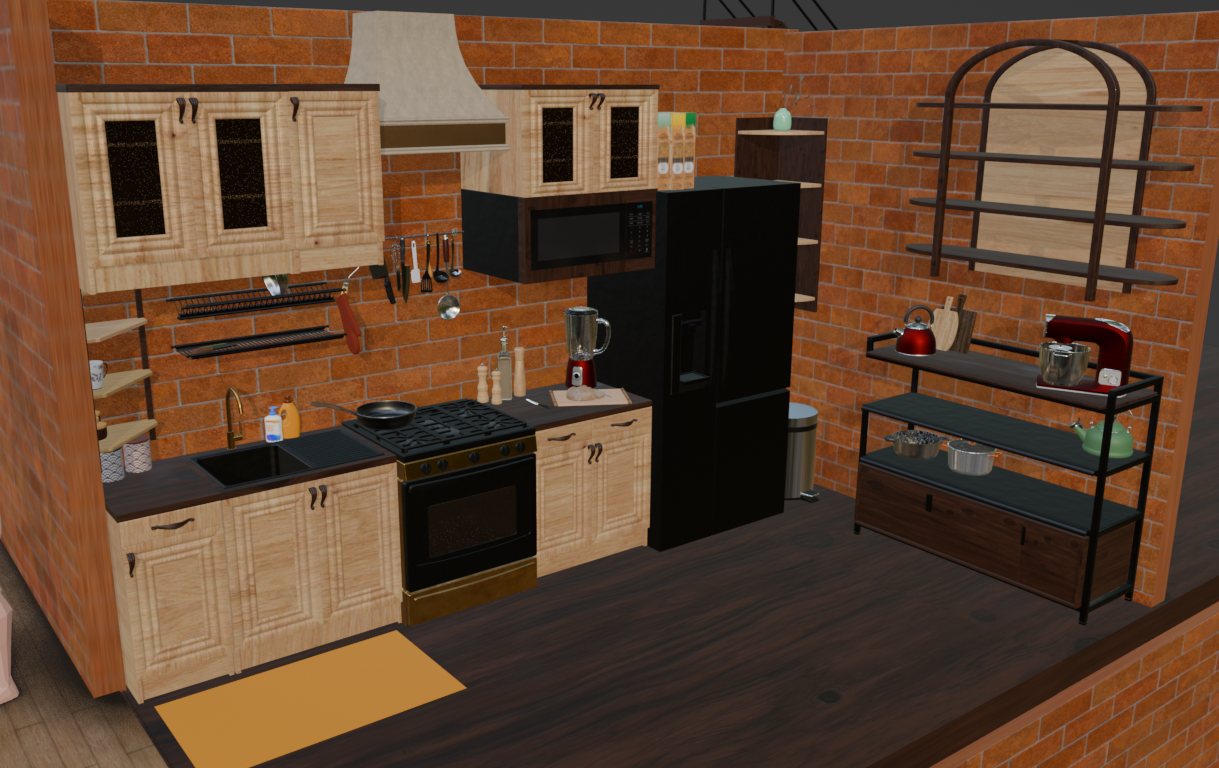
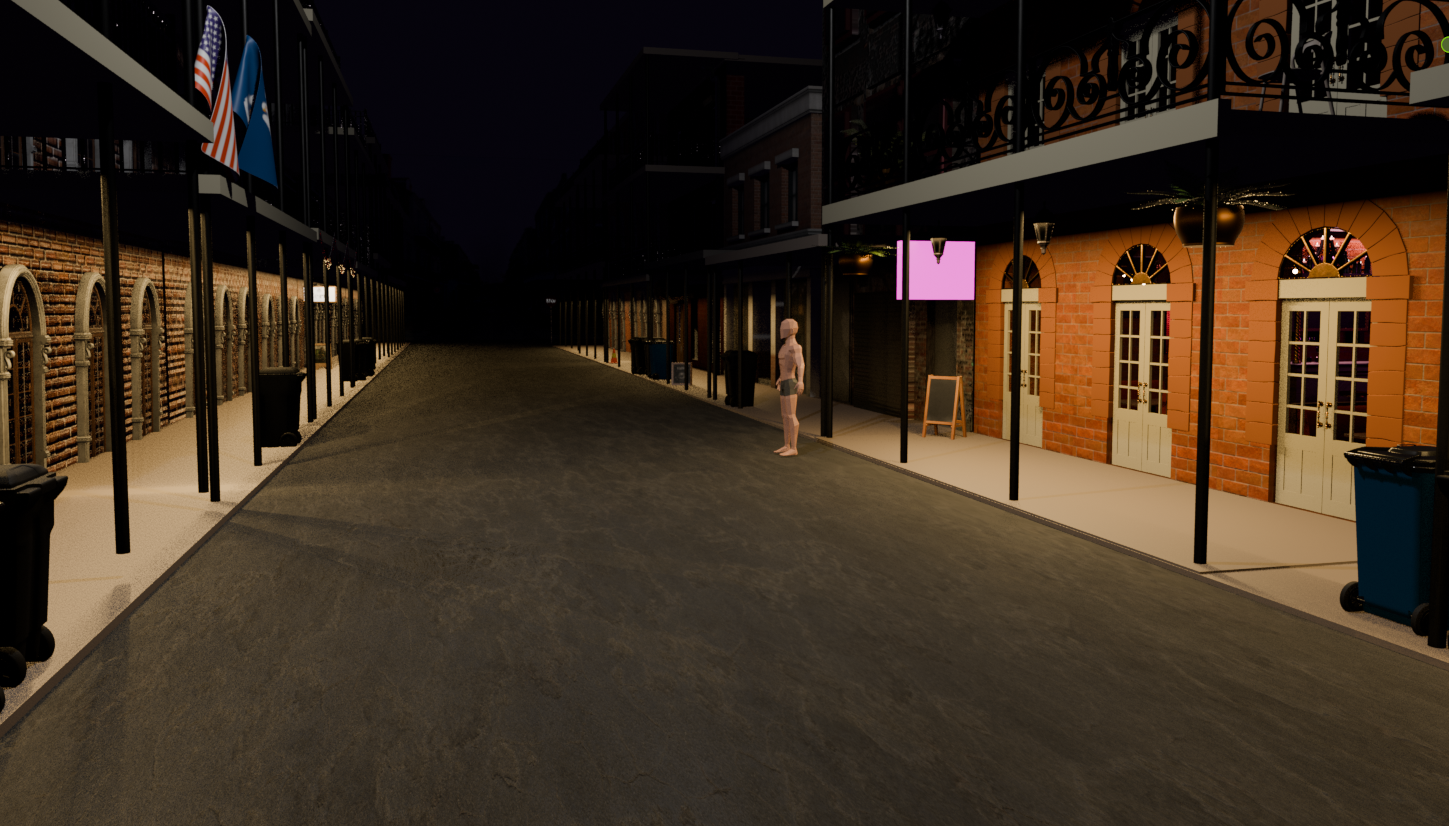
Here’s a pic of some of what I have so far (I’ll put more in comments if I can). The setting is based on New Orleans and a lot of scenes take place in this building which has 3 floors.
I may need to redo the outside bit, I was copy-pasting objects before I found out about alt+D and it’s like 20 gigs of memory to open. Oops.
First, use instancing. You say you already learned about alt+d and that’s great. For your scene where you haven’t used it, it might still be possible to save the situation. Do the duplicated objects still have all their location, rotation and scale data non-applied? If they do, you can select them all (making sure one of them is the last object selected, the active object), then use “link object data”. This will change objects that already exist into instances.
If you have instances, also make sure they don’t have modifiers on them, that forces them to be processed individually and prevents the performance benefits they should have. In fact, beware modifiers in general in a large scene, they can be a source of poor performance. If you don’t actively need a modifier to exist, you can apply it and it won’t need to be re-calculated all the time anymore.
If the many details on the desk are separate objects, join them all into one object. The number of objects has a performance cost even with the same polygon count. You can wreck the performance if you open a fresh blend file and duplicate the default cube thousands of times.
For something that won’t be rendered directly, that’s a good idea. If you find any object that’s heavily rounded and subdivided or a heavy photo-scan or sculpt, the reduction process could probably even be done with the decimate tool with good results.
From your images, you are using Eevee for rendering.
Eevee takes a rather big performance impact from multiple light sources, especially if their shadowed areas overlap. This impact can be reduced by lowering the shadow resolution in the render settings.
It default to the maximum and there is often room to reduce without much of a drop in quality, especially with soft shadows like you are using. It’s also possible to use the resolution limit in each light’s settings for this, if you want more control over individual shadows.
–
Speaking of shadows, I notice a quality issue in some of your renders. I know you aren’t looking for the render to be the final product, but I am guessing you want the shadows to be visible at least, without light leaks.
In some of your renders, there are entire areas where the shadow is breaking apart into shapeless noise, like under those tables.
This is the symptom of trying to use extremely wide light sources in Eevee, it’s not really good at them, at least not with the default settings.
Something that can help is to increase the shadow steps from the default 6 to the max of 16. This helps soft shadows be more accurate (up to a certain point) and has little performance impact.
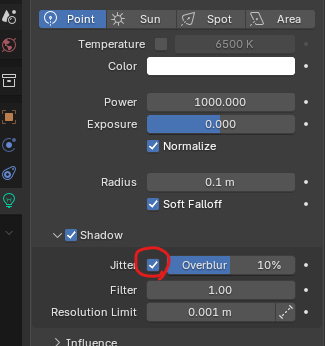
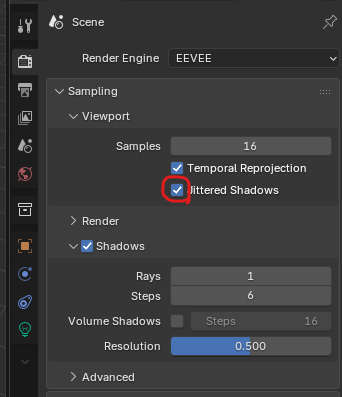
If this is not enough, you can also use jittered shadows for much more accurate soft shadows. They are activated on the light itself and also in the main render settings if you want to see what they do in the viewport preview.
It’s deactivated in the viewport at first because they flicker while they are rendering, so that can be annoying in the viewport. Jittered shadows replace the noisy shadow rendering with an other method: it will render hard shadows from a bunch of different angles until they add up to accurate soft shadows. This can take lots of samples if the light is very wide, but guarantees a much more accurate result without the usual light leaks or noise.
An other thing that can be done instead is to purposefully keep every light source smaller so the shadows aren’t too soft for what Eevee handles well.
–
performance wise, something else to consider is the number of textures and their resolution. This does affect performance quite a lot in Eevee and could be an issue if you are cobbling models together from various sources.
See if there are high resolution textures that can be reduced. Objects that are in the background where you won’t see all that detail.
Any texture that doesn’t really do anything? Example, an empty metallic texture on a fully wooden material, or a stone texture where the roughness map is almost a solid color and does nearly nothing. Delete those, replace them with simple values in the material.
Are there multiple generic materials with seamless textures that are almost identical? Reuse the same material instead.
Wow, these are really helpful! Thank you!! I’ll try these out and see how they affect the memory usage.
Would you recommend doing something like making a material “palette”?
I’m surprised about the lights! I really thought many smaller lights would be more intensive than one big one. I made all the outdoor lights one singular long one, so that might be part of the performance issues haha.
I still have to go through and do most of these but even just applying modifiers so that the linked duplicates don’t have them and I’ve noticed an improvement already. Thank you so much for your help!
If you are using only basic materials with seamless textures, that can be a good idea. Less so for advanced visuals with complex materials that mix multiple textures, but that doesn’t seem to be the case for you.
The way I would explain it, the performance problem with light sources is how much overlapping shadowed area is present on screen at the same time.
For performance, what matters is how many lights affect the same area at the same time. You can have lots of light sources in the scene without problem if each one is relatively separate and confined to its own part of the scene. In your case, each light source is so strong that its affected area covers the whole scene, so all your lights all reach and overlap each other. It’s possible that using more, smaller lights would actually perform better here, as long as they are each relatively contained to their own area.
–
I also wanted to ask, is raytracing on in the main render settings? I see some pitch black areas, this makes me think you have no light bounces. That can encourage bad practices and cause performance issues if you add more light objects to compensate for this darkness.
If you aren’t using it, you should try it to see if it fits your art style. It’s much lighter on performance than trying to manually fill the dark areas with light sources. The default settings are mostly fine, though I would uncheck denoising, as it can blur textures a bit.
With raytracing, the lights outdoor could be small spots aimed at the ground and the raytracing would help bounce some of that light at the walls and the underside of the balconies.