Too much noise in my interior / Nishita / Physical lighting

Hello,

I’m trying to create a physical method of lighting that could be used and replicated in several 3D scenes. The main goal is to make realistic architectural renders, with a relatively low amount of samples, and no compositing.

Here is the method used :

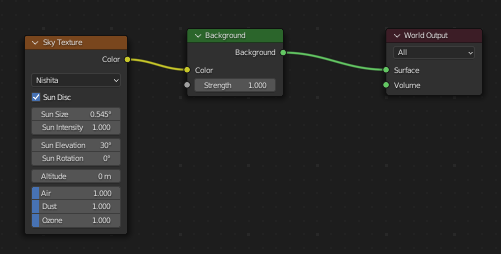
  • Nishita sky, with those settings :
    image
    (default)
  • Physically accurate inside lighting
  • Realistic PBR materials.
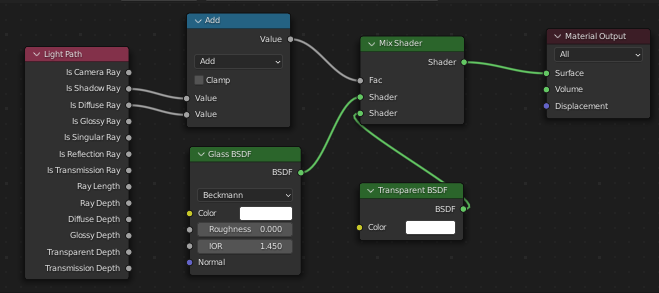
  • This glass shader for the windows (I digged into the forum to find it)
    image
  • Photographer add-on for the exposition
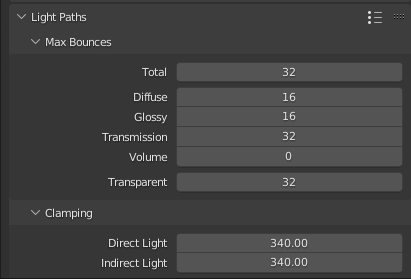
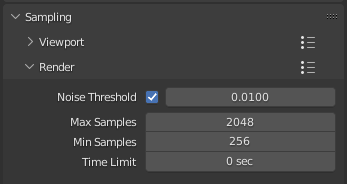
  • Those render parameters :
    image
  • 600 samples
  • OIDN denoiser (normal and Albedo)
  • 6k x 3k image, equirectangular.
  • Filmic very high contrast.
  • Area lights (portal) behind every window.

Here’s my issue :
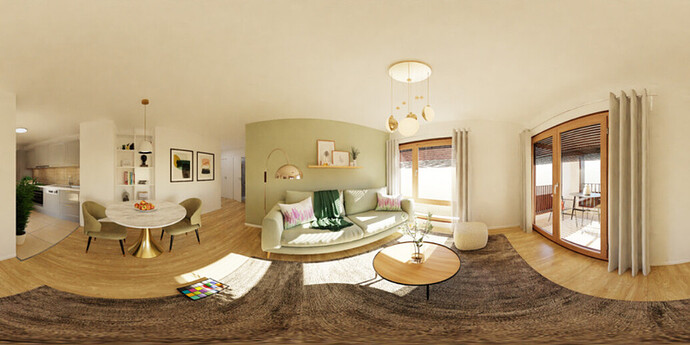
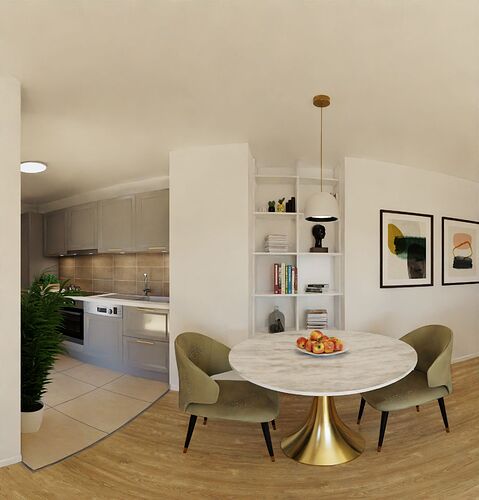
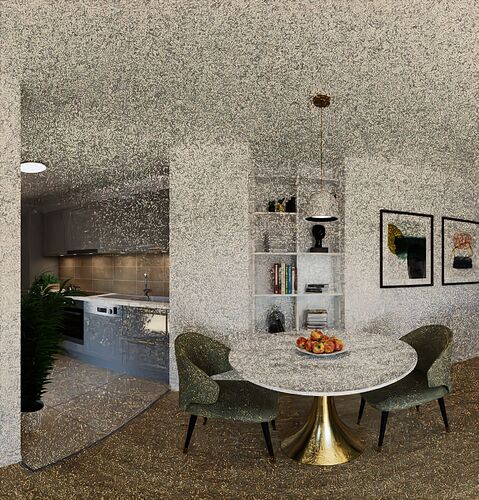
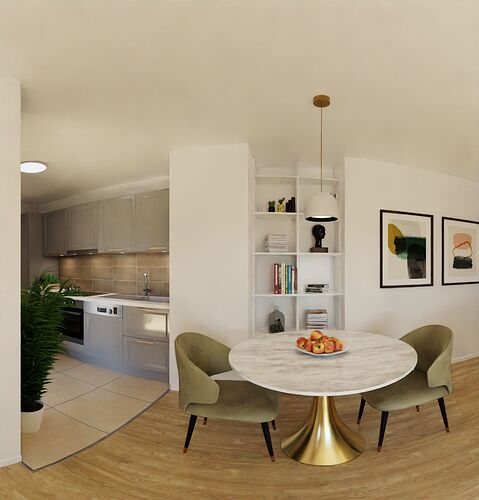
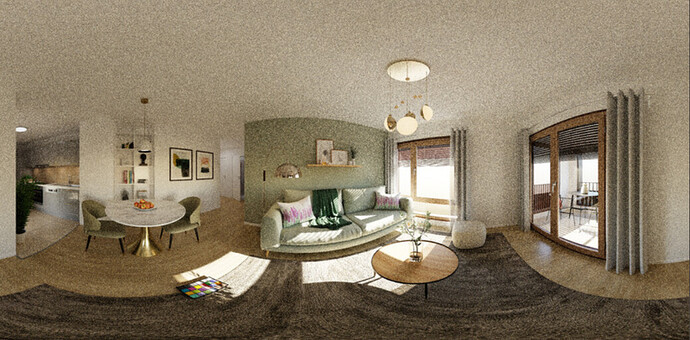
The render is very noisy and the inside lights aren’t showing at all (which is not realistic). Every light is on with realistic values in the picture below.
=> I tried adding more samples, up to 6000 just for the test, and it still wasn’t clean and sharp.
=> I tried adding some light bounces, with no results.
=> I tried another sky, [Physical Starlight and Atmosphere] (https://www.blendermarket.com/products/physical-starlight-and-atmosphere) but the add-on kept breaking and the render was even much more noisy…
=> I tried turning off the Nishita, leaving only the inside lights and the render was cleaner. So it is mostly a sky issue.
=> I tried removing the windows, with no change at all, so it’s not a glass issue.

I guess my question is : how to make a clean, physical and sharp render with blender’s default sky ? It seems like the simplest thing… what am I missing?

Pictures below :

Render without denoiser :

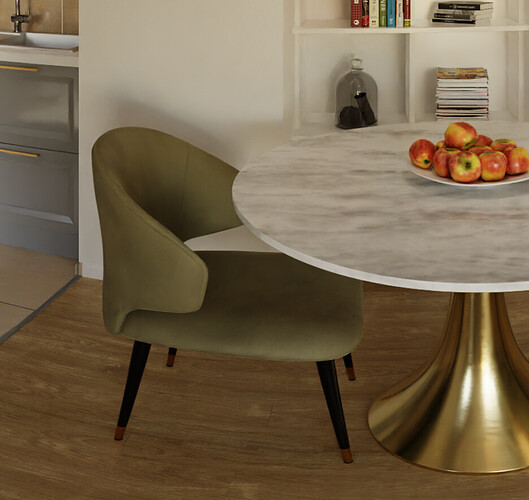
Render with denoiser :

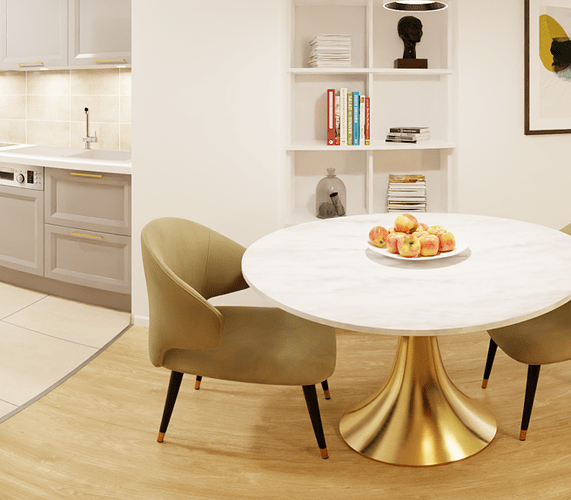
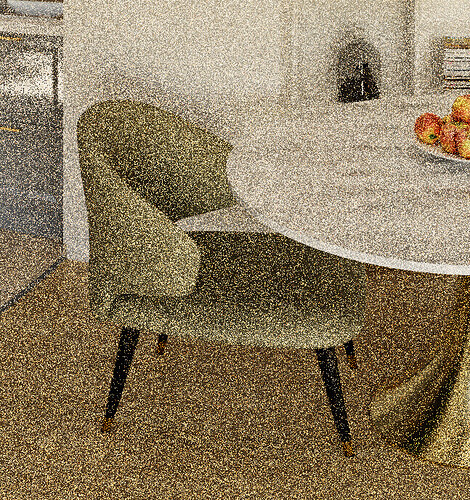
Render with denoiser - close up (very noisy, OIDN is creating a lot of artefacts trying to clean the picture) :

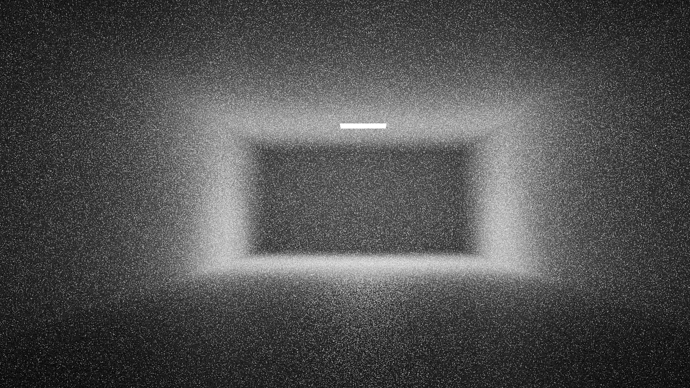
Render with no sky, only inside lights (image is more clean, but still not perfect) :

Thanks a lot for your help,
In my experience the lack of light is usually something that makes interior images very noisy/jacks up rendertimes. A dimly lit room on an overcast day can render for a looong time. Try simply overdriving the amount of light you pump into the image, it usually does the trick for me. Placing a big area light behind the camera usually works well for me, might be difficult in your case when it’s more than 180 degrees?
If “faking it” is not an option I think you can really only bruteforce it by throwing more rendertime at it. Cycles is unfortunately known to be pretty slow for interiors.
But the denoiser usually makes up for that slowness, so I am surprised that you get such heavy artifacts. It usually works very well for me. But I also can’t really judge the level of noise you are experiencing since the image you postet is very small.

Hello,
Thank you for your answer.
It is indeed a 360 picture, so I can’t really fake by adding a studio lighting.

You’re talking about a lack of lighting, but I have many inside lights with physical values… In the living room and kitchen alone, I have ten of those (every “lamp” object" has a light, going from 500 lumens to 2000 lumens). The sky and sun are also physical (I suppose, given that it’s the Nishita default) and I have three windows with area portals helping the light going in…

Here are the pictures in better quality :
without denoise => https://ibb.co/XYnYQ97
with denoise => https://ibb.co/KGsrLtC

Thank you

I think you could use the fast GI option in the ADD mode and set it to a really low value. That would help a bit, I suppose.

By the way, are you using a noise threshold? How many minimal samples?

Yes, I did try noise threshold but couldn’t see any difference :

0.001

0.01

0.1 (no idea what happened here)

0

Seing that I just disactivated it for the time being.
I’m going to try the set GI approximation and keep you posted, thanks for the help.

1 Like

Have you tried using a flat background outside and a sun lamp instead of the nishita sky? I am curious what the performance impact and noise of a physical sky is. Maybe it could be a good idea to use an HDRI instead, I seem to recall nishita sky as having a poor performance for me, unless it has changed.

For the artifacts, are you rendering with noise treshold (adaptive sampling)? You might want to turn it off in an interior scene, it often helps very little and mostly causes problems in that kind of scene, because it misses important features of the light and stops sampling too soon.

Also, are those lamps emissive materials? If yes, that could be a major source of noise. Cycles is not very good with emissive materials, light objects have much better performance. Also, they could be taking samples away from the sky. If the lamps are glass materials with lights inside, that’s even worse, you should make sure to use the same shader trick as the windows have to solve that.

For the general performance, Cycles is sadly not very good at interior scenes. That’s because it has neither path guiding nor any kind of light cache feature.


A little bonus
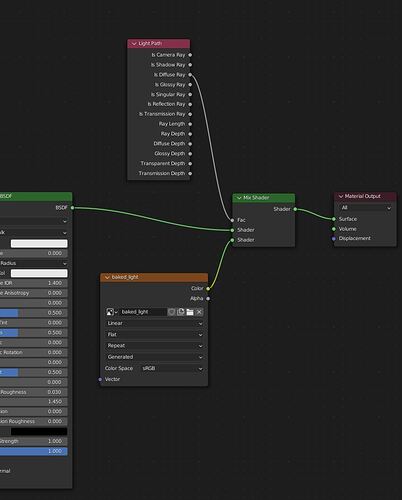
If you want a more drastic technique, I have a way to massively speed up this kind of render, but it requires some texture baking and will only work if the scene and its lighting don’t need to change.

1- Choose the larger surfaces of the scene (floor, walls, ceiling). Separate each material as a unique object, this will make the next steps easier.

2- Make sure each of these objects has a UV set that’s suitable for texture baking. If necessary, create a second set of UVs (you can use auto unwrap, but make sure to leave a decent marging between the islands so there are no light leaks).

3- In each material, create a new image texture (choose 32bits, we are going to be storing lights values). Don’t connect it yet. 2048x2048 should be good enough.

4- Select the texture node, then go to the bake settings and do a full combined bake with the default settings. You don’t need many samples, the texture won’t be directly visible, so set the samples to, lets say 16 before baking.

5- You now have image textures of the floor, walls and ceiling’s lighting. Save them or pack them in the blend file.

6- In each of the materials, use the light path node so the diffuse rays use the baked lighting instead of the main material:

7-In the material’s settings, deactivate multiple importance, or else the walls would be sampled like light sources, which would slow things down uselessly.

Done! The render should now be way faster and have less noise.

1 Like

When using noise treshold, the lower numbers have more quality. A higher number will stop sampling when there is still lots of noise.

What the treshold does, is that it looks at the amount of noise in the image, and when a section of the image reaches the same amount of noise as the treshold number, it’s considered clean and it stops receiving samples to save on performance.

The min samples number is how many samples you render before that effect activates. if you set the numbers to 0, Blender will decide for you.

Have you considered to use K-Cycles or E-Cycles. From what I have seen, they should be optimized for those kinds of use cases. But I don’t have any experience with them, just judging from their marketing…

As mentioned, lack of direct light or relying too much on bounced/translucent light is a known source. Try using light groups to identify what is the root of the problem if it’s related to specific light source, and see if you can “help it out” to get to hard to reach places. Add only as little global AO as required to get rid of it - if that is the approach - and then possibly crunch the shadows back in post.

Try sky portals on your window openings.

When using adaptive sampling be sure you actually use the Min Samples parameter. Having it set to zero gives a lot of “false positive” causing the halt condition to clusters of pixels, that in the end results in denoising artifacts.

image

In this example I set Min to 256, therefore the adaptive job kicks in after 256 samples, giving a reasonable “ground” to test the threshold against.
Edit: a good-for-me threshold is 0.01 for final renders
Another thing to check: World > Settings > Map resolution
Higher values use more memory but give better noise convergence

Thanks a lot for all of your answers, here are the test I conducted with your help :

One of my coworker suggested that Blender is bad at denoising interiors lit with contrasted HDRIs (so basically environment with sky and sun mixed together). So I tried both of your ideas and separated Nishita sky (without sun this time) and a sun lamp. The results are a lot better :

Some details are still missing, and the picture is still blurry, but I got rid of a lot of noise artefacts. I’m a bit confused, is the default blender sky not supposed to be used in interior scenes at all?

Here is the result without denoise. It’s still way too much noise to have something sharp as a finished product :

Next test will be with a plain blue background, still rendering.

No, they are just simple lights.

Thank you for the baking technique, it’s very interesting but sadly not compatible to our workflow…

I heard good things about those but haven’t tested them yet. If everything fails i’ll look them up! I hope cycle will be able to make a simple physical interior render on its own…

I have to say that adding global AO is a bit of a last resort solution… the idea was to make a realistic render, and I don’t see those things being compatible. Post production is very limited in our workflow, sadly, that’s why i’m trying to get the beauty as perfect as possible.

Done since the begining. It is slightly better.

More answers in the post following, thanks a lot for your help.

You can add filling lamps and hide them from camera, maybe that could help :thinking:
Another thinkg, try adding a big plane outside the room, like a floor (not sure if this could help tho)

Interesting… i have no idea :face_with_raised_eyebrow: how to give any good advice :slightly_frowning_face: because all i would come up with are already mentioned and also then got far behind my knowledge about profesional lighting… :sweat_smile:

But can a very simplified version of the scene with just some cubes and cylinders with simplest materials, no extra addons but of course the lightsettup could be any helpfull to find out the reason why this might be problematic?

I see that lots of lamps in the scene are hidden inside of holes or are partially encased. Are you using point lights for those? If yes, you should switch all these to spot light objects. Cycles actually treats spots directionally, which will make their sampling much easier in this kind of scenario. here is a demonstration, same number of samples.


Hello, I tried with your parameters and have no noticeable difference.

No noise threshold :

Noise threshold :

Most of them are areas :
image
is the issue the same with those? The pictures you send are quite telling indeed. I always try to use the light shape that’s the closest to the actual modelisation… Spot light are sure cleaner, but the result is very different visually (sharper beam of light)

Just one point light that I will change to spot.

I just tested it.

If the light is floating in the air under the lamp mesh, areas and spots have the same noise level. However, if the light is actually encased inside a hole, then using a spot with a narrower beam does make a big difference, light rays are less likely to be blocked and wasted because Cycles will only try to sample the light if a ray is inside the spot’s cone.

1 Like

Actually, this image does raise a question for me.

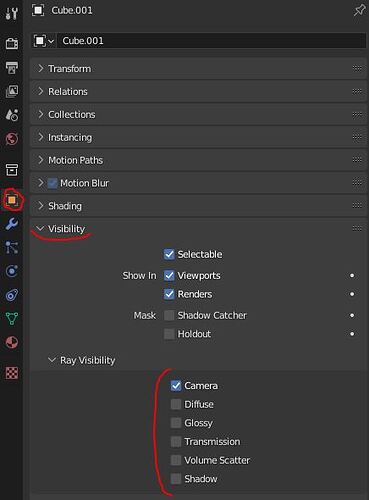
I understand the lighting is done entirely using light objects. However, If you got the mesh of the lamp to glow, you probably used a little bit of emissive materials? If you haven’t already, you should try to make those emissive materials visible only to the camera. Make the emissive part a separate object that contains only the glowing material, then do this:


If any of the lamps needs to be visible through a reflection, you can leave glossy on.

If there are emissive objects in a scene, even weak ones, Cycles will understand them as light sources and attempt to send rays at them, causing lots of light rays that aren’t very useful. And because those emissive surfaces are inset in hard to reach places, this will lead to lots of failed, blocked rays that don’t help solving noise.

or… make it invisible to diffuse, while setting the light object only visible for diffuse

1 Like