Hi,
First time post - I have a problem with the head bone on my ‘stickman’ (see image). I followed the tutorial at YouTube but something didn’t quite go right.
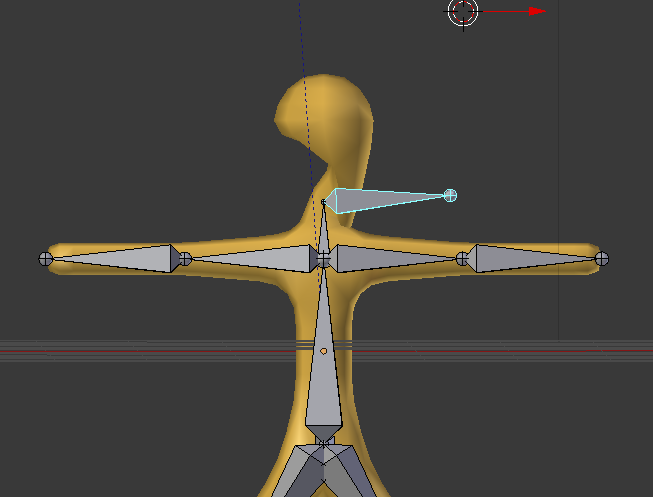
The ‘skin’ modifier created the armature but with 4 vertices in the Head mesh it auto-created 3 bones. I deleted two and extended the third but it’s lost its connection to the Mesh and it doesn’t move the head when you grab it in Pose Mode, the bottom of the head moves with the bone but the top of the head does not.
Can someone help point me in the right direction to fix this please?
Thanks Hatchet - not weight painted before and when I click on ‘weight painting’ mode the mesh disappears and a circle for the weight paint brush appears!! Not sure how to get the mesh back so that I can paint it!
I was hoping it was an easy fix, would it help if the .blend file was uploaded?
You haven’t applied your skin modifier. The only real geometry in your little guy is the stick figure string of vertices you used to create it. It’s not disappearing, it’s just showing you what the object actually is.
Also you have two armature modifiers. That’ll cause other problems.
You also might want to try re-Partenting your Mesh to your Armature after you do what K Horseman suggest above…
To do that… Delete all your Armature Modifiers from the modifier list…
Then…
Goto Object Data (triangle icon) in the Properties panel and find… Vertex Groups… you should see a list of vertex groups that corespond to the names of your bones… (You should name your bones something more meaningfull than bone.001… )
to the Right of the list you should see a black Arrow…
Click on it to get a popup list…
Find ‘Delete all Groups’ and select it…
now you can Re-Parent your mesh to your Armature clean using Automatic Weights and everything should work pretty well from there…