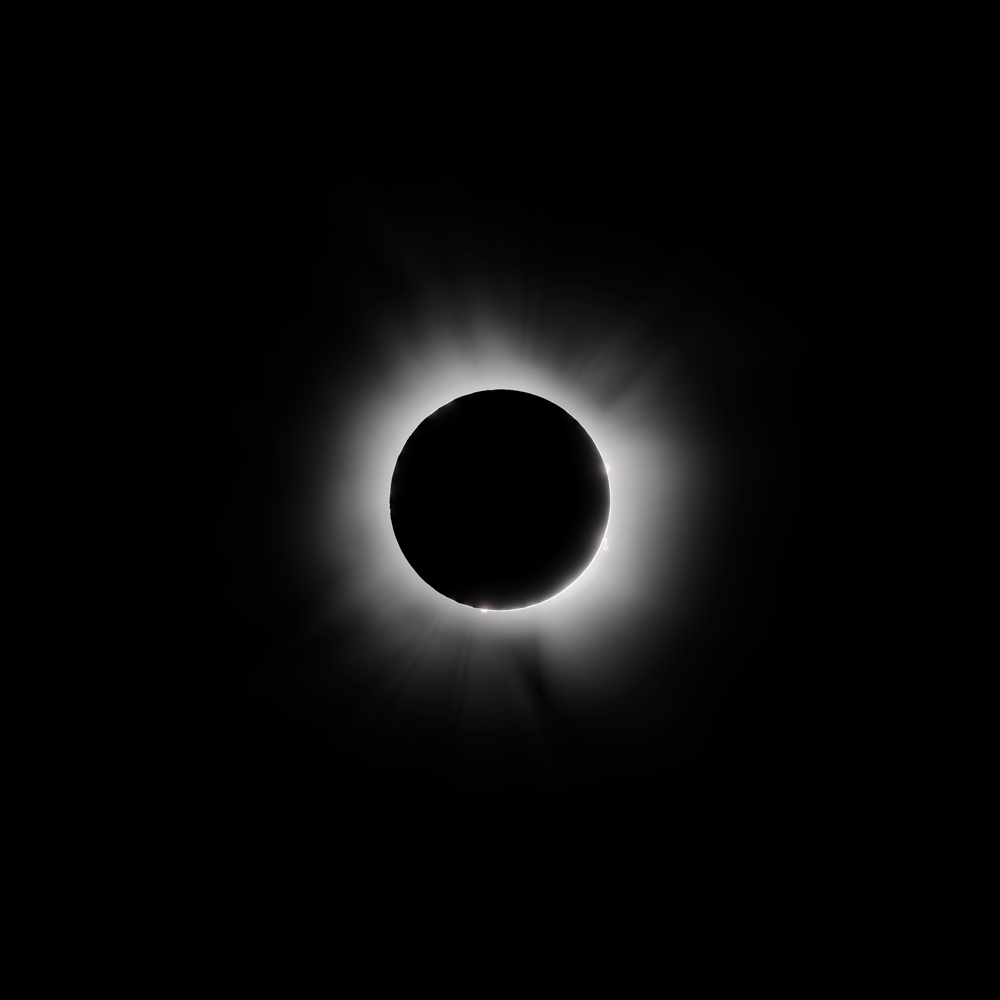
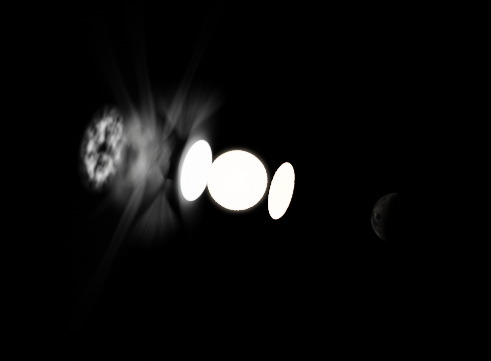
So on Monday, I saw the total solar eclipse that crossed the US - I had to drive a little under 2 hours to get to the path of totality, with about 2 min and 9 seconds of totality for the effort. Crazy amazing and totally worth it. But it made me wonder - can I make and animate a photo realistic solar eclipse in blender? Obviously won’t hold a candle to the real experience that God made, but I might get some of those pictures I missed… It’s been a while since I did a project just for fun so the time was ripe. This one is made almost entirely in blender and the blender compositor. I usually rely heavily on photoshop for compositing as I find the blender compositor to be slow and difficult compared to the controls in photoshop, but I really wanted to avoid it being a work of digital painting, and instead let blender do the work. I used procedural textures on everything but the moon, which is a real 3d moon texture.
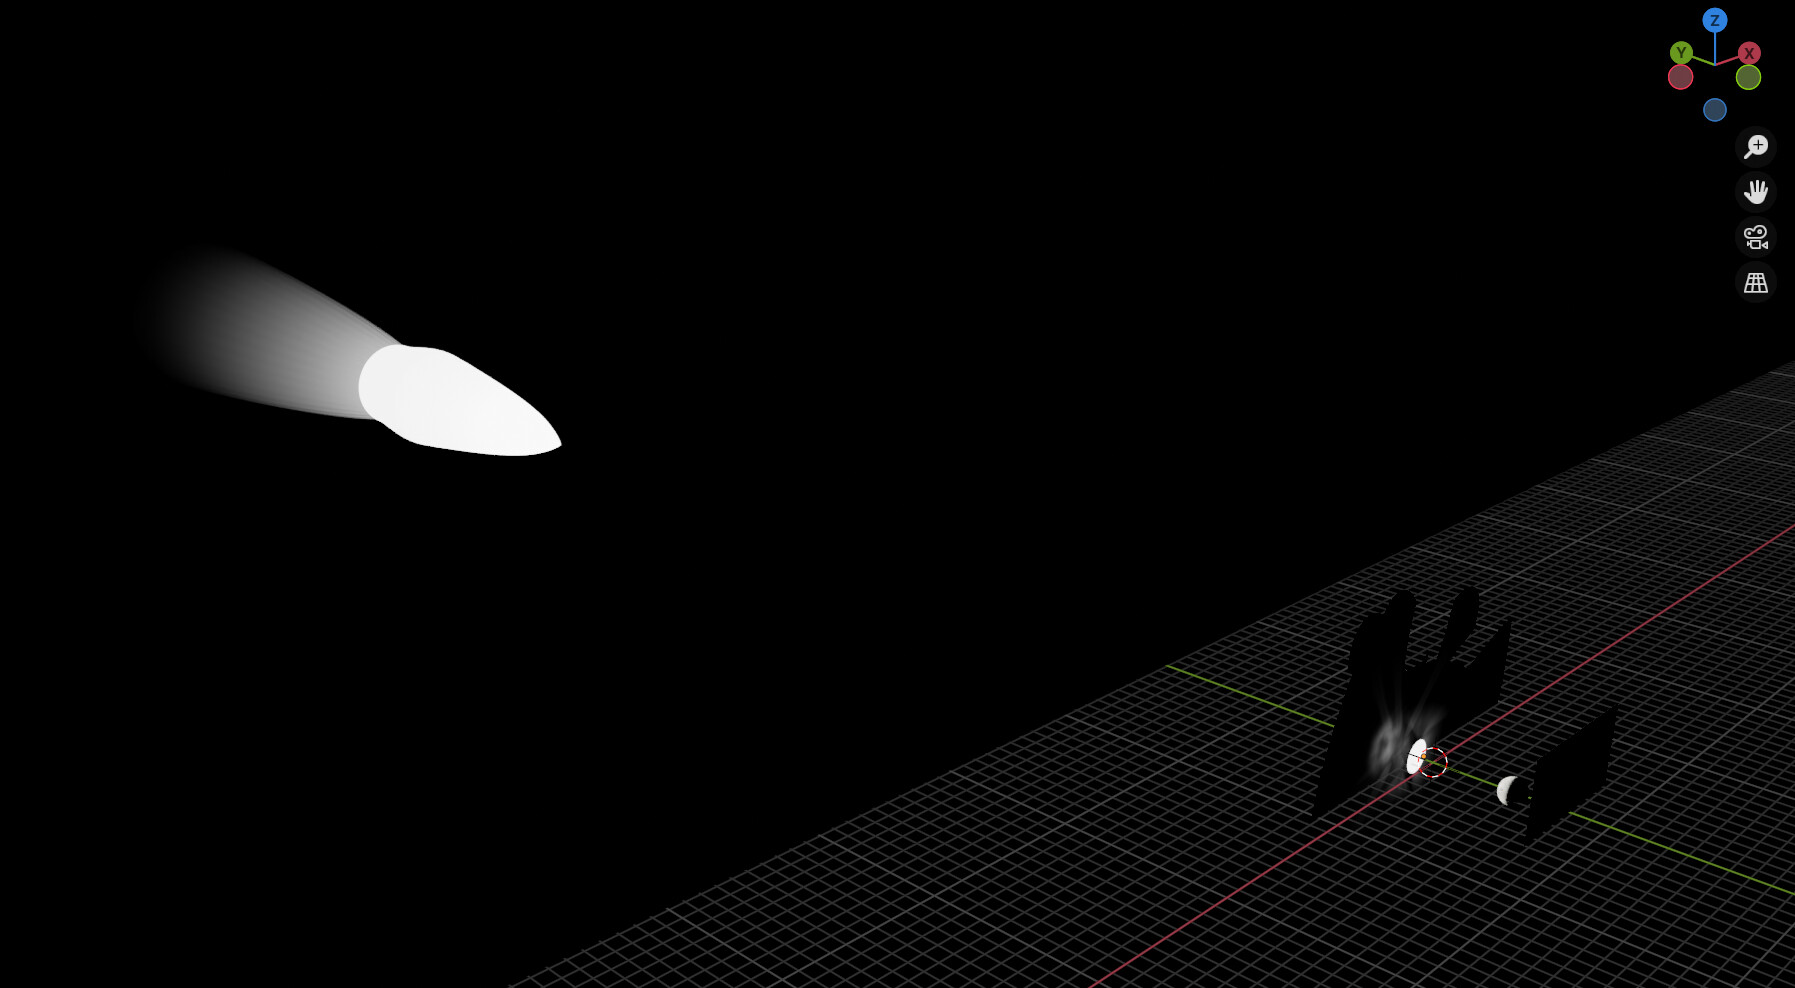
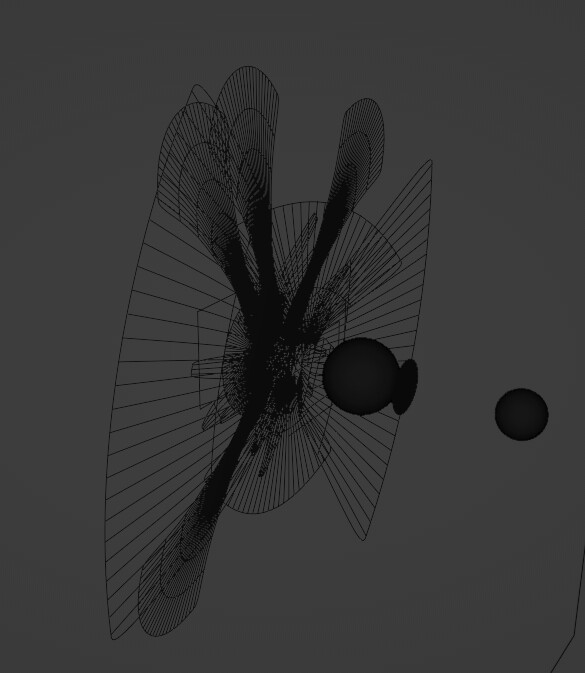
Also, there are aspects of blender that I have never learned well - Procedural textures being one of them and gradients being another. I wish blender gradients worked like photoshop. This project looks like a mess on the backend because I didn’t and still don’t know what I am doing. I am just throwing stuff together by trial and error. Lots of error. Definitely a work in progress.
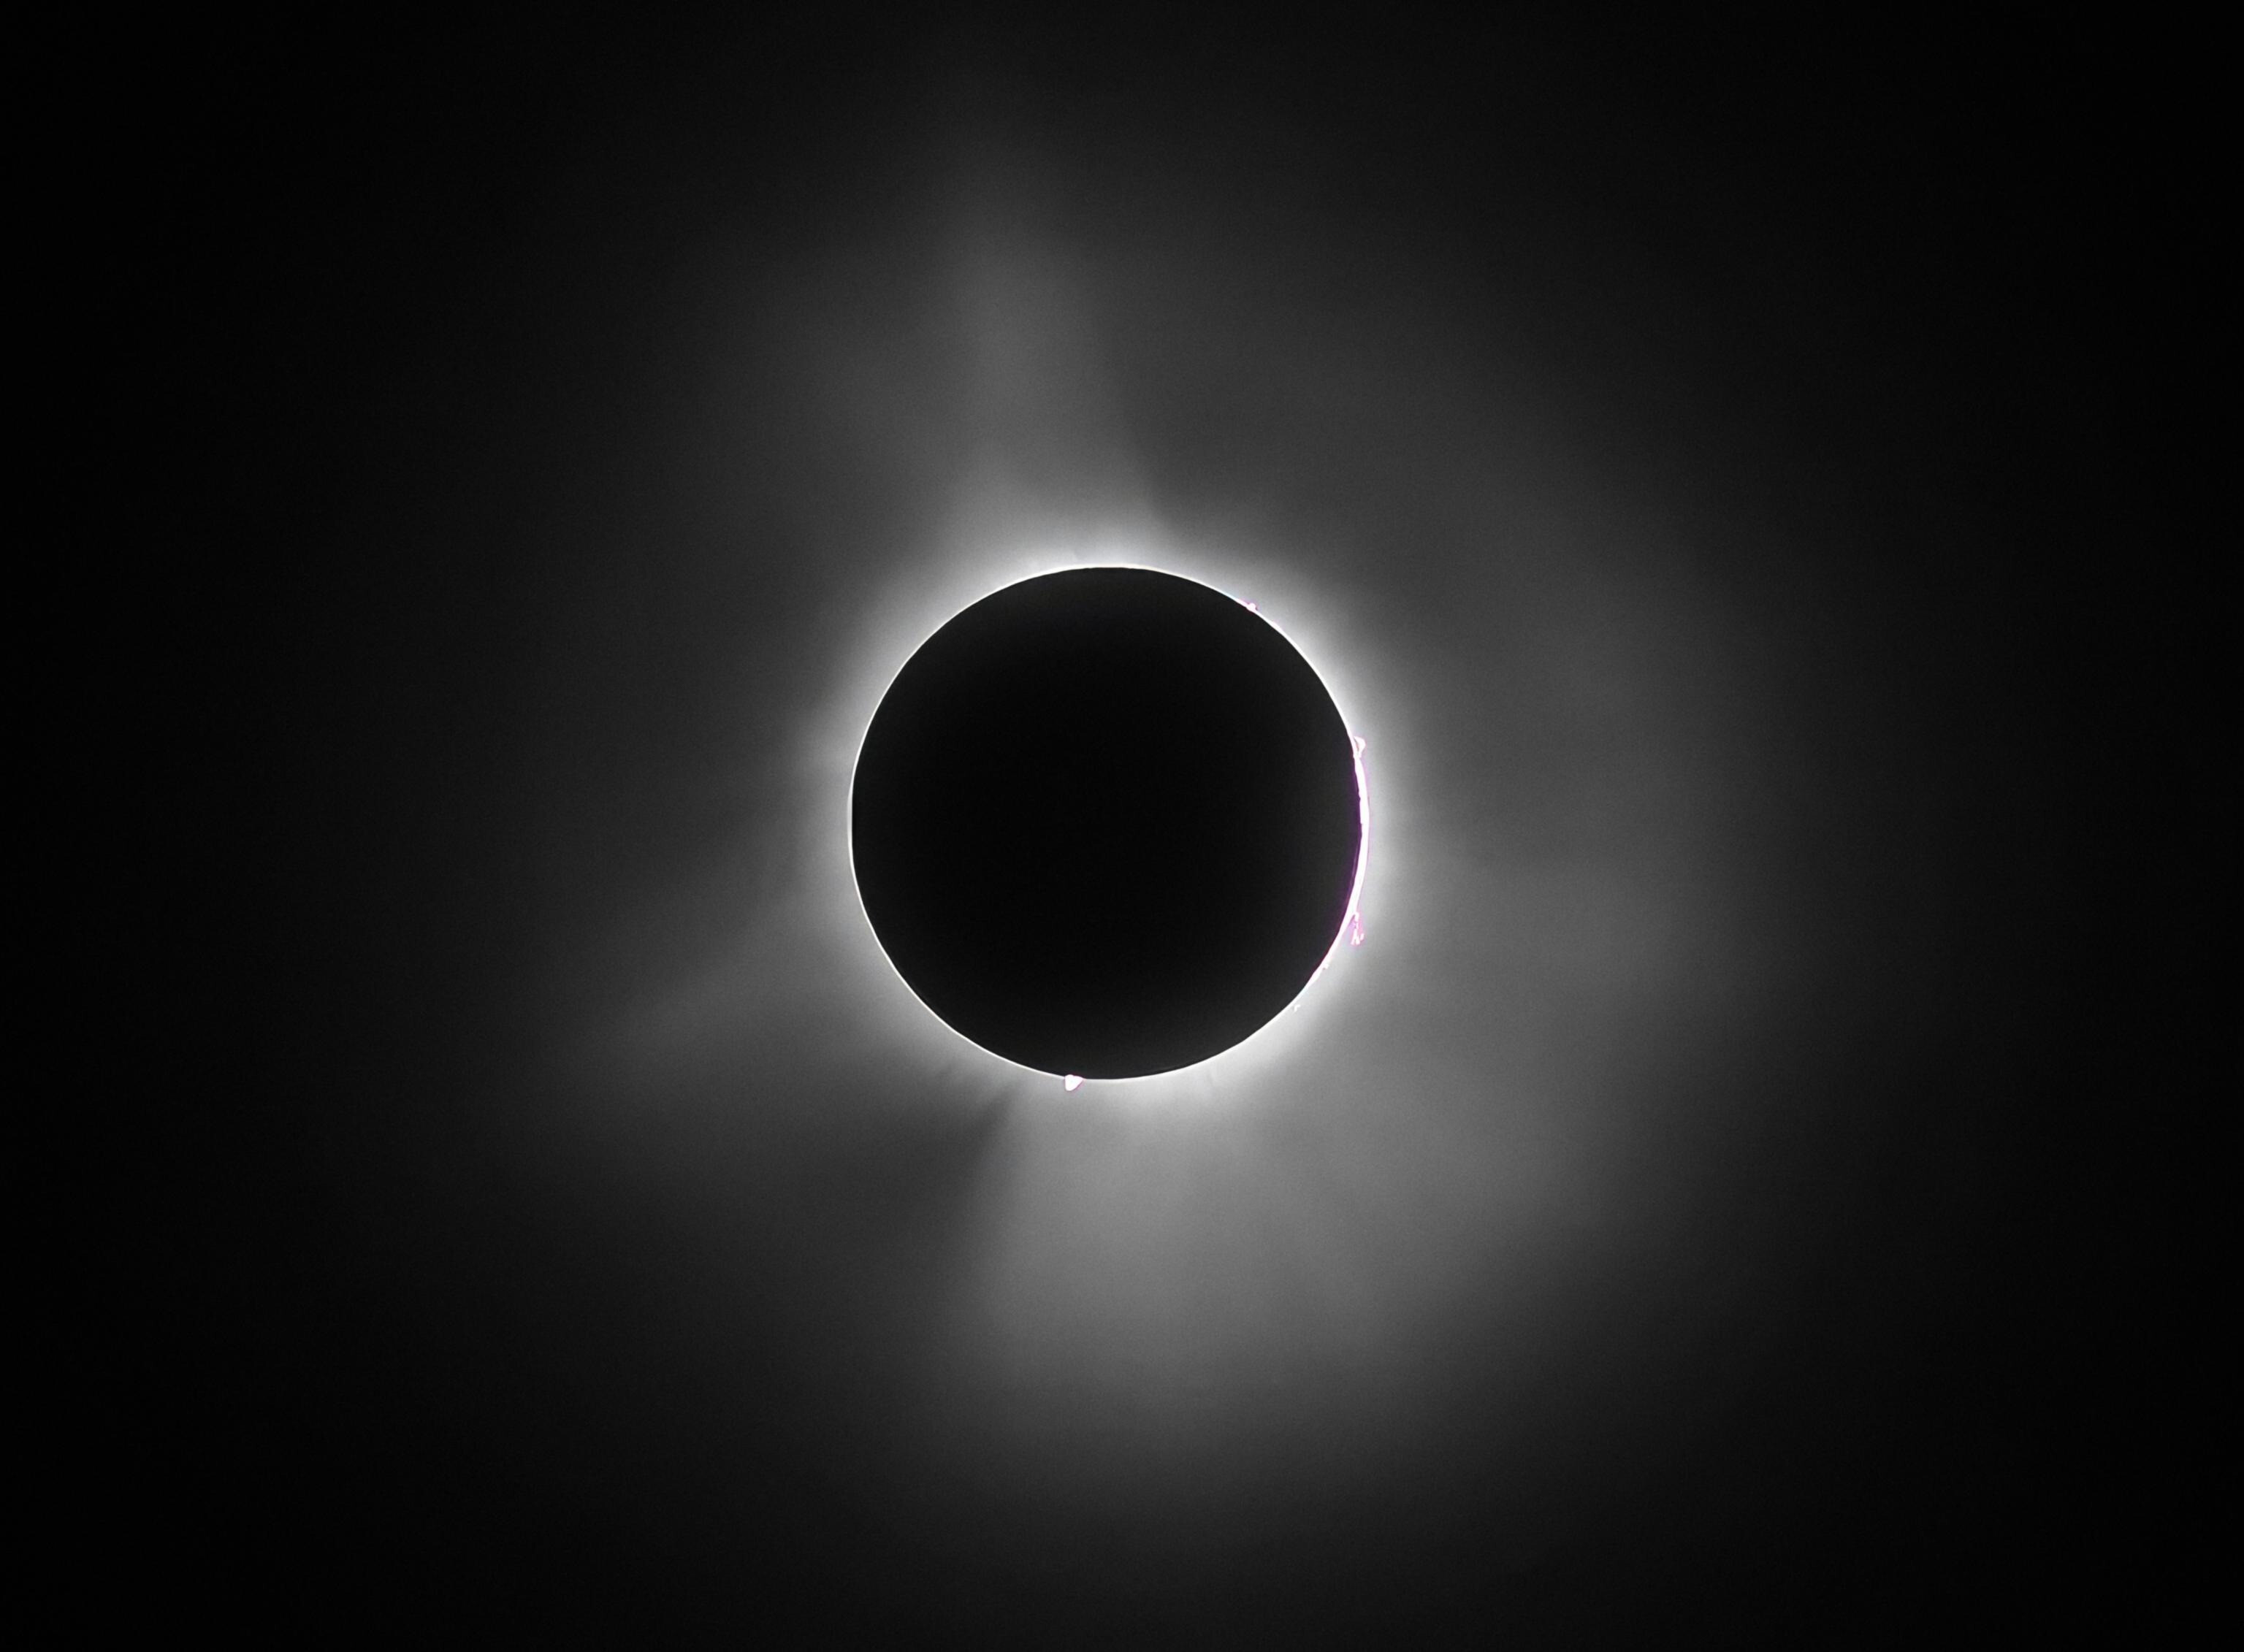
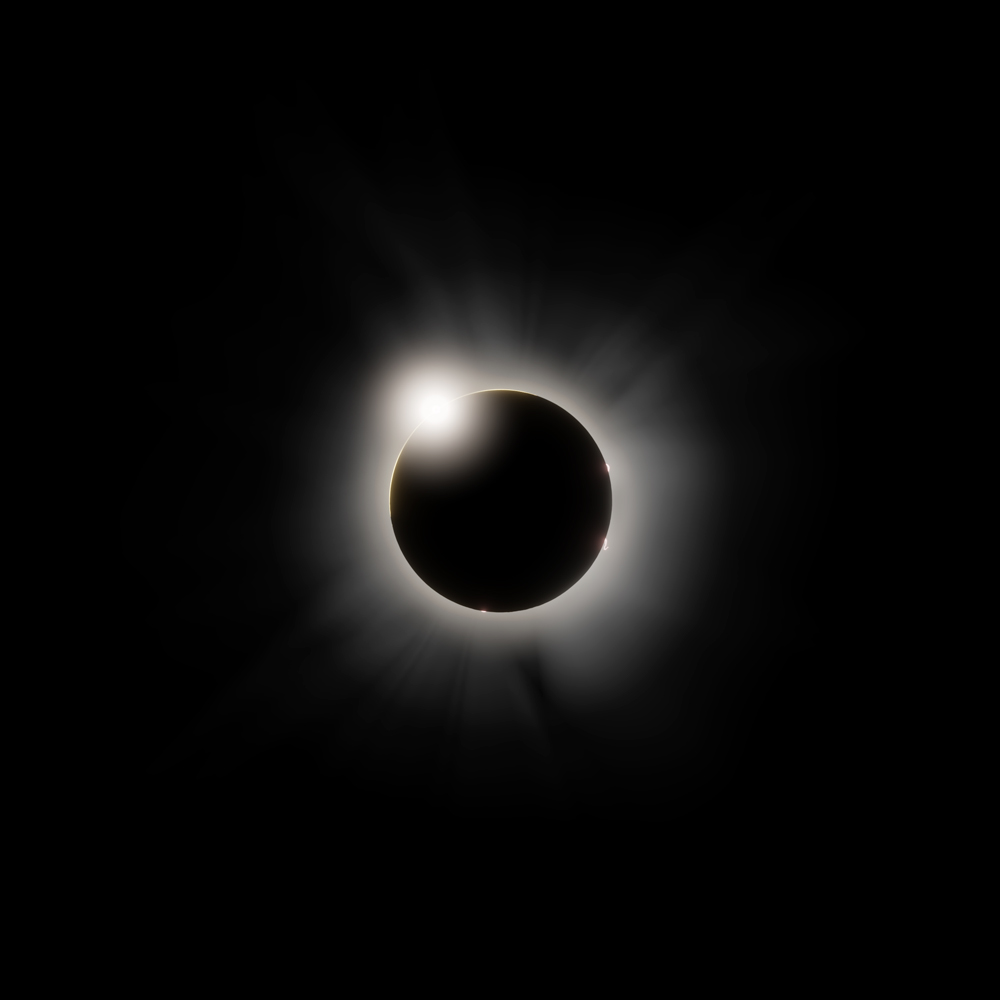
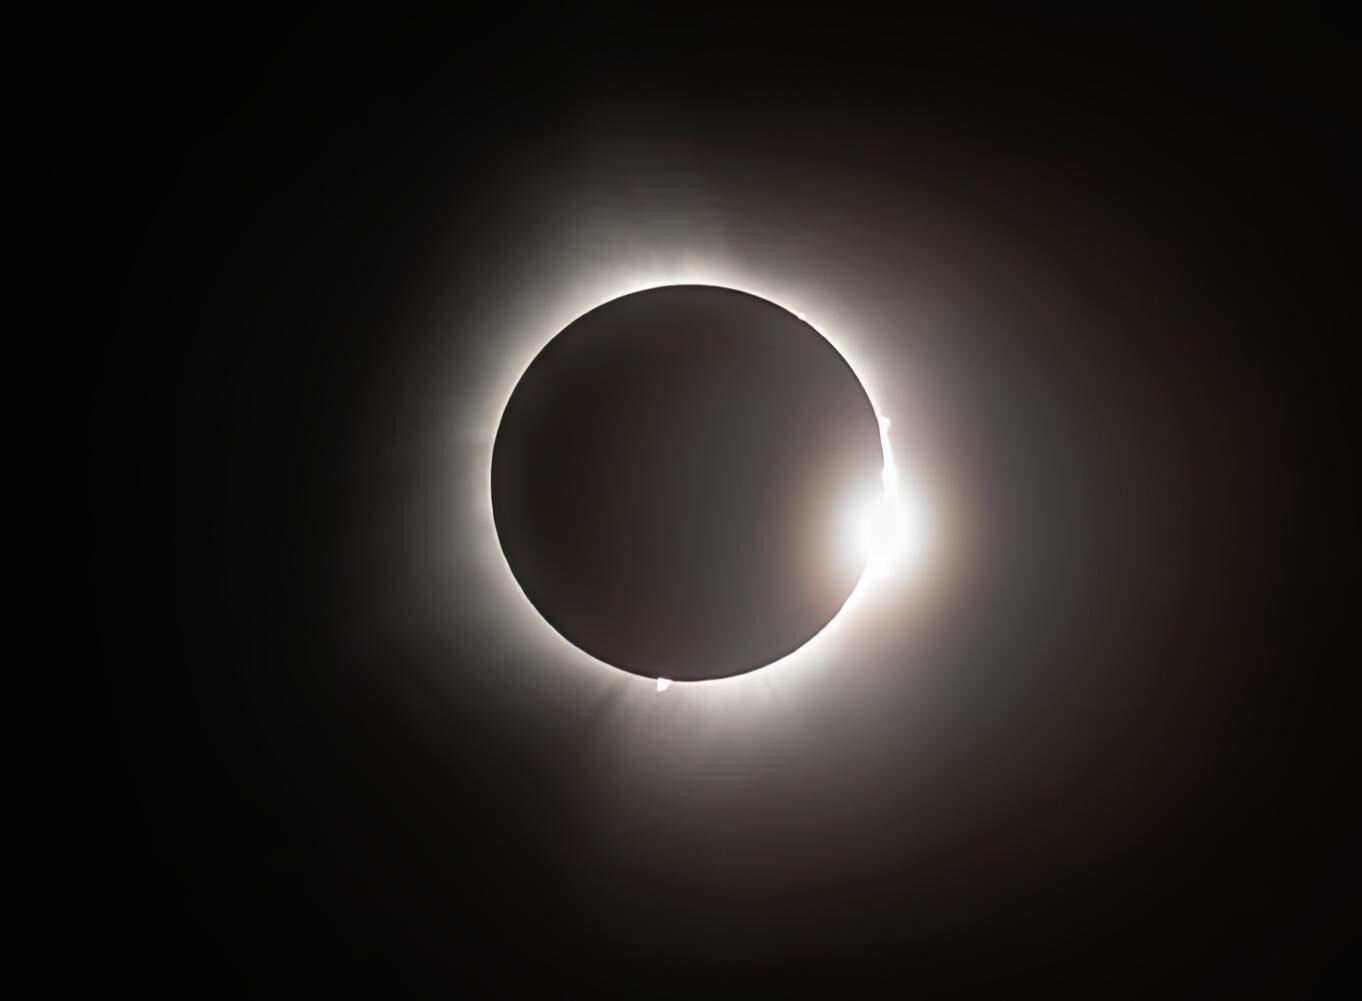
What you’ve done here is quite believable, giving the suggestion of the “flaming pretuberances on the solar surface” that you can see during a total eclipse.
My wife and I made it a point to be in “the totality zone” for both eclipses, as well as the “annular eclipse” (“ring of fire”) which happened last year. You really did capture very well what you see during totality.
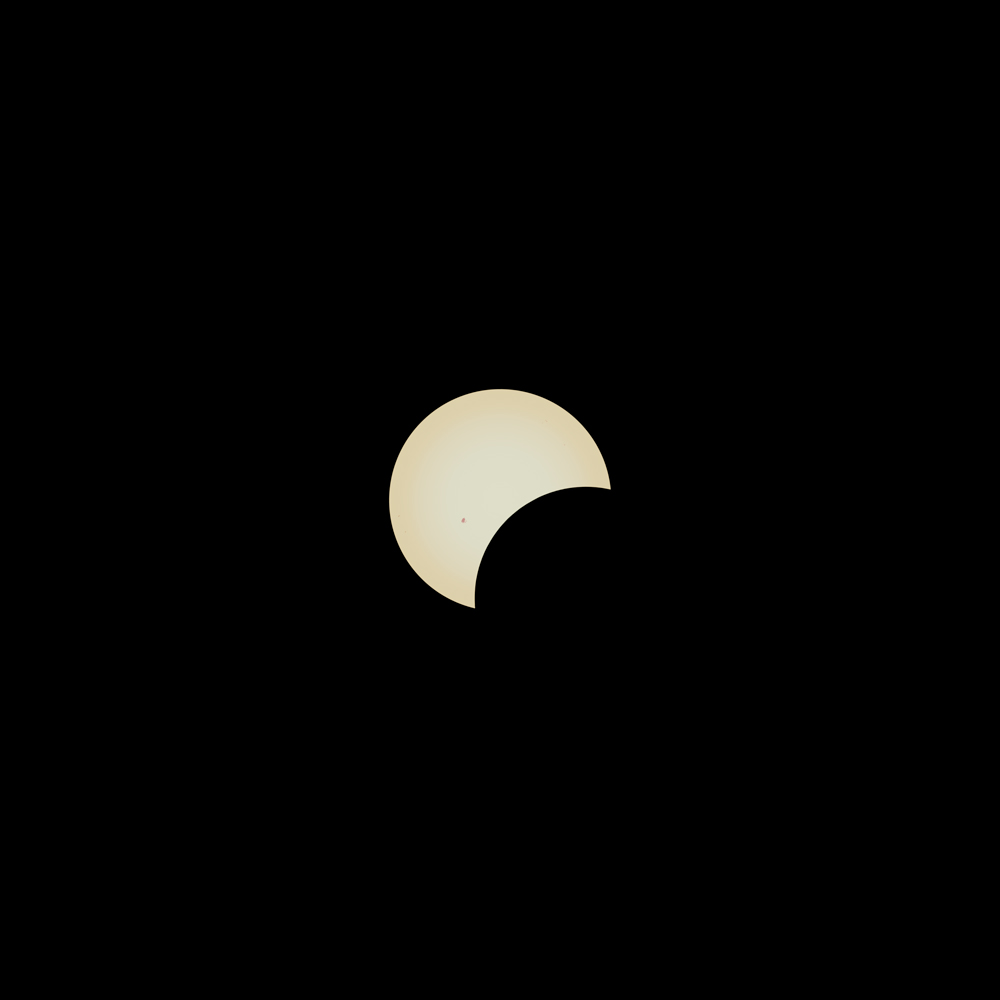
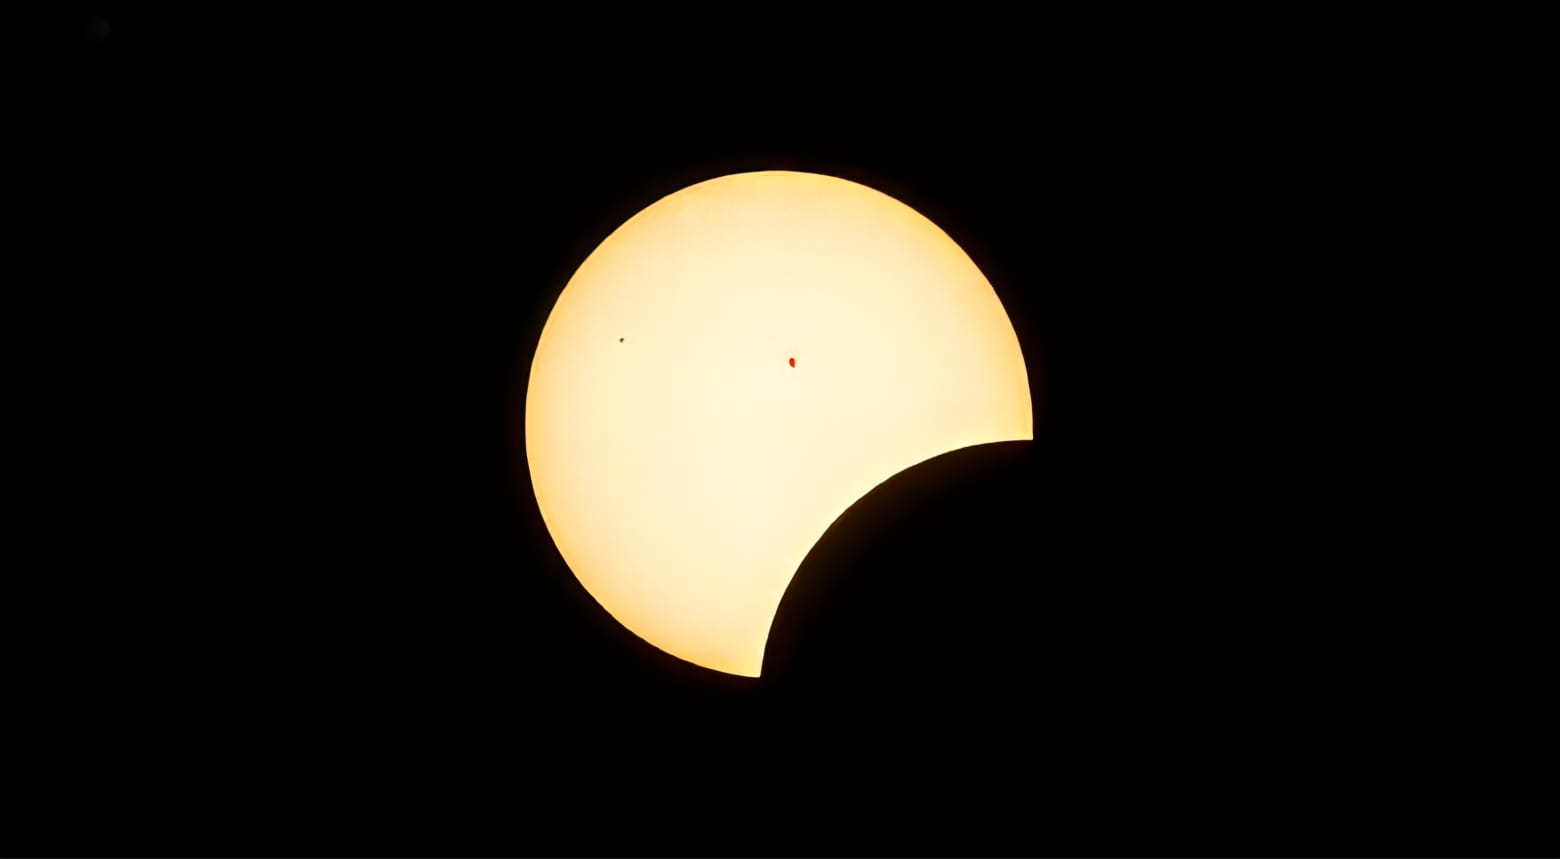
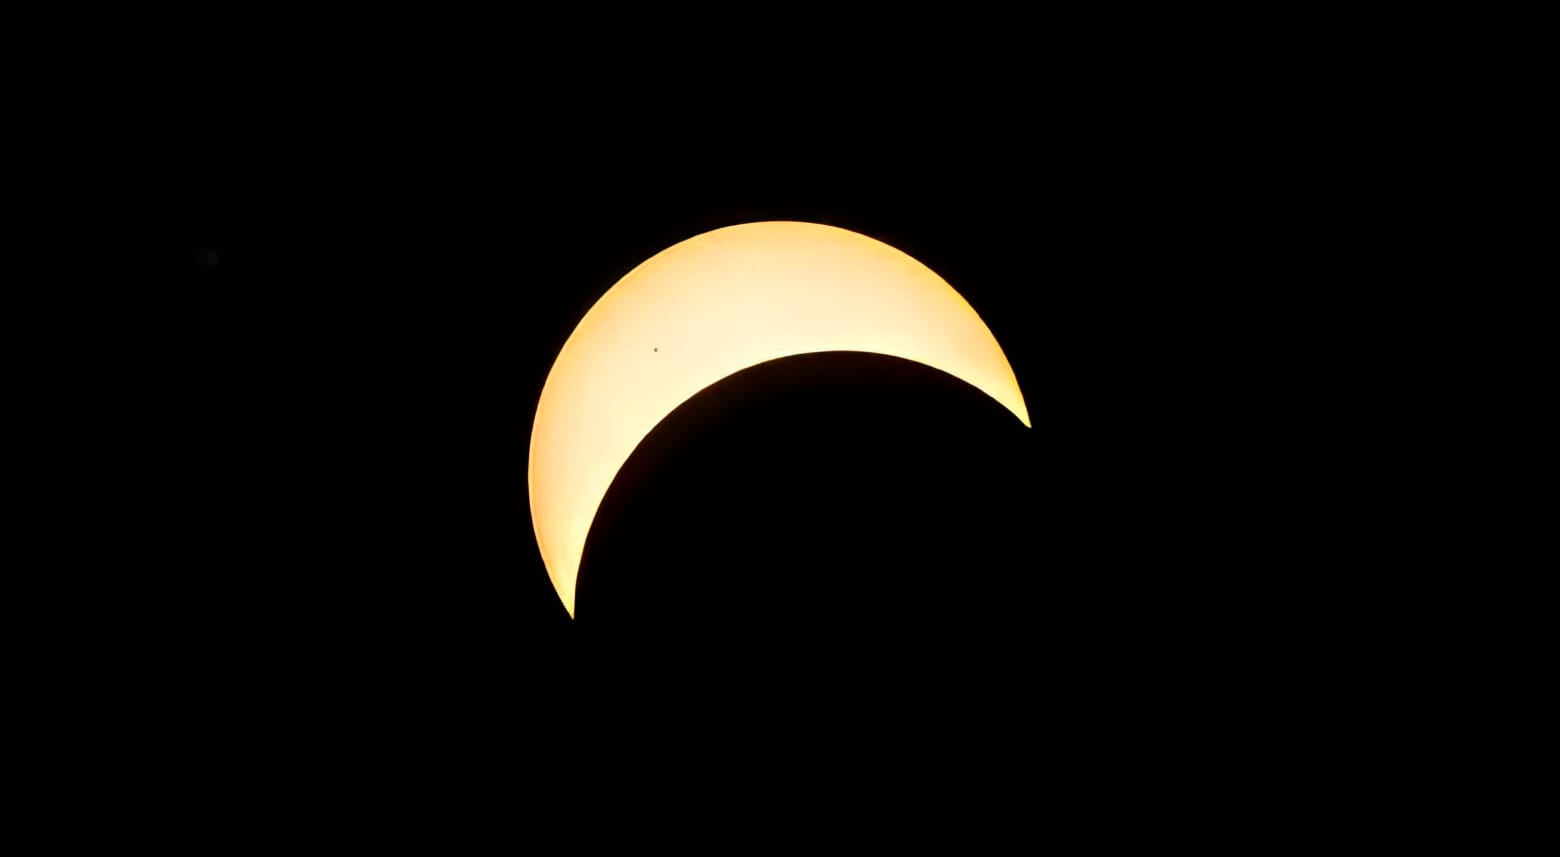
Thanks, I don’t know how to do that with the slider. I should make a set line up perfectly. That said, the description is opposite, the one on the left is blender, the one on the right is the real photo, Nikon z6 with a Tamron 70-200mm lens, cropped like crazy, because I really needed a 800mm zoom. I did get quite a few reference photos that day, so I am working on making an animation and having it look like the real event. Big thing is I want to make my own textures from scratch, not use the photos for any of it. So a realistic eclipse sequence from first contact to totality, baily’s beads, diamond ring and all.
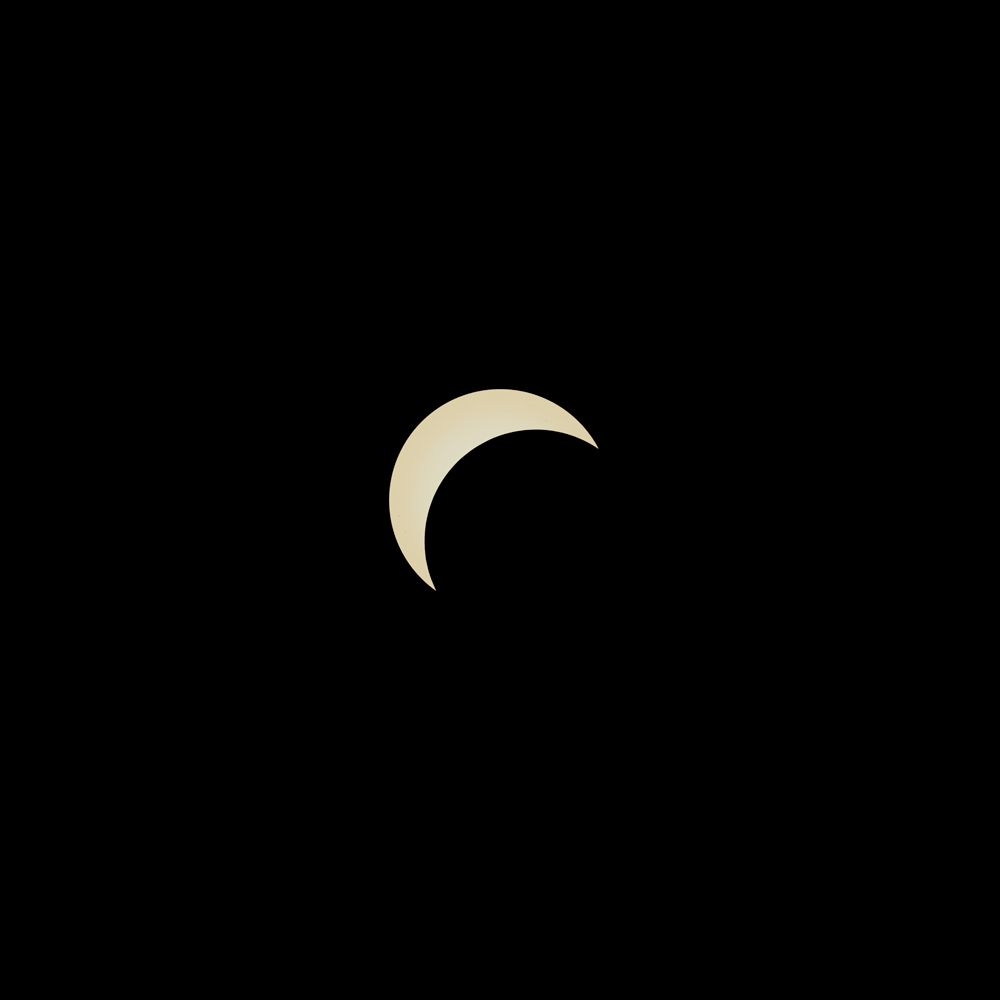
Thank you. This one was my first totality to experience. Mind blowing. The first part of the eclipse is the easiest to make in blender. Getting the glow to come out correctly with the baily’s beads and diamond ring have been more difficult, but I think I have figured out how to do it.
I very-honestly think that “You nailed it!” And, I hope that you will very soon prepare and publish a “how I did it” tutorial and post it here with videos and blend-files. Because, what you just did is not “obvious.”
There is nothing (!) like “witnessing ‘actual totality,’” but you have done an exceptional job of simulating it for those who have never (yet) seen it, in all of the very-fine details. (I’d encourage you also to continue your animation all the way to and through the “fourth contact.”)
This should also, in due time, be featured. It is a simulation, but a correct one.
P.S.: If you want to see the next eclipse, you’ll probably have to go to Spain or Portugal in a couple of years. “See you there!”
It would be fun to put together something on how it is done, though I am still trying to figure out how to do this with less monkey rigging. I’m sure some of the artists on here would cringe if they looked at the crazy steps I took to get that to come out… I have the simulation all the way to the end, hopefully will get it posted soon. My family just added our third child last Saturday (two under a year old now) so this week has been a little full and I haven’t had time to do much with it. I have an outdoor scene I would like to add it to to see if I can replicate the environmental effects I witnessed as well with a wide angle view. I took video during the totality with all settings on manual so I could get a good gauge on light level drop off and everything.
“The environmental effects that you witness,” as you look around the place as totality approaches, are something else that I have no idea how to simulate. But I do look forward to it, also. “When you have a little more time!”
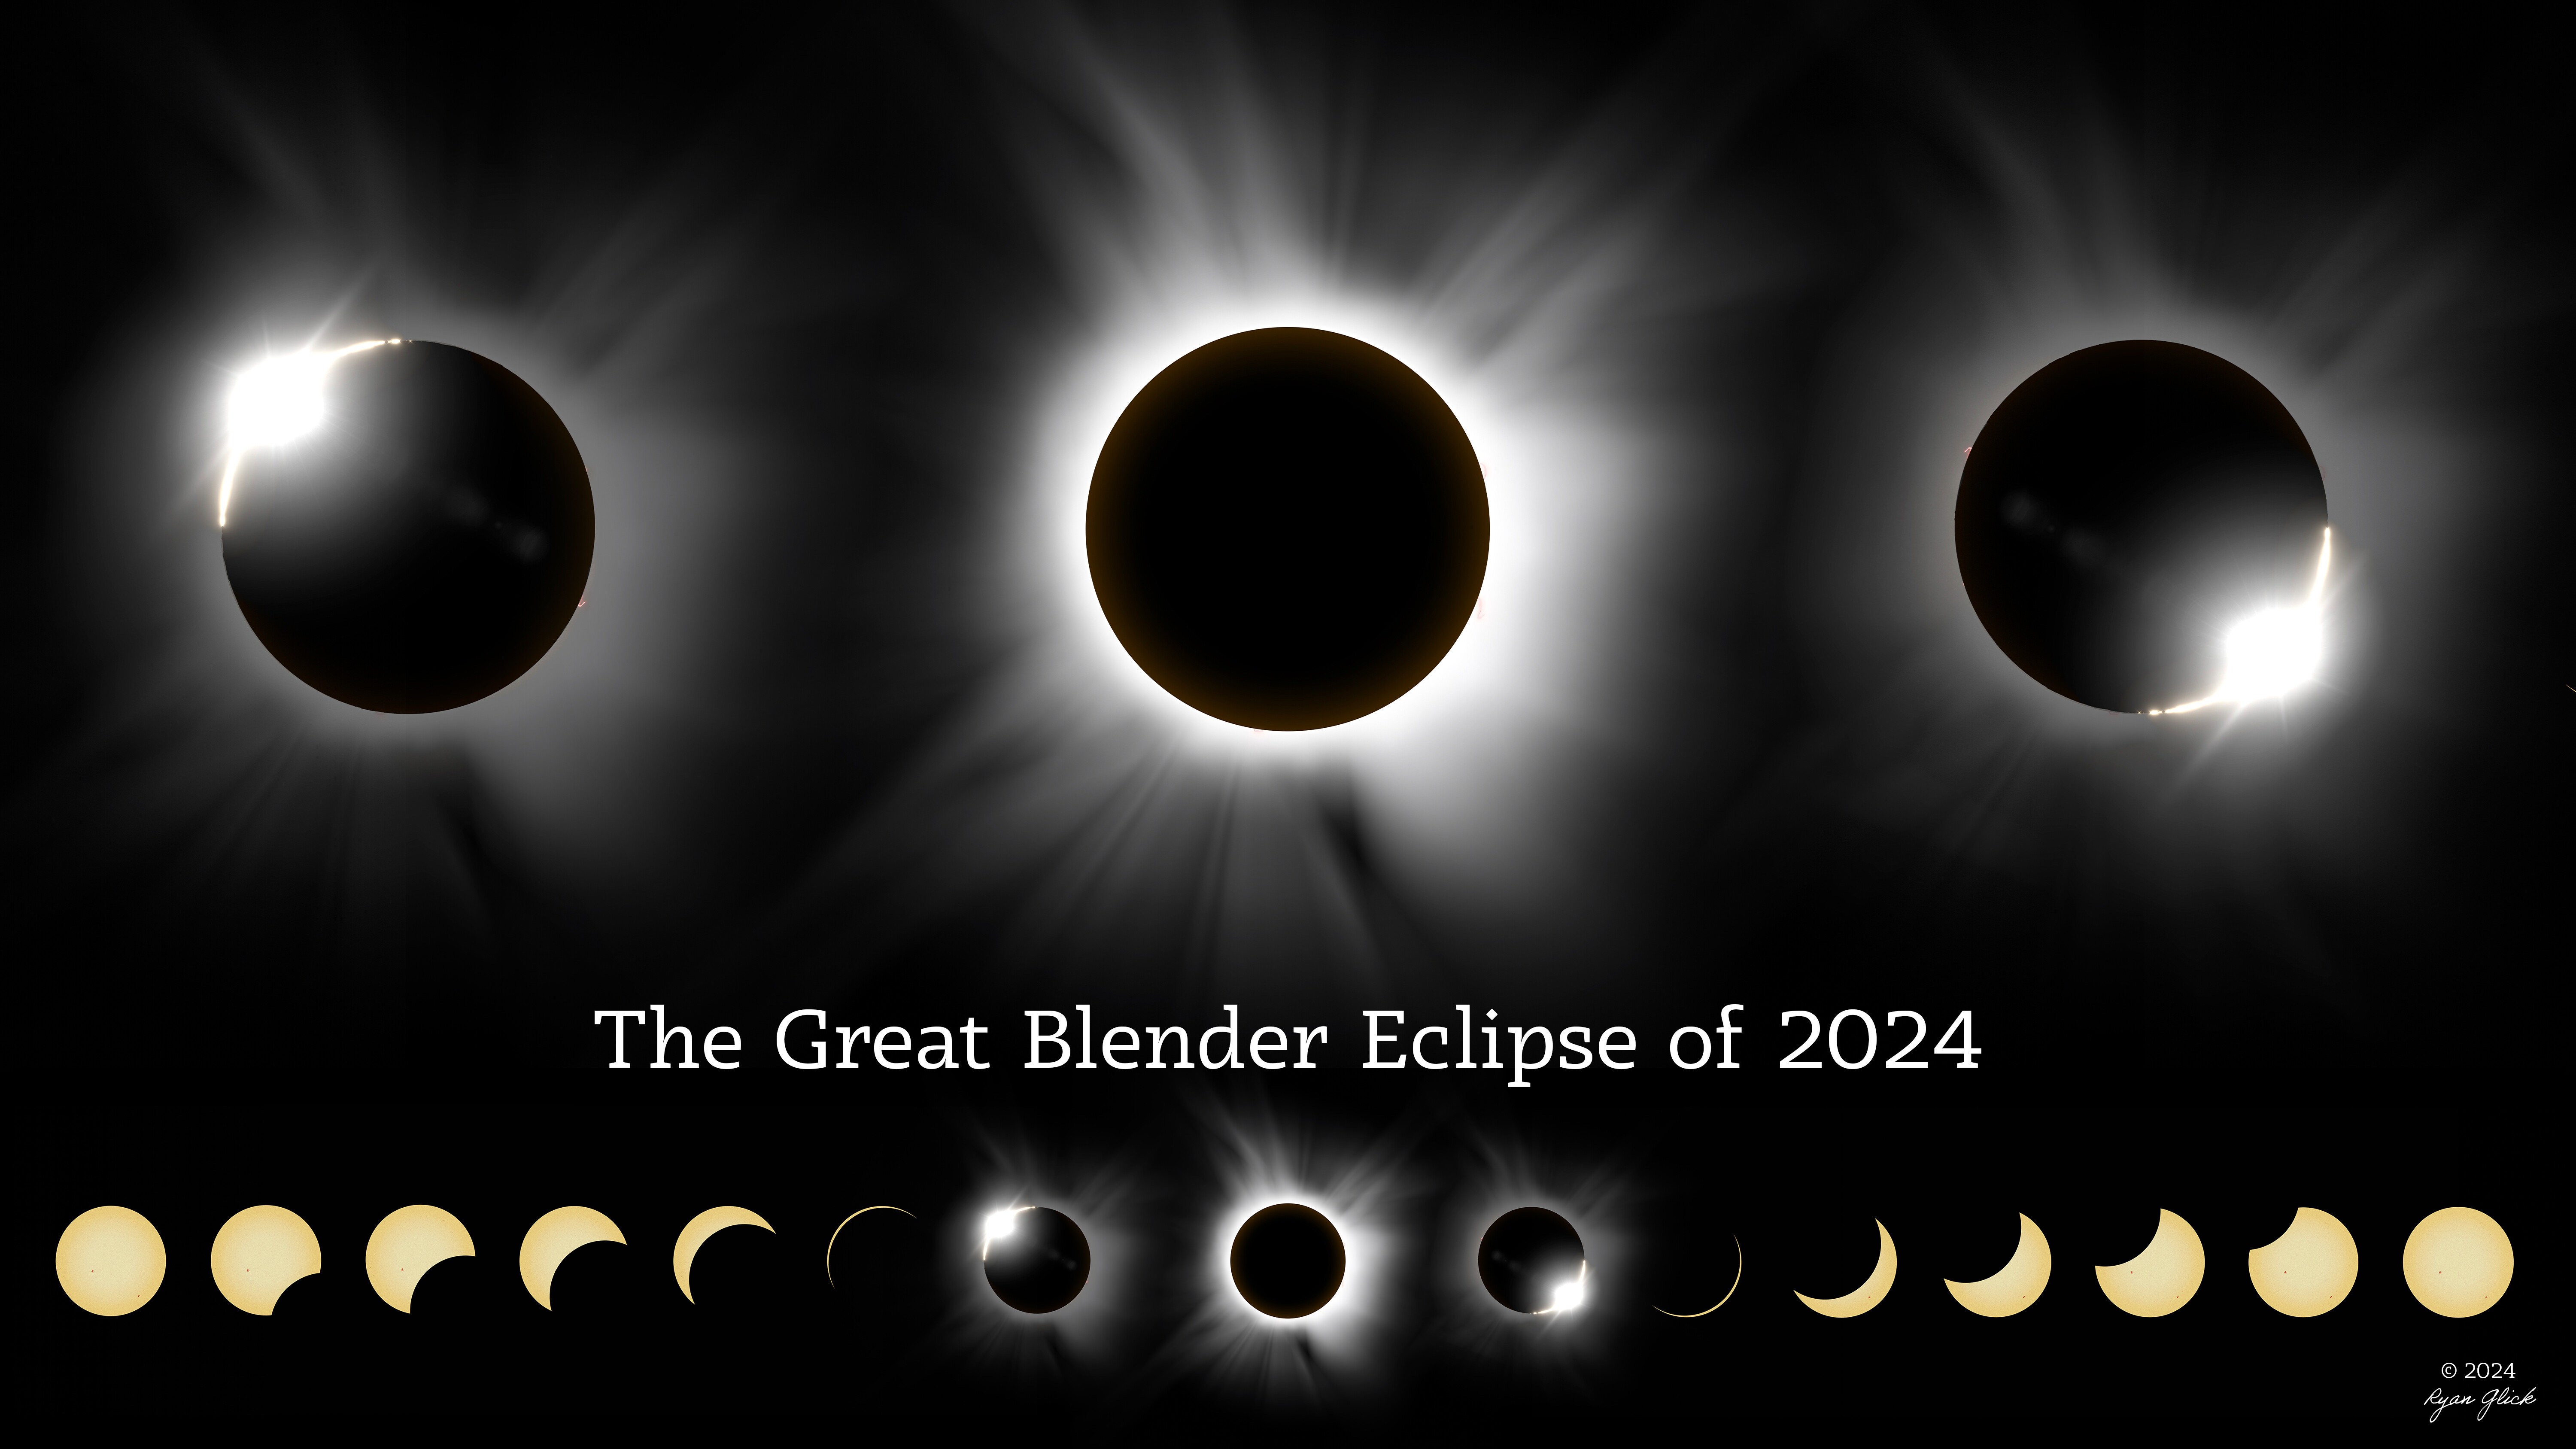
Still dabbling with this. A couple transition points in my animation need work yet to achieve believability/realism. But I saw someone else did a line up like this and thought it looked cool. So here is my current blender totality… Made it my desktop background actually.
I have made the backend simpler as well - largely when it comes to gradients. I finally gave up trying to make all the gradients in blender, and instead created some gradient textures in photoshop for finer gradient control. I have some future simplifications I would like to to do, but as of today, this is what I have.