Where can I find the Trace Image to Grease Pencil option in the latest version of Blender for Mac? I only see Convert to grease pencil, but it’s not working with my simple B&W images. It just converts the image to a mesh object.
Thanks
Where can I find the Trace Image to Grease Pencil option in the latest version of Blender for Mac? I only see Convert to grease pencil, but it’s not working with my simple B&W images. It just converts the image to a mesh object.
Thanks
If you imported image as a Mesh Plane, that is the mesh that will be converted as Grease Pencil.
You need an Empty Image (Add Image > Reference or Background), to have Trace Image to Grease Pencil operator.
If you have a BW image, you may prefer to vectorize it in another software, and then, import an SVG file as Grease Pencil.
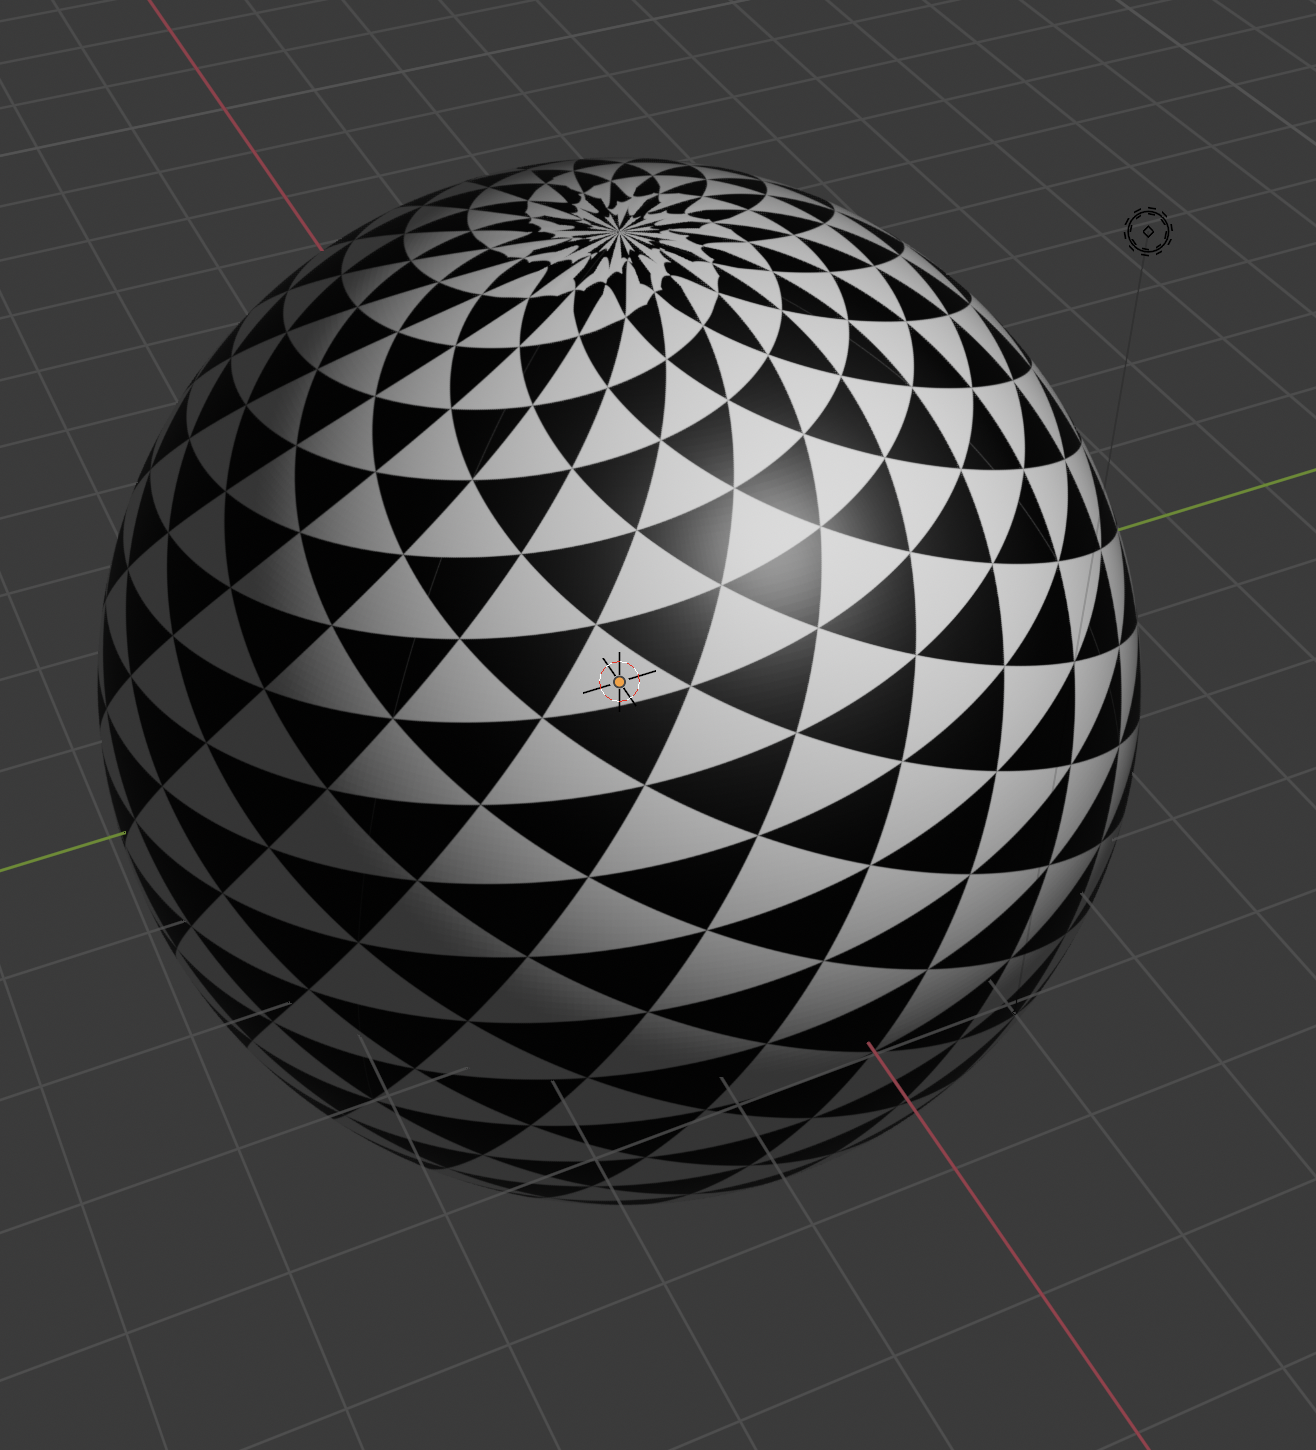
I created the pattern in Illustrator and tried importing into Blender as either png, jpeg and SVG. My goal is to add the AI pattern to a Blender object as a material. Then I want to export everything back into Illustrator as SVG. I have attached a pic of my Blender globe with the AI pattern. How can I export the pattern on the globe as a vector graphic? Thought I might be able to use the Trace Image to Grease pencil option for that even though I can’t locate it in Blender.
Are you trying to just trace the square image texture or the pattern as it rests on the surface of your sphere here?
If as a square texture, simply load it up as an image empty and use the trace to grease pencil you are asking for, but that could be done in Illustrator, right?
If you are talking about turning the image of the sphere with the texture into a vector graphic, maybe look at Liero’s script for that - it might be closer to what you are looking for. Ah, I see you already have his script and you are struggling to make it work on a mac - maybe this is a question for blender.stackexchange.com if there is no more input from mac users here. I am curious how this will work out.
Thank you for your prompt response Craig.
Yes, that is correct. I am desperately trying to turn the image of the sphere with the patterned texture into a vector graphic and import it into AI for further editing. The globe is just a simple example of what I want to create. I am aware that I can create a globe with a pattern inside AI. However, what I am ultimately going to create cannot be done in AI. Hence the reason why I am trying to learn how to use Blender for MAC.
As you can see, I have been struggling with this issue for weeks now and am very hopeful that there is a solution.
I pray that someone can figure this out. Thank you!
Are you needing the shading so that you have many colors to trace, or are you going for a flat emissive image of just the two colors in the pattern?
Sorry, I neglected to mention that I don’t need any shading or lighting. Simply the two colors (black & white) flat image.
Honestly, I’d tackle this by setting up emission shaders for the objects and textures and then render to a solid background that is not going to be confused with the two colors of the texture. Then autotracing that render should be good enough - I did that by sculpting metal trays and using a color ramp node to squeeze the shader colors into a two color drawing style and then traced the render in Illustrator for my illustrations on the carton.
The SVG export add-non doesn’t work in MAC as I get an error message. However, I see that the output you got doesn’t include the pattern so that wouldn’t work anyway.
I am new to Blender, so I am not really understanding your suggestions.
Yes, tracing the Blender image in another software is a great idea. That’s a good alternative solution.
Can you please break down in detail how you created your B&W globe with the blue background in your previous message yesterday? I was not able to replicate that. As you mentioned, it’s important that the background be a solid color with no shading or lighting on the globe.
Also, how do I make the image high resolution? What file format should I use to import it into Illustrator for tracing?
Your help is much appreciated! Thank you Craig
I will work up something in a bit.
Tracing is best done with a program that can handle it. You could use Adobe Illustrator instead of Inkscape but I really prefer the trace function in Inkscape myself, even after using Adobe professionally for over a decade.
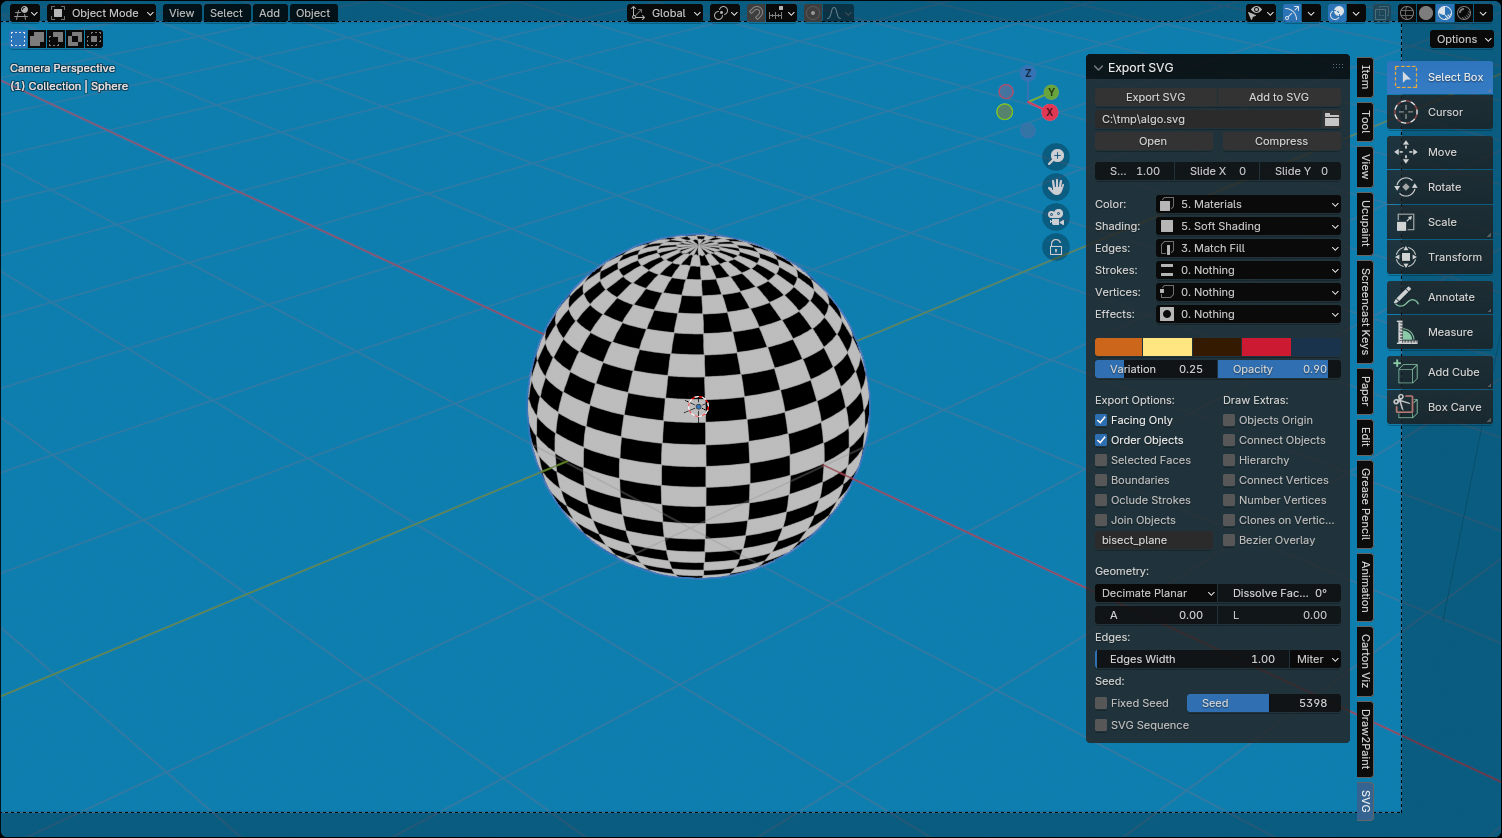
A screen shot first of my setup - I am using a 1024x1024 camera zoomed in on my object. I have an emission shader on my sphere and have a subdivision surface modifier at level 2 to avoid angular edges in silhouette. I chose a checker texture set to UV and scaled up which scales the UV map in relation to the texture which makes the texture smaller in detail. Upper right window is another shader editor for my World shader - just chose a green color there.
I used Eevee because it is fast and there is no detail and shading from Cycles necessary here.
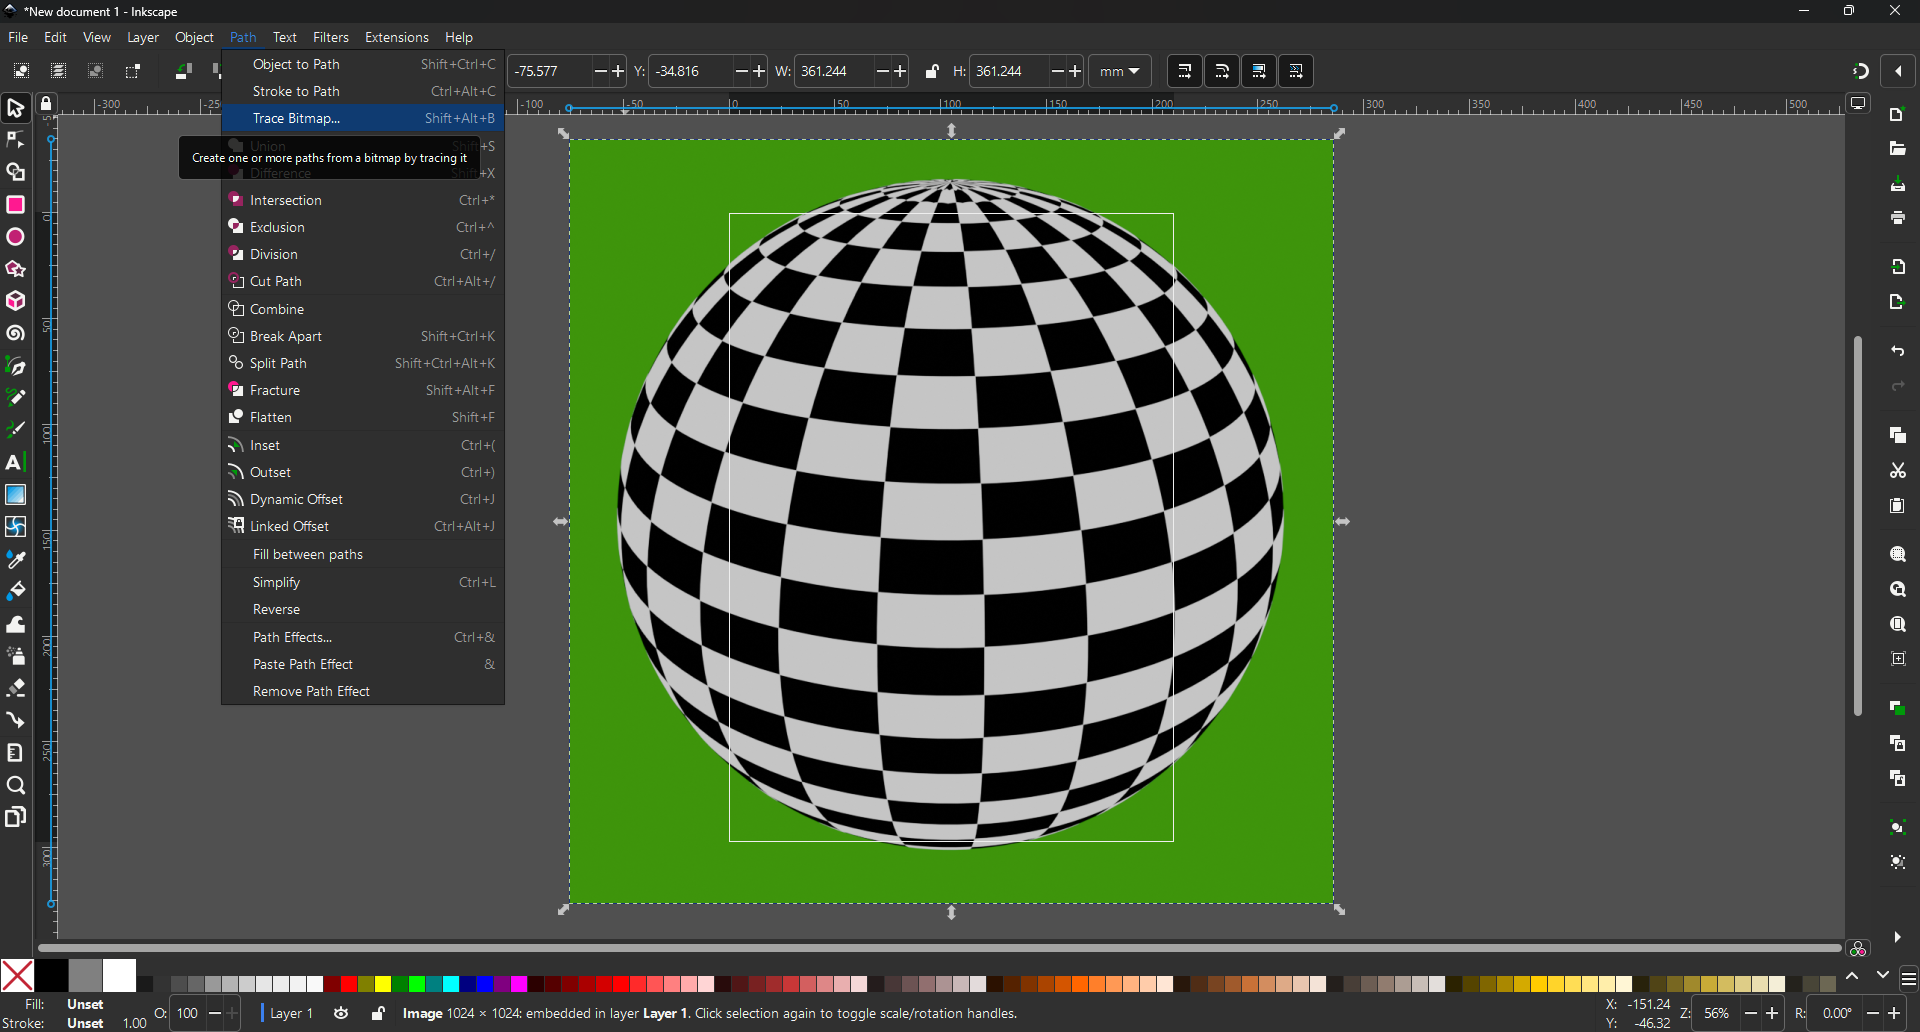
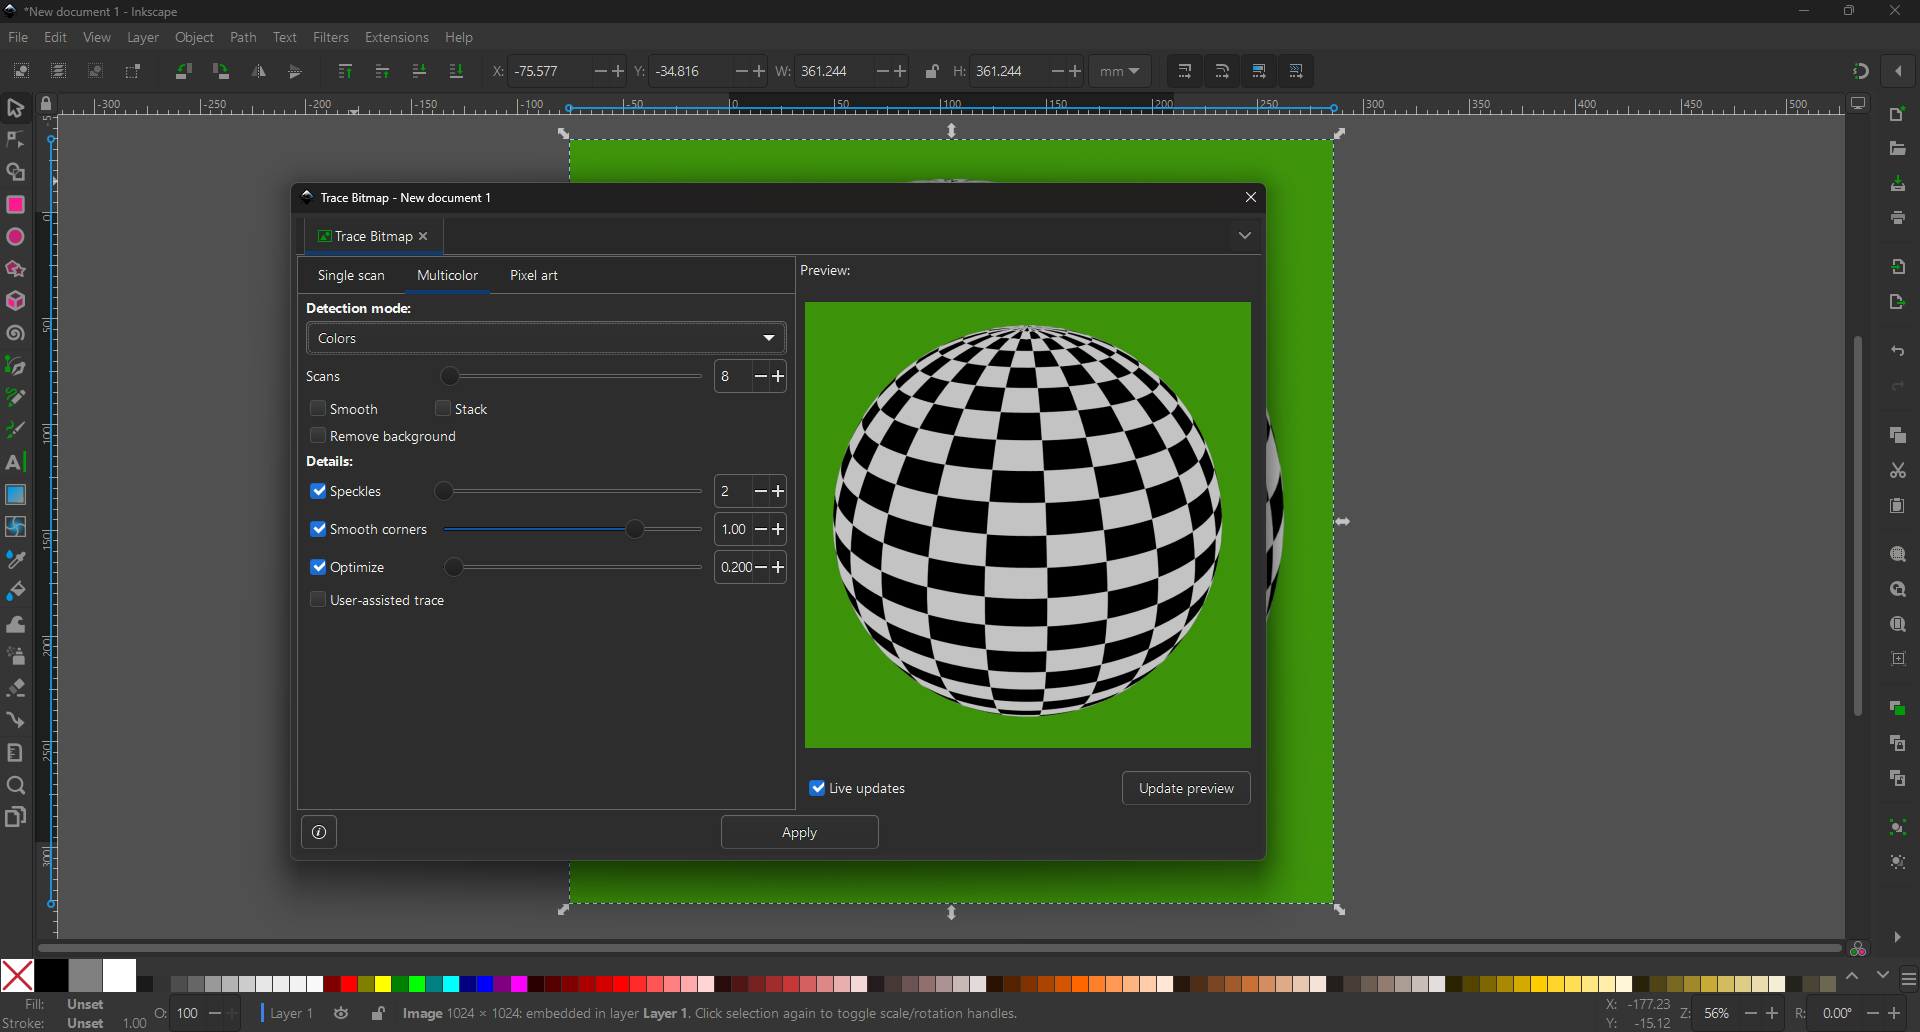
Save your render and import into Inkscape.
Choose Path > Trace Bitmap
Set to Multicolor Detection Mode and choose Color, then apply to trace
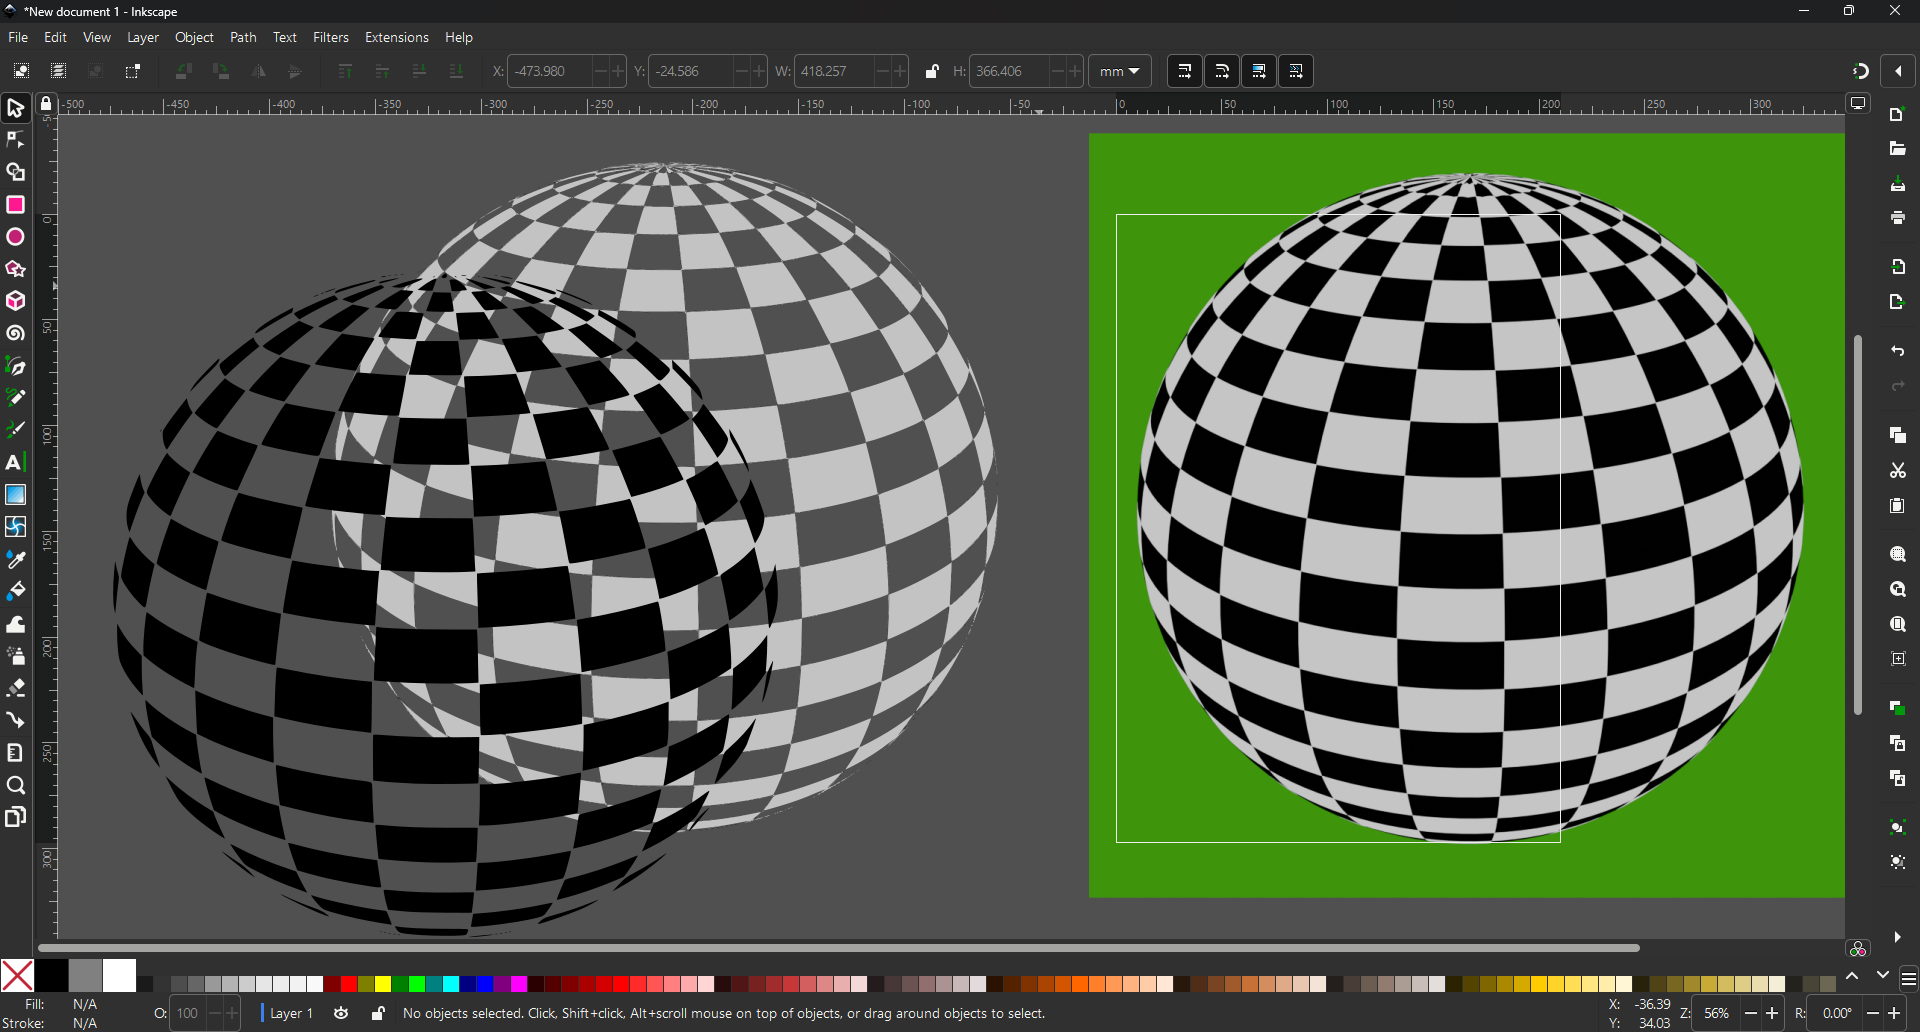
Here is my result after moving the image to the right and deleting the background and moving the elements.
Thanks a bunch for your detailed response! I will follow your instructions tomorrow and let you know if I have any additional questions. ![]()
I have been trying to replicate what you did above. However, in Layout, I don’t see the option to add nodes. I made sure that I am using Eevee. Then I tried going to Geometry Nodes, but got stuck there too when adding a light. Again, I don’t see the option to add nodes in the Data property panel.
I am a real novice at this, but willing to learn. What am I doing wrong?
Thank you!
I don’t know, do you have an object selected? In the Shader Editor, you can use Shift-A to add a node, choose a Texture> Checker Texture.
Here is an example file. You need to learn the basics before you attempt to do things outside of the norm - I say this from experience. Mistakes and struggles are the best teachers, but to learn from them you need to get familiar with the environment you are swimming in.
checker_to_emission.blend (1.2 MB)
Yes that worked.
I agree with you. There is a big learning curve involved and I am not familiar with the environment. Thanks for the link. I will spend the weekend navigating this.
I spent the weekend learning how to replicate what you created above, but I am not there yet. I have a couple of questions listed below regarding nodes.
Why are your background + world output nodes in the upper right hand field and not with the rest of the five nodes located in the bottom field?
I have been researching how I can save my nodes as a group and reuse them on other projects so I avoid having to recreate everything from scratch. When I saved my group of nodes, I couldn’t locate them on my desktop as it never asked me where I wanted to save the group.
What is the easiest way to save and reuse a node group? Do you recommend using an asset editor browser in blender or the Nodes Presets I added to my preferences?
I look forward to hearing from you soon! Thanks