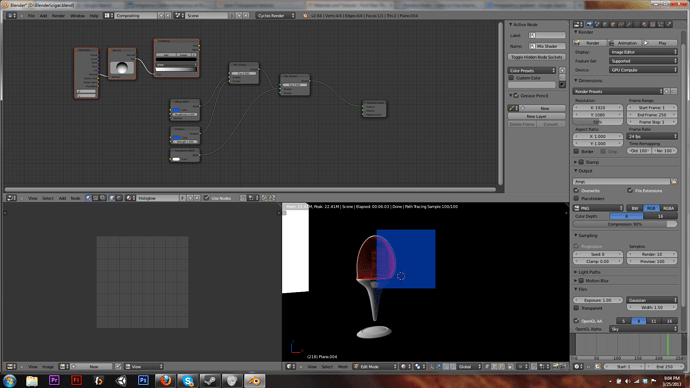
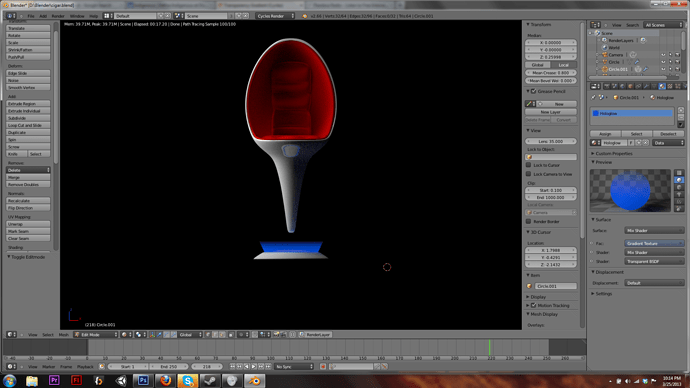
I am trying to fake a glowing light effect by making a cone coming out of a terminal. I want it to go from the 100% alpha to 0% on a emission and diffuse material. However I just cannot get a way for any type of gradient to be applied to the actual material. I set up just a normal plane to try and get the effects real as I have seen planes do a transparency gradient before and I will provide a screen shot, (ignore the background stuff). I am relatively new to cycles and will include my node setup as of right now.
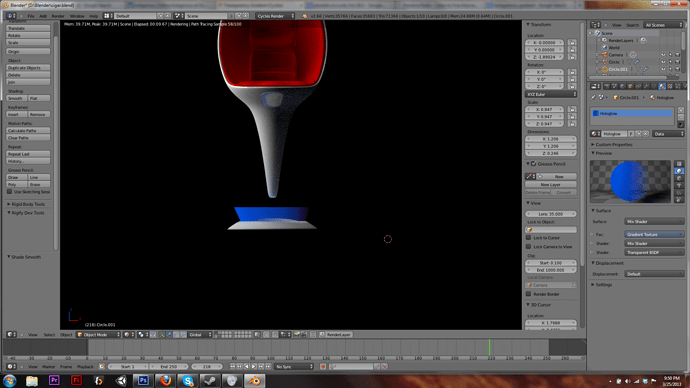
Okay so I got a little further I found the gradient texture now all i have to do is play around with the emission settings a bit and do some glow compositing later on. Is there any way to make it a softer gradient? or maybe switch the direction of the gradient? Ive applied it to the cone but I can not get it to go from blue to transparent on the z-axis.
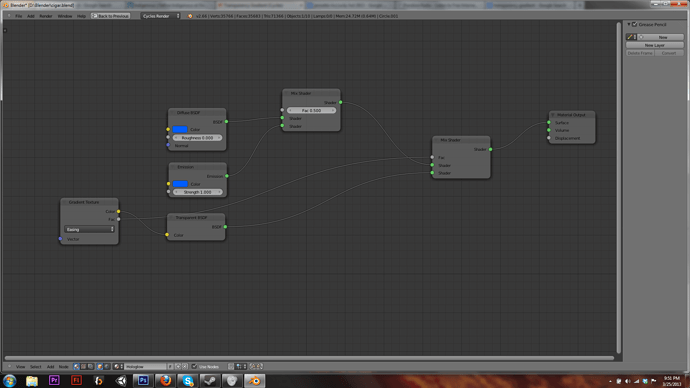
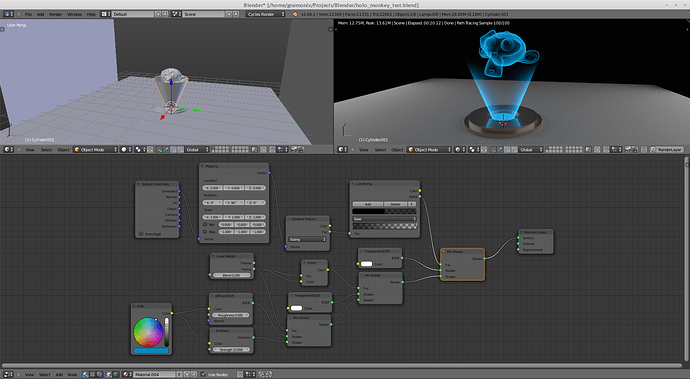
My nodes:
So found out I was smarter than I though tonight, I figured it out and got it working :). Uhm I guess have this closed or solved so other people can see what I did because I know this was a bit of a problem for me. Here’s the final screen. Actually if someone knows how to soften the gradient that would still help 
Why weren’t you in bed? We were working at the same time… 
First, your questions.
To rotate the gradient, you need Texture Coordinates (Input category) and a Mapping node (Vector category). You plug the coordinates you want into the Mapping node to rotate them, and you plug the result into the Vector socket of the Gradient texture… Or else you can just rotate the object in Edit mode so that the gradient is on the right axis, then rotate again in Object mode to make it point in the right direction.
To soften the gradient, you can use a Color Ramp (Convertor category) or an RGB Curves node (Color category).
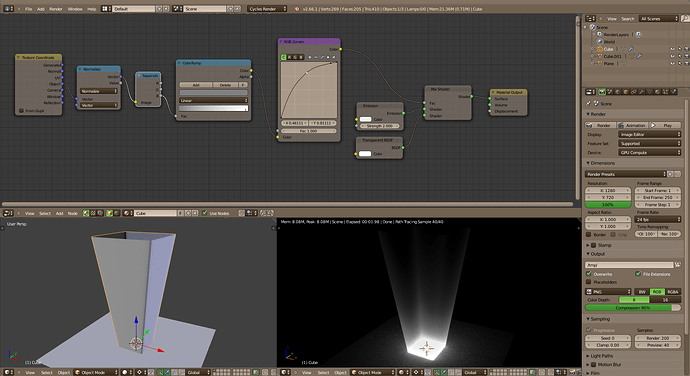
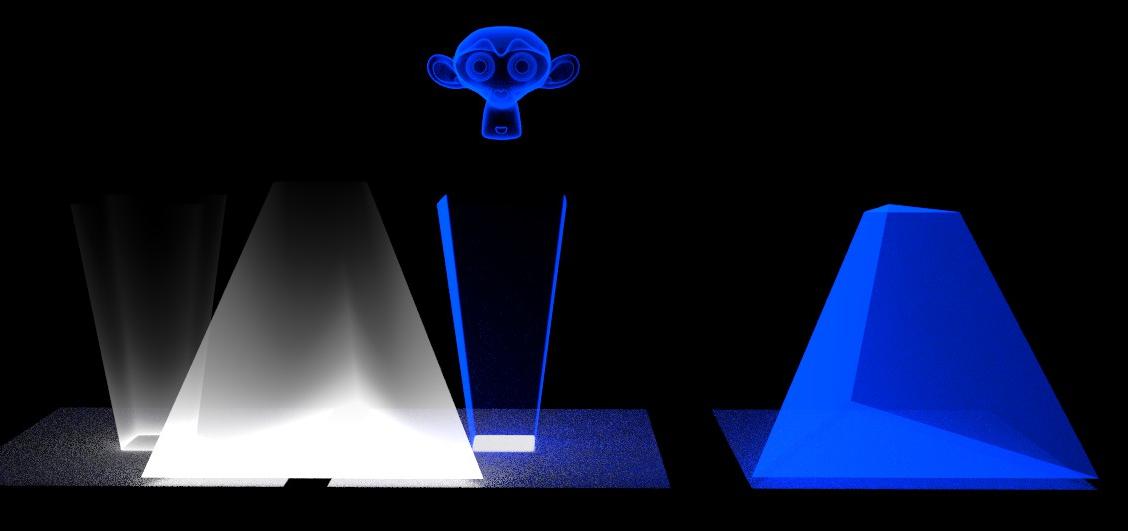
Next, what I did for fun…
In plain English: To produce the gradient, I simply used one axis of the Object’s Texture Coordinates. A bit of maths and that gives you a factor to switch from one material to another one along one axis of any object. The color ramp allows me to select the transparency thanks to the colors I set and the RGB curve controls the “falloff”.
Here is the file to play with: Forum Fake Spot.blend (86.7 KB)
You talked about the halo of a terminal so I assumed a screen. I made a square with round corners and that’s also the shape of the spot “cone”.
I like the result but I wouldn’t use it any way. This isn’t the way the light of a spot behaves in reality and I foresee troubles if objects intersect with this fake cone.
I was in bed…working haha.:eyebrowlift2:
Yea I figured out the mapping coordinates I just couldn’t post a screen last night for whatever reason. In terms of the gradient falloff thank you I’ll apply what you said right now and see what kind of results I can achieve.
What would you suggest as alternate to the spot and kind of hologramish glow, kind of like a projector glow around the lense. Here’s the screen though so you can get a better idea of what I’m doing and a reference pic 

Im trying to make the chair have a feel like it is floating on that little pad with the sort of glowing futuristic light like the star wars image.
Yes that is closer to the effect I was looking for I’ll try out your node setup and see if it looks better, thank you. 
That material works quite well with the feel im trying to get thank you I’ll open up a WIP soon on this piece so I can get some critique. Thank you for all your help everyone!
OMG – this is exactly something that I was searching for! Thanks so much!
Could you attach the final ready version of the project here ?
What? This post was necroed from 6 years ago why would I have the files and why would I post it?
