Hay,
Can someone help me to reach the material like in the picture?
Its important that its kinda transparent.
Hay,
Can someone help me to reach the material like in the picture?
Its important that its kinda transparent.
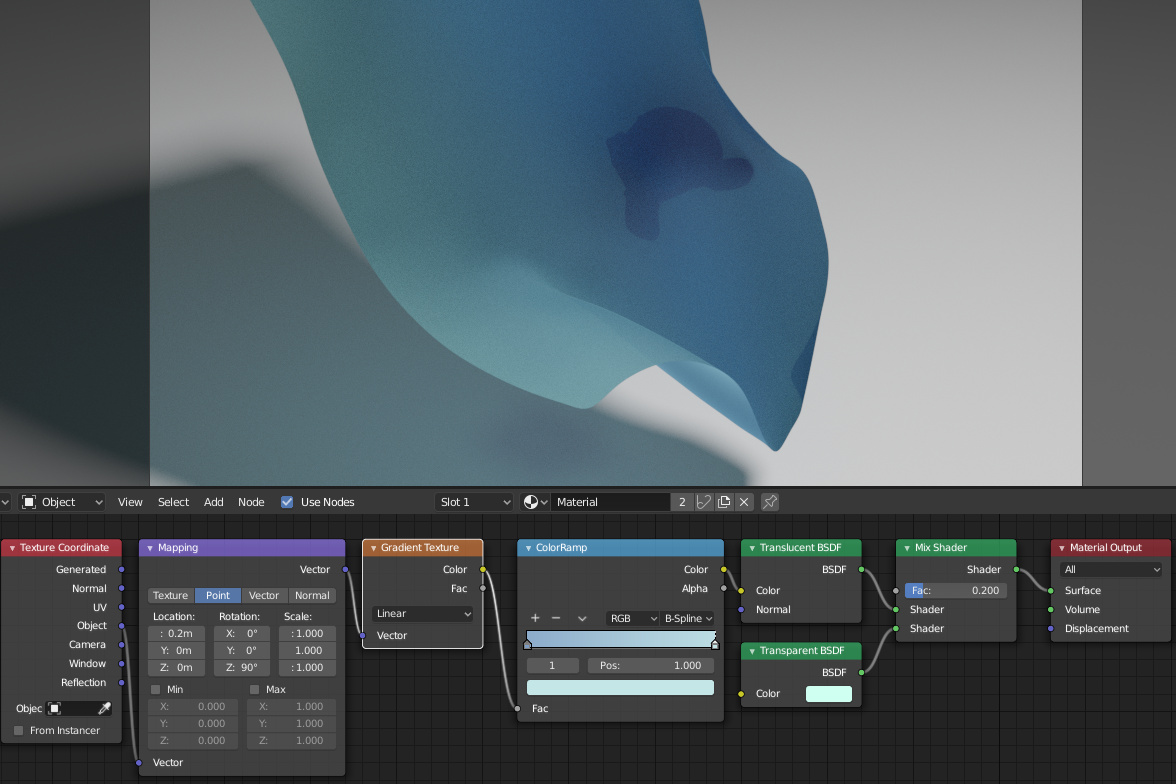
Material seems to have translucency, so you can try mixing translucent and transparent shaders. Something like this:
Thank u sir, ill try that.
If I try to consider how materials “work”, I come up with this line of thought, in order of mix shaders:
Diffuse and translucency, where color of translucency can be made more saturated and dimmer (HSV node) as more color is picked up and more energy being absorbed (darker). Fac is some percentage. This corresponds to the mixing of diffuse contribution for front and back side.
Mix 1 with refraction whose normal is geometry/incoming (for thin surfaces). You can also replace refraction with fully transparent, but you loose the ability to have specular effects from the other side. Fac is some percentage (0 to disable it).
Mix 2 with glossy, where fac is fresnel. However, for thin surfaces, you need to make sure the backface produce the inverted IOR value - previewing the fresnel node should produce the same result for front and back face.
Mix 3 with transparency. Use a mix of viewing angle and texture (such as knitting or weaving). The angle is needed so that the holes of the pattern have no effect when viewed at grazing angles as the real thing would have thickness. As this has nothing to do with going into the material or specularly bouncing off it, you should use layer weight/facing instead of fresnel for this effect.
— Very optional below —
Mix 4 with modified colored transparency again, but this time the light path/shadow ray should be used. Now you get additional control over how shadows work, which can be a thing if you want to do fake glass.
Mix 5 with diffuse using light paths for the fac. This diffuse shouldn’t have anything plugged into normals, and is generally used to control how global illumination interacts with the material. Sometimes the full realistic definition (steps 1-4) can become very noisy and hard to control, and this simple diffuse allows you to help it. It’s fake as hell, but it can really help out.
Mix 6 with fully white transparency (last time, promise :D). Here you will use light path/camera ray multiplied with geometry/backfacing as a fac. This is pure utility, and allows you to do backface culling for rendering.
Someone please let me know if I managed to screw this up. I know I don’t cover multiscatter energy conservation, fresnel reduction, microroughness, or any sort of absorption texturing.
But I think this cover a fairly complete set of “how you should mix shaders” thought process, at least for thin surfaces. Surfaces with thickness would look a bit different.
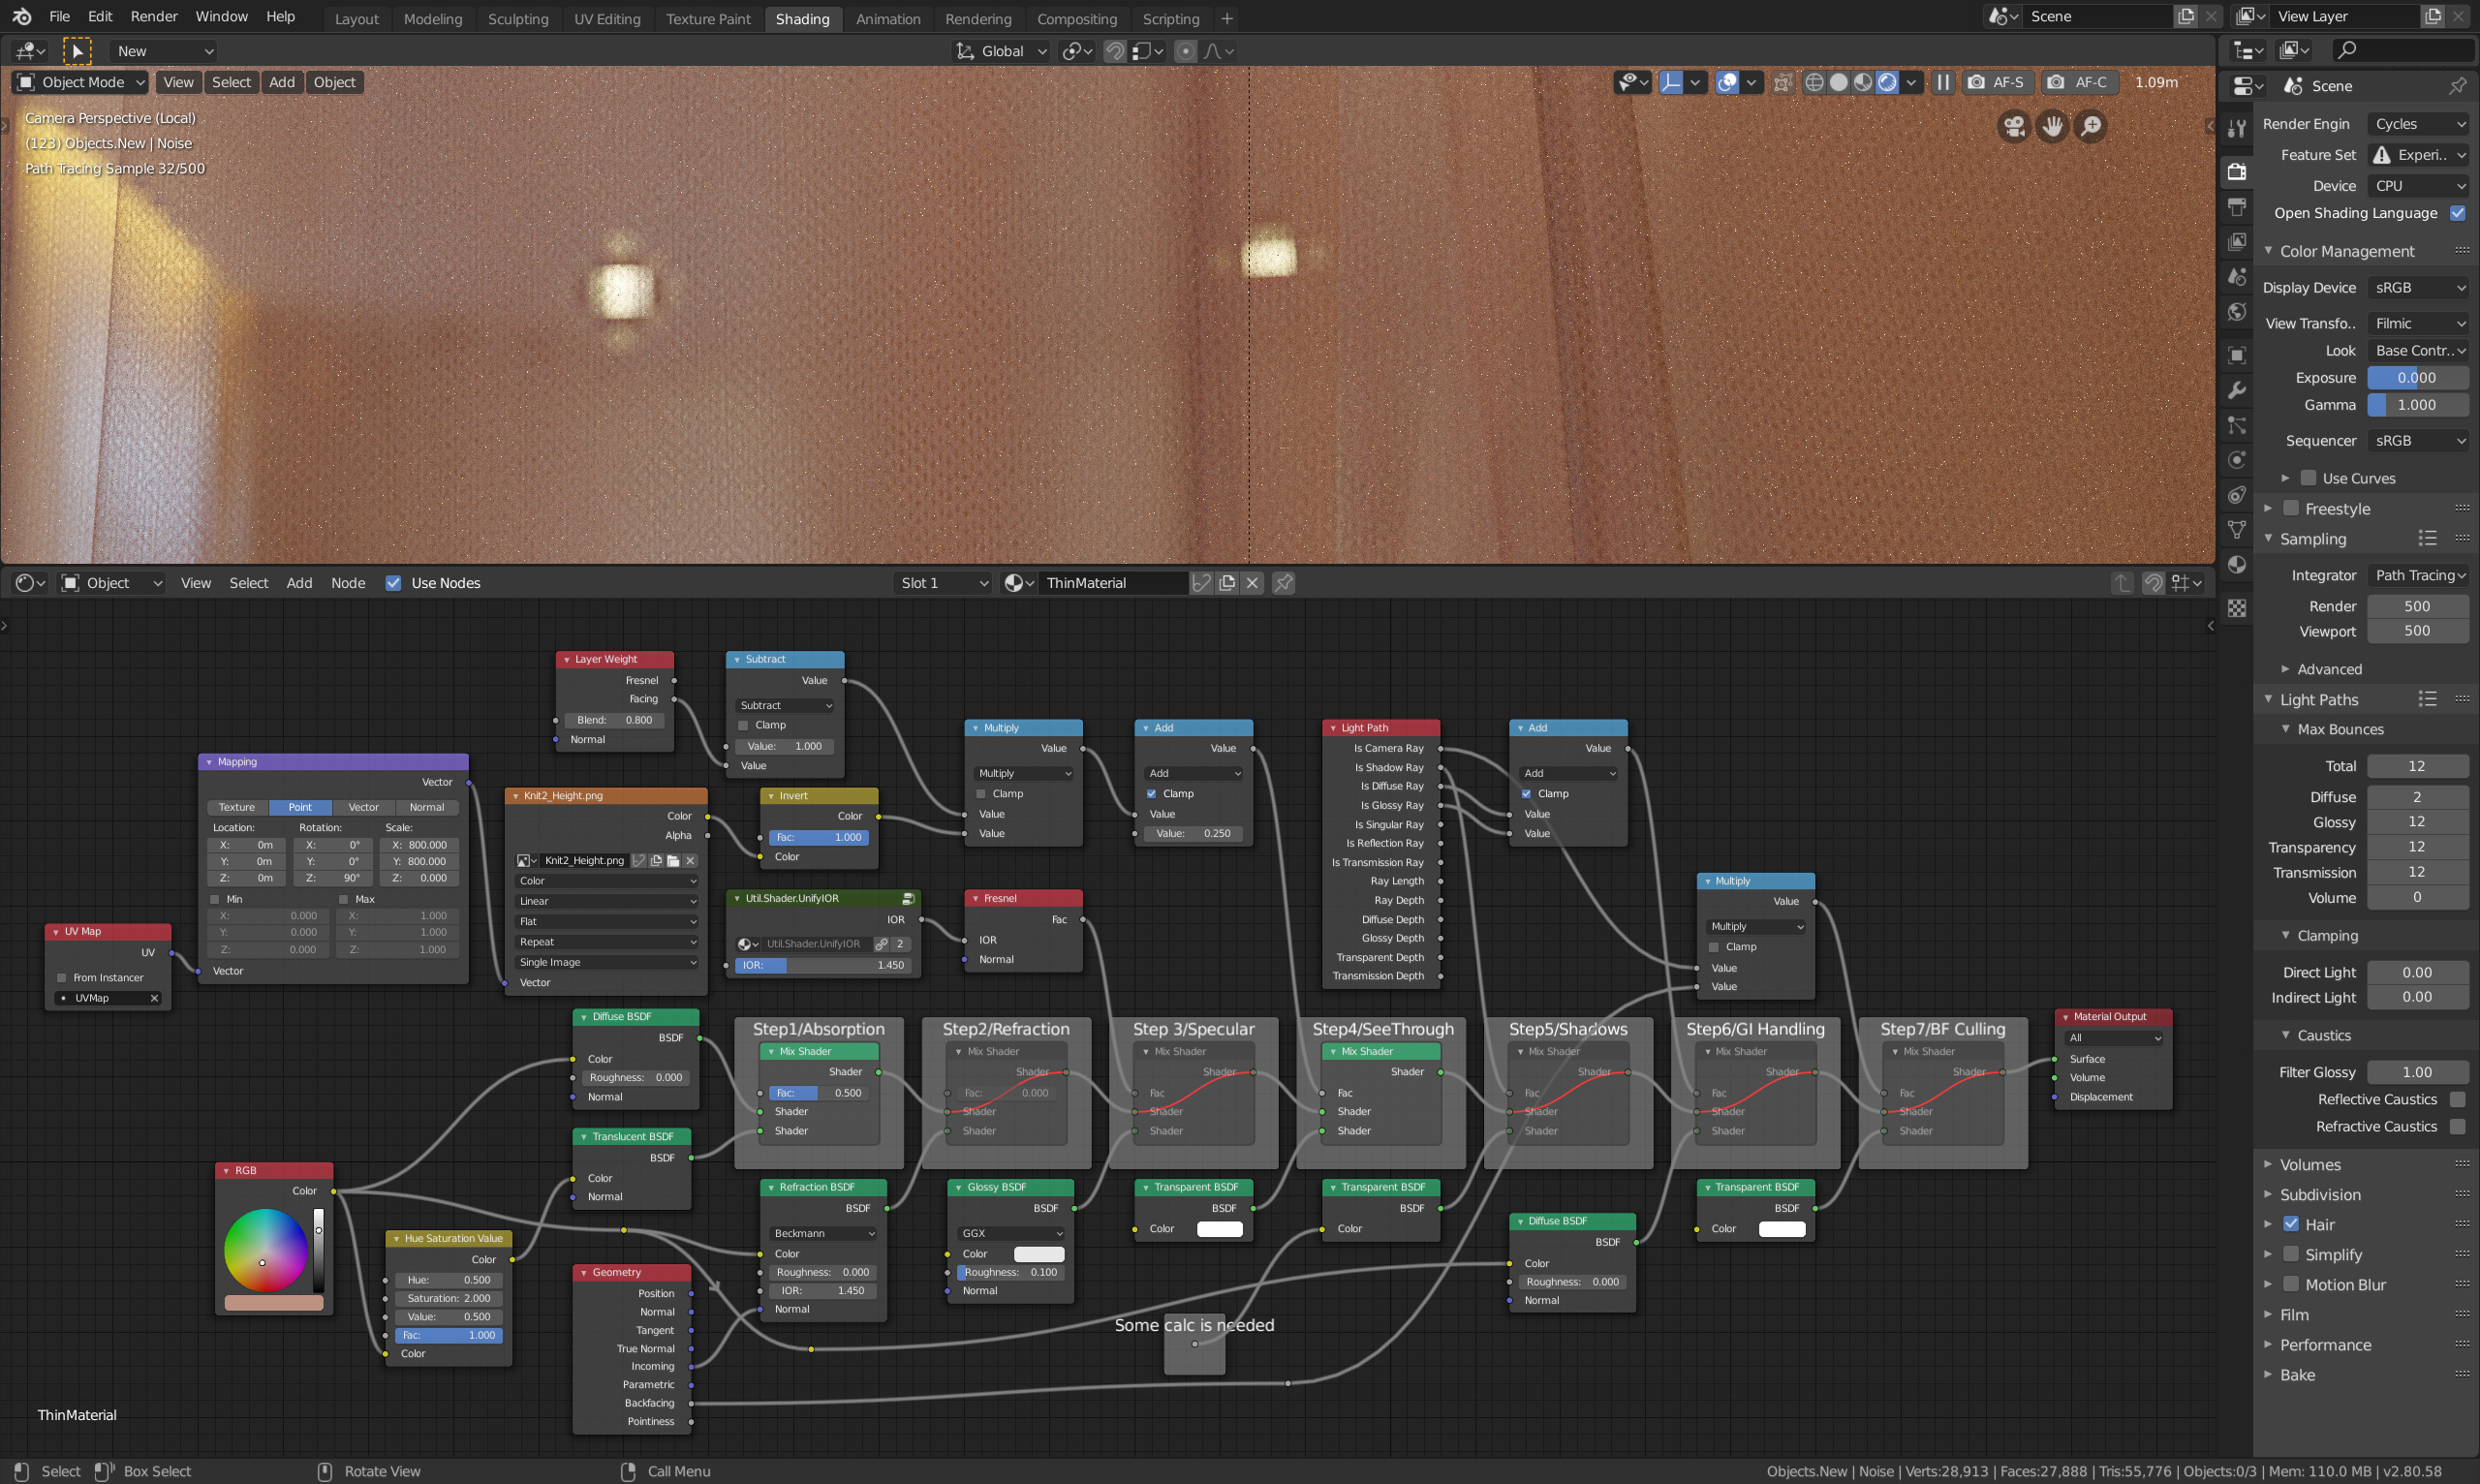
As seen in the snapshot below, any part of the shading step you feel is not needed, you can just mute the mix shader - just make sure the added effect is in the second slot:
Hi CarIG, can you share the blend file and unify ior node ? 
I don’t have the file available anymore, it was just my idea on how to stepwise evaluate shading properly. As for UnifyIOR, the idea is this: