Hi,
I am making a cross road and would like to know how I could solve the problem I have with the seam between the 2 roads?

any idea?
Hi,
I am making a cross road and would like to know how I could solve the problem I have with the seam between the 2 roads?
Show us:
-nodes setup
-uvmaps
You may need to add another uvmap over the seam, and blend the textures there…
I have basically 3 pieces of meshes: see attached picture.

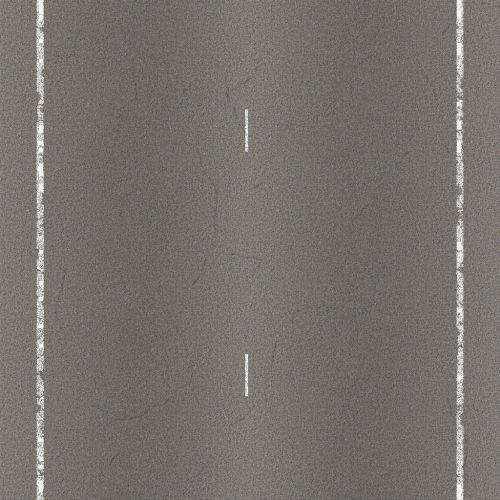
Here’s one way you can set up your road tiles to avoid seams.
If you extend the no. 1 tile to the center of the intersection, you can mirror the piece to complete a 4-way intersection. But also if you spend a few more minutes on the texture, you can make it seamless with a 180 rotation, which will be less noticeable.
The benefit of modifying your tiles rather than fixing through masking/UV solutions is that you can avoid having multiple special case materials and node groups for each piece type. I.e. it will be more difficult to arrange incorrectly once you get your pieces created/recreated. And I realize you’re posting on the Mat/Tex forum, so perhaps this isn’t going to be a proper solution for you… just thought it was worth mentioning.
Also hinted at in the image is the idea that more complicated street layouts will require additional tiles, but I’m sure you know that.
Thanks for your answer, next time I definitely proceed differently not to encounter these barriers.
For now I wonder about a kind of workaround, patching trick which could be useful when these kind of seam problem happen.
Have a look at this blend. You could use two UV unwraps (and a mask to blend them) in order to cheat the seam. It doesn’t match the proper look of an actual street and intersection, but isn’t as obvious as the harsh line.
When you redo this, you can certainly do a higher quality job than I’ve done, especially if you use a handpainted mask, rather than gradient. The most important thing to remember is that you’re combining two seamless texture configurations with a mask.
Hope that helps.
good idea, I will check your file.
I checked the file carefully.
I don’t know how to do the UV Map inside the object data, I think you created from there a combined map from 2 separated mesh called “intersection”.
Do you know where I could find some tutorials or so in the net showing how I can reproduce that UV Map inside the object data?
It’s not very complicated, but can be unintuitive if you’re just learning it. This BSE answer uses the same basic technique I used in the file I sent you, albeit for a different purpose. Here’s a video doing another similar-but-different process with the same technique. It’s really as simple as hitting the plus (Add UV Map) button and manipulating the second map to be seamless where the first one is not.
Merging your objects together, temporarily, can be helpful since you can see all the necessary UVs at once. You may find this addon useful to that effect…
Hmm, the thread is acting funny and not updating after my response. Please excuse this bump/doublepost…
Edit: even still, the reply count on the face of this thread doesn’t equal number of posts - 1. I wonder how I managed to botch that.
Thanks for the links, I am checking them and what I understood from it and your blender file is that you must have baked another texture at the seam and used a combination of the 2 finally.
Not quite. I purely manipulated the UVs while using exactly the same base texture. Sorry to confuse you with the baking references.
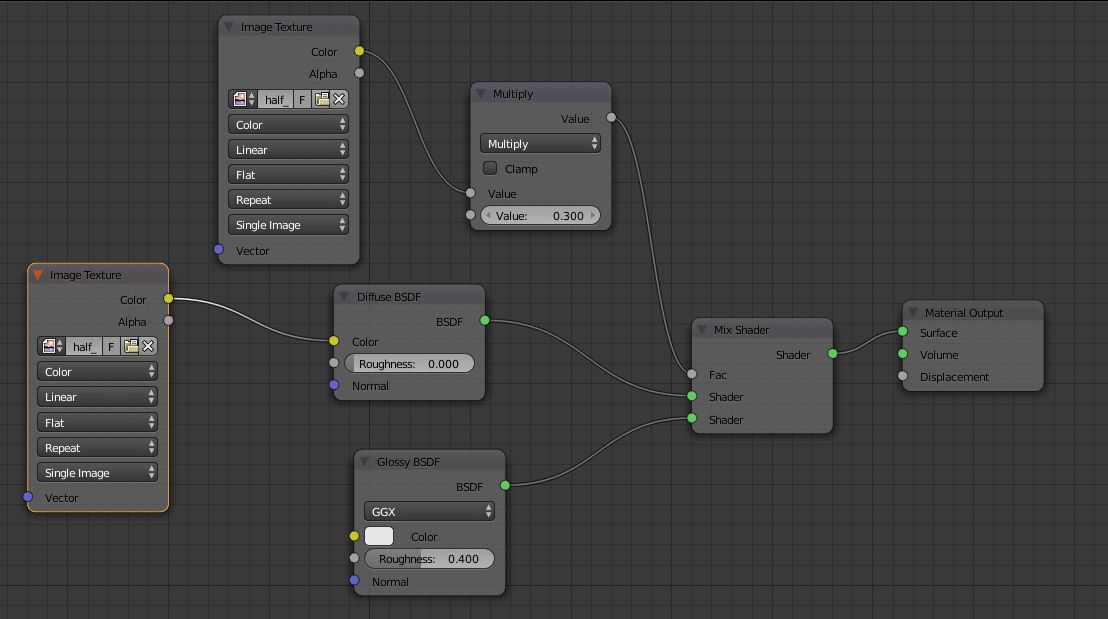
If you’re not using Node Wrangler, you should be. Ctrl + Shift + LClick the images and mask and you can see the relationships between nodes clearly. Here’s a breakdown anyhow:
It’s just the same texture arranged two different ways, as to be seamless where it matters, and then mixed together with a mask. The mask can be handpainted or procedural, which I’ve done.
Not to confuse you further, but this solution really is inelegant and makes adding new, future road tiles problematic. I still stand by my first suggestion where each tile has it’s own texture, which can be baked from the original image, but made to be seamless in all places. This is an interesting option for you to learn, and it can help you cut corners if you need to rapidly get visuals rendered out, but it’s not ideal.
Ok, I got it now, thanks Derek