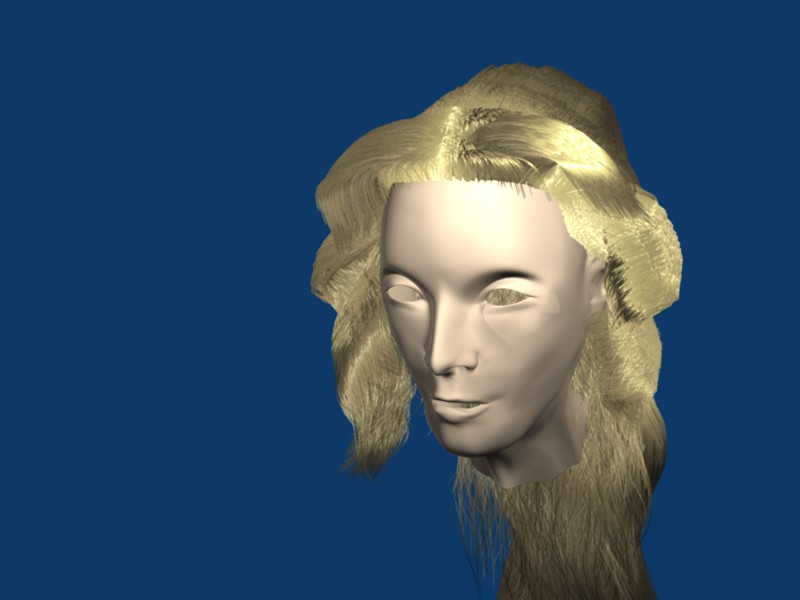
I never thought I’d become a virtual cosmotologist. Just shows anything’s possible in Blender.
wow. WOW. WOW.
that is cool. you can have the mesh deflect the hair if the hair is not static.
click deflect (next to fields).
Thanks, remix_eyeballs. I just figured out how curve guides work in making hair. I was pretty excited to get that kind of result with just 7 guides. I’ll use your deflection suggestion in the future.
I’ll update this thread when I have any new significant results. Right now I’m working on braids. I think I’ll have something to show in the near future.
no offense but if my gf came home with that haircut I’d send her back. of course, it’s lot easier in real life to fix… just kidding around, good work
EDIT: 500 posts baby. where’s my cookie?
Oh, thanks, NodeRanger. Trying to get a cookie off my thread. That’s very bad form, you know. 
erm… how you do that?
poke-poke
It’s not nearly as difficult as it looks. I gave a basic explanation of my understanding of curve guides and how they work on hair in another thread. I quote myself:
I’ve also torn my own hair out trying to figure out how best to do the hair-do-ing. Turns out that curve guides alone are the best option, but knowing how to use them is not well explained. (I’m going to assume that you’ve already been to the blenderwiki and know all the settings.)
First, when you make a curve guide the most important setting is the first one ‘MinDist.’ That’s not intuitive. It should read ‘Beginning of influence.’ Set the start of your curve guide, the first bezier vertex, right in the middle of the surface of the region you want to affect. Then set your ‘MinDist’ to the area of influence that you want.
Second, when you use a curve guide, it is the guide, not ‘Life’ that controls how long your hair will be. To prove this to yourself, set Life very low. I pulled a long strand of hair out with a setting of 2. Now, you can shape the curve guide any way you want, but the strand is going to only go to the first and last points of your curve guide. Set the value to 100, say, and it’ll look better, because it now has more resolution. That’s what life does when you’re using a curve guide; it gives the hair more resolution.
Third, set not only life very low, but also any other settings. In fact, set everything to zero till you have the shape you want. Then, use only one click for ‘norm’ and, optionally, one click for ‘random.’ Random will really screw up a long strand of hair.
Fourth, don’t worrry about gravity settings and stuff until you have something close to want you want. Toggling ‘Vect’ on the right side of the particles ‘Display’ panel has interesting results. Pay attention to your “patches” when it’s toggled off. You’ll see alot of what I’m talking about when playing with the ‘Life’ setting.
Fifth, break it down and keep it simple until you know what you’re doing. When you start throwing in more than one curve guide, use ‘Additive’ to mix their results. You can also put regions of your scalp and their controlling guides on different layers in order to keep their influences totally seperate.
Unquote myself.
Furthermore, you can get hair in any shape by first making a mesh pattern, selecting the edge you want as a curve guide, and then using the Mesh to Curve script, available in Edit Mode, to create your nifty quide. I created the curls and twisting ponytail from a single 3-vertex tube that I tweaked up.
Pay attention to how MinDist and MaxDist interact when making complex guides. Also, though I didn’t think significant enough to post an image, adding just .002 random influence will give you all the random strands of hair you need for a very convincing look.
I wanted to get a few more cool wigs, including a braid, before I went all tutorial, but since you asked, there you have it. Maybe now someone else will beat me to it. Feel free! 