Trying to combine two images / alpha masks to create a "height map" in Blender

Hey.

I’m trying to do something in a particular way, which there is good reason for.
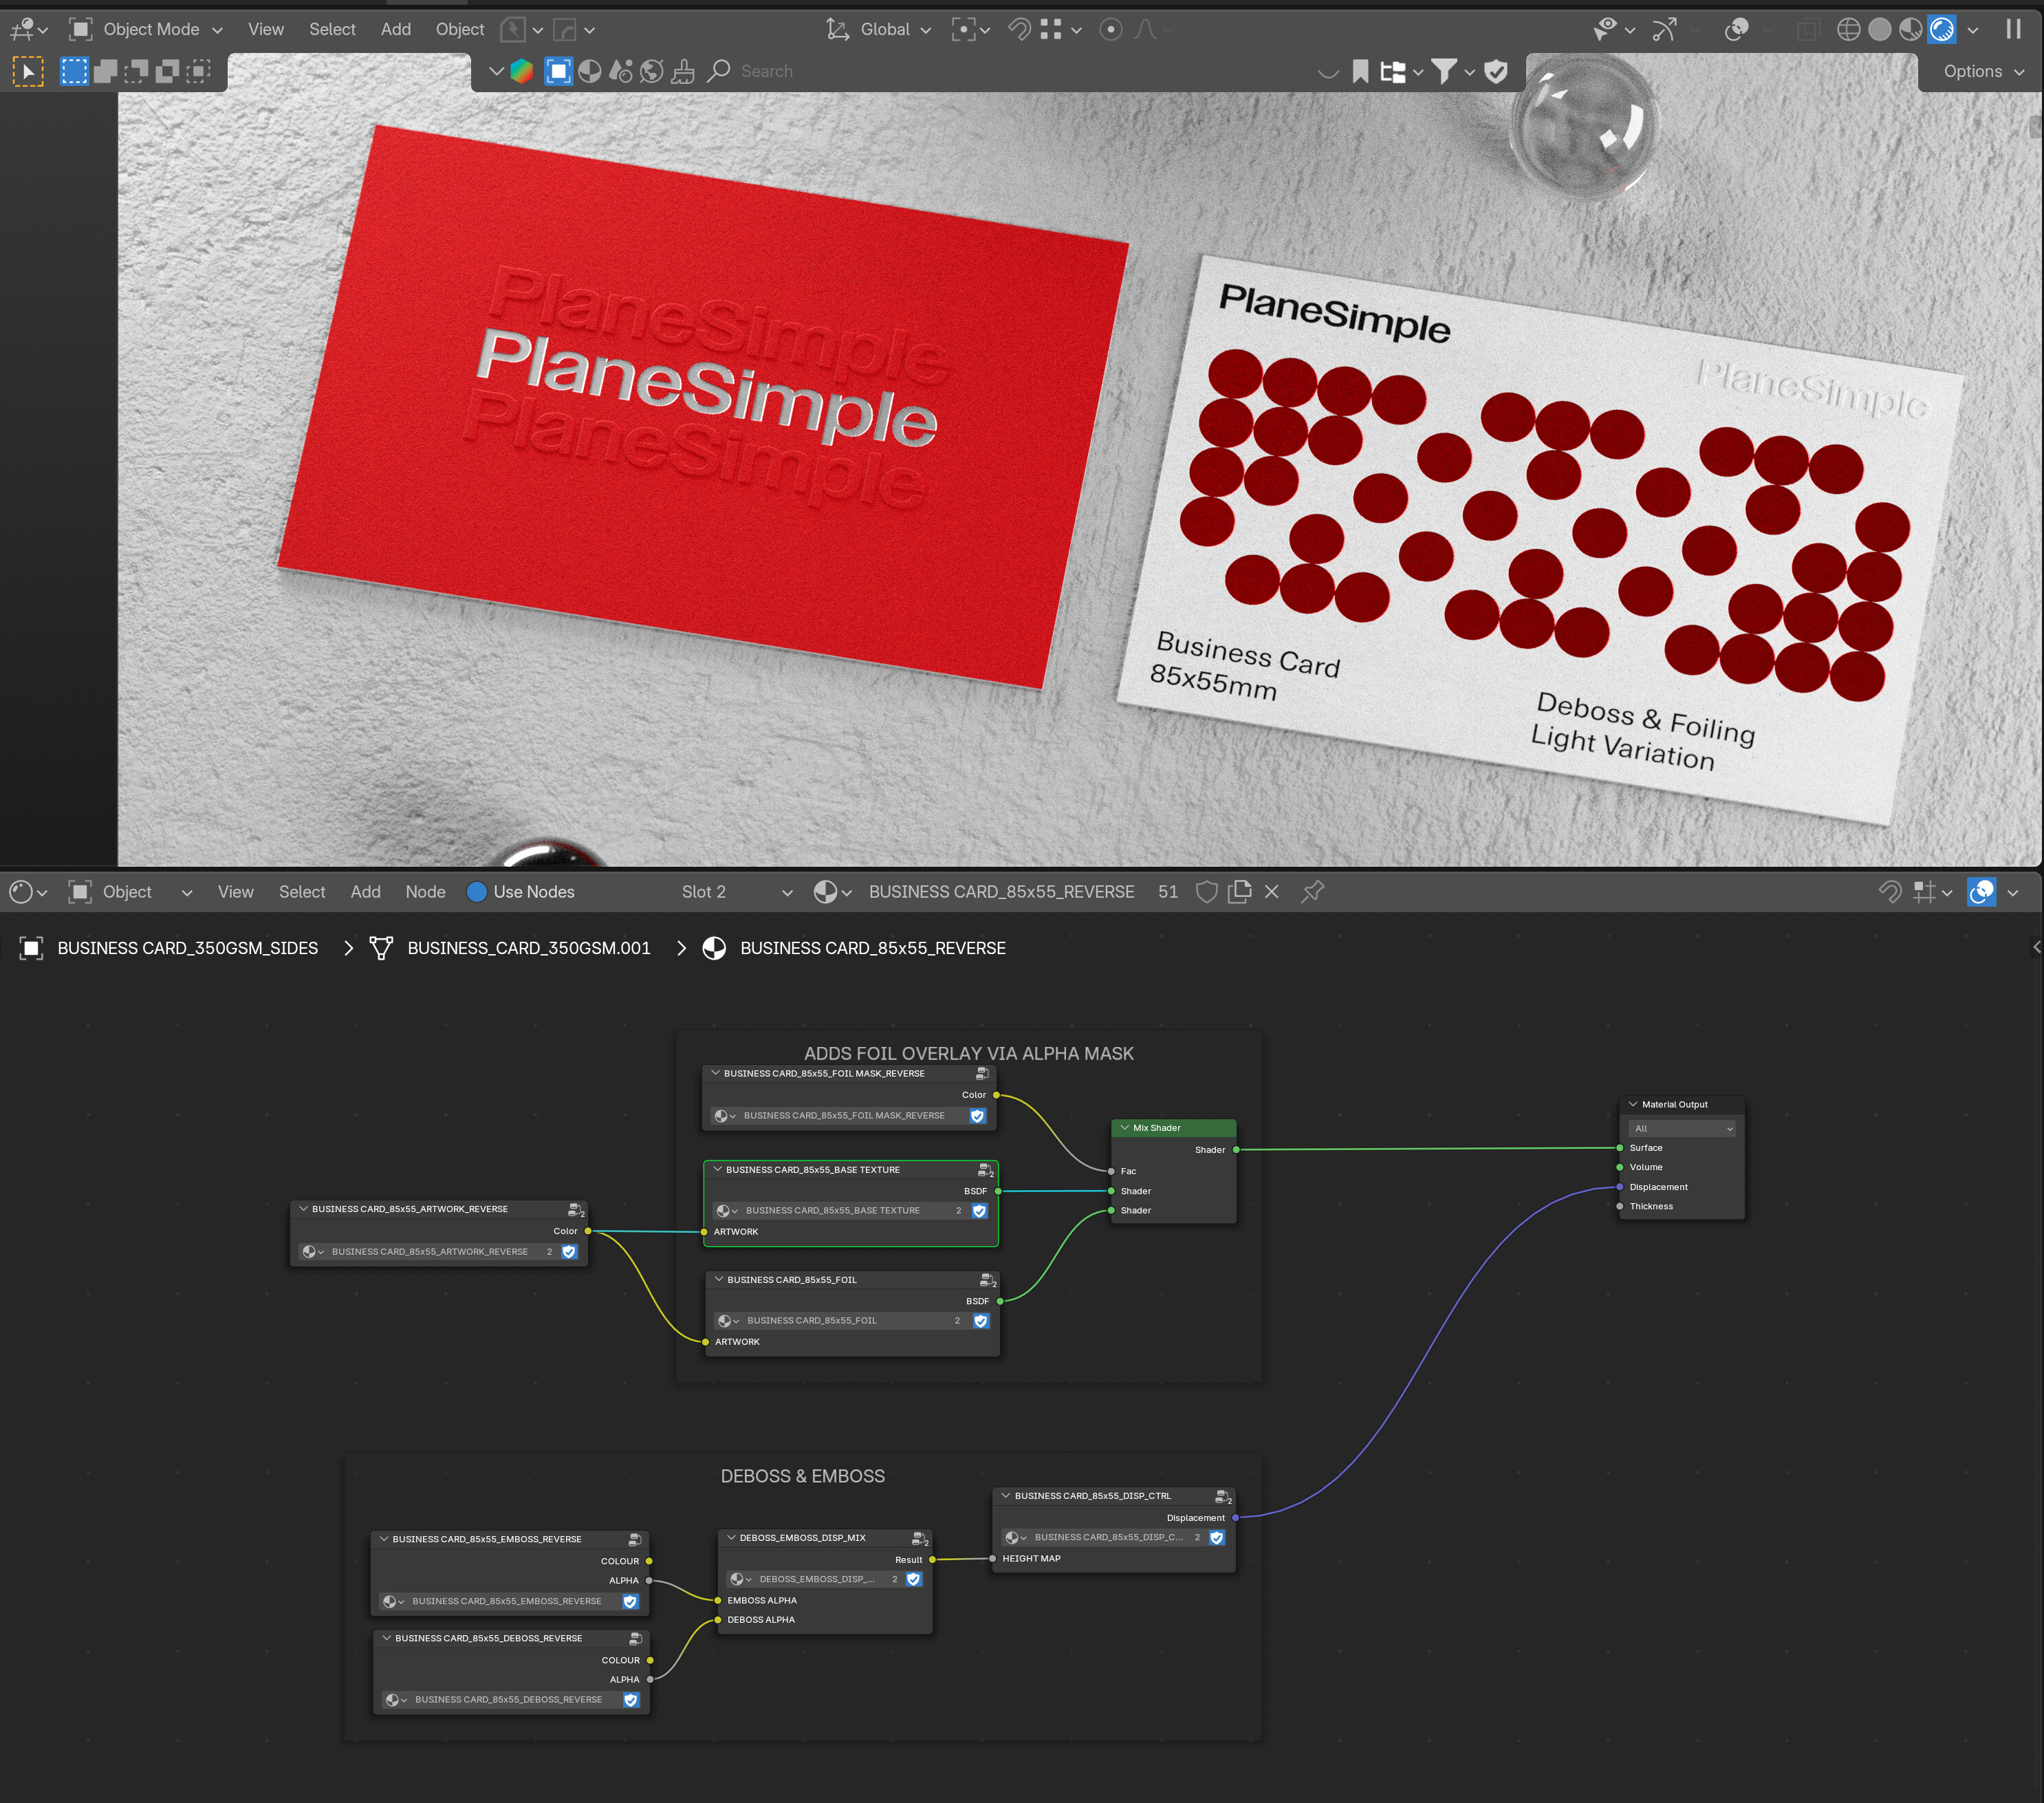
I have a setup here with a business card in it, as an example. There are various things going on. One of them is that I am combining two alpha masks to create a height map, which is then controlling the displacement on the business card.
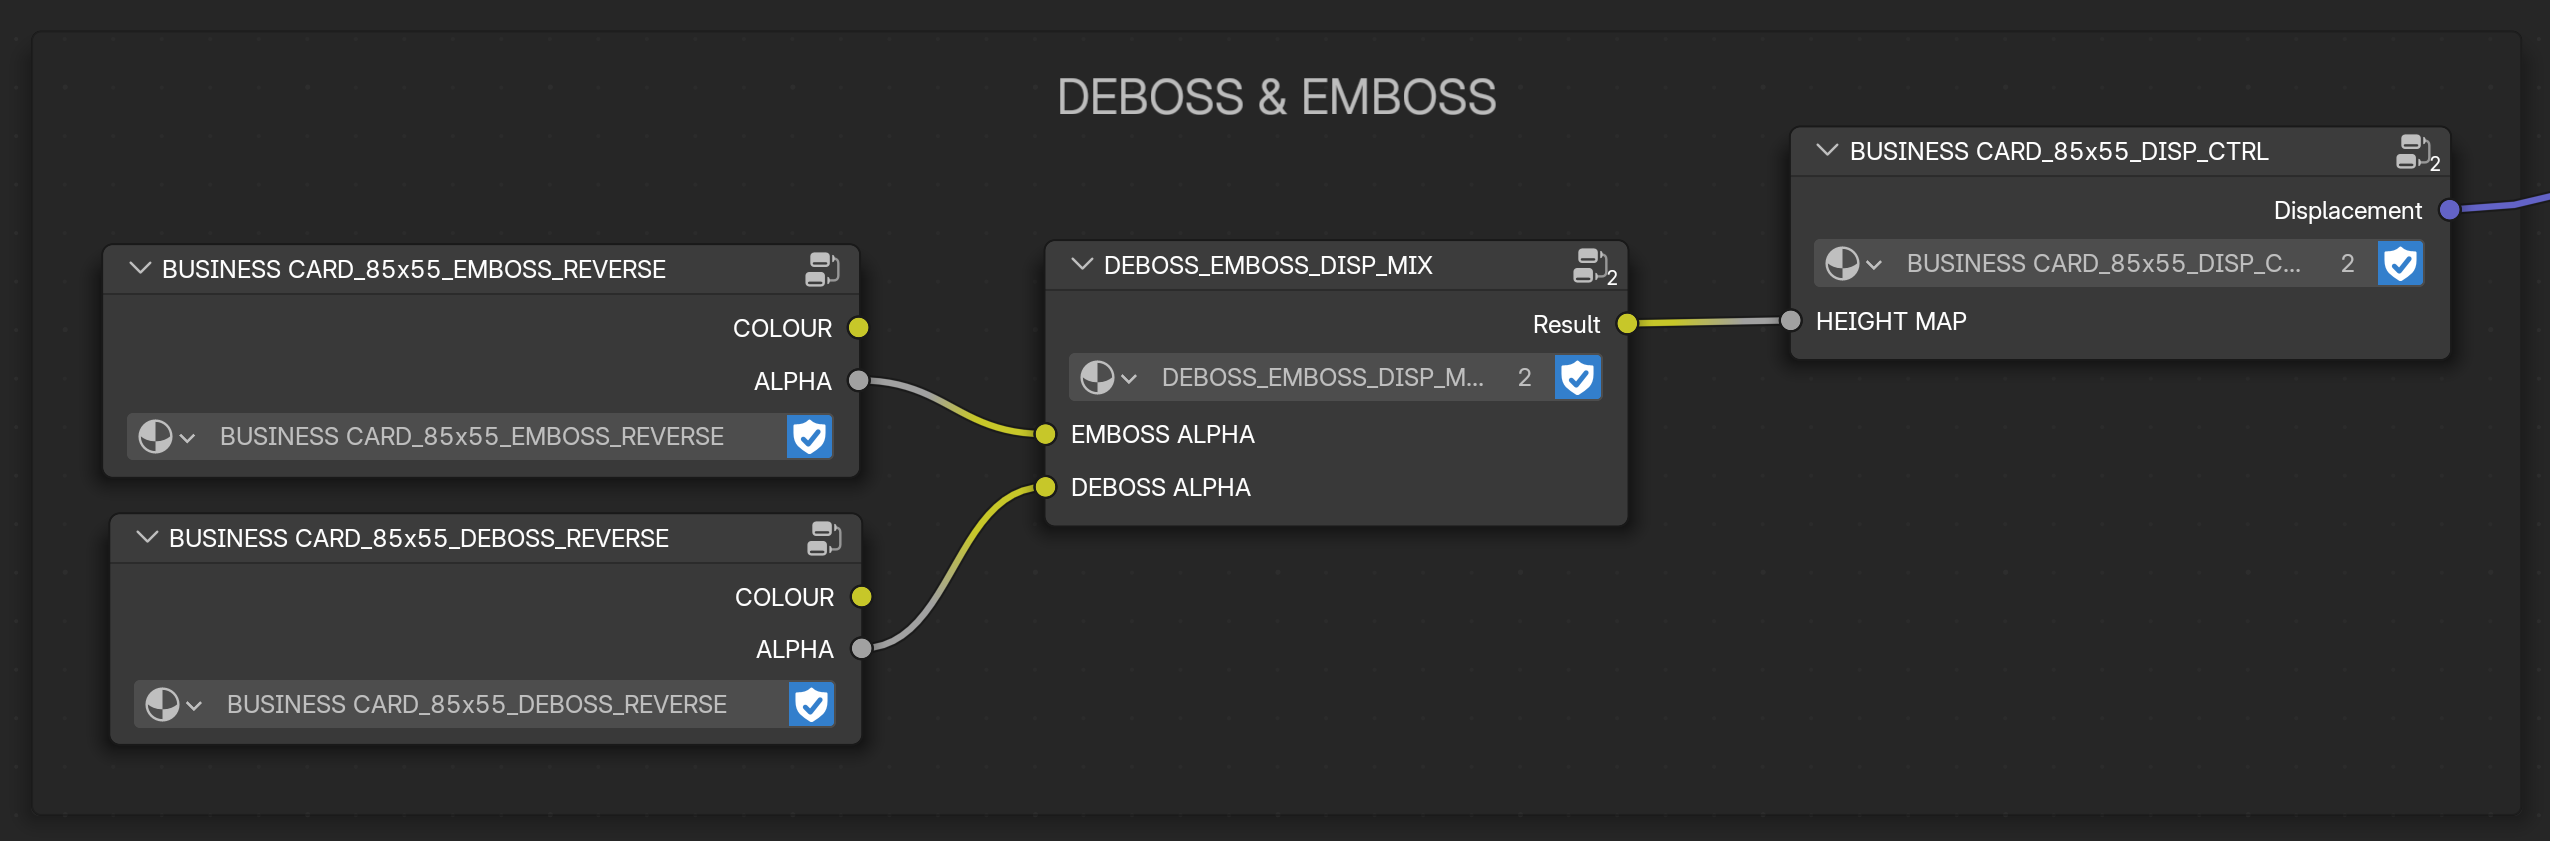
Below is the output of the DEBOSS_EMBOSS_DISP_MIX node, which is displaying on the card on the right and which seems to be working as intended, however the colours aren’t quite correct.

i.e. The grey background isn’t the right mid-level (#7F7F7F). There must be a better way of doing this, which will also give me more control over the black and white levels of the masks?
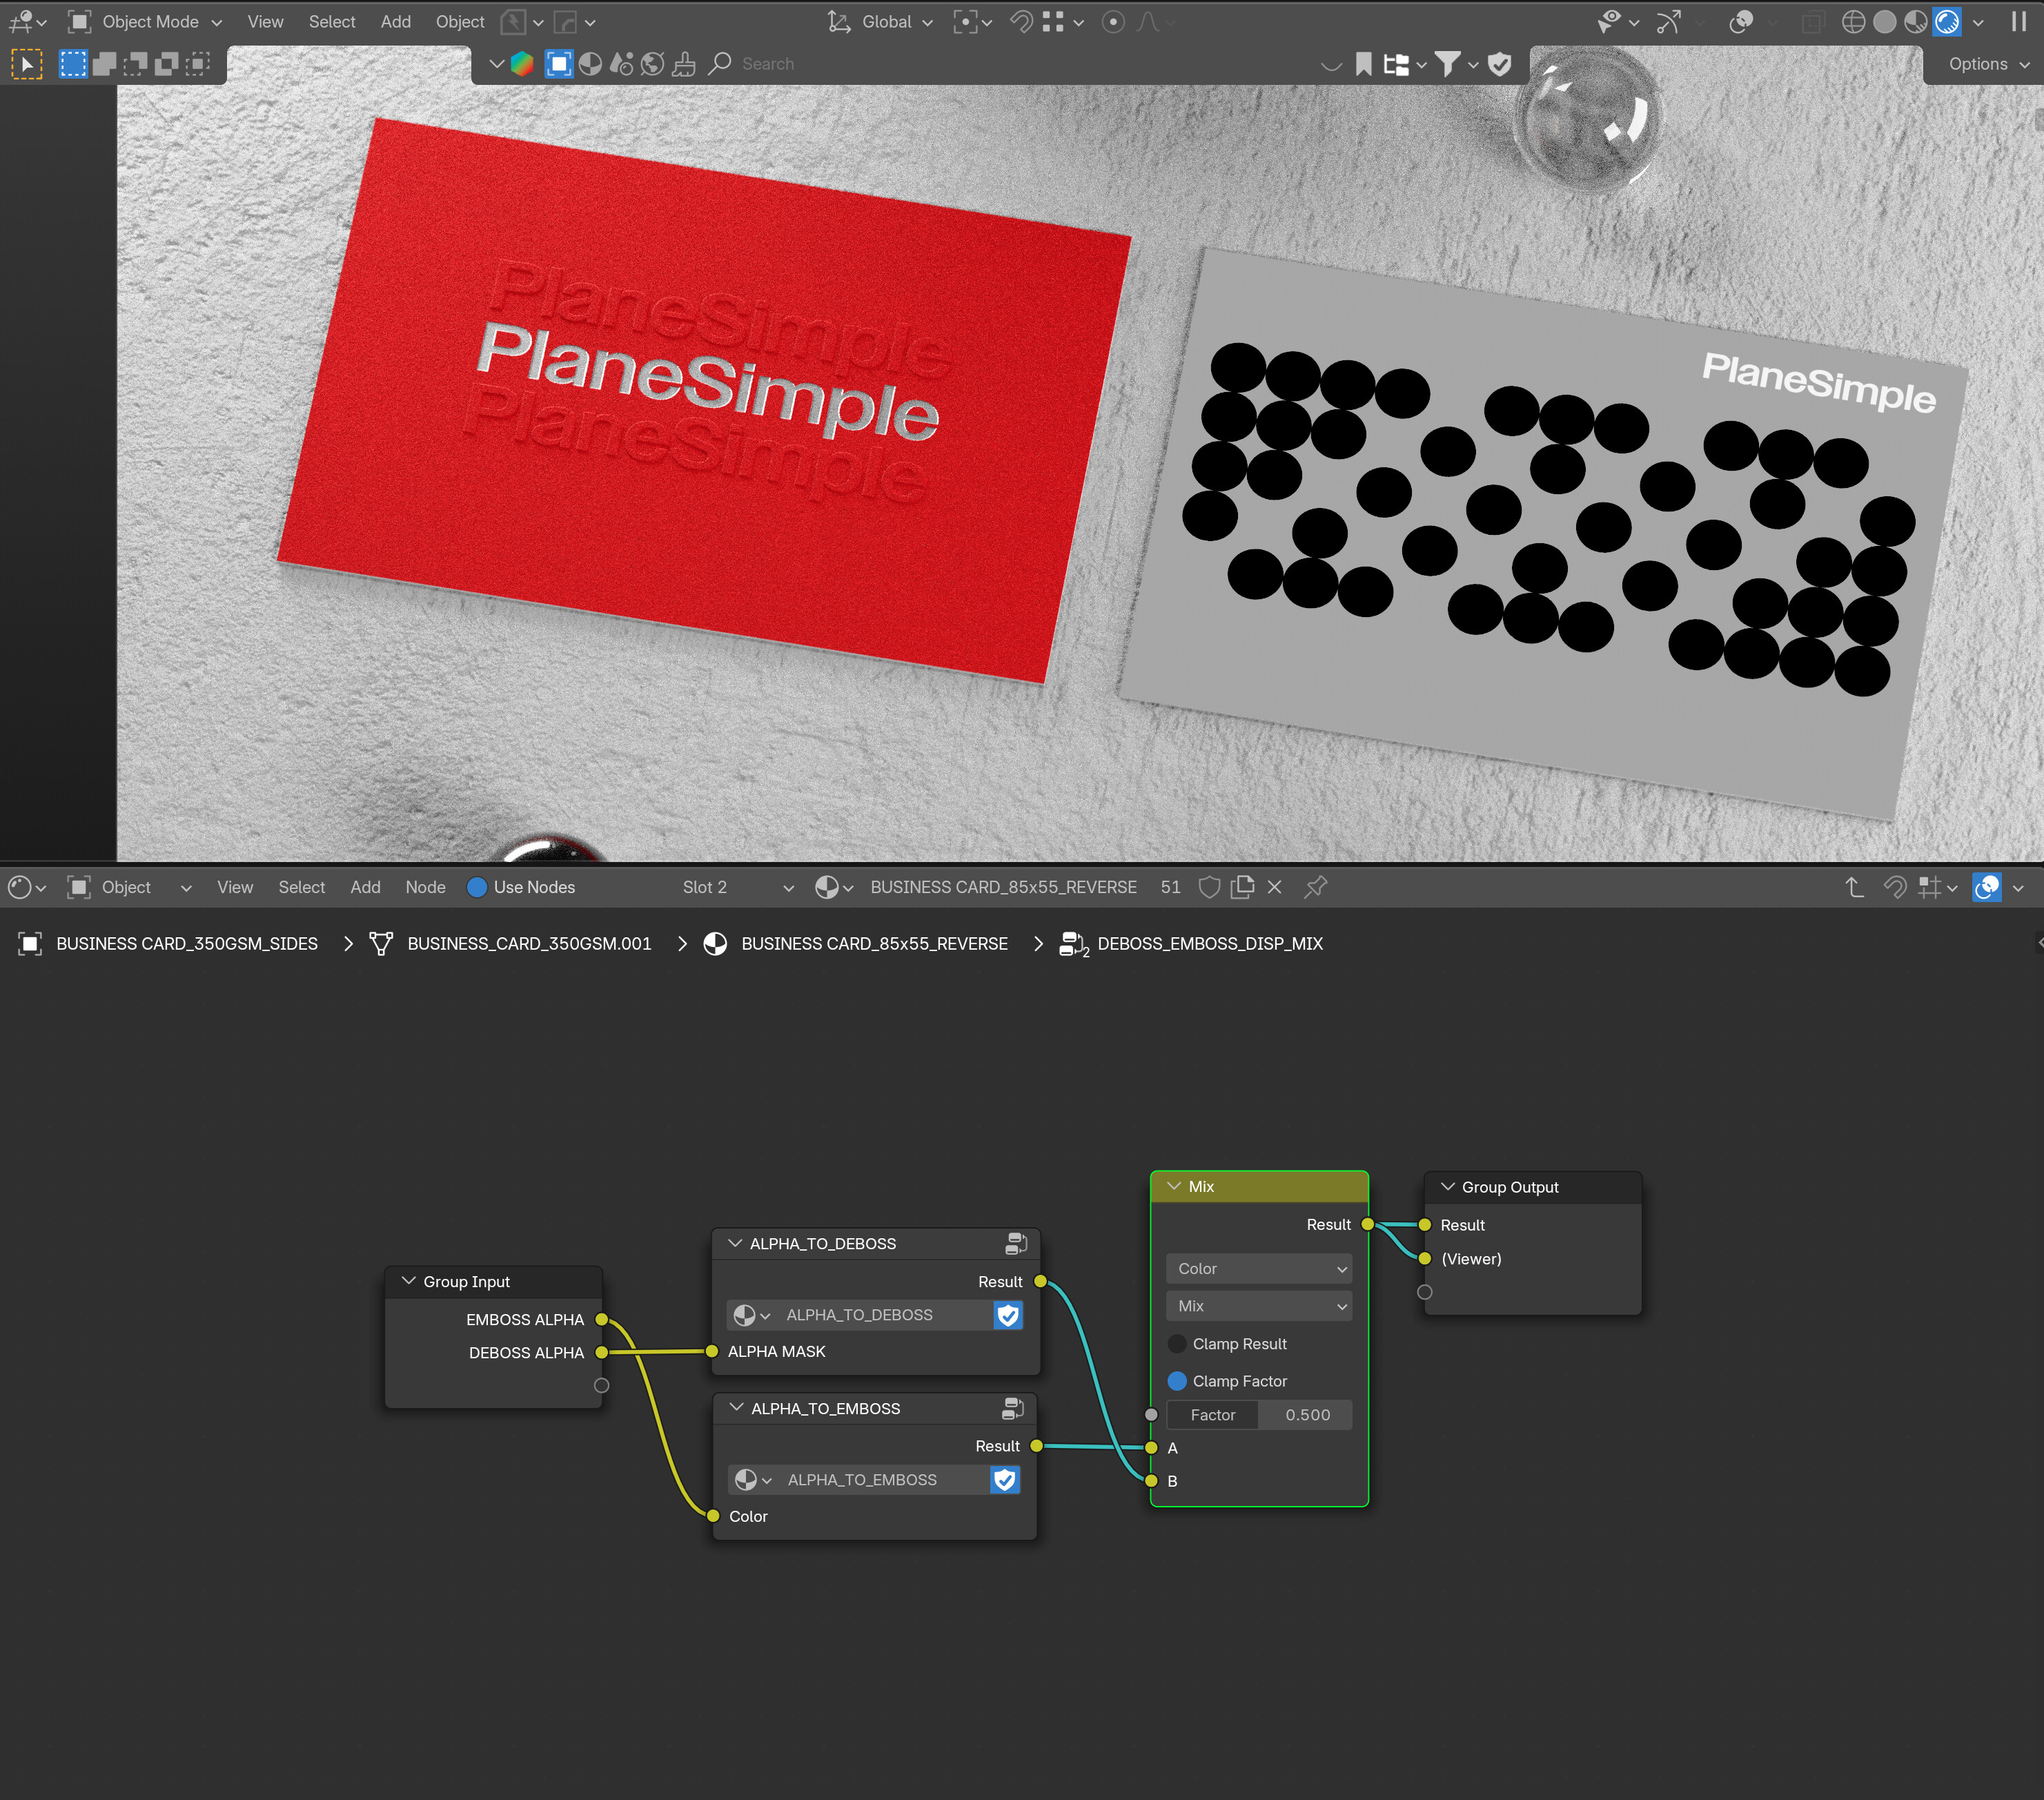
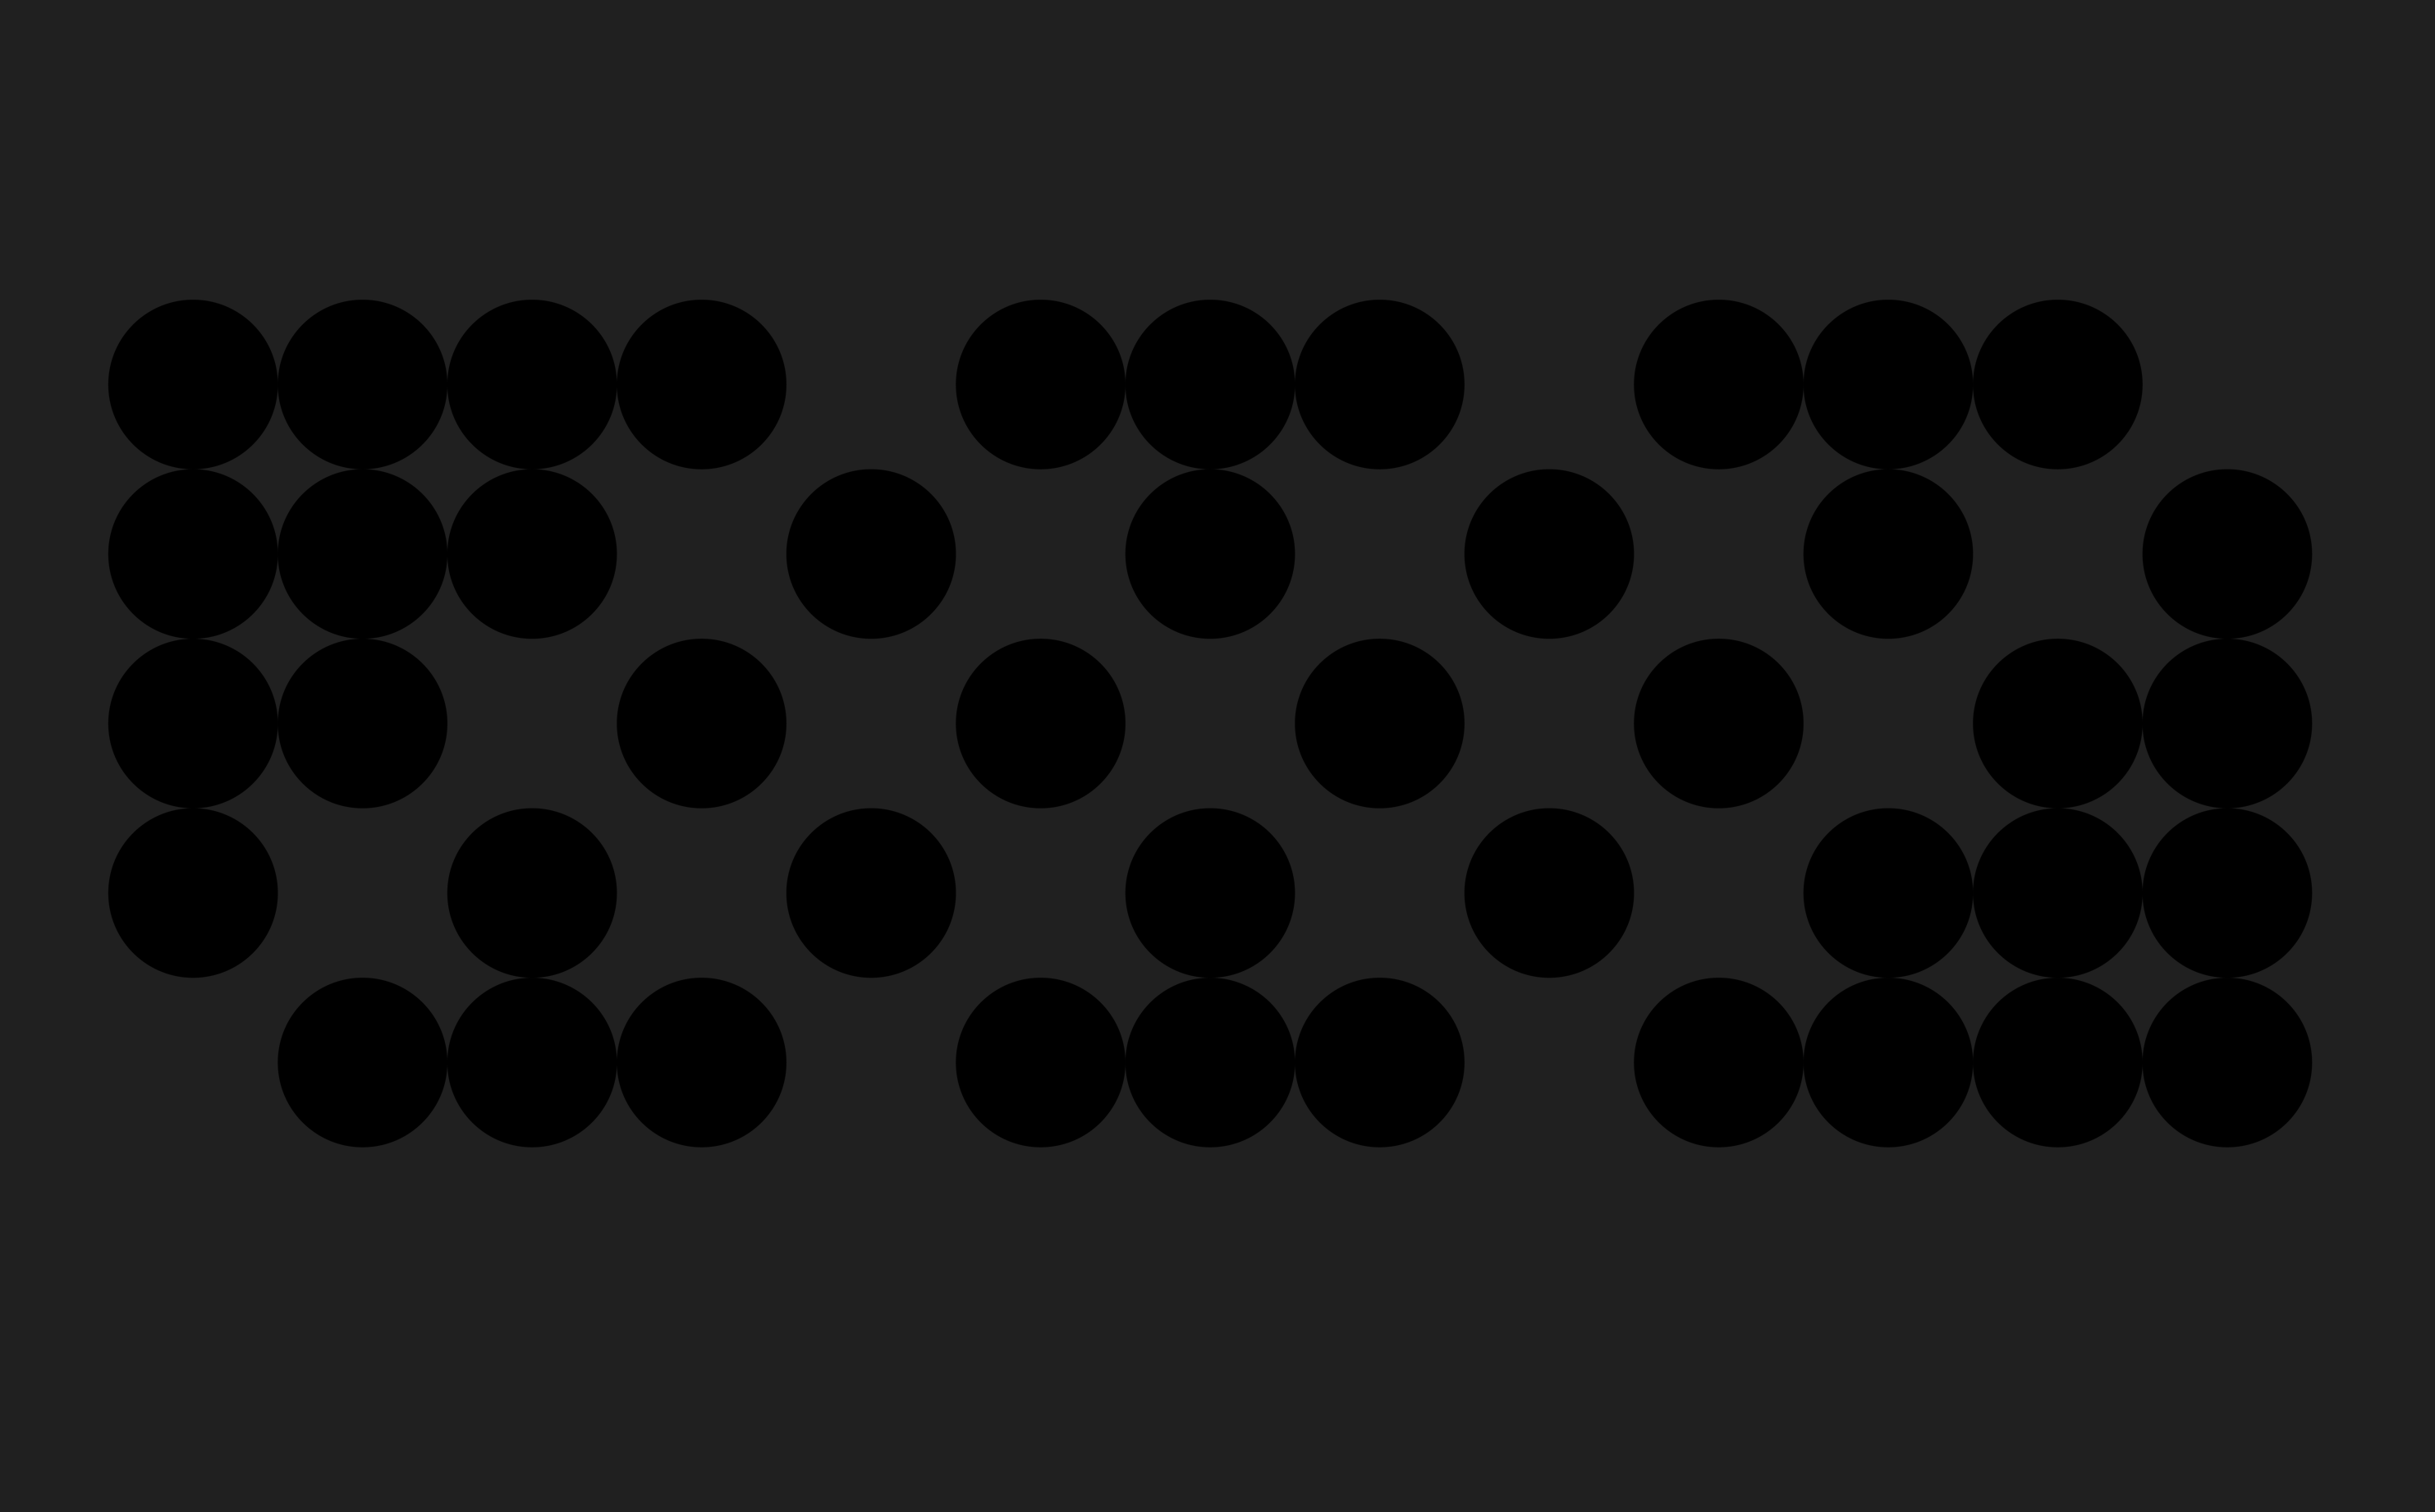
What I am essentially doing is taking the mask for the Deboss (negative displacement):
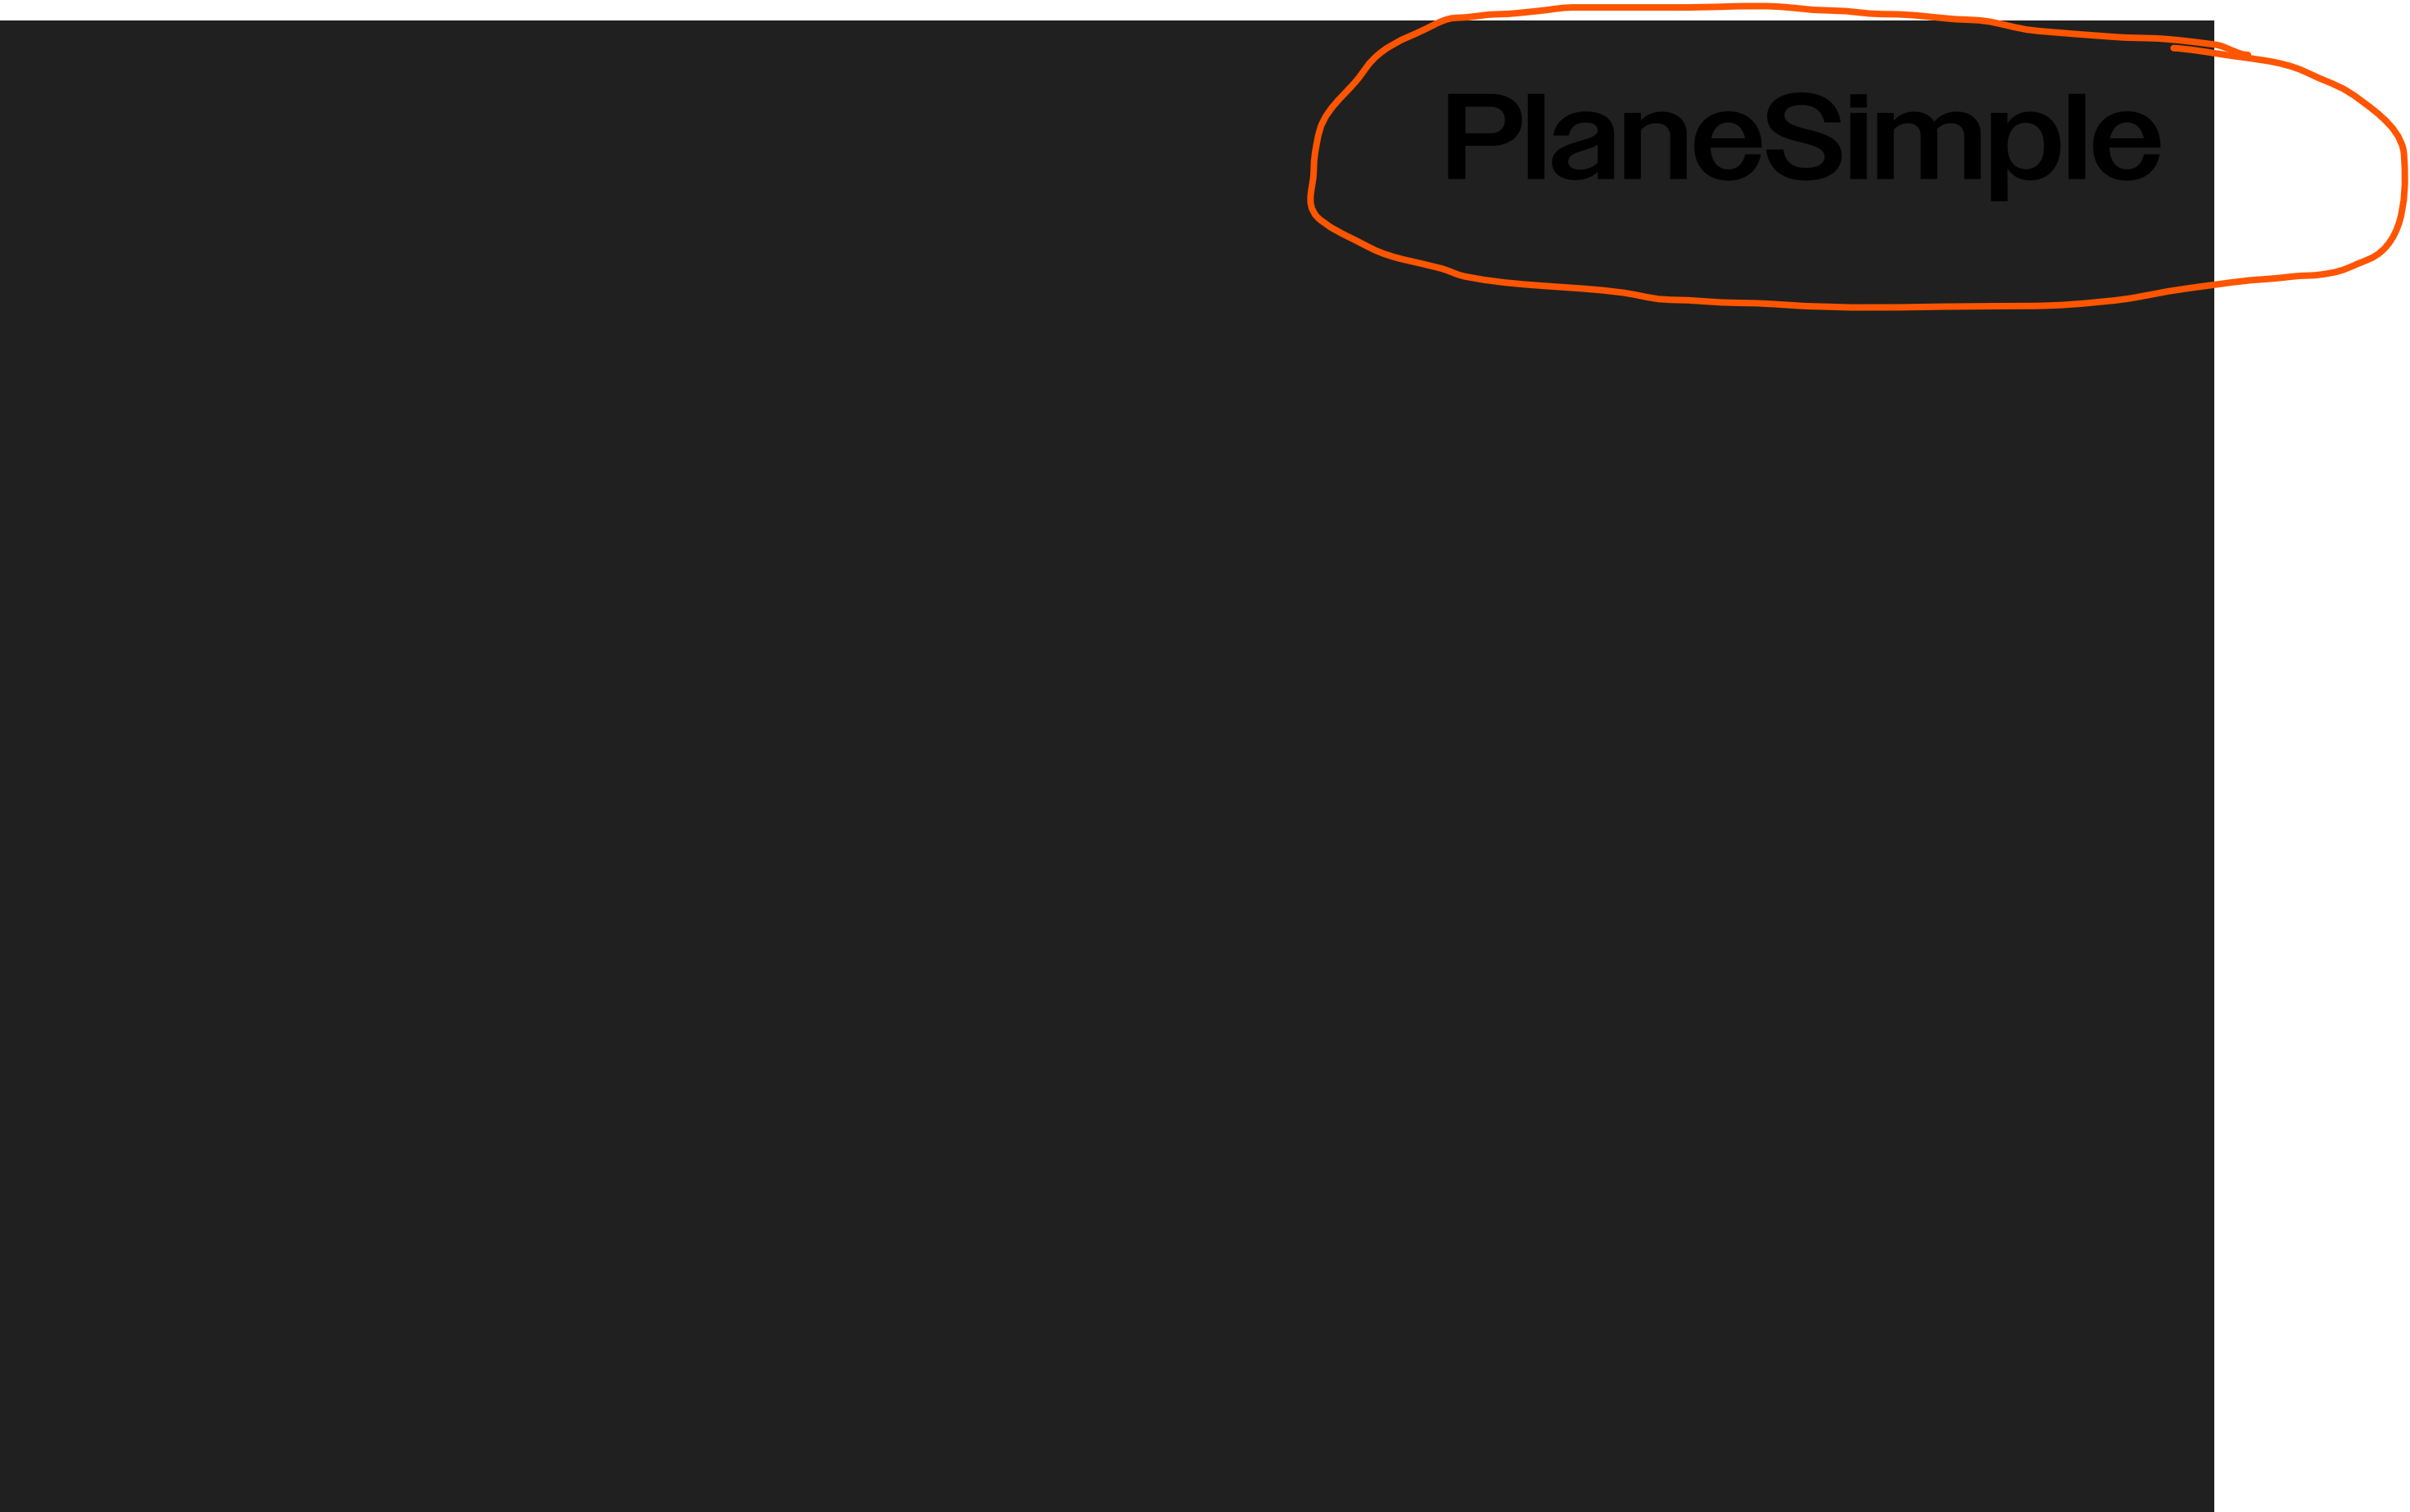
And the mask for the Emboss (positive displacement):
Then adding them together and attempting to change the colour of one of the masks so that it is white (for positive displacement).
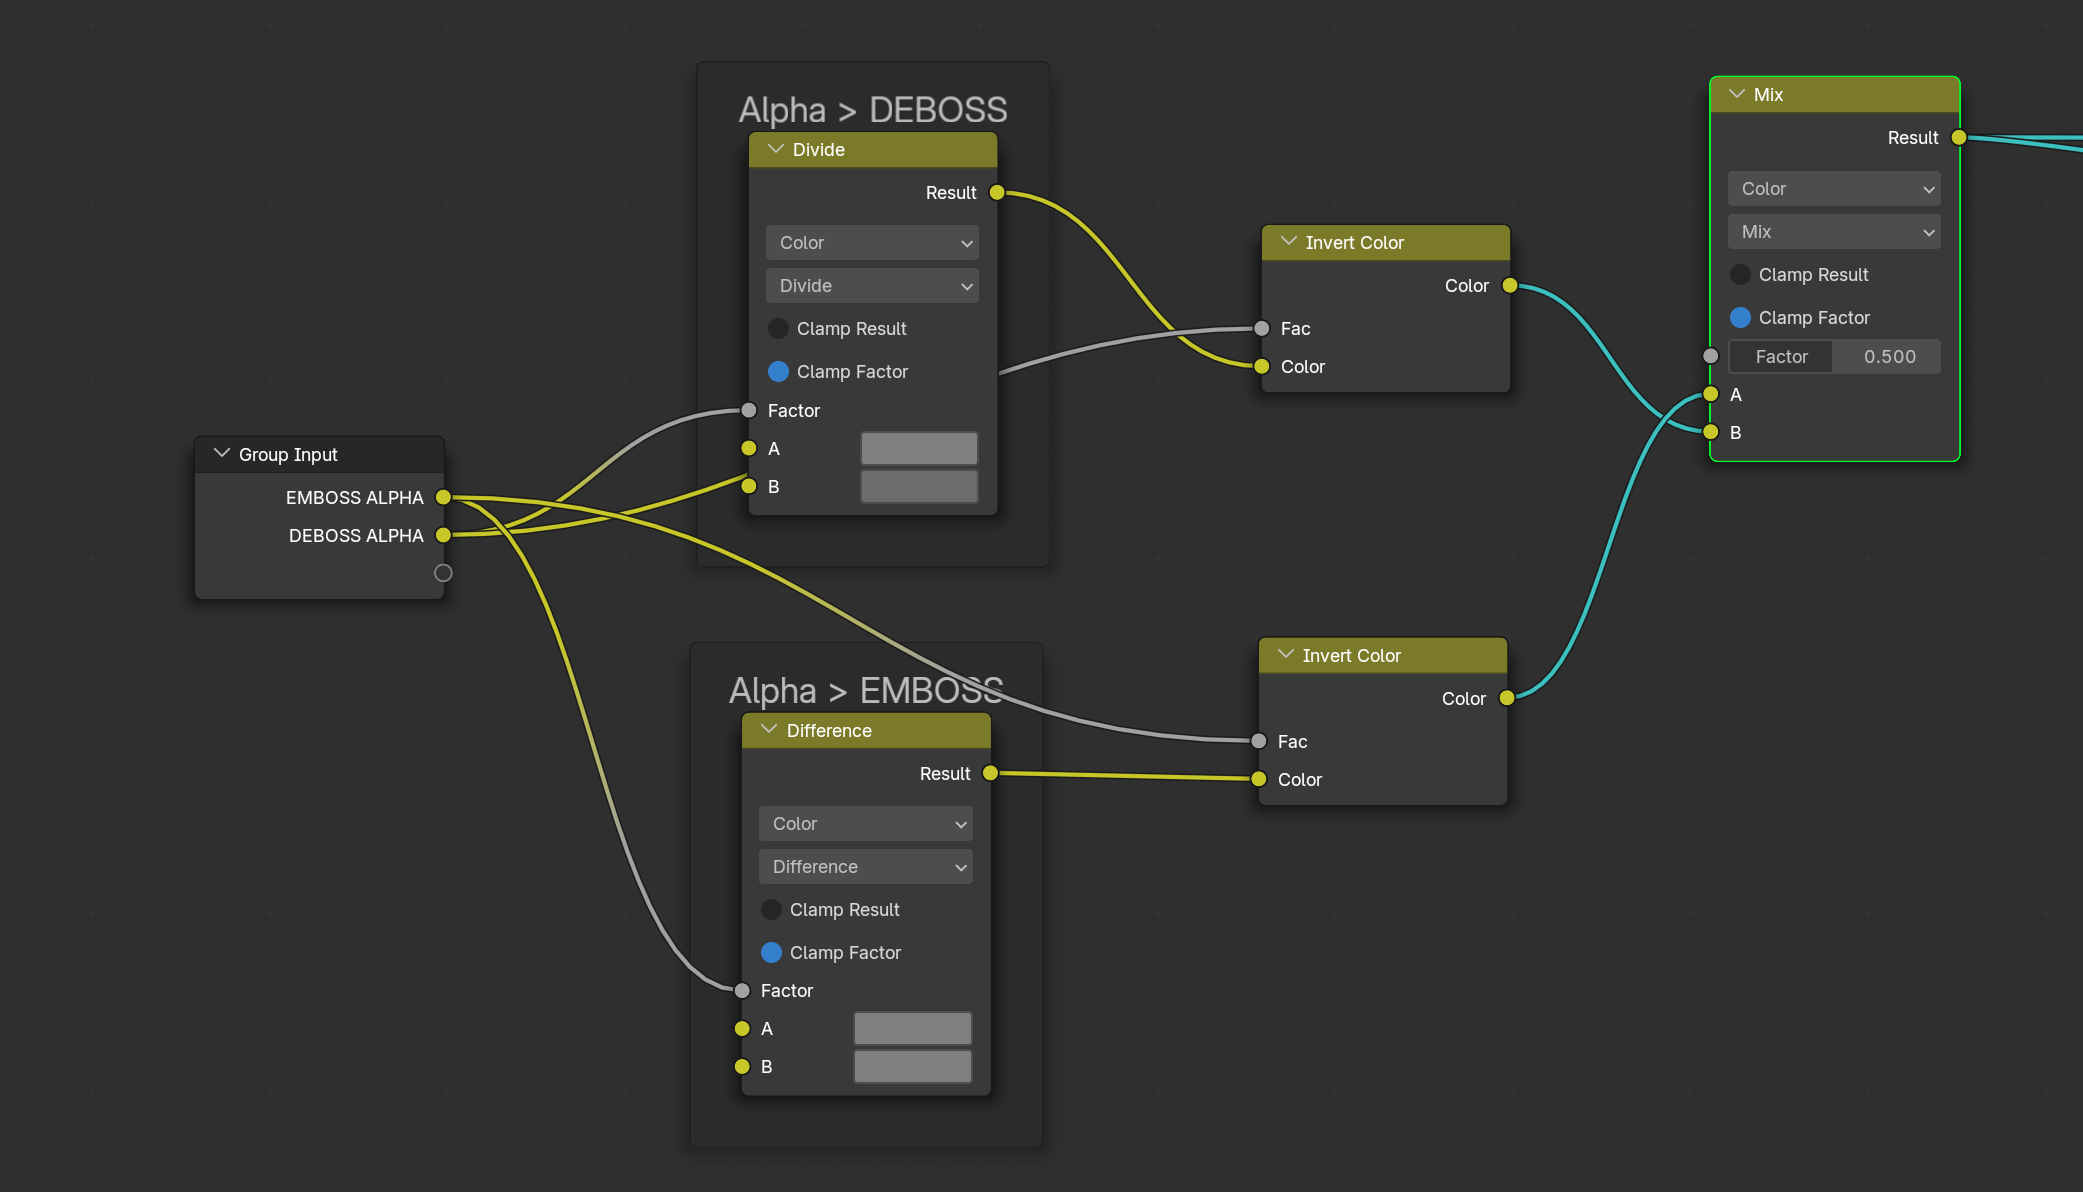
To create this:

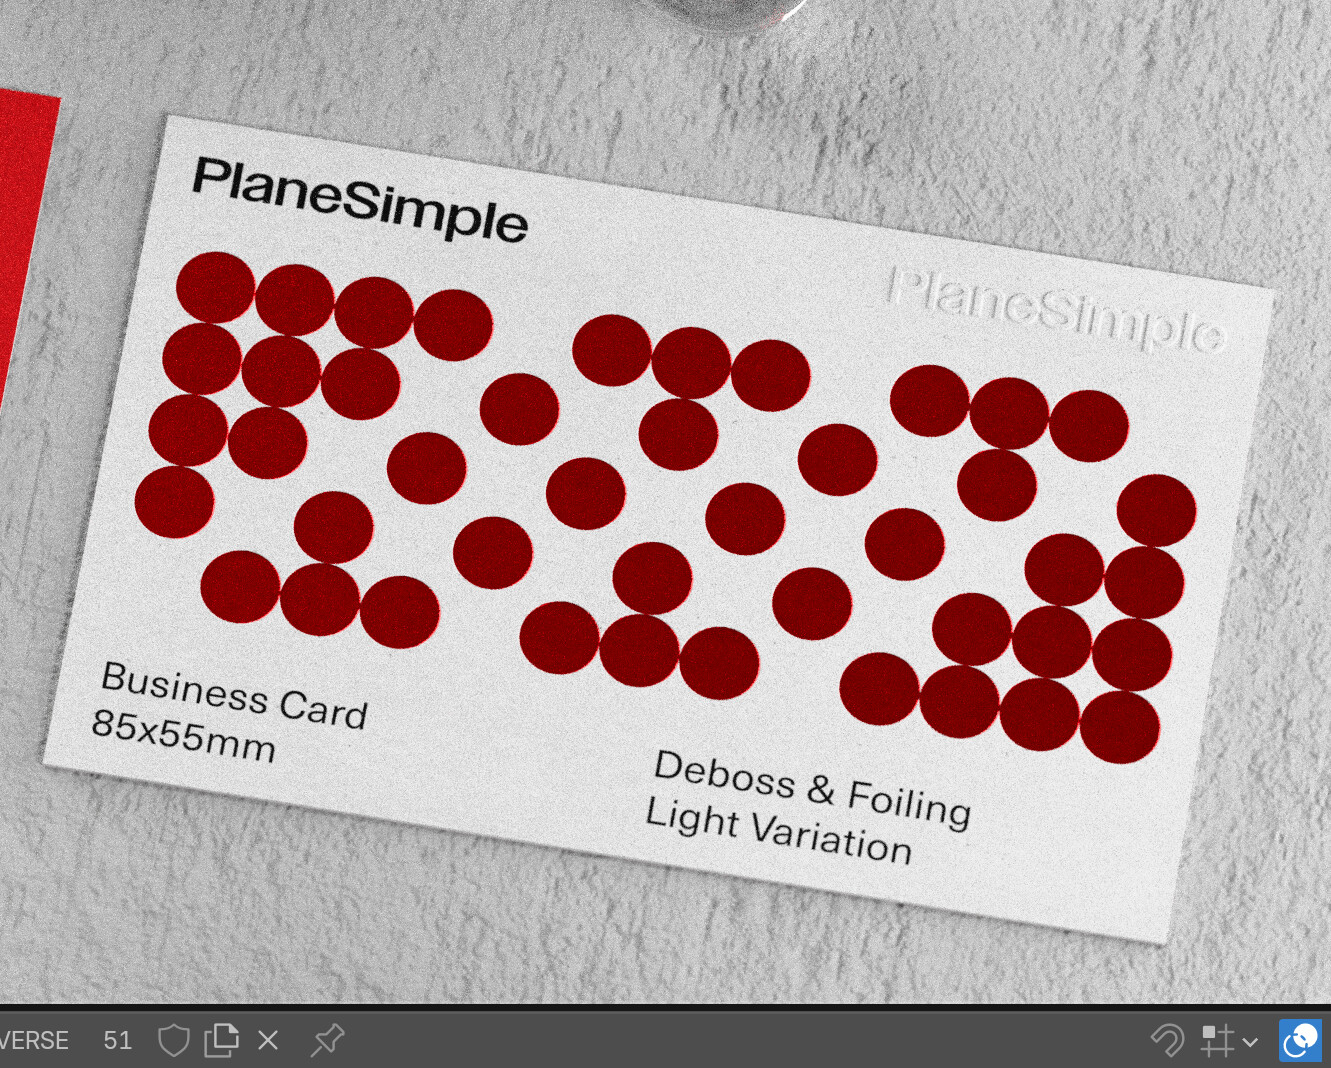
Where you can see the displacement is working.

What I could really do with, as well as making sure all of the colours are correct (mid level, white and black), is to be able to add some kind of dither or blur to the mask to create more of a “slope” on the displacement.

Like you normally would do inside an image editor - and which I know is the way it’s usually done - but there is a reason for trying to do it all within Blender as it will streamline a workflow significantly.

I’ve spent some time looking into it but can’t find a solution for this exact use case. Someone had used a Diffuse BSDF to achieve something like that (the slope, feather, blur, whatever you want to call it). But I can’t plug the output of a BSDF into the displacement node.

Any help would be massively appreciated.

Thanks.
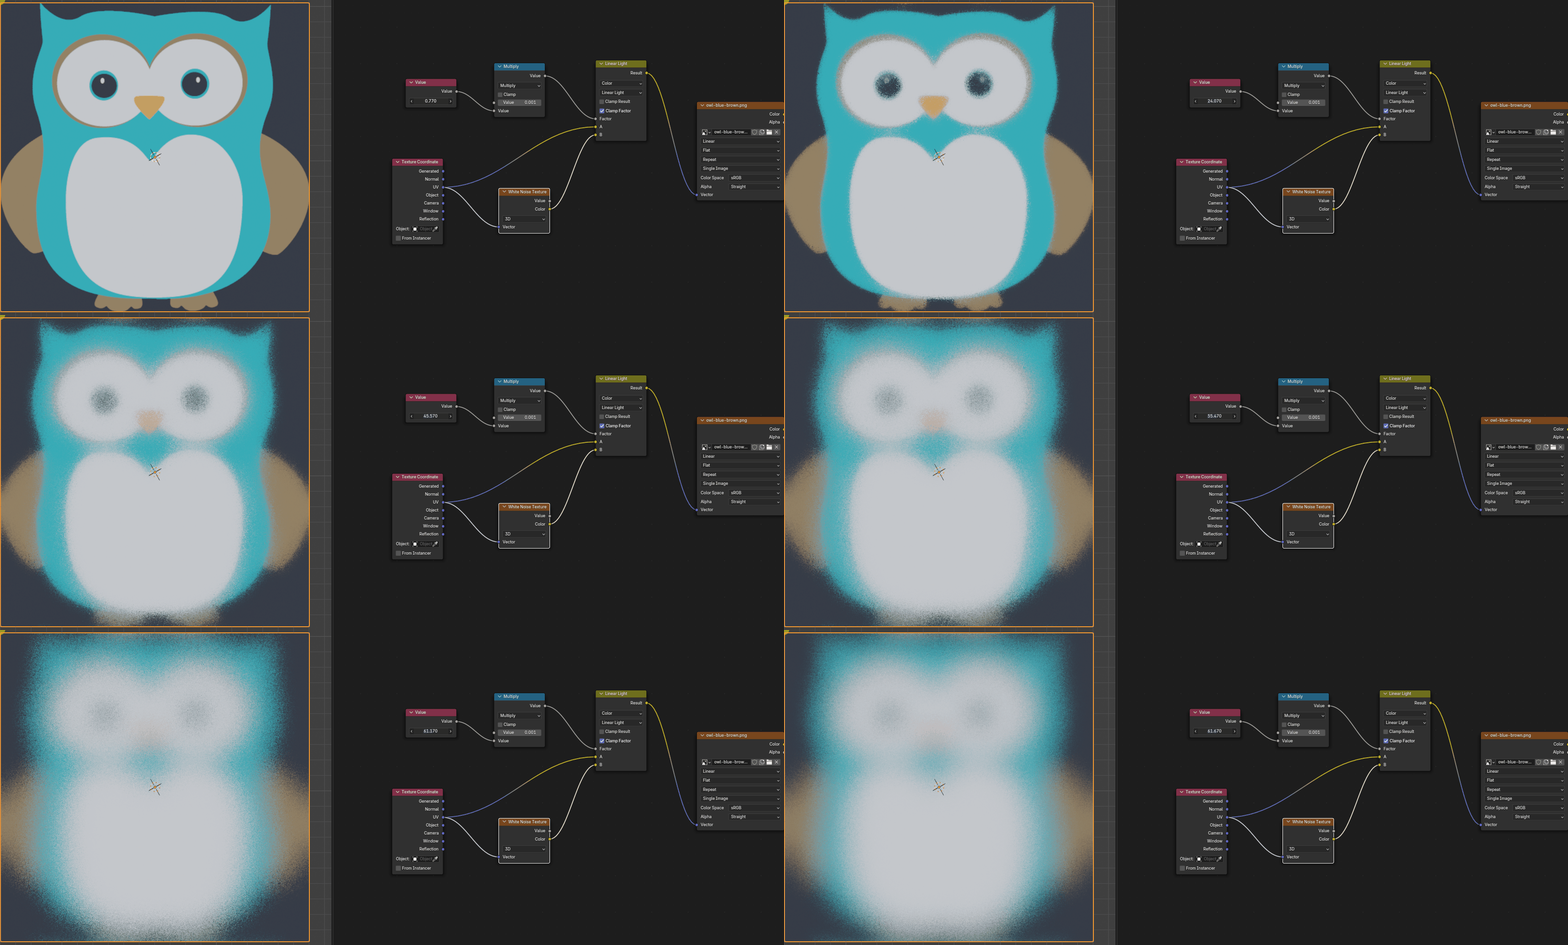
I don’t think the shader editor has a blur node, but you could do it in the compositor.

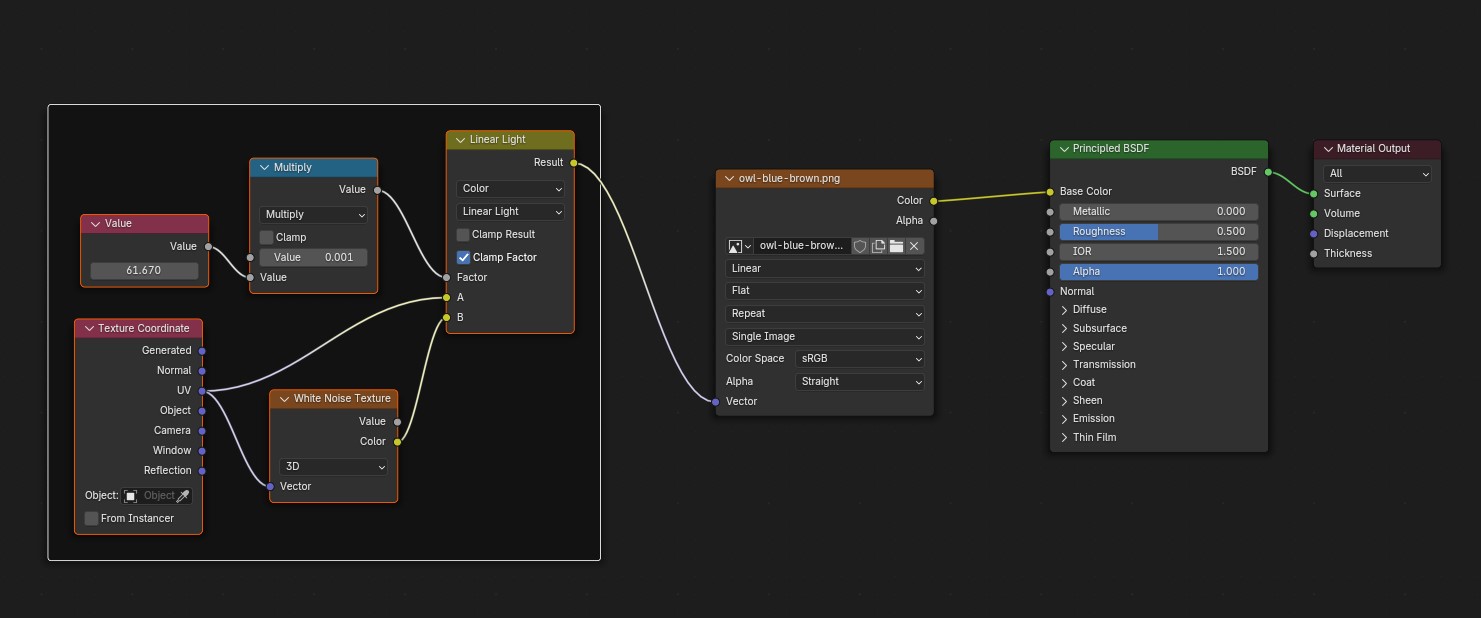
not a blur node, but you can get there for what’s needed for a dsp -

blur

Great, thanks so much @dan2! It’s a step in the right direction… but doesn’t work due to the noise texture.

It needs to be smooth, as if it were a gradient, or if you applied say an Outer Glow or Gaussian Blur in Photoshop or another program… and only very slight. Ideally I could control it with a colour ramp. No idea if it’s possible or not and have spent some hours fiddling around but no luck.

Is there a way to do that in the compositor automatically i.e. so if I were to update the two images that I’m using for the masks, it would apply the blur, and replace the output from that which can then be reused / relinked in the image textures being used for the displacement?

I want to say it could be done with the node wrangler addon using “link to shader”.

Not familiar with the link to shader, could you show me what you mean? Googled it but no result.

Is it clear that the output of these two images needs to be plugged into the displacement? There are no shaders involved currently, as the output of a shader can’t be plugged into the displacement.

Thank you…

Yeah, I am looking into it now, and it looks like the only thing that node will do is allow you to preview shader outputs in the compositor, so not helpful for this.

I bet one of the coders could whip something up if you dropped a suggestion.

You mean the Blender team or just a community member? Could you point me in the right direction? Really appreciate the help!!

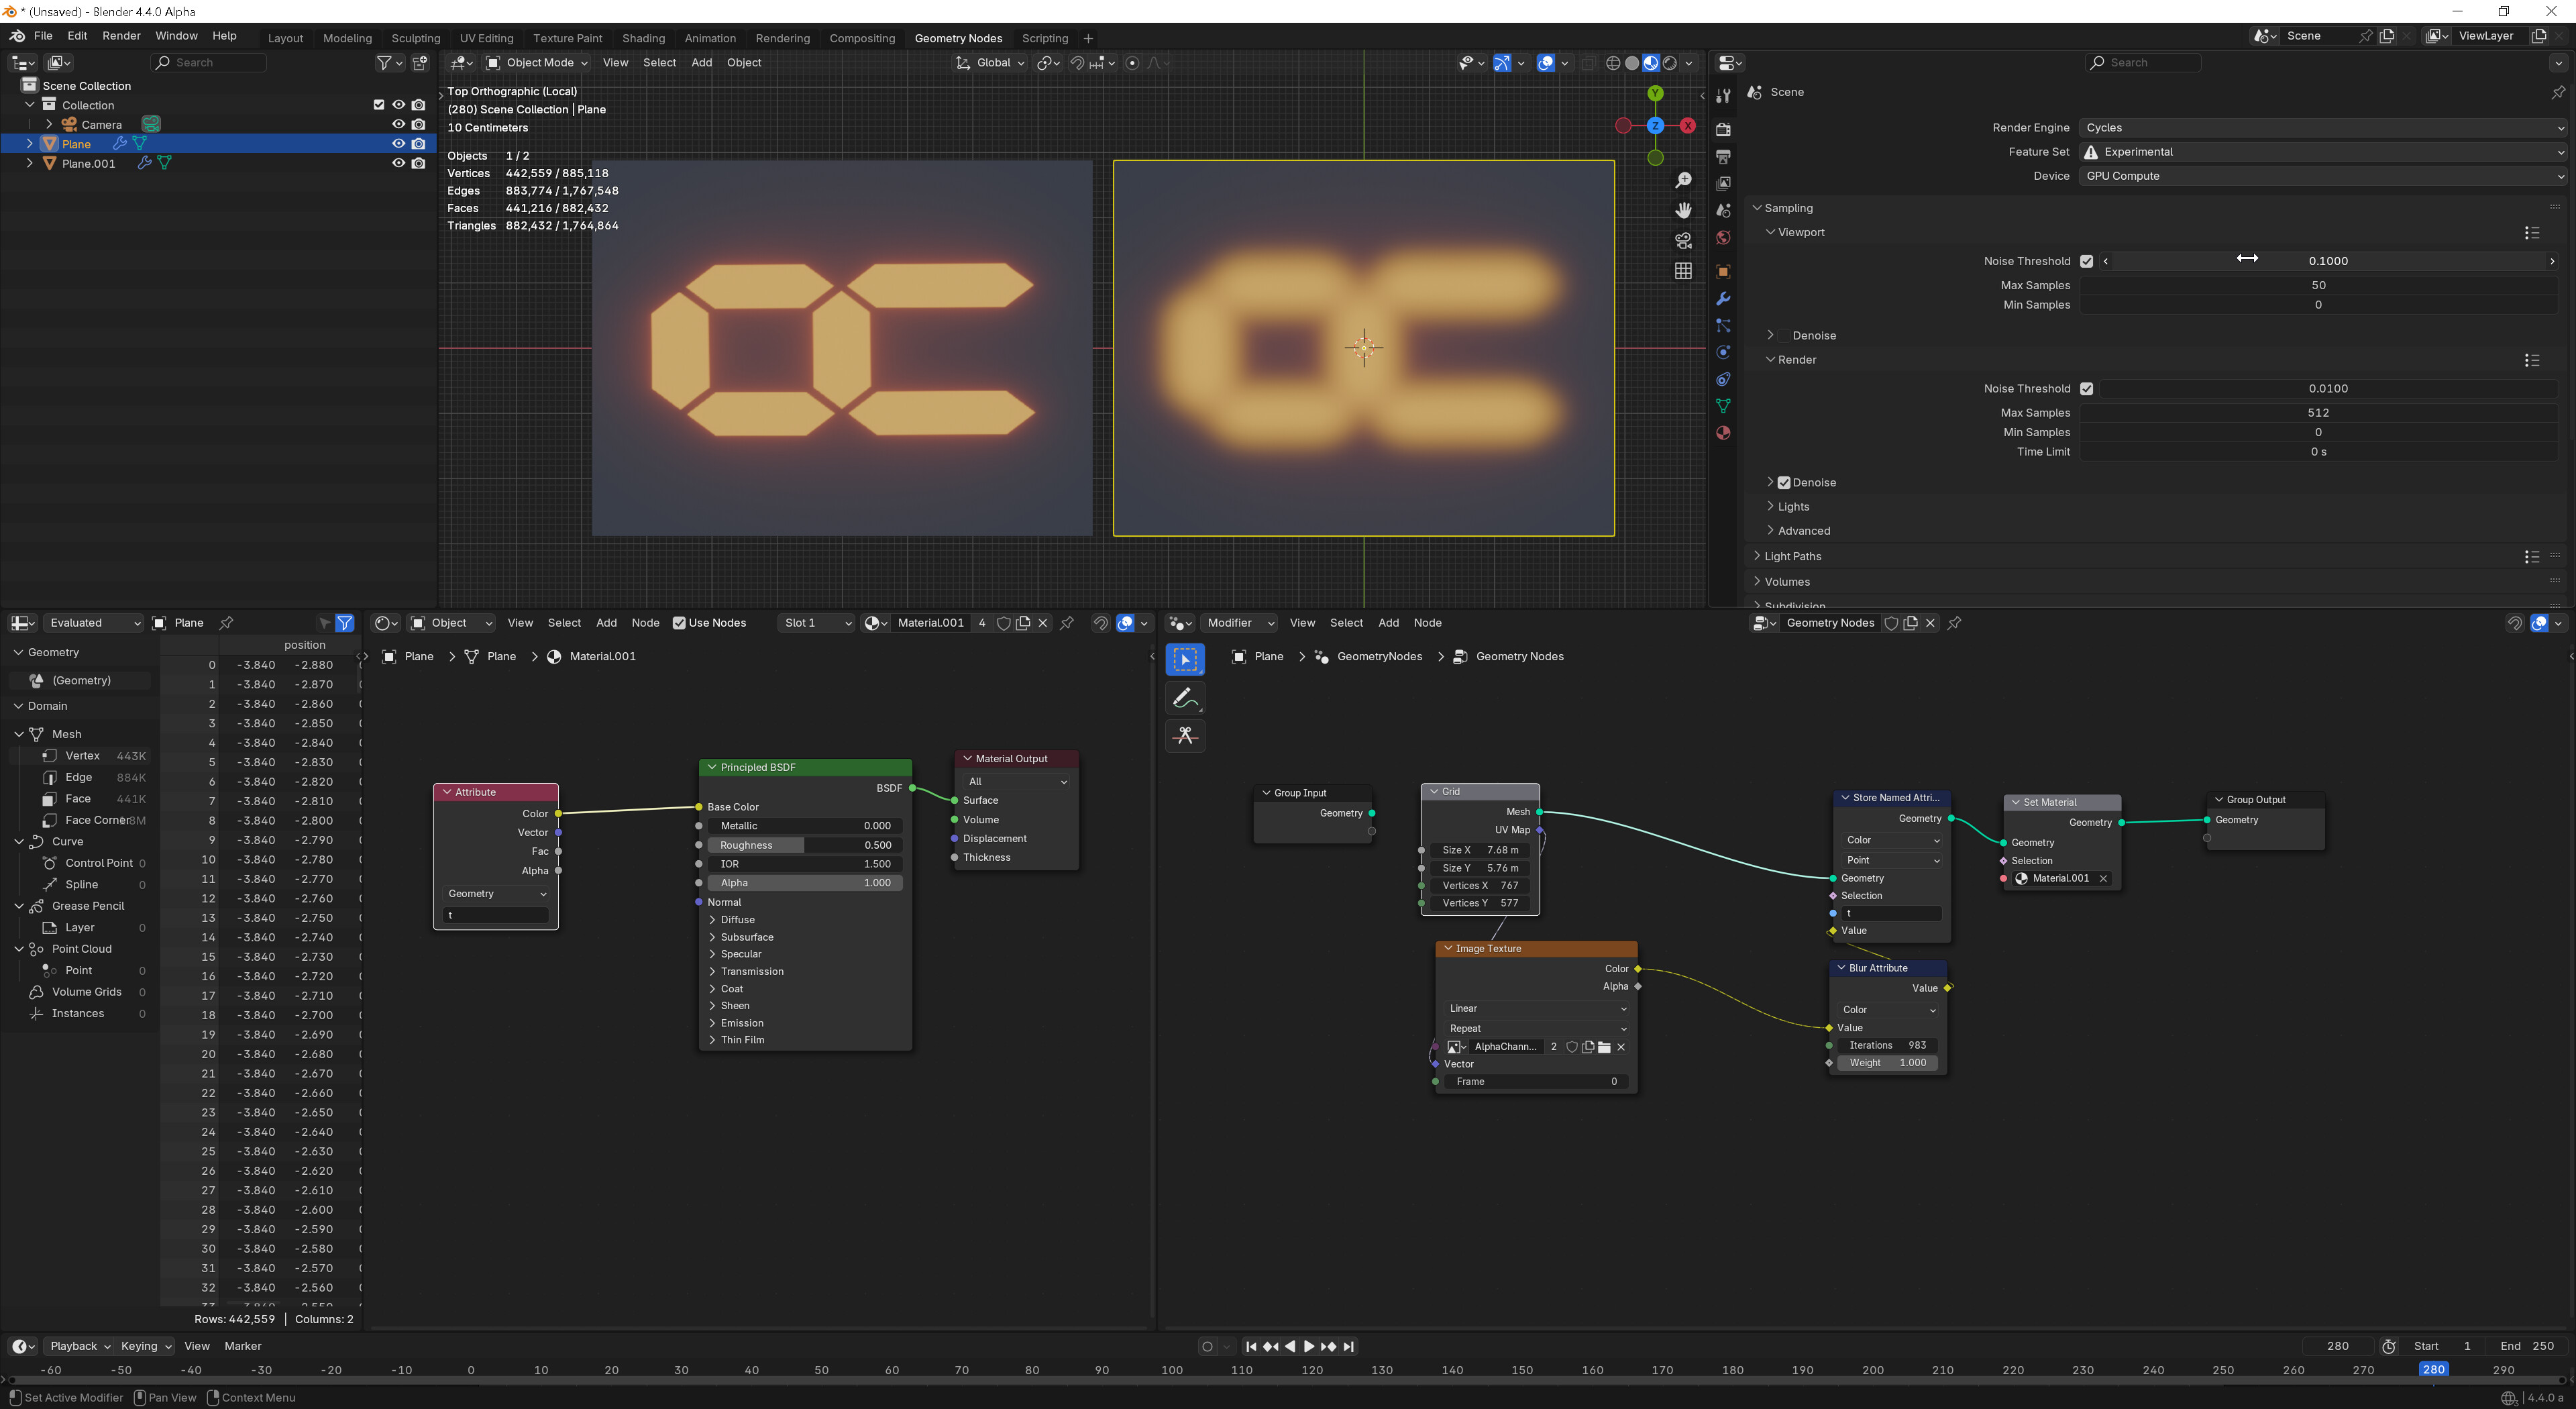
How about geonodes.

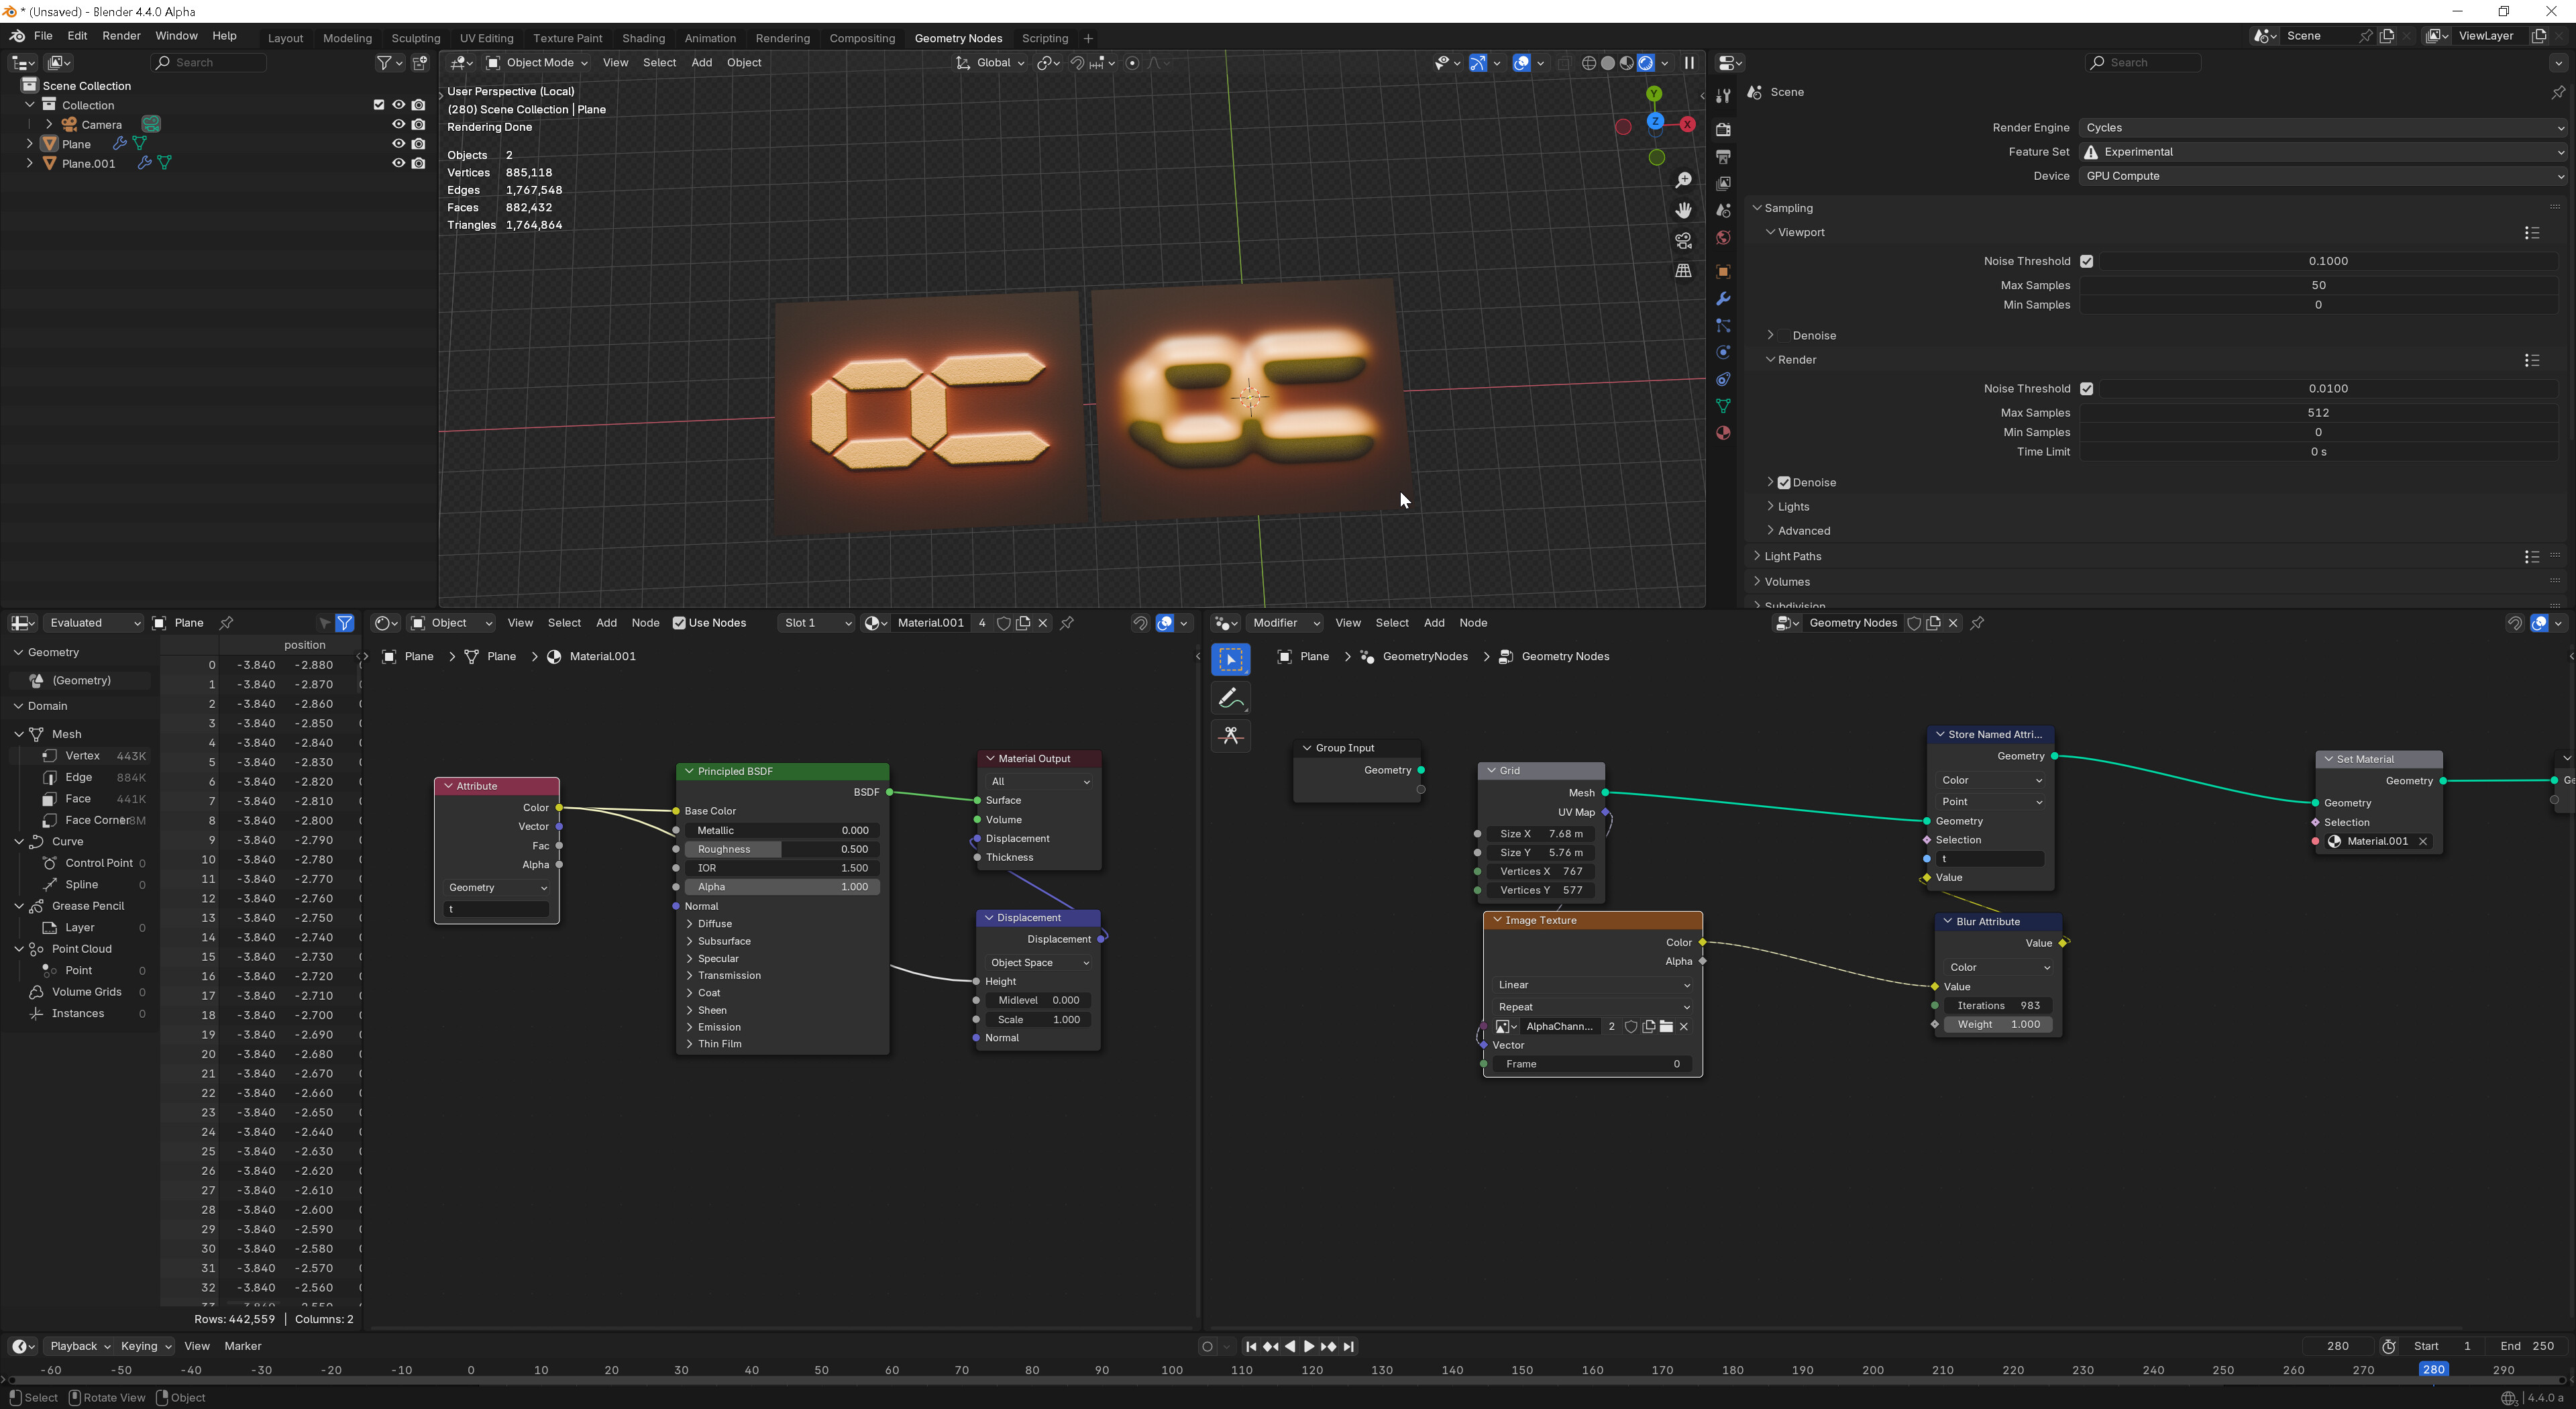
This technique takes an image on a grid set to a resolution (PAL here!)

and resamples it onto a grid then blurs it, resamples it and passes it as colour data to the shader.

and into displace…

Who says we cant get blurred images into Blender’s material slots?!

Hope that helps

I think there is a suggestions thread in one of the coding subforums of this forum. At least there used to be. Then there is the paid and volunteer work section. And it seems like there must be a way to put it past the developers at Blender.org, though I couldn’t say what that is specifically. It’s been awhile since I interfaced with the developers.

Thanks so much @AlphaChannel - this looks promising!

Would you be able to build on that further using an alpha mask set in black, converted to white, as I am? Not sure if you already are as I can’t see the actual image texture you’re using here.

The reason I’m using black is so that it’s much easier at the design stage to see what’s going on and it saves having to recolour things constantly… These masks are being re-exported often as the design changes.

No worries if not.

blur image.zip (113.2 KB)

Yeah sure have a look…

Hope that helps

I don’t think you’ve packed the file, so the textures are missing!

Thank you - will give that a shot too!

I wasnt going to give you my logo.

Use yr own texture!

You can blur images with OSL (I think it should be built into Image Texture Node but it isnt).

Check this post in SE

Being a simple scene, I guess you can live with a CPU rendering.

Yeah, me too.

Thank you for the input here, this is really useful to know about.

I think after digging into it a bit deeper, that Blender just isn’t going to be able to give me the kind of control I’d need to do this properly, and that I’ll have to find another solution outside of it. Which I think I may have done, with Affinity Designer. (I’d been using Adobe’s tools but was running into walls with them).