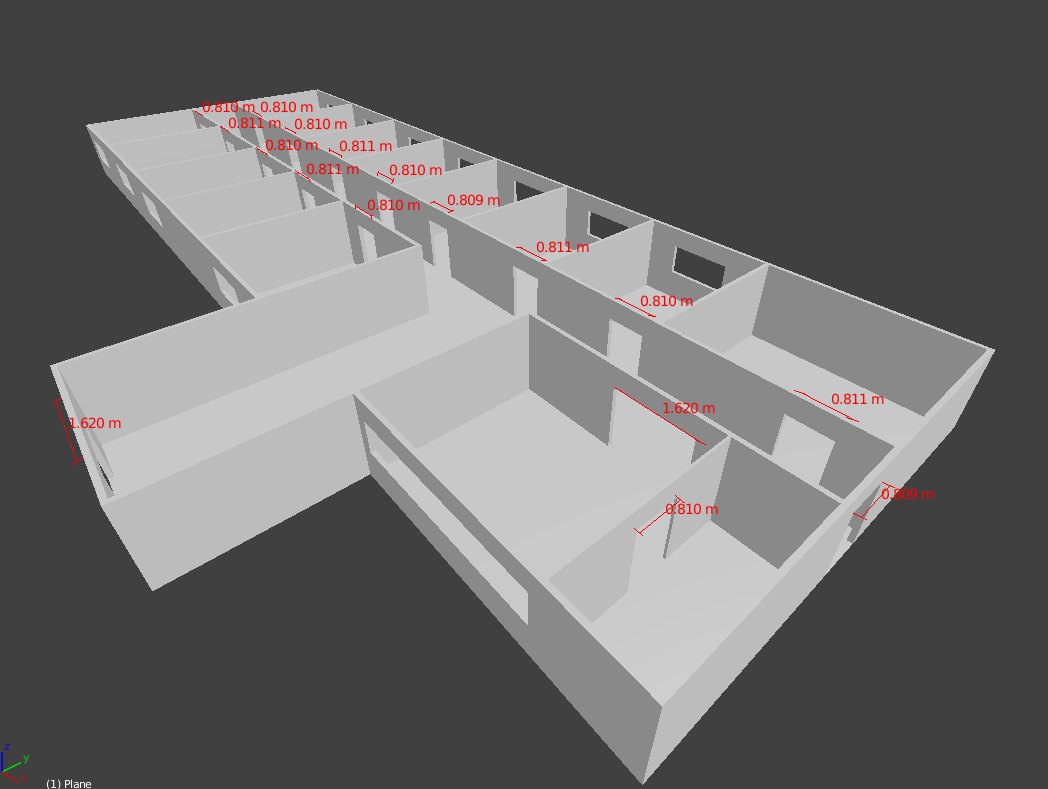
And I’m very confused on how I should go about editing it since it has so many parts to it.
I see all these UV tutorials on a cube where they tell me to mark “this and that” as a seem around the cube, and I have no idea where I should mark seems on this creation, if you even have to do that at all.
After a while of playing around I just selected all of it, and unwrapped it, which resulted in some progress, but some of the parts in the building such as floors were for some reason bent in the actual UV Map.
Which I couldn’t solve, so I played around some more with the UV buttons, and found “Smart UV Project”, I clicked on it which resulted in a much better UV Map, however it was still very confusing :
It’s so many parts and It’s impossible to see which part is which.
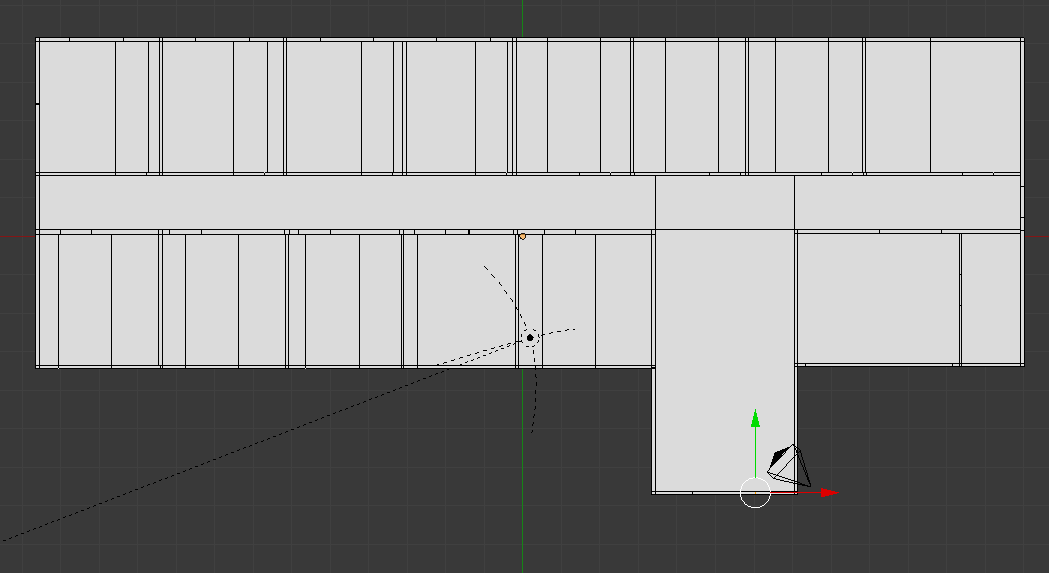
I’m not sure at all how I should sort it, so far I tried laying it out as it is on top-down view in 3D mode :
Why are you UV unwrapping ?
What do you want to use the UV unwrap for.
If texturing what faces are important so they need as much UV space as possible
Can you use multiple materials. If yes and each room is textured differently then the UVs of each room can overlap and thus have make maximum use of the UV space
There are some faces who’s UVs are not important (wall edges etc) so why are they taking up so much space
Be logical, would you think it best to have the 4 walls of a room connected together ? Probably, so that hints where you add seams.
No way to do this automatically. You need to have a plan for how to texture the model and then manually add seams, unwrap and arrange uv shells so that they make sense.
Texture walls, floors, etc. separately. By using a different material for each, you can select all at once in the materials panel. You can then use Project from View in the UV Unwrap menu while viewing the faces in Ortho mode to apply the textures evenly.
What you do is set up the 3D view on those parts so that you’re viewing them exactly how you want the texture projected onto them – in this case, facing straight at you.
There should be no out-of-line faces this way, because you control that by how you project the textures onto them.
You can also manually move the mappings for the individual faces in the uv editor to adjust them if you have to. For instance, that one part in the uv mapping you show that’s out of line can simply be rotated to align it with the others.
You don’t need to be concerned with the mappings for different faces sharing the same texture space. That can save you a lot of resources if your textures are high-res.