have you packed the images since rendering without very dirty enabled, or have the auto pack enabled? This would cause the old cache file to continually be used even after rendering with the correct settings. If this is not the case could you send me the file to the support email address so I can investigate. I did make changes to the volumes in the last release, so I just want to make sure I haven’t introduced a bug.
No, I have not. But is there a way to manually clear the cache? Just to be sure that’s not the problem?
I will send more information and tests to your support email…
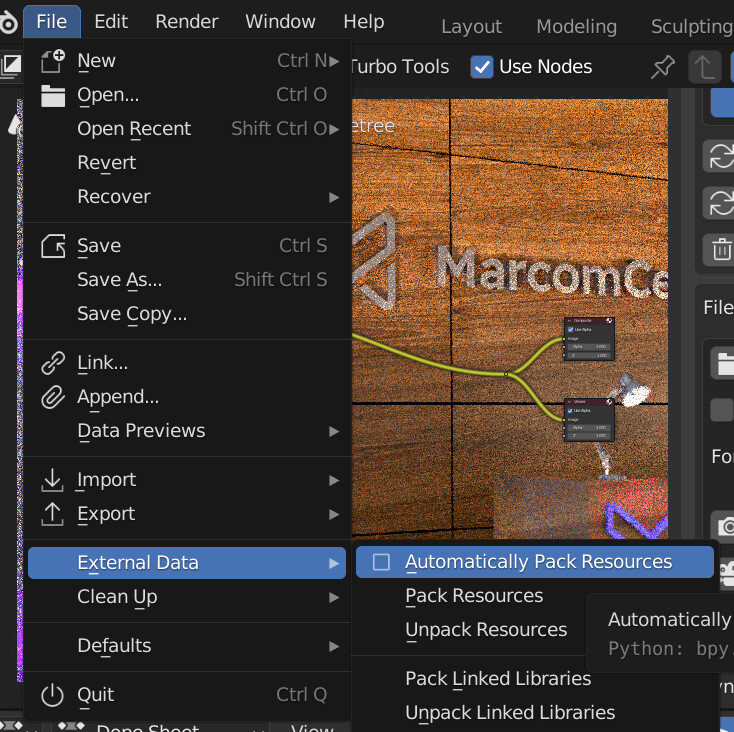
to manually clear the cache you can go to the cache folder you’ve set and delete any sub folders. It’s not necessary though, the cache will always hold the most recent renders.
I’ve just done some thorough tests with volumes here and can’t replicate any issues, so I’d like to investigate your file if possible, so I can find the cause of the issue. Can you upload it somewhere and send me the link to the support email address shown on your receipt?
Good to know, about the cache.
I’ll send more info about the haze issue to your support email a bit later.
Just one more question for now:
Is there an easy way to mix the denoised image with the original, noisy render? A completely denoised picture usually looks to clean, too artificial to me. Instead of simply adding noise in photoshop, it might be helpful to mix a tiny bit of the original, noisy render to it.
I don’t include the noisy passes in the cache. The reason is that noisy passes take up nearly 30x more disk space than clean passes. This is why the multilayer exr’s produced by turbo render are around 30x smaller than those produced by Blender’s render output.
What I’d recommend instead is this setup. It adds animated noise, and limits it to the dark areas (same as a camera). I’ve used the image pass brightness here, but for more accuracy you could use the diffuse passes instead.
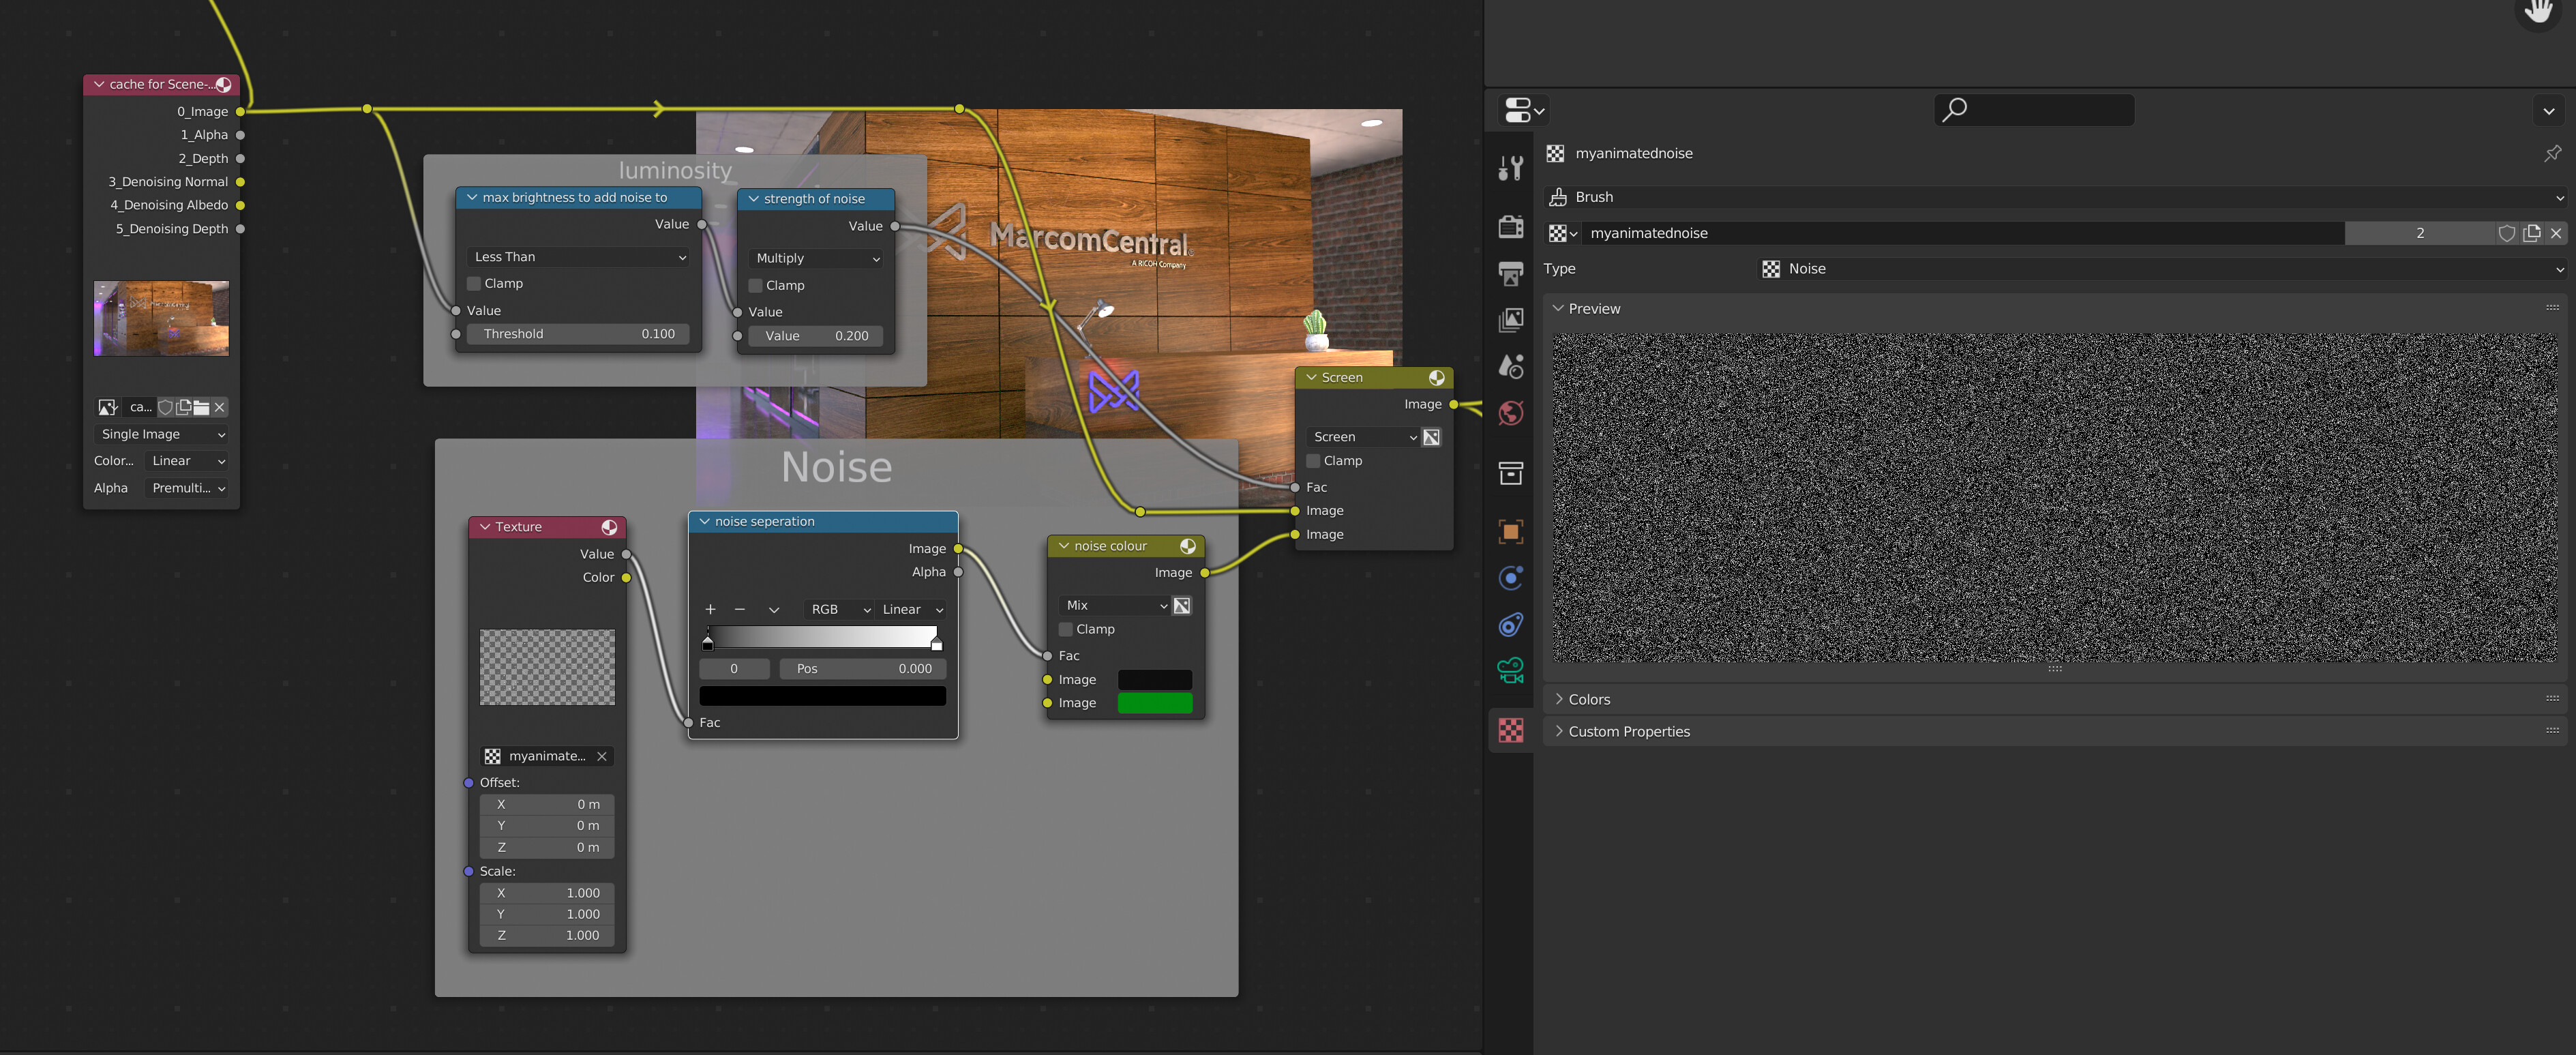
@JollyJumper it’s super performant too. Even when using Turbo Tools’ realtime compositing features directly in the compositors backdrop it’s only adding a fraction of a second to playback. This is functionality not possible without Turbo Tools by the way. This method also gives a lot more control, as you can see below we have the ability to modify every aspect of the noise, something not possible when using the noisy render.
Hmmm…that can be somewhat of an issue with animation. So you’re saying it’s either one or the other? What about DoF blur?
It’s the nature of the beast I’m afraid. Temporal denoisers require a motion vector, which Blender is unable to produce if motion blur is enabled. If you need both temporal denoising and motion blur, then you’ll need to add the motion blur in post using the motion vector pass. Or in a 3rd party solution like RSMB (Real smart motion blur) plugin in after effects.
DOF appears to be fine. Check the above animation examples of the marcom central render. It has extremely heavy dof on the bricks and distant pink lights.
Interesting. Yeah…it’s going to be a bit of an issue for certain types of shots. I wonder why render engines aren’t capable of producing both motion blur and a motion vector separately? Cycles isn’t the first render engine I ran into this issue with.
I suspect it’s an impossibility due to the nature of motion vectors. You could check with the Cycles devs on blender.chat though if you’d like to learn more. There’s a channel here:
2 Likes
That looks impressive!
Personally I would add noise to a video in after effects, though. I get more organic, film-like looking noise/grain there.
I did ask about the original noisy pass, cause that way it would have allowed to add a bit more of the original details into the denoised image, at the same time as adding noise. But I understand your explanation regarding the disk space.
1 Like
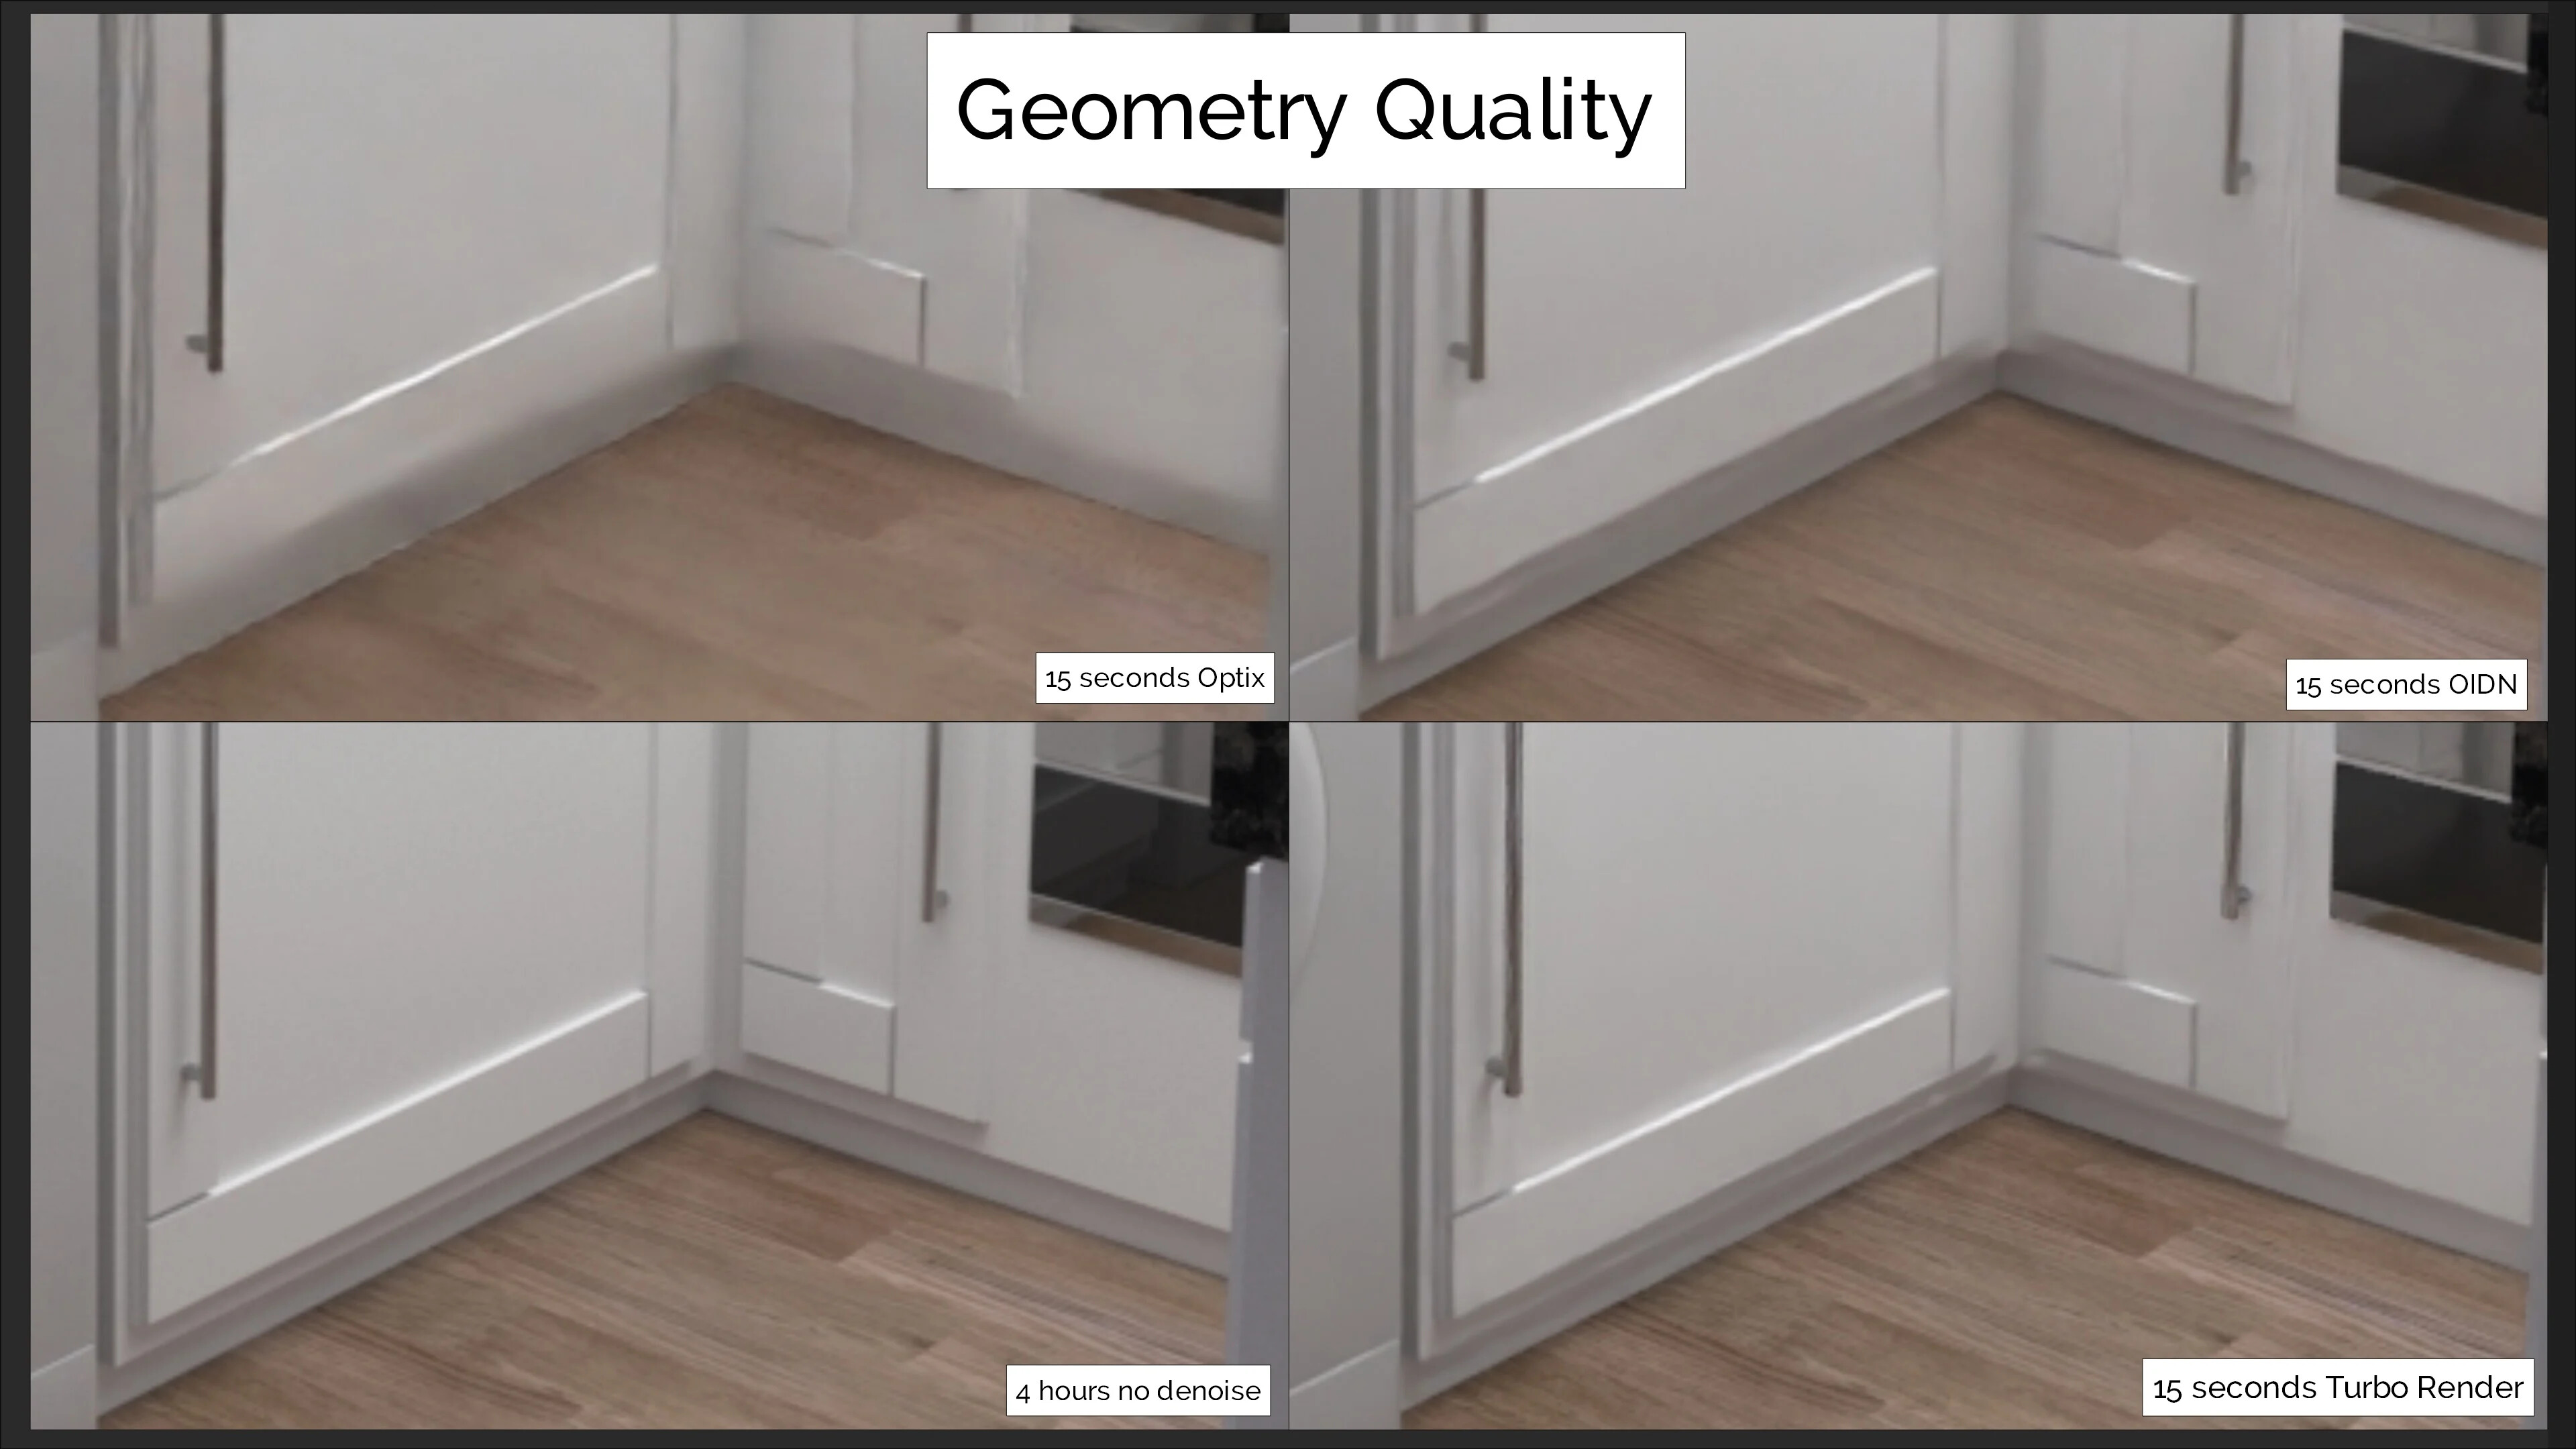
I did consider adding it to the cache early on in development, but I found the geometry and texture detail to be so well maintained by Turbo Render compared to the other denoising options, that I thought it would be better to reduce memory and hard drive usage instead. The smaller file size also provides a big boost to realtime compositing as well.
Here’s an example of Turbo Render’s geometry and shadow preservation. Check the bottom of the kitchen door, if you do notice any wobbliness in geometry, then the ultra denoising mode (not sample preset) should be used:
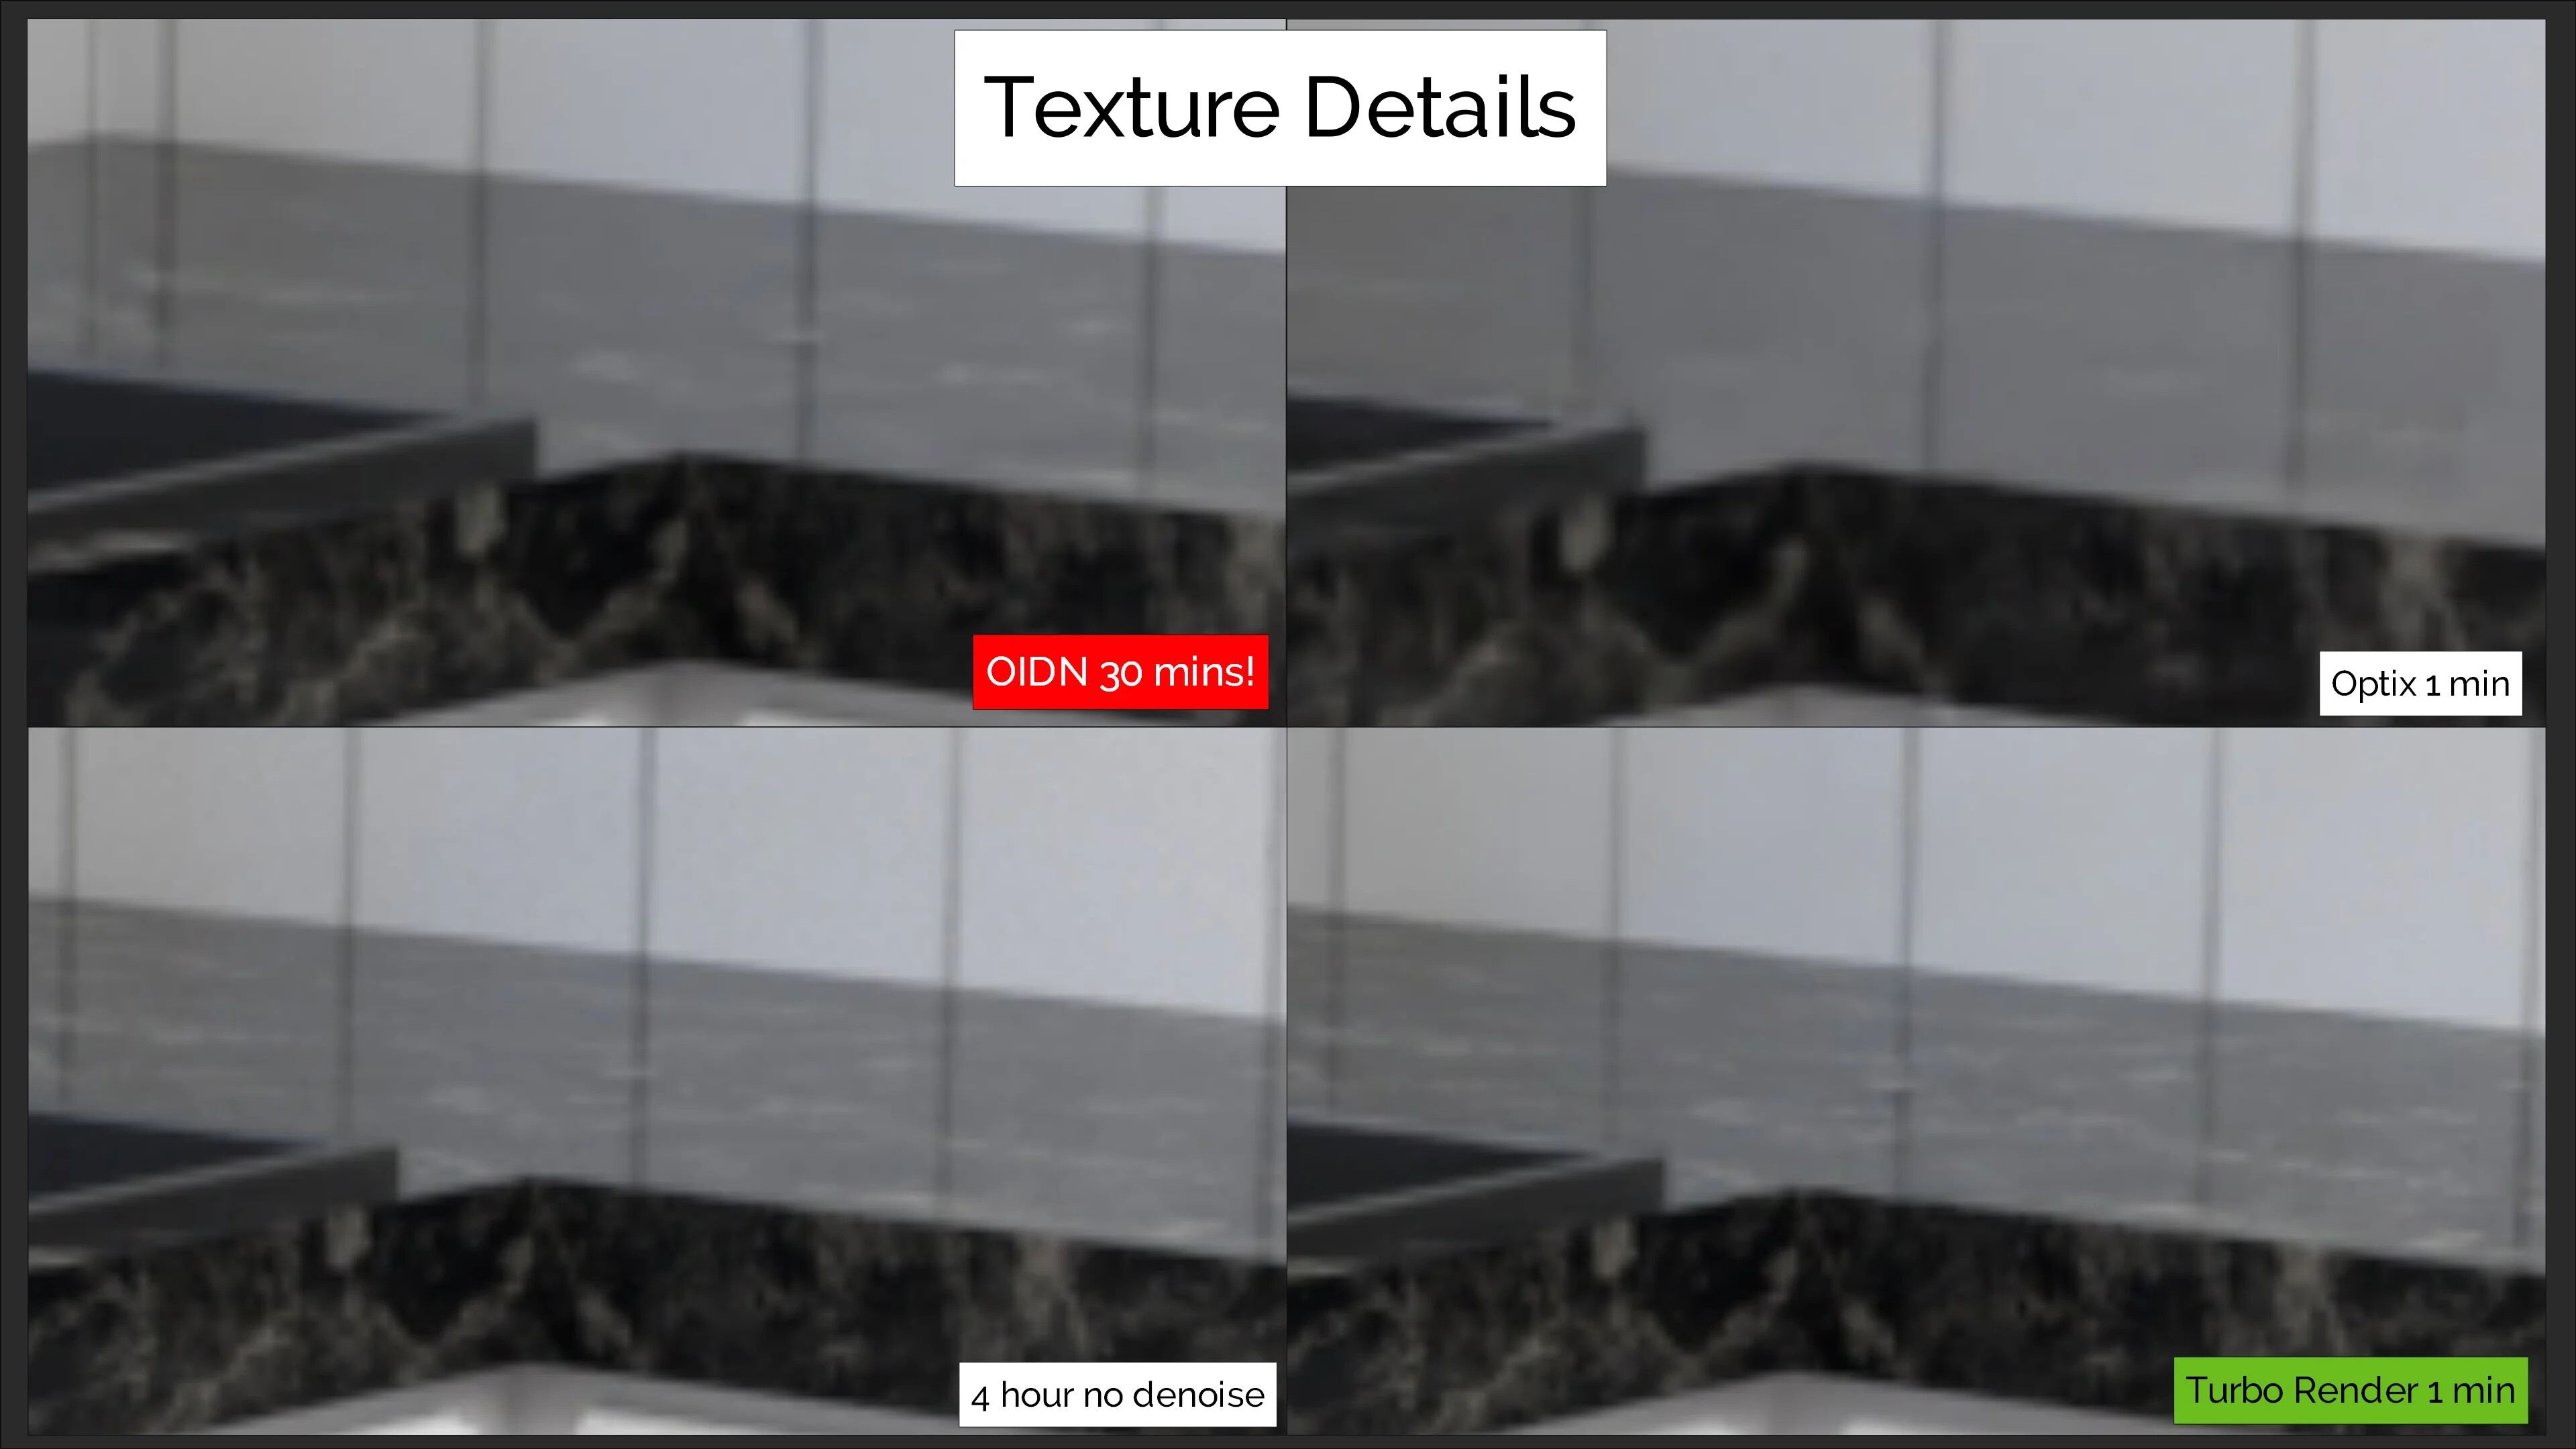
Below is an example of how Turbo can retain texture details compared to OIDN/Optix from the render settings. In the top left OIDN was actually provided with a 30 minute render, and it still couldn’t retain what Turbo retained in only 1 minute. This is thanks to the ‘enhance textures’ option.
2 Likes
This is actually an extremely important tip. It helped me to get rid of quite wobbly geometry, even with Medium samples. I did not use Ultra before with Medium samples, cause the documentation recommends to use it at least with High samples.
Ultra actually also helps a lot for textures in some cases.
1 Like
Yes, sometimes if ultra denoising mode is used with a sample pre-set that’s too low for the scene, it may introduce edge artefacts. Generally even the lowest denoise mode (‘draft/fast’) will retain geometry detail if enhance textures is enabled.
By the way, the scene above, if you enable very dirty, disable enhance gloss and reflections, do you still get the artefacts behind the fog?
Another tip which is sometimes useful. If you want to use the Turbo Render sample presets and it’s Cycles speedup options, but don’t want to denoise. You can just uncheck the left hand column ‘visible to camera’ options.
Yes, I do.
I did loads of tests with smoke in this scene. Tried tons of options selected and deselected. Changed camera and light direction. And I always get strange artefacts and overly bright lines on metal surfaces, especially.
I’ll send more information to your support mail… (edit: Sent)
1 Like
Thanks Ivo. I think I know what’s causing your issue with volumes. I’ve sent you an email detailing a test to try which I think will solve it ![]()
Looking at the Texture Details, I wonder if TR is maybe pushing it a little too far. If we consider the 4 hour render to be ‘correct’ then TR almost seems to be ‘sharpening’ the marble texture just a little too much, making it a bit more ‘defined’ then it maybe really should be.
And yet, at the same time, TR is doing the opposite to the reflected wall tile lines on the bench top, they are a bit more blurred and ‘wavey’ compared to the 4 hour render.
The huge difference in render time not withstanding of course.
1 Like
Hi, yes the enhance textures option can enhance the look of the texture slightly at very low samples. It’s generally not noticeable or is actually pleasing. Very rarely I might decrease the contrast of a texture very slightly if it is noticeably pronounced though. The reflections are equally straight, I think it’s an optical illusion due to this particular texture being black and white and slightly more enhanced than the original.
Well spotted though, eagle eyes!
have you tried this with UPBGE?
bpy.context.scene.render.engine = 'CYCLES'
people have in the past with cycles but this sounds like potentially real-time
1 Like