Yes I know, the question is just about how to denoise the passes individually
But I am getting too.
Is it possible to change the names of the outputs of the cache exr?
The standard for the first layers is rgba, followed by z for depth,
This is way it works in every image editor and compositing software.
The passes are automatically denoised individually if you use the ultra denoise mode, and are then saved into the render layer cache file which you can then use in any 3rd party compositor.
To keep compatibility with Blender the render layer cache EXR needs to match the render layer node’s output sockets for all the automatic rewiring Turbo does to remove any work users would otherwise have to do if they have complex node setups in Blender’s compositor.
I’m interested to know why you need specific naming convention and layer order in your third party compositor. Generally the name and order isn’t important as you can wire up anything to anything regardless of the name.
You can of course opt to output to any naming convention and order you want by using a file output node set to multilayer exr, and to save hard drive space you can turn off the animation option, so that only one frame of render layer cache is kept on disk at a time. I’ve made this easy to do by providing the automatic file output node creation and wiring using the below button in the turbo tools compositor panel:
You could also opt to remap the render layer cache naming conventions in your 3rd party compositor to avoid manually wiring. You could also use a simple python script to rename and re-order the layers in the render layer cache.
Awesome, that’s a big saving. Make sure you test a few frames first to make sure all elements are compatible with temporal stabilisation, if not you can stick those elements on a different scene with more samples and then automatically re-combine them in the compositor during rendering
I wouldn’t be able to release this video for weeks to come because I have a few more video subjects pending in front but turbo render was involved in the rendering and I was able to try out the temporal denoise yet again.
This solidifies something for me, and that is Temporal Denoise does not work for rigged characters.
Checking “process RGBA separately” does not help.
The background is not composited, it is part of the scene so the “blank background/alpha” issue from the last video test could not be the reason anymore.
So yeah…temporal denoise does not work with rigged character.
Seems it works for a static posed character turning slowly in space, or interior architectural, but not for animated characters.
I could be wrong, but yeah, that’s two for two experiments here, both involved rigged animation and both failed, nothing to do with “process RGBA separately” nothing to do with background alpha.
It doesn’t matter though, I am using the lowest setting of turbo render and even without the temporal denoise, the render still looks great, thanks Turbo Render
[There are no motion blur enabled, no composition shenanigans used, so no reason now other than…it just doesn’t work for rigged animated models]
Hi Bracer, the temporal stabiliser works purely on pixel information, so the way the object is animated (rigs, keyframes, particles, etc) shouldn’t make any difference. Are you able to send me a simple test scene for me to investigate what’s happening?
edit, just looked at your video, it appears the issue here is caused by the similarity in colour between the foreground moving object and the background, in combination with the moving geometry is very thin.
The issue is actually caused by blender’s 2d displacement being unable to move pixels sufficiently. To fix this I need to make modifications to Blender’s source code. I’ve started looking at this already, so hope to have a fix approved by the Blender foundation in the coming weeks.
Not at the moment, but when I have something that I can let you troubleshoot on, I will let you know asap
In the meantime, even without temporal for rigged animation, I am good, turbo render makes my render looks so much better than what I have ever been able to do for myself.
So I got time to test out all the stuff written.
As I basically understand the cache file denoise every pass, even the ones that do not need like the color, depth and alpha outputs.
Also it looks like there is no way to influence naming or what layers get output. And since denoise doesn’t happen on the passes of the normal output its pretty much, this or nothing, right?
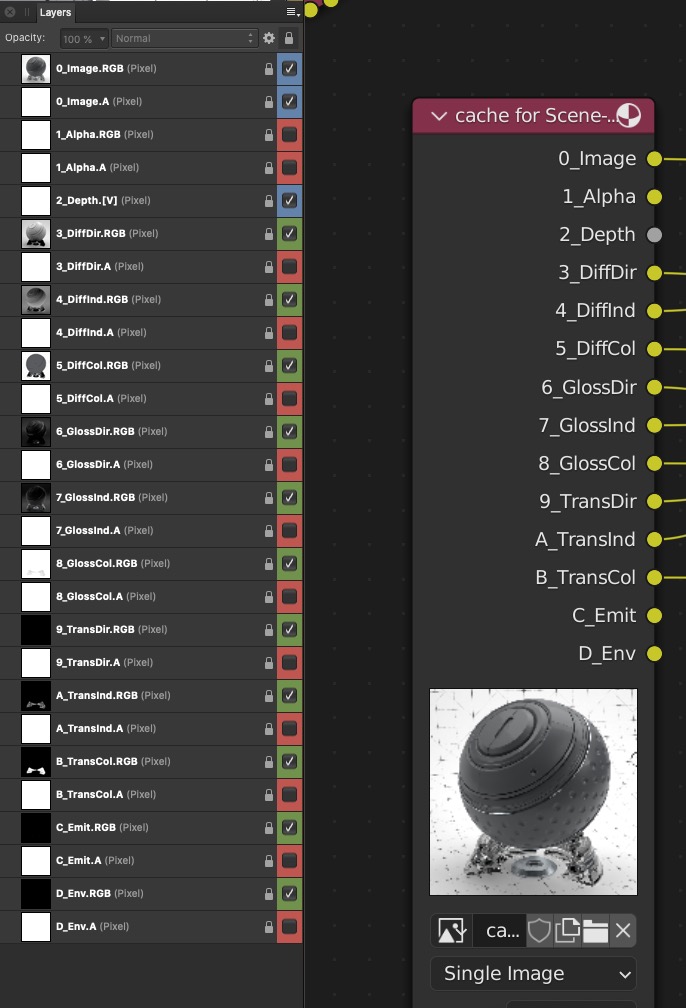
Thats so sad, as Blender already does a bad job on EXR files and passes. I have an example of how an output looks like in the cache. Remember the same I get when rendering with other renders and have not more then: RGBAZ followed by 5 RGB (no alpha) channels. Resulting in less than half of the file size.
I colored the layers, blue for RGBAZ and green, for useful, but not optimized and red for useless.
If you solve this, you are the hero of every serious compositing artist working with Blender.
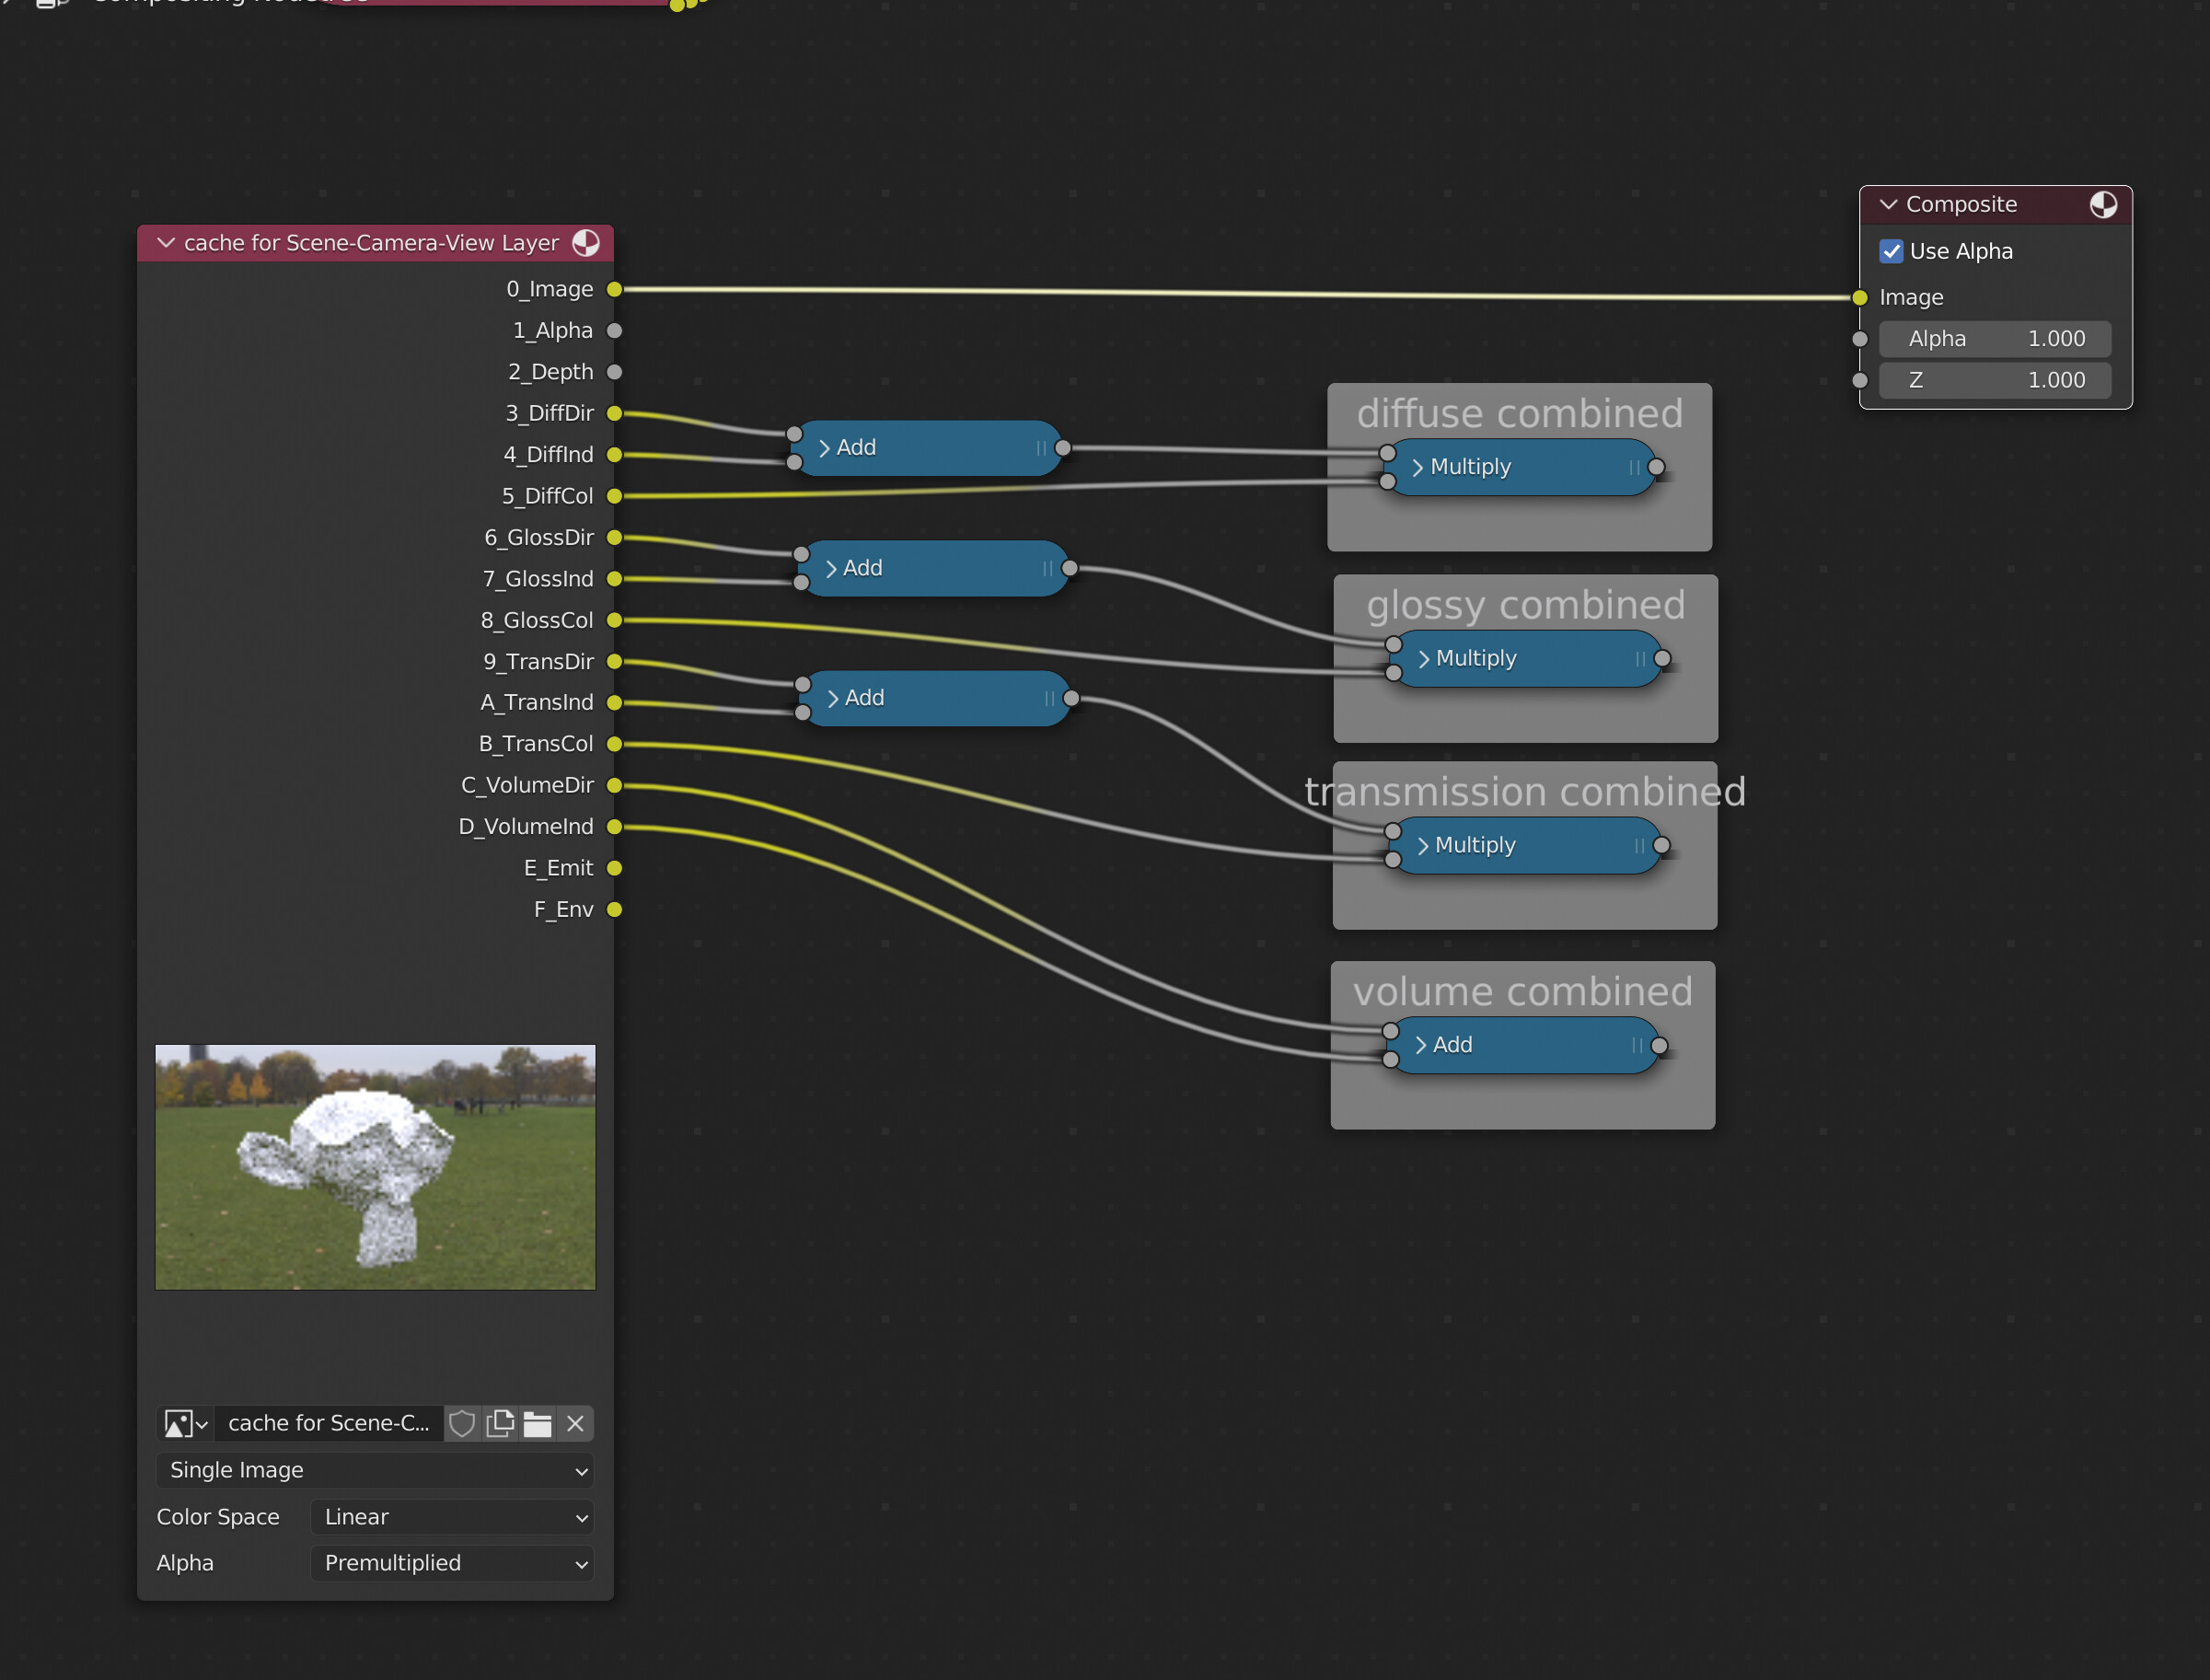
Hi Robert. It doesn’t denoise every single pass, it only denoises the passes that require denoising based on what you select in the visible to camera section of the turbo render options (but will of course still be saved into the cache exr if you have them enabled in the viewlayer options). The colour passes are only denoised when your scene could introduce noise to them, for example if you have very strong depth of field, motion blur, or if the passes which the colour pass belong to are behind a volume.
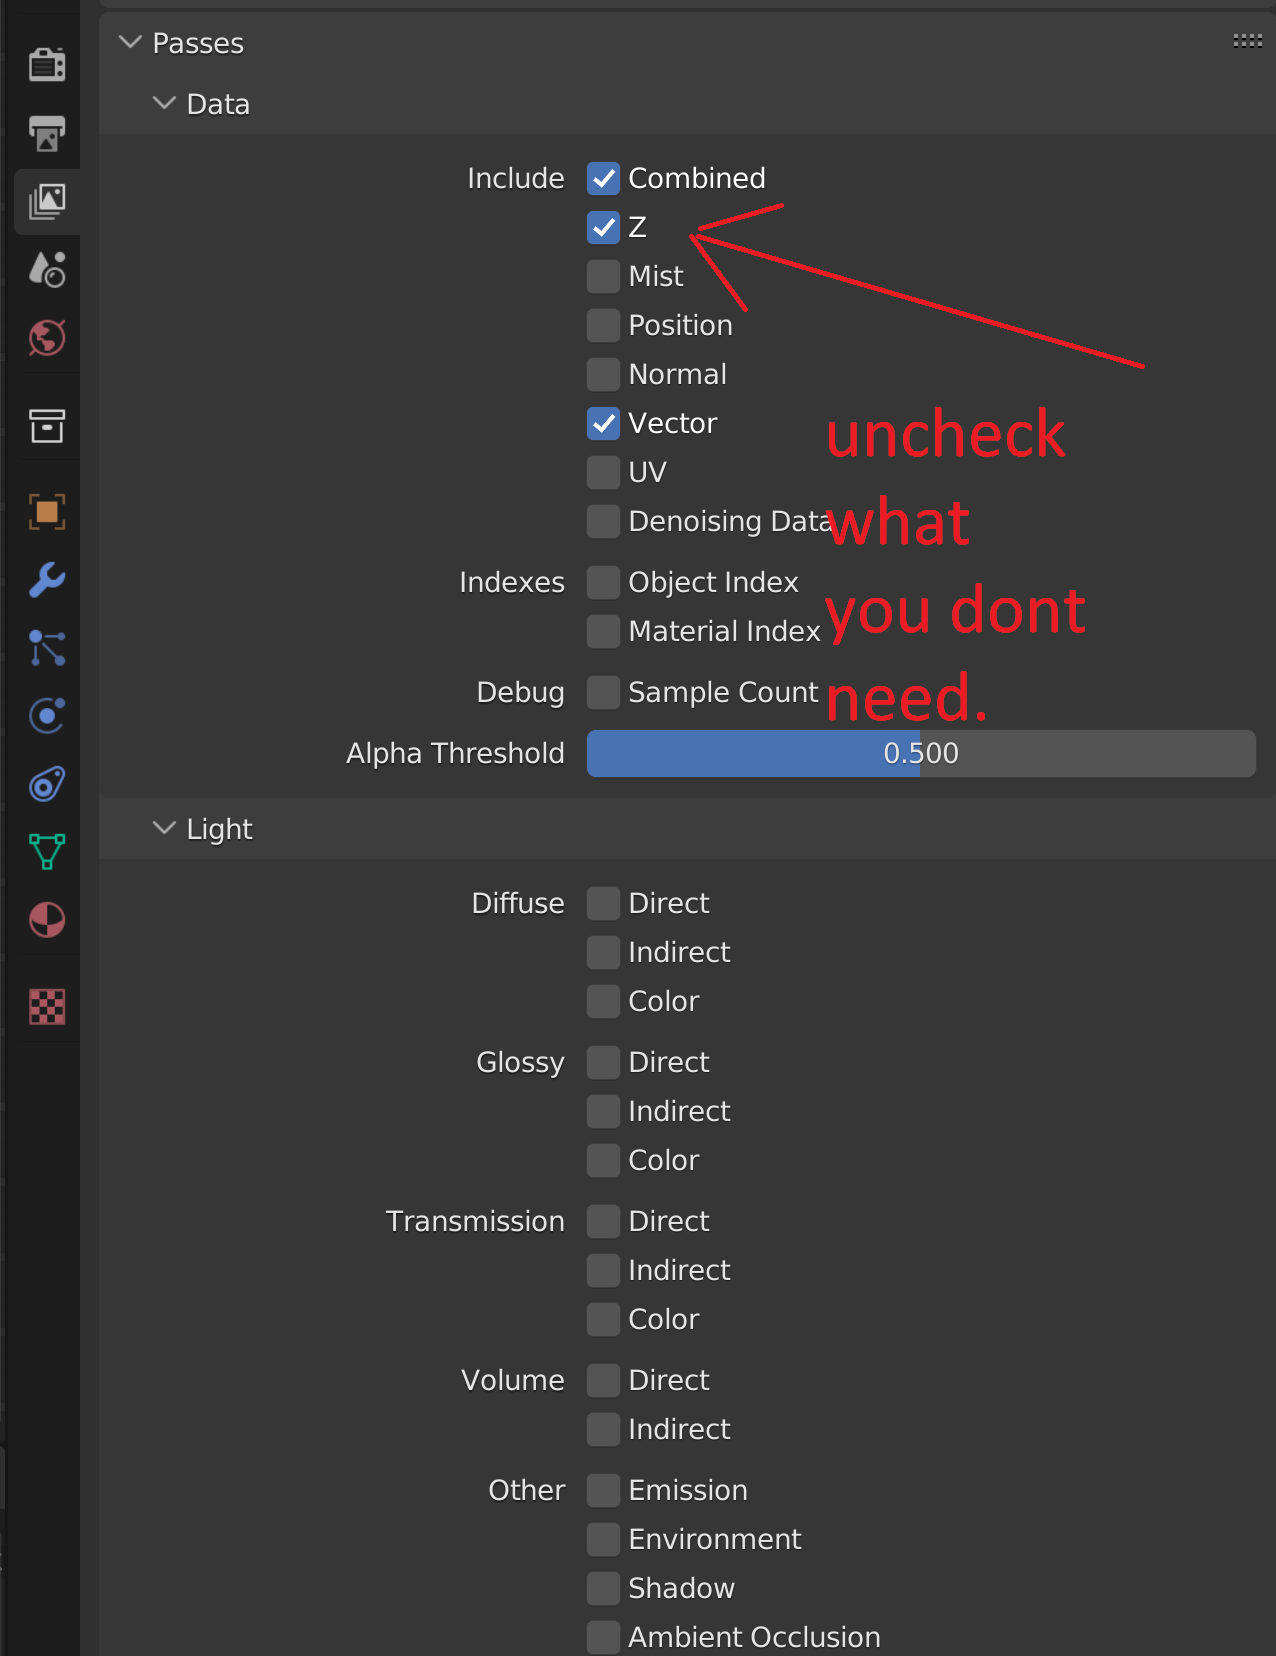
Just to re-iterate, only the passes you have enabled in blender’s viewlayer options are saved into the render layer cache exr. So if you don’t want the depth pass, you simply uncheck the z pass:
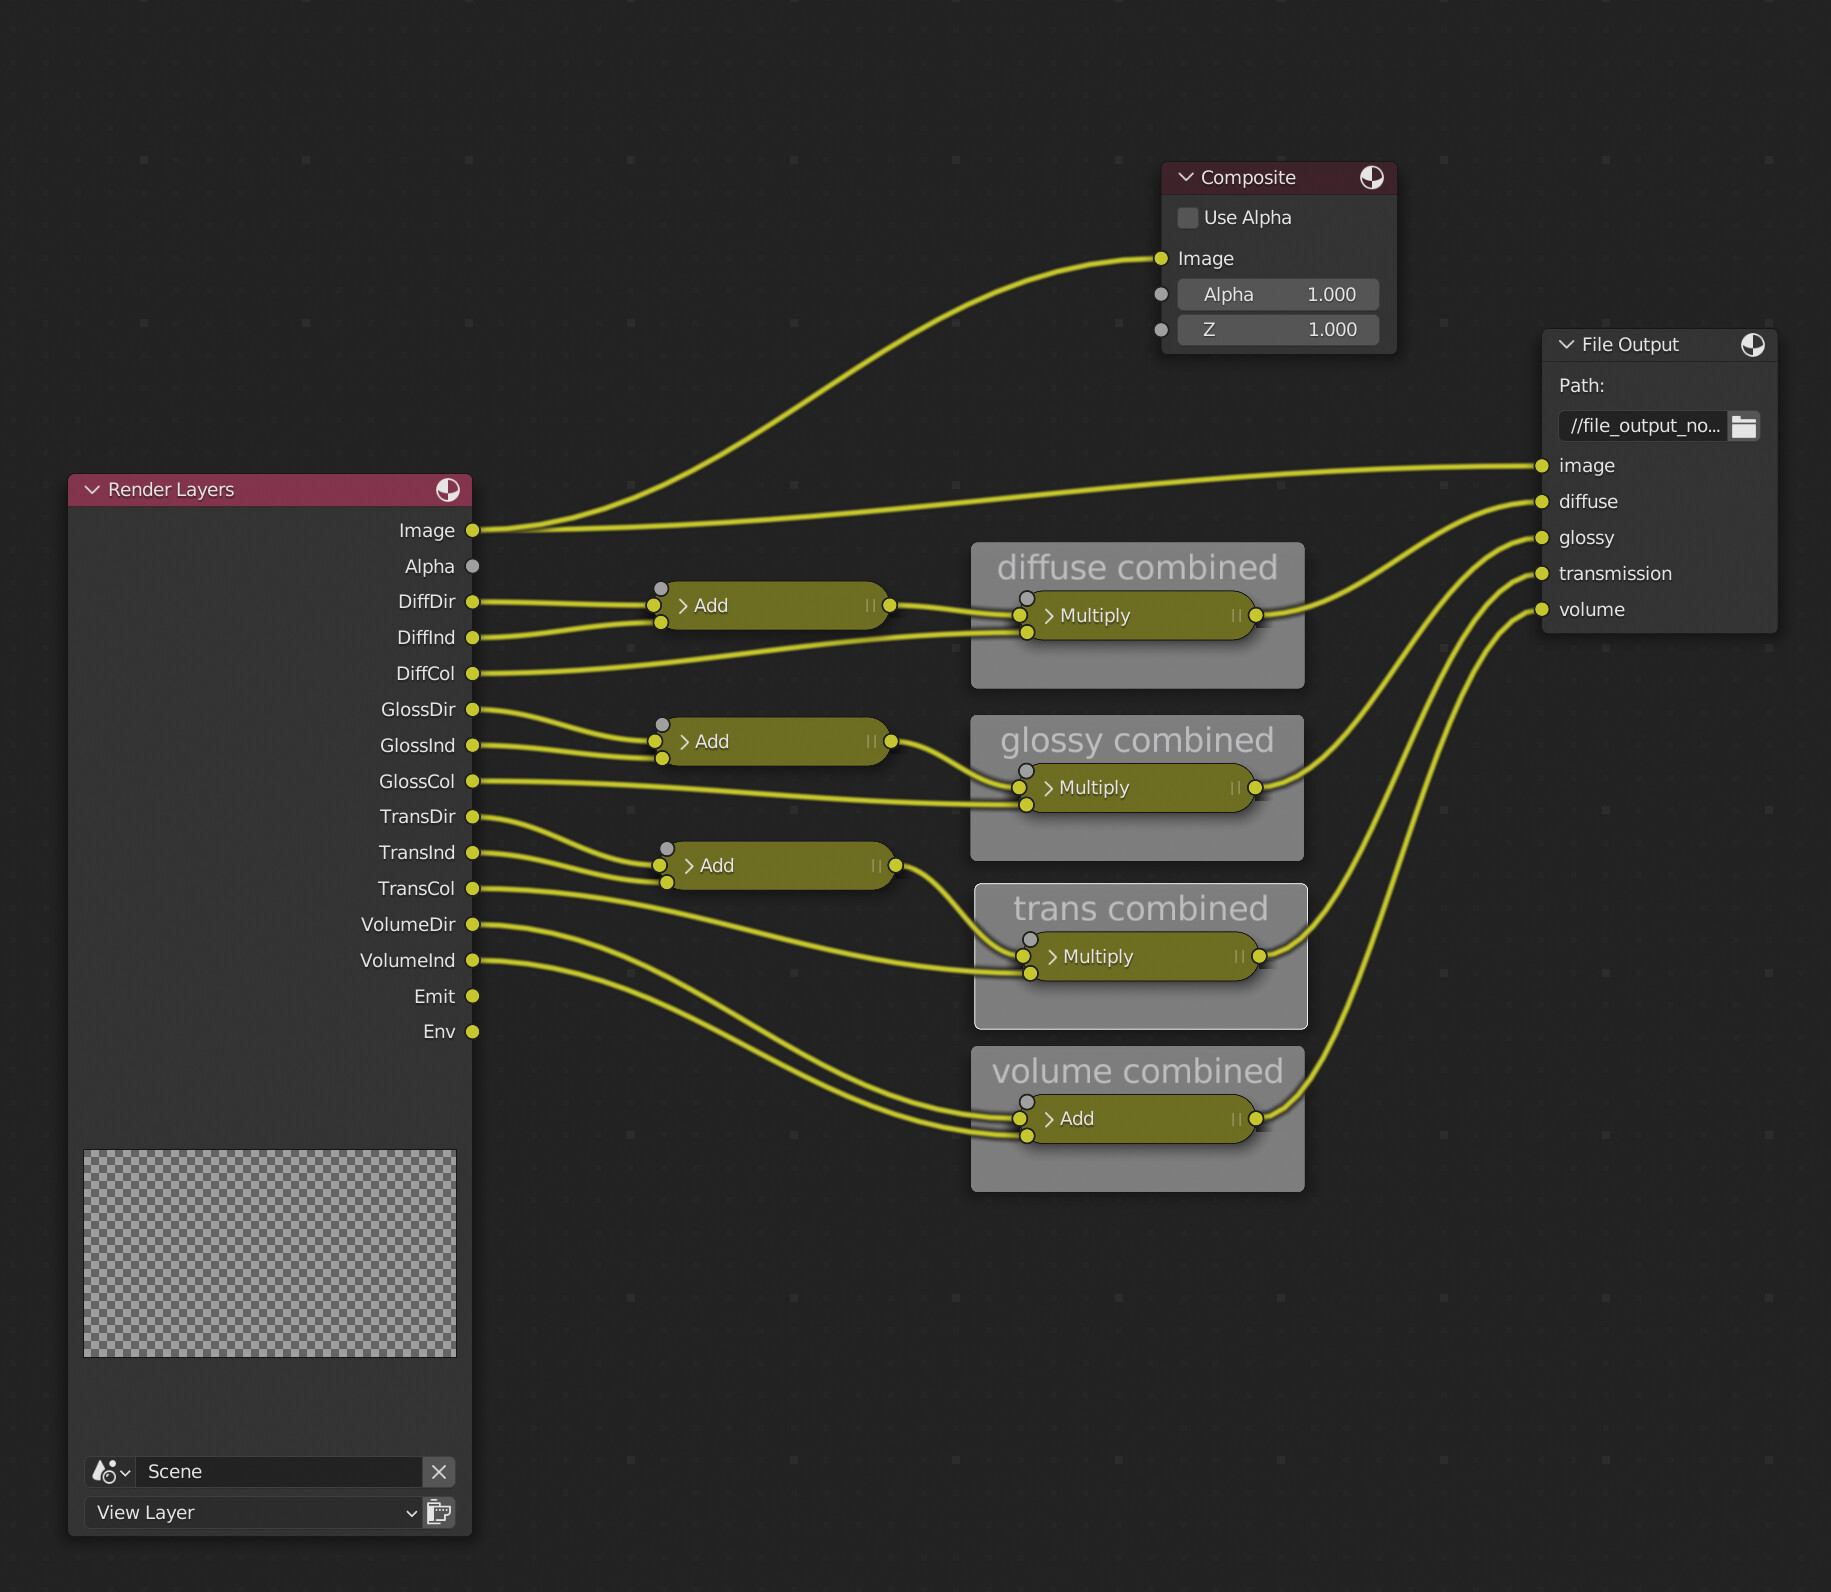
As mentioned in my previous response, you can name and order the passes in any way you wish by using the file output node to manually create the exr instead of using the render layer cache. To save hard drive space you can then uncheck the animation option so that only one frame of render layer cache is kept on disk (because you’re generating your own with the file output node)
The non required alpha passes you’ve highlighted aren’t seperate layers, that’s just how your 3rd party software is separating the individual rgba channels. To the best of my knowledge it’s not possible to output a multilayer exr as RGB from Blender, it always outputs as RGBA even if you set it to RGB in the file output node.
As others may also find the answers to @RobertLe questions useful, here’s a short video.
In the second part of the video I cover how to output to bespoke layer name and order from the render layer node. If you want to output only the combined diffuse, glossy, and transmission, then you would do the same as in the video, but link up the combined passes instead (they’ll still be denoised at the per pass level).
Ok thanks for the video… couldn’t test yesterday because I had strange bug in cycles that did cost me lot time. Ever seen a that a blend file does the IOR on glass shader wrong? Is just the scene, once I copied everything to new scene it worked… spooky.
Anyway:
Blender can output none RGBA channels. It calls it V for what ever reason. Depth is V channel and also Alpha. Only in your cash file its RGBA. So thats strange. Should be a ‘grey’ V channel.
Yes Blender adds to all color outputs an alpha. Like in Shaders etc. Well, its not really always, but in compositor it is. And no, its not your compositing software. Its Blender. Its a stupid channel adding software. You have that in Fusion, Nuke etc. And guess what, EXR is limited to 64 channels? Hence why people output crypthomate extra (another is 32 bit need).
Your example image actually does it wrong. You link the Render Layer not the Cache. With the render layer you only get the noisy output. At least I haven’t found how to get a denoised output on the render layer. Maybe disable cache? Disable Animation did not work.
I did test layering the outputs to get the same result. It looks however that some bright areas of the glossy output did became less brillant. Looks like being clamped, compare to the combined output.
Hi Robert, the example image I provided above will work fine. Turbo Tools will do all the rewiring automatically for you, and the individual passes will indeed be denoised if you use ultra mode.
If you’re getting clamping when combining, then make sure you don’t have the clamp checkbox ticked in the compositor’s mix shaders that you’re using to add and multiply. other than that check colour management and also uncheck prevent fireflies if you don’t want clamping during rendering with Turbo Render.
I’ve just tested the addon to make sure unchecking the animation checkbox prevents the render layer cache being kept on disk for every frame, and it appears to be working fine. You may have misunderstood it’s purpose? You uncheck it so that the render layer cache for only the most recently rendered frame is kept on disk. During rendering there will be two frames on disk, the frame you were on when launching the render, and the last rendered frame, this is so it can return to the original cache if the animation is cancelled, but after rendering you will only have single exr file. If you have understood it’s usage correctly, and you find there are more exr files in the cache folder, then they are most likely from other renders and will need to be deleted manually. This is by design to avoid people accidentally losing their renders.
I’ve never seen Blender do IOR on glass shader wrong, unless you don’t have solid glass, in which case either set ior to 1 or add some thickness to the glass geometry.
I see no denoise in Depth and AOVs, but having Motion Blur option on. Is that only for Animation?
The order in the EXR is alphabetical. I guess thats another Blender does it different and gives a F* about it. The reason you may used numbers. How sad. Anyway not your job.
As for the alpha, no matter what type of link I use its always an RGBA channel, but for the good part its saved correctly in the image output. At least one thing working correctly!
only the passes which are used to rebuild the image are denoised. depth, aov, ao etc are never denoised. You need to add a denoise node to those outputs if you want those denoised. This is to keep denoise times as fast as possible, and generally the other passes don’t need denoising as they clean in very few samples generally.
If you want RGB rather than RGBA, then you have to use a non multilayer exr. You’ll get a seperate EXR for each pass, but they’ll be RGB. For convenience I’d stick with multilayer EXR as a solid colour alpha won’t increase file size substantially.
I think you misunderstood. Actually I find it really good that with your tool, the image output get the right alpha channel. Normally its quite tricky to get Blender to render an rgba output correctly. At least this improved over the standard outputs… which is cool.
I’m more concerned about how hard Blender makes it sometimes to get this stuff right.
As for denoising, I have to find a case where motion blur would make that important. But yeah, there is always a way to fix that. I just wish, it wouldn’t be so much work.
Hi Bracer, I’ve actually found a way to fix the issue without modifying the Blender source code. I’ve been coding the improvement this afternoon, and am just testing it.
I plan to release it later tonight or in the morning.