We come from here: Apply different textures to wall corners? - #9 by carmanfer
Hello, I was having trouble applying a masked texture of some bricks while respecting the background texture and I didn’t find any tutorial on this matter in specific (maybe they exist idk).
Also I am no expert in texturing, this is just something that worked for me and wanted to show it.
First some images of the result I had following this method. As you can see there is continuation of the background texture (there isn’t any seam).
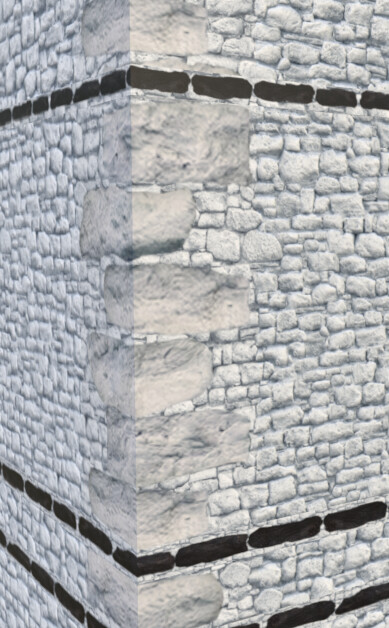
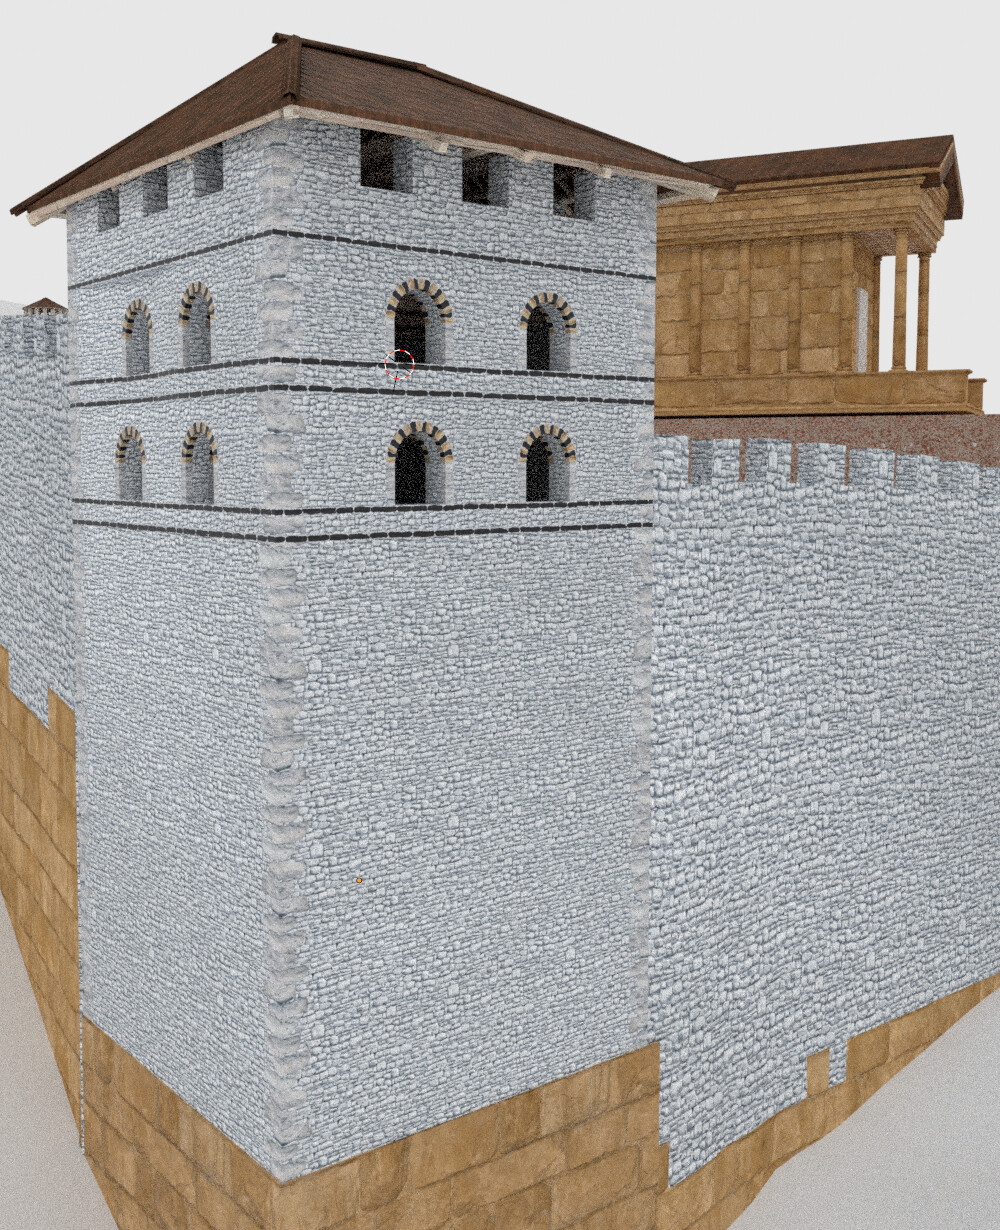
Respecting background texture:
Method description:
1- In GIMP or Photoshop, create the corner texture (or arch or whatever) that you want to use with a transparent background (or a solid background but with a mask instead of an alpha channel, whatever you prefer). Mine is a 1k trim sheet with alpha channel in which I have many combinations.
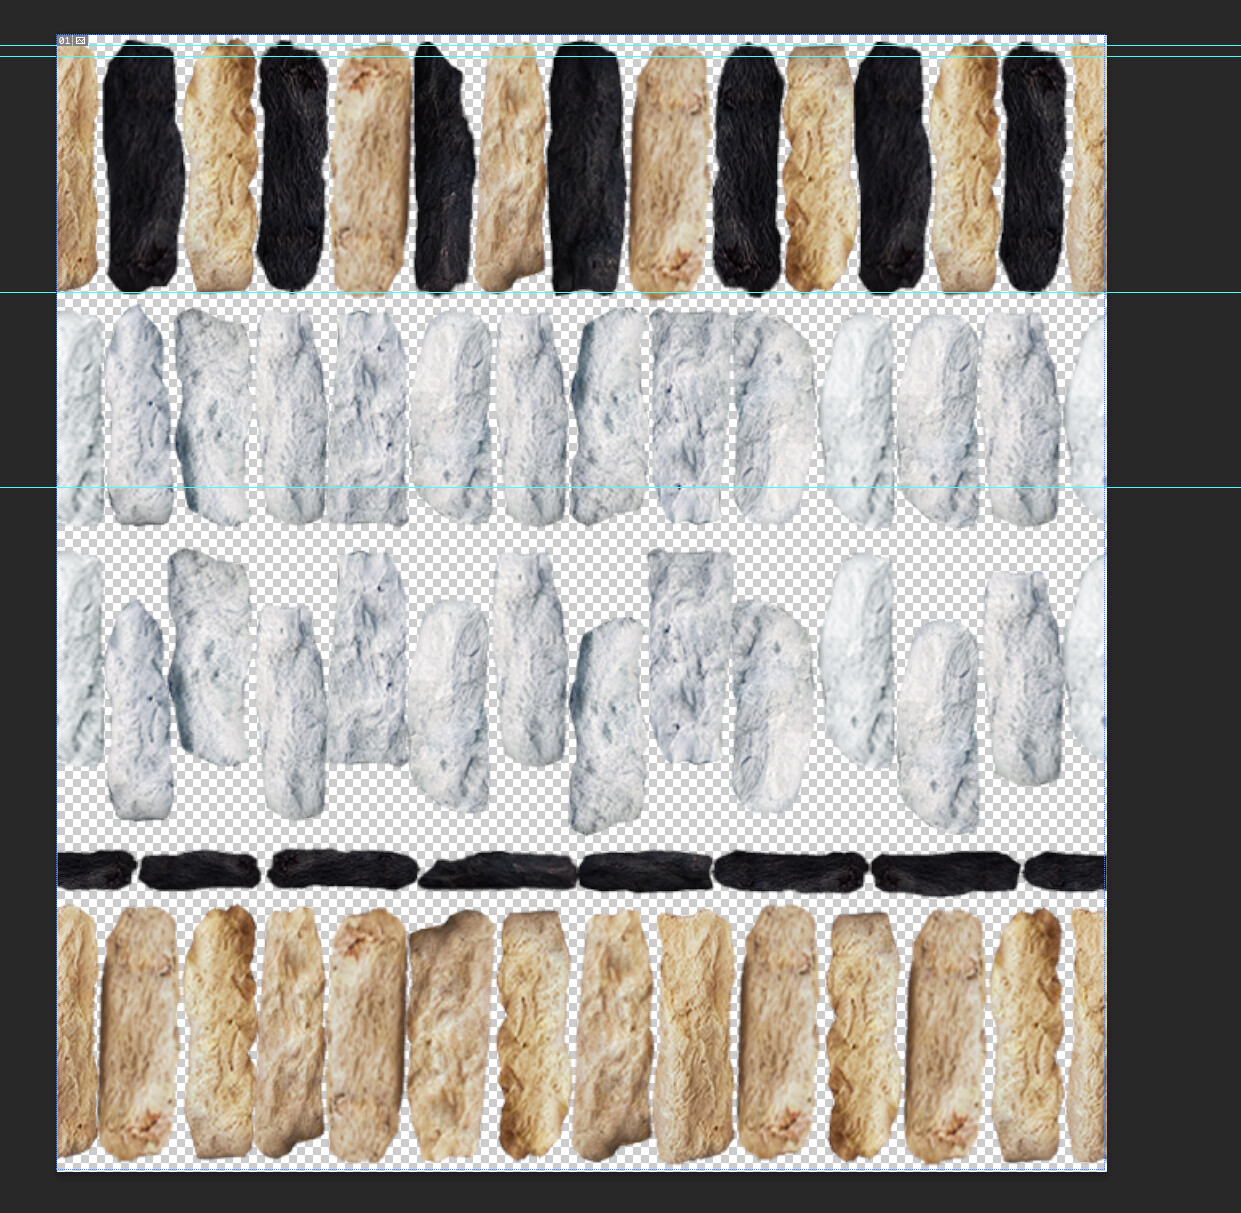
If anyone’s interested I made it by selecting stones from other textures, cropping them and placing them together as you see in the screenshot.
Edit: now I see that the bright/dark side of the stones is irregular in my trim sheet, some point left and some right, ideally, they would point towards the same side so that the normal map aims at the right direction. Or even better, there shouldn’t be any dark/bright side, like an albedo map.
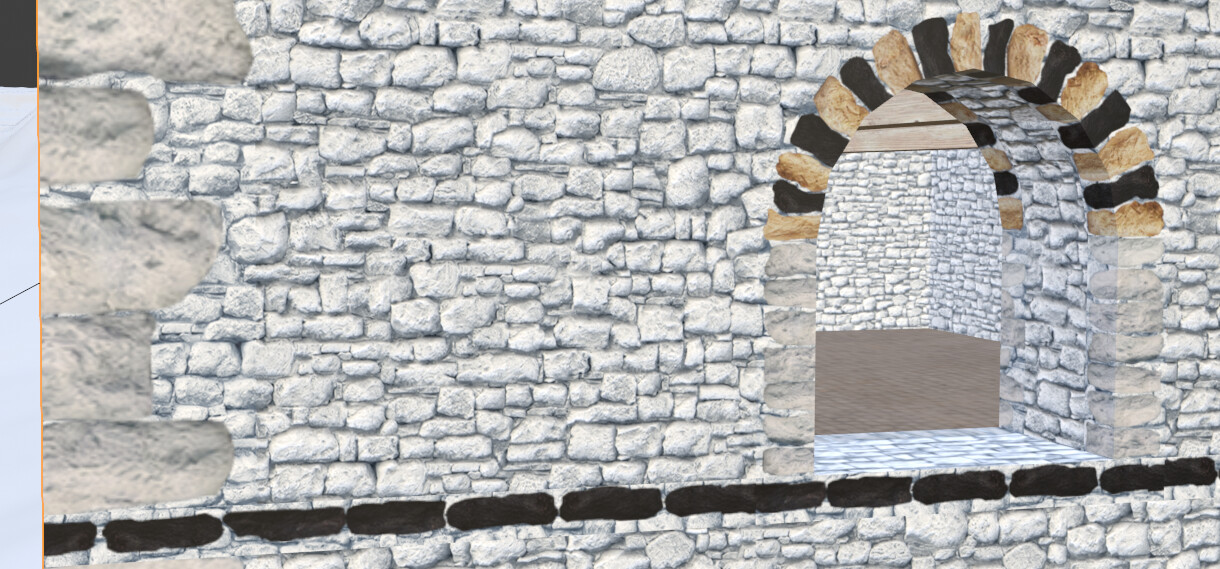
2- In Blender, for the object that you have, create faces where this texture should go. In my case I had a window with an arch. As you can see I have faces surrounding the aperture of the window.
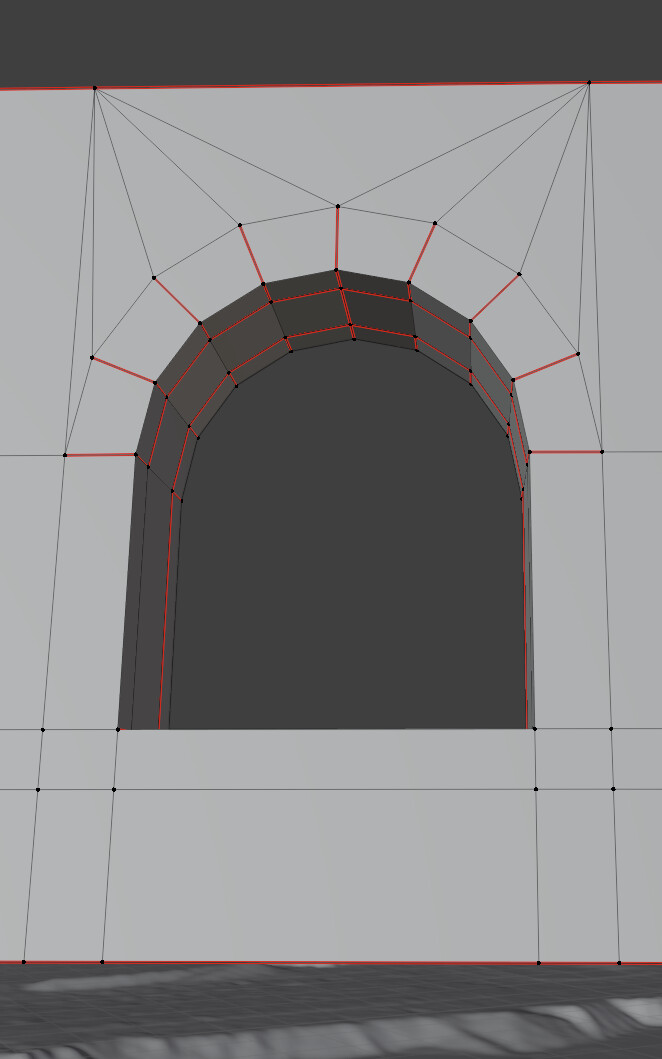
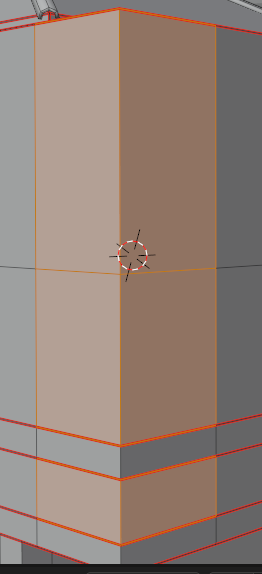
Also for the corners you should have dedicated faces:
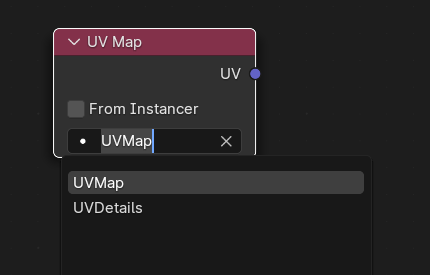
3- Create two UV maps for this object. One will be the general UVs for the basic wall texture (from now onwards BasicUV) and the other for the details (corner texture) that have to overlap the basic textures (from now onwards DetailsUV)

4- Create a new material. You should have 2 materials: (edit: maybe this can be done with one material somehow???)
-
one with your basic wall texture only, (I will not show mine because it is a complex material that blends between another two and I don’t want to confuse the reader, just plug your diffuse and normal as you would do in any material). Make sure that the information of the coordinates comes from the Basic UV map.
-
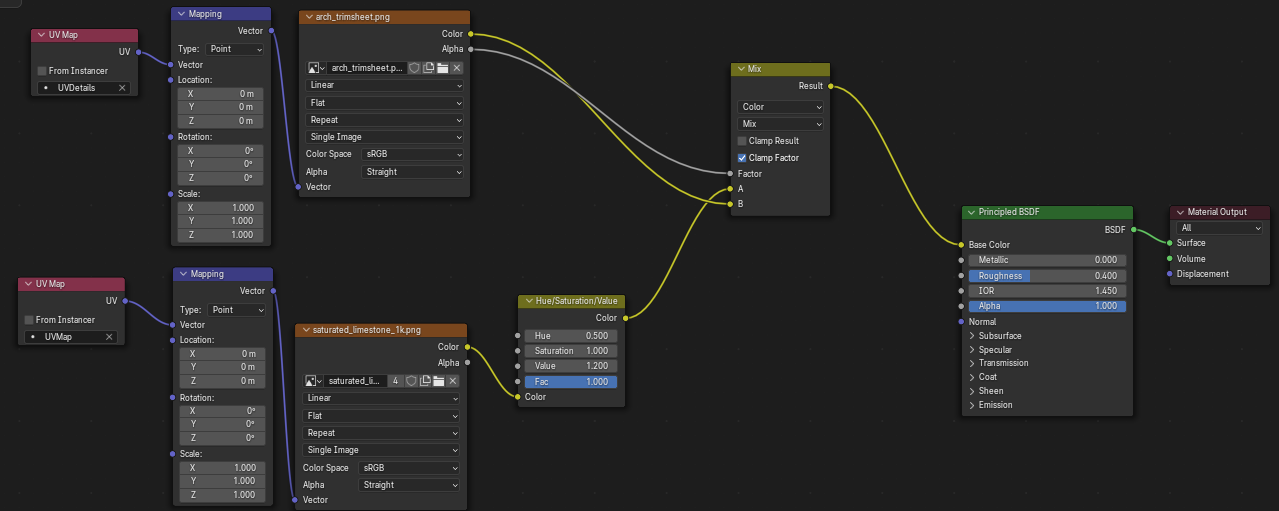
and another material with the same basic wall texture and your “corner” texture made in step 1. In this new material we will overlap the “corner” texture with the basic wall texture in the following way (for alpha textures, if you have a mask just plug your mask color output into the alpha of the mix node).
5- Select the BasicUV map (in the previous screenshot “UVMap”). Now in the UV Editor you will be modifying this map. Unwrap the mesh (make sure you don’t have distortion, or in other words, that the stone bricks look good):
Check that there is continuation of the texture from the faces where there isn’t any corner texture with the ones that have them. This is because the background texture is the same for all these faces and acts on the same UV map (BasicUV), so there is continuity.
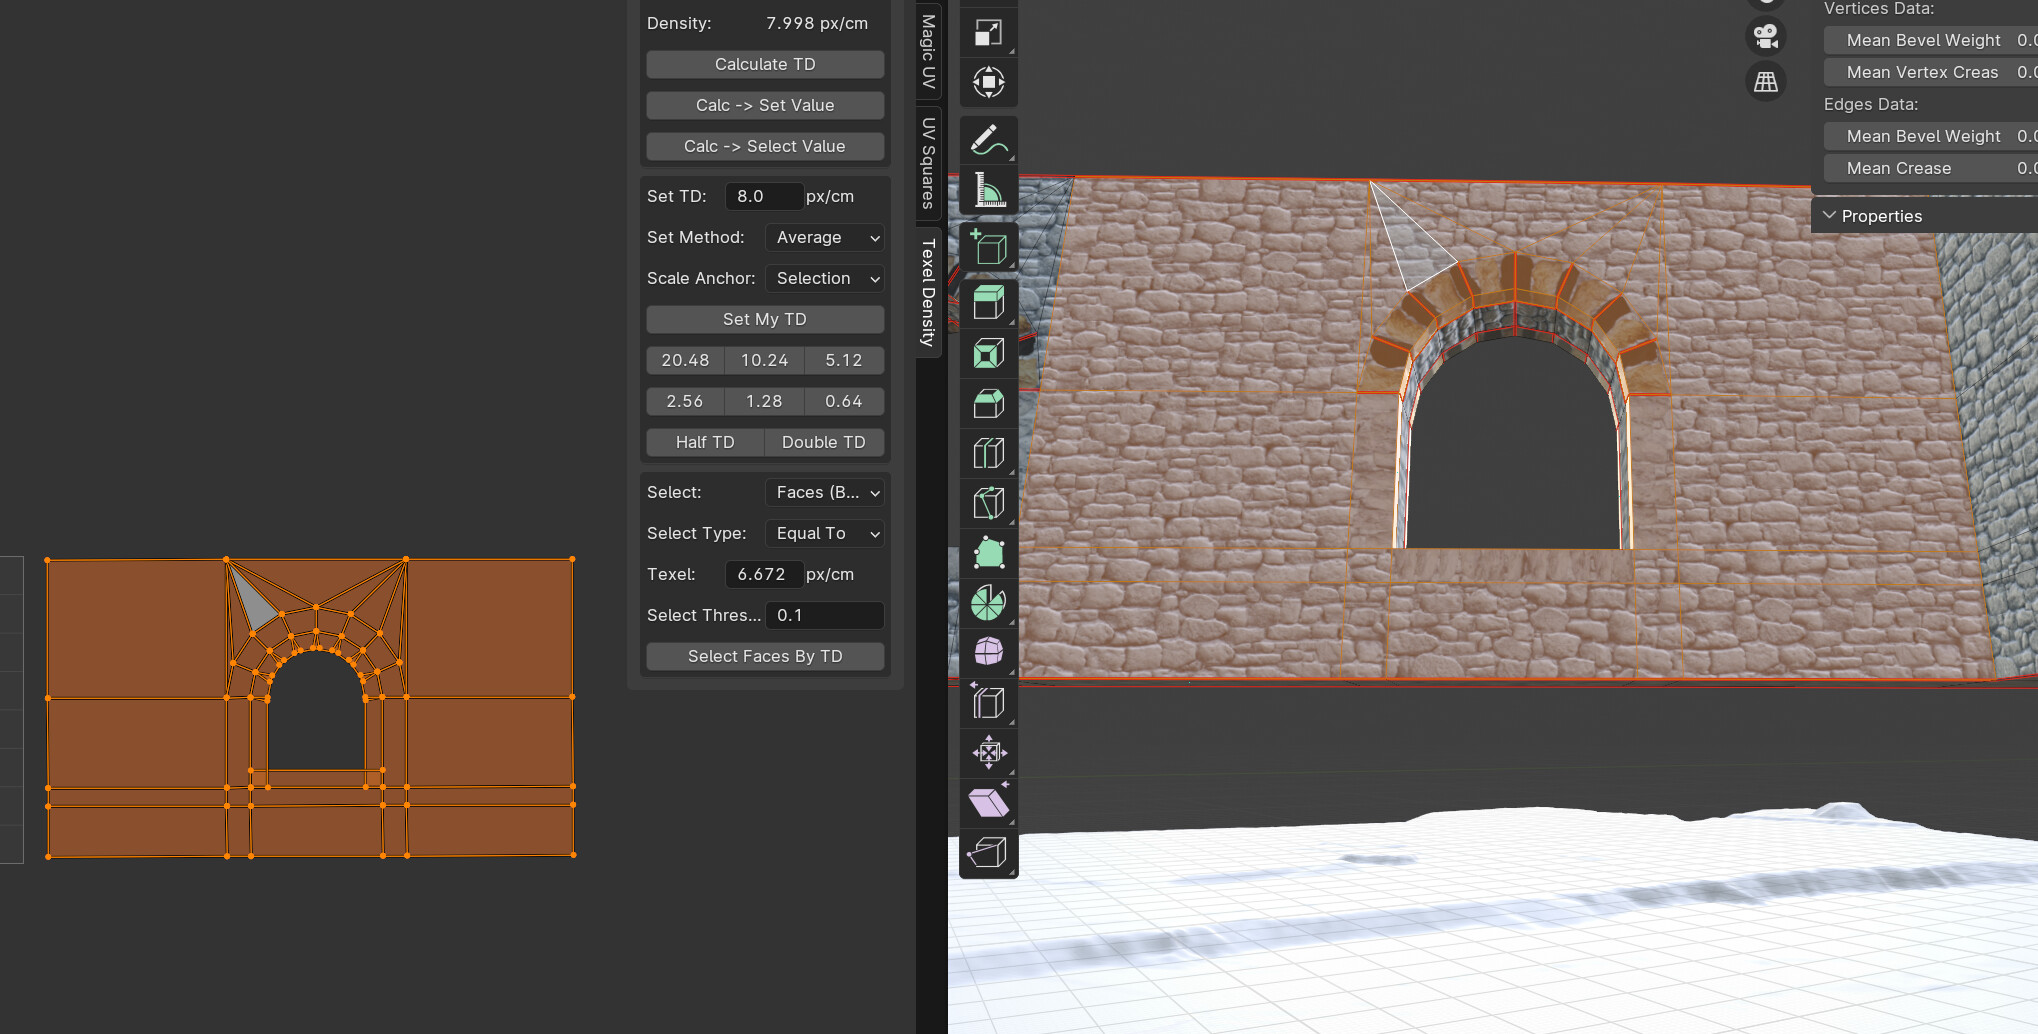
6- Select the second UV Map (the DetailsUV Map). Now you will be editing the details (corner stones). Position the unwrapped faces on the trim sheet (or whatever masked texture you have). Check that you don’t need to position the faces affected by the details material (in my case the trim sheet) connected to the rest of the mesh, since it is a different UV map and it does not affect the basic stone texture in the background.
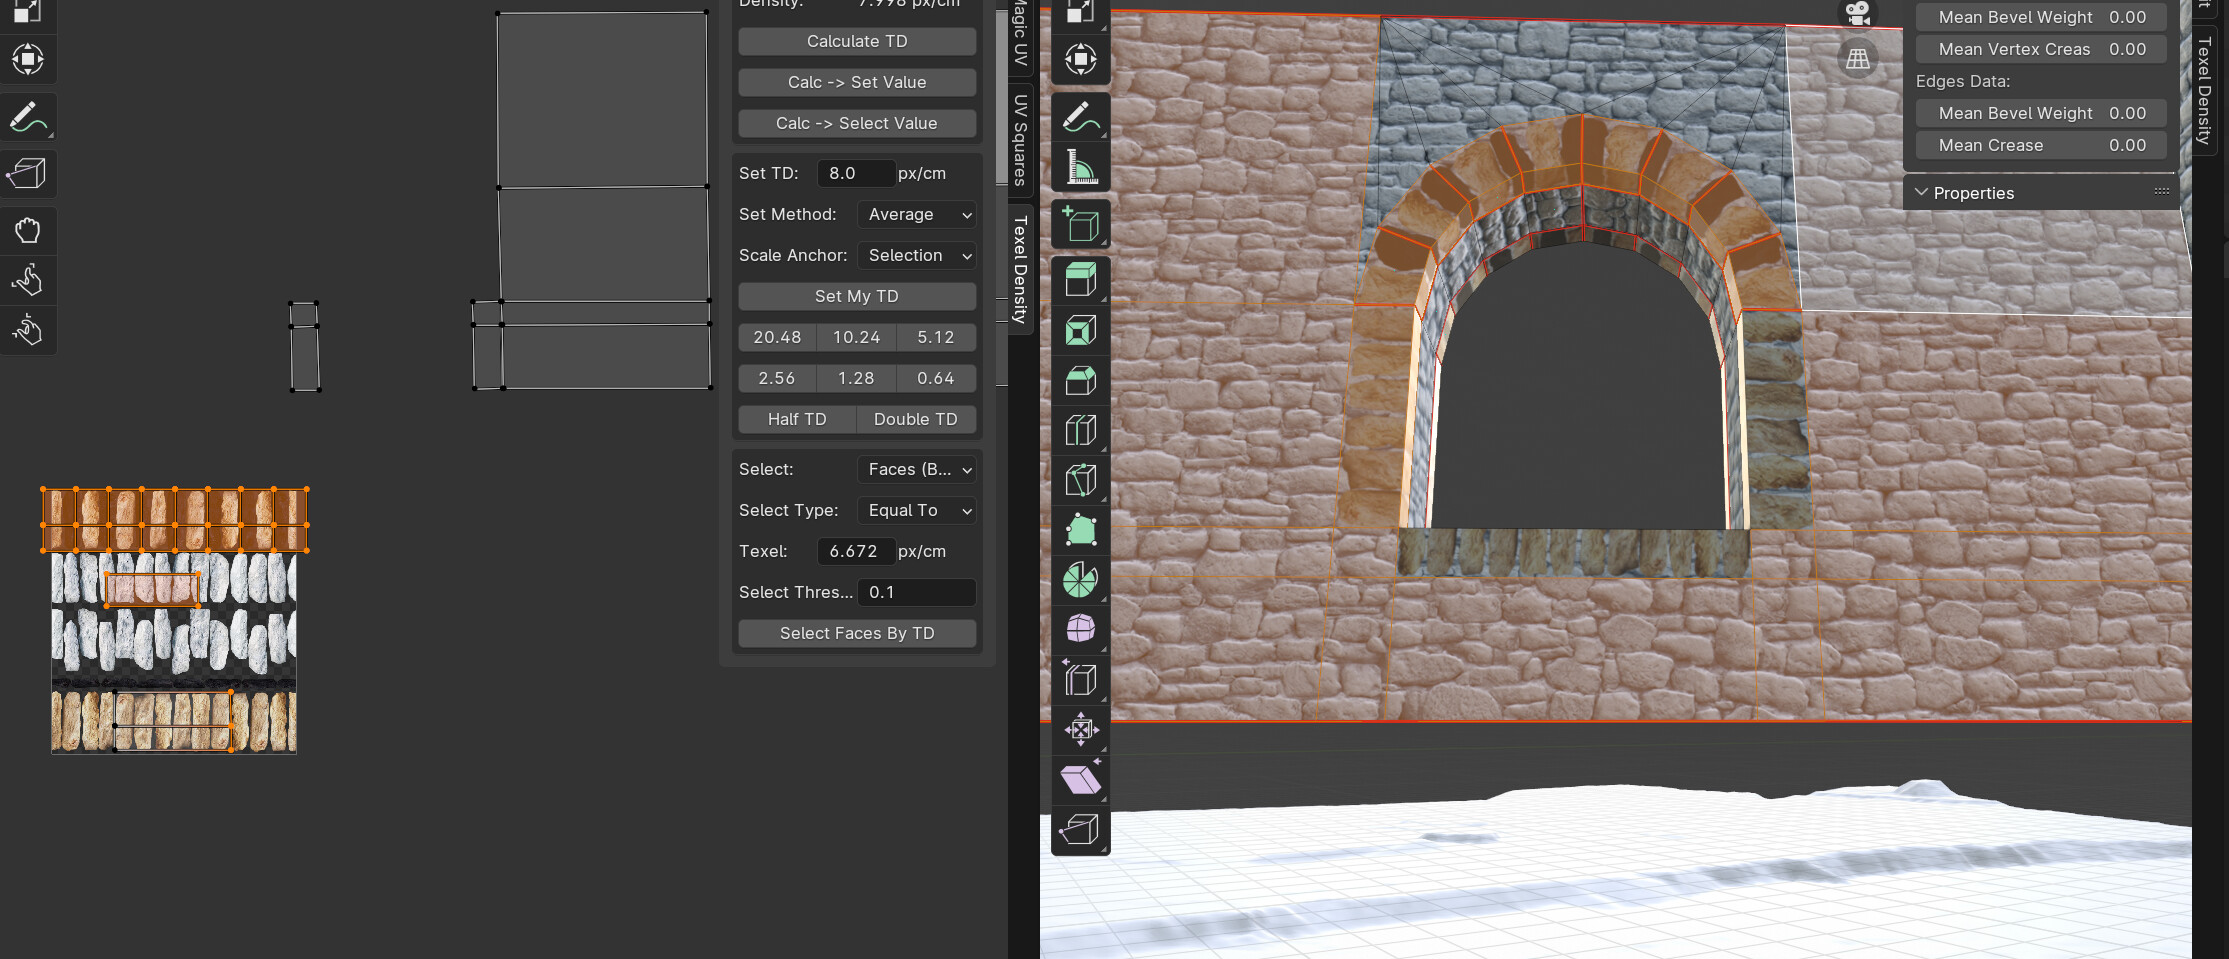
PS: To unwrap the faces of the arch properly, I use an addon called UV Squares that allows me to turn the weird shapes of the unwrapped arch into rectangles, then I just align them manually (top row of the trim sheet).