I am learning product visualization in blender and now I want to learnt lighting and compositing the products which can help me get proper 3d renders rather then flat renders. I have got some quite nice tutorials for lighting but I cant find the same for compositing (related to product animations) so can anyone help me how can I learn compositing? Should I watch compositing tutorials that are in general? (Does mostly the same nodes get use in product viz too?) or are there any other tutorial or way that i can learn it for products? I am also learning to use photoshop and davinci resolve so which software should i first learn post processing in?
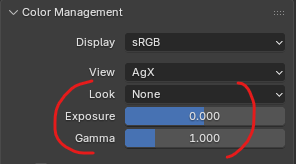
For product visualization, there would usually not be much compositing at all. The more important thing is the color management settings. The default (AgX with nothing changed) tends to look washed out and flat. You can improve renders by playing with the look/exposure/gamma settings (it’s a bit subjective, so try some stuff and see if it looks good).
If you do want to use compositing, you would use a rather generic cinematic setup that imitates camera imperfections (bloom, lens distortion, film grain), though you would also keep that really subtle as product renders need to be clean to show the subject clearly.
Do you have any attempt you can show? That would make it easier to give advice.
Thanks for the advice and today I also found some videos from TheBlenderRender yt channel (he is an amazing tutor who has a niche into product animations) and he has some videos of post processing the renders in da vinci (which includes the color grading part which you told me to look for in the blender inspector) and I found them quite helpful when i watched some of them.
And to answer your 2nd part, I just started doing product animation pratice from past 2 months and have made a beverage render by looking at the same theblenderrender videos and I made a JBL headphone render myself (but I feel both are not ready as yet as its quite flat because of not so good lighting and post processing and also some animations were not rightly paced and I also need to learn sound design and editing to make them look portfolio ready with good enough transitions i feel)
attaching both of them here as a drive link as files are huge .
https://drive.google.com/file/d/1dryqBUDgOrSJZXLBGMn_C-_X1Ep4b66T/view?usp=sharing (headphone)
https://drive.google.com/file/d/1Ew3yXCj5x-4npScyYin43eDleVEIkI6c/view?usp=sharing (beverage not edited yet)
The files you uploaded say access denied, I can’t see them.
(headphones)
(beverage) quality is degraded slightly due to upload but now it should hopefully open
This is actually pretty good! When you were saying it looks flat, I was expecting something much more obvious.
I think it varies from scene to scene. Some scenes are great already. The first scene of the headphones does look a bit flat. I think I can tell the reasons:
-
There is a light source coming roughly from the camera’s direction. That flattens the shape of objects, it can look like cheap flash photography. A more expensive product visualization wouldn’t use flash coming from the camera but rather actual light sources placed more to the sides.
-
There are multiple light sources and they are all perfectly white. It can be a good idea in that situation to vary the color a little between lights, ex make some slightly yellow and some slightly blue (because those are common colors for real light bulbs). That helps separate the effects of different lights on the object.
-
Is the background added in compositing? I would expect a bright yellow background like that to reflect a little on the edges of the headphones. It looks like it isn’t, so the product looks disconnected from its surroundings.
Thank you for the feedback!
And yes after making this animation I learnt about the basic three point lighting setup (2 lights from side and a backlight) but I am in doubt do we need to animate them too with product/camera animation or keep them still and just let the product do the animations? Because I use to think yhat 3 point pighting setup is for still renders so I dont know much about the setup with animation.
And no the background plane was there in the render itself but it looks that it isnt reflecting so should i have given it an emission shader? So it could have more power annd reflection or tweak the roughness or something in its principle bsdf node??
I would usually not animate the lights. If they move as well as the product, it’s going to get dizzying.
That must just be the lighting making it look that way then. It will probably look better with 3-point setup, so no need to change it.
I think photoshop is a good start, or krita or else, because it’s the simplest and it’s about ideas…
Can you take a render of yours and make it looks better in PS ? Then once you know what an image is lacking, how to solve that in PS then you can look at compositing which is basically the same but in motion therefore with a more limited set of tools…
Compositing comes in two parts : first the tools but that’s not very helpful without ideas or how to improve an image.
Indeed as @etn249 said, since we work in 3D you might want to do most of the work there and do very little compositing, or learn that as part of your toolset to improve images.
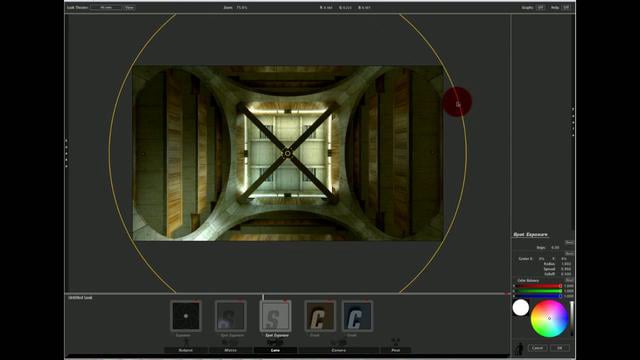
Here is a cool example to study how much comp and grading can do to a render :

16 years ago but it stills hold up IMO…
A complete shot from start to finish to better see the process :
obviously the author has a great culture of cinema , light and photography therefore the creative decisions are spot on !!