Recently I have been dabbling with graphic design, with the purpose of creating a t-shirt for the threadless community.
The design I want to create is a pattern which wounds around a shape similar to the ‘mobius strip’ (Not the same though)
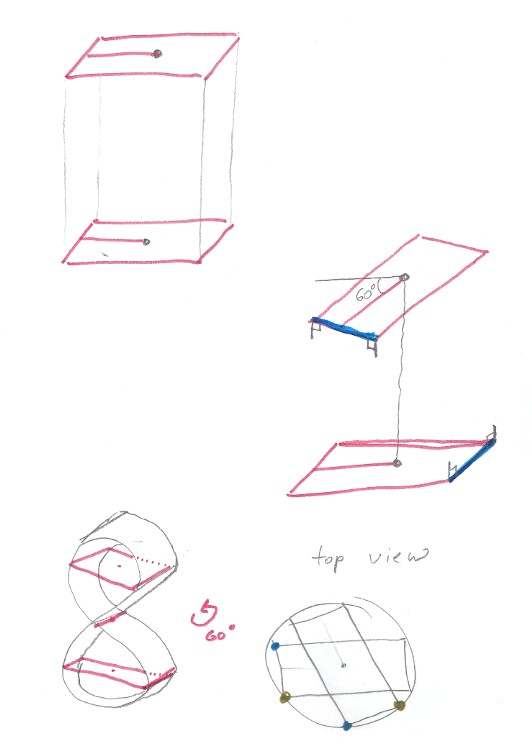
I have sketched out a guide which suggests an explanation of this geometry.
Basically we take a rectangle, copy it directly above.
rotate one of the rectangles ~60 degrees.
then taking a similar side of each (Blue highlights) we connect the two in (the most natural way) like if there was a paper strip in-between them.
The finished shape will be something like a twisted figure 8 made out of paper.
Please outline how I can do this in Blender (i got 2.49b) ?
I am sure there are a lot of ways to do this, but I would take two planes, position them as needed, then use two curves, shape them as the outer edges of the figure eight looking thing, then after they are right, convert to mesh and start creating faces.
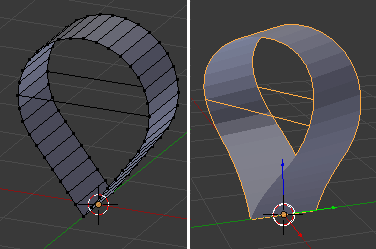
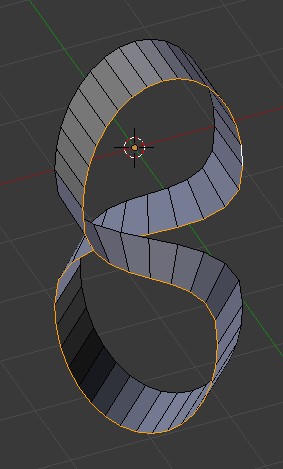
It’s easy to dream up the geometry. But to make 3D model you need to layout the geometry in 3D space. Quick way to experiment the twist shape geometry is by using Simple Deform > Twist Modifier.
First, layout the upper profile and give it some depth. Add Simple Deform modifier and do simple twist. Remember that object will twist from object origin so create the shape from origin up. The twist angle you give is located at middle of the curved section. So I added an edge there to roughly visualize 30 degrees twist at that point. Angle can be seen from top view. So actual twist angle is more then 30 degrees to get the edge to turn 30 degrees.
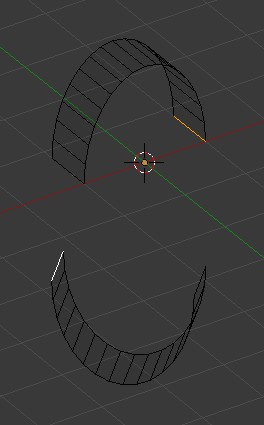
You can duplicate this twisted object, and flip it to create the lower section. 30 and 30 degrees make 60 degrees total twist.
My twisting eight diagram was misleading… that is not quite the shape i want.
It has to look like its made from a single strip of thin~ paper. There is no intersections.
here is a new diagram, does this make sense? its a sketchy AXO view with the ‘scafolding’ rectangles both turned 30 degrees respectively.
note: The orange line traces one of the edges, while the green, (incomplete) traces the other. if you then follow the path of the strip, you have two sides.
However you choose to model the strip, don’t make it a flat plane. Make sure it has a little thickness, otherwise it’s a nonmanifold and you’ll get smoothing problems.
Your shape seems to make sense as a drawing. But did you make a real model of this shape out of paper strip? I can make twisted paper model shaped similar with loops but not quite the way you show it on the drawing. How do you twist the real paper strip to do that?
Piotr: I want it to be flat because the whole point is to add a pattern that has see-through parts, like a single repeating shape. This is so the visualisation is primarily an object copied and following this tangled path… I hope that makes sense? …i’ll sketch it out in the morning.
ridix: the geometry is such that you can’t quite make this shape out of a single strip without some strange deformation… I have not tried but my intuition tells me to make this you have to cut separate strips and glue (probably with slanted ends).
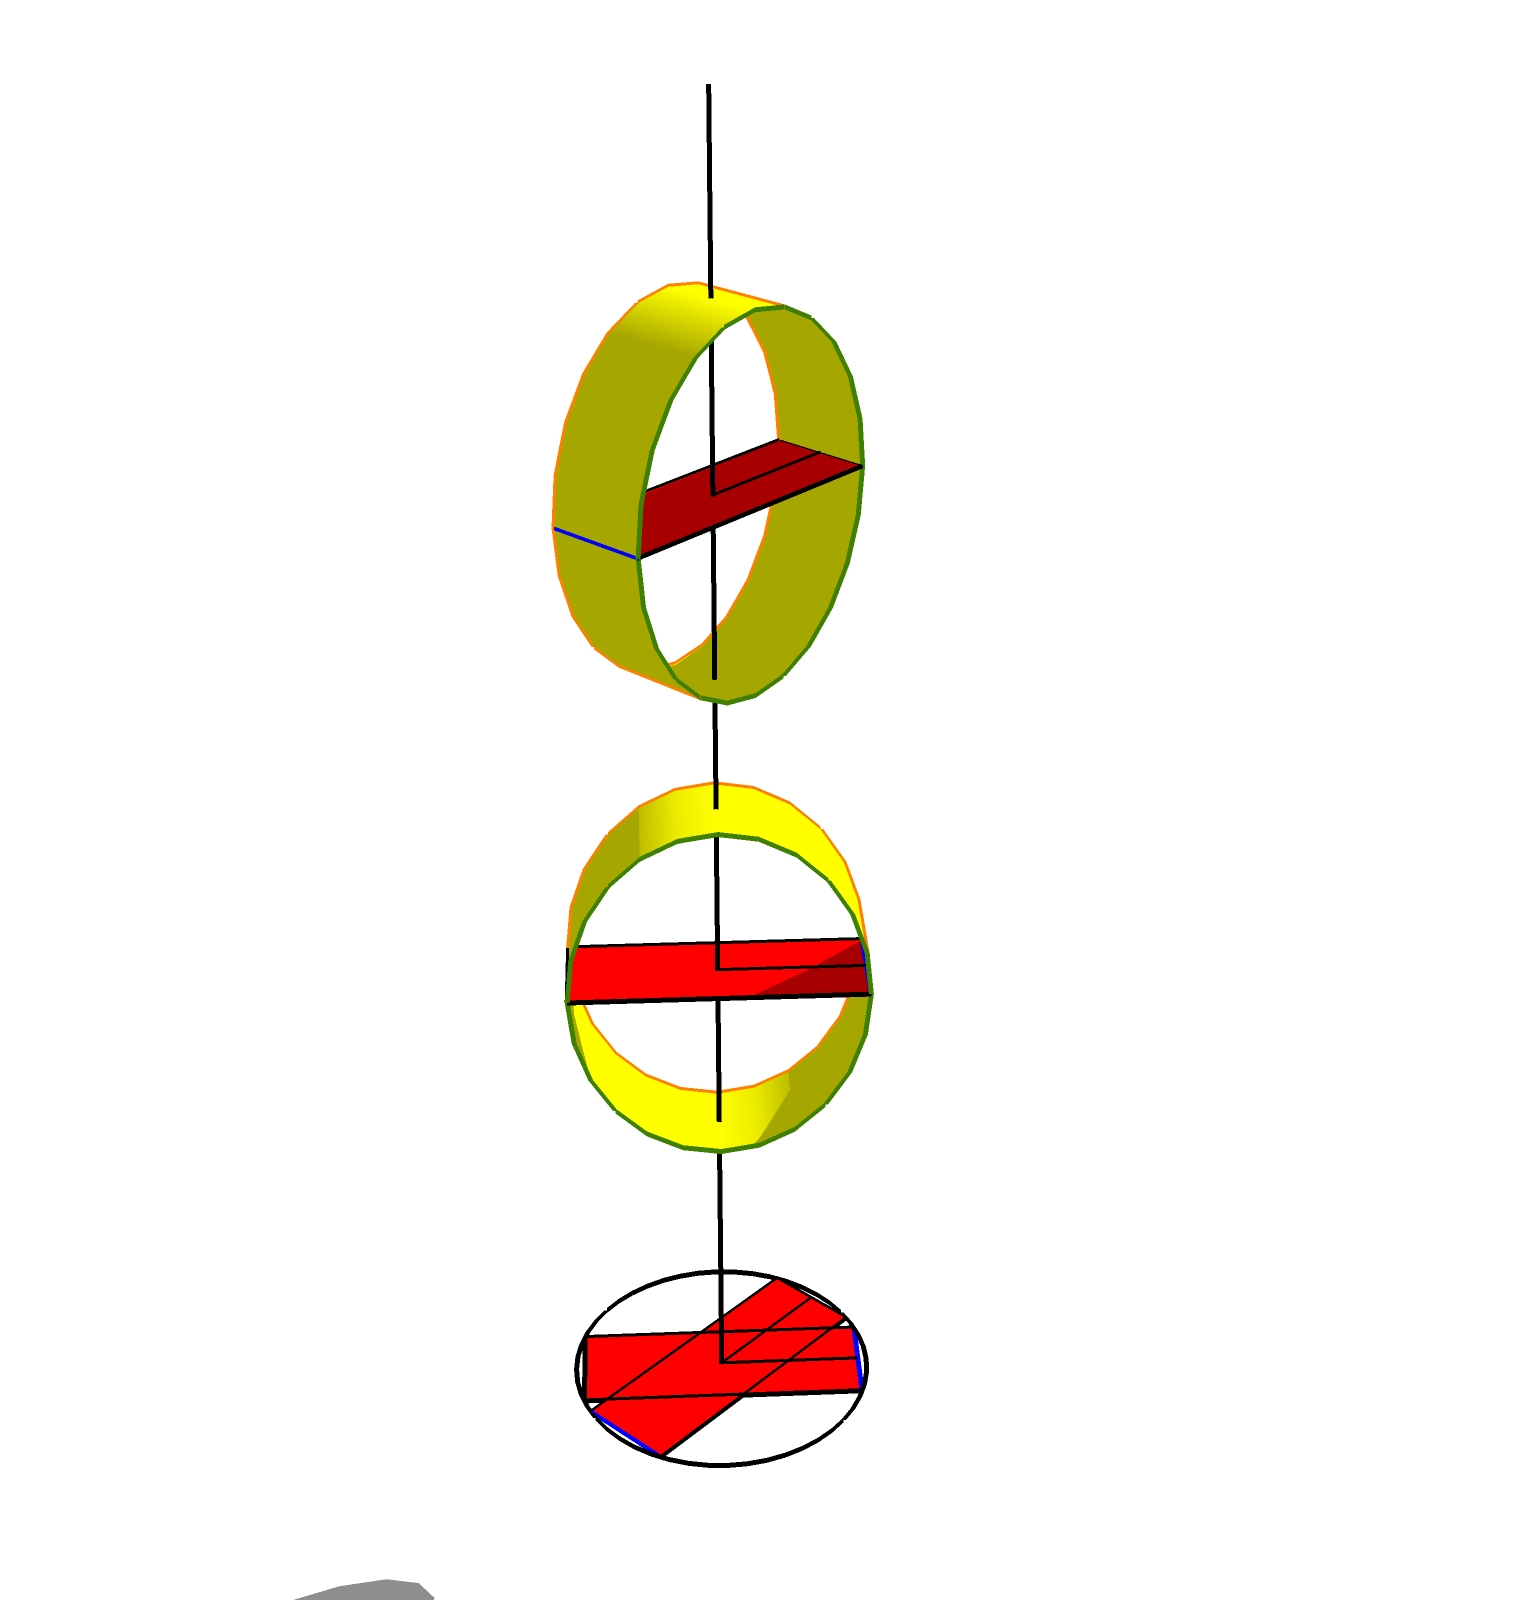
Ok I hope this diagram is clear. two similar ovaloids are spaced one above the other, then one is rotated (45 degrees this time**) from its logical origin. This is the geometric scaffold.